Compare databases on unconnected SQL Server instances
If the computer where dbForge Studio is installed doesn’t have direct access to the database server, for example, for security reasons, you can do the following:
1. On the computer that hosts the database server, create a snapshot or a scripts folder.
2. Copy the generated files to the computer where dbForge Studio is installed.
3. Use dbForge Studio to compare and synchronize the files as needed.
Compare databases using a snapshot
When you select a snapshot as the Target, you can choose to overwrite it after synchronization.
When you select a snapshot as the Source and a database as the Target, you can run the synchronization script directly on the target database.
To compare databases using a snapshot:
1. Open the New Schema Comparison Wizard in one of these ways:
- In the top menu, select Comparison > New Schema Comparison.
- On the Start Page, select Database Sync > New Schema Comparison.
2. On the Source and Target page:
-
Under Source:
1. In Type, select Snapshot.
2. Click
 to create a snapshot and add it to the schema comparison.
3. In the Create Scripts Folder or Snapshot dialog, select the source type and configure its settings.
4. Select the snapshot target type and enter the path to the .snap file.
5. Click Create.
-
Under Target:
1. In Type, select a database, snapshot, or scripts folder.
2. Depending on the selected type, configure the target data source settings.
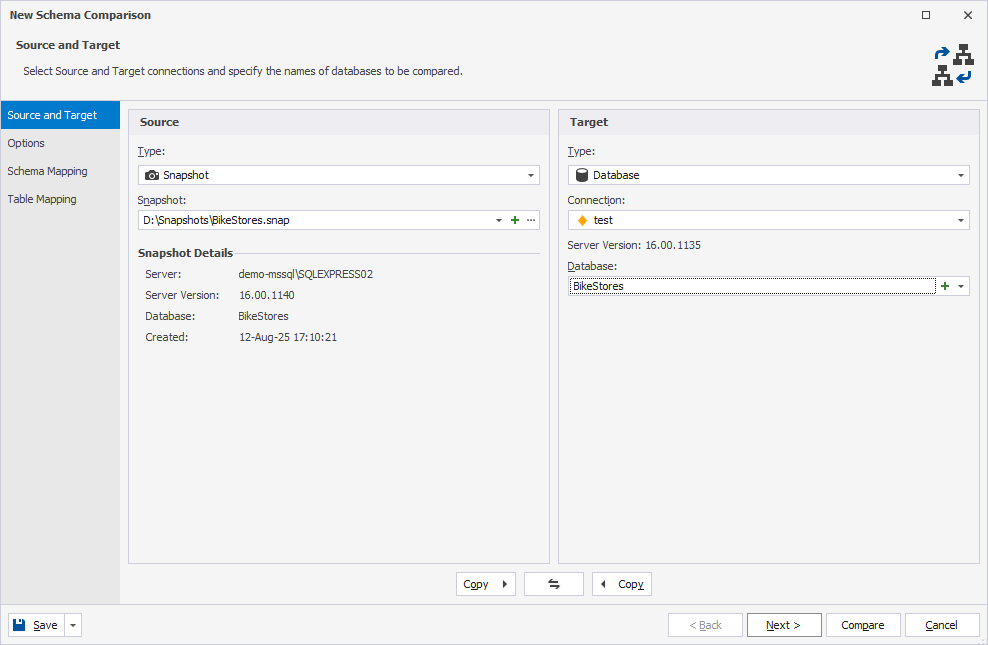
3. Optional: Configure the comparison options.
4. Click Compare.
The Schema Comparison document opens, displaying the comparison results.
By default, all objects are selected for synchronization. To exclude an object, clear the checkbox for it.
5. At the top of the document, click  to open the Schema Synchronization Wizard.
6. Select the output option to manage a synchronization script and, optionally, configure synchronization options.
7. Click Synchronize.
Compare databases using a scripts folder
When you compare and synchronize scripts folders, dbForge Studio generates a synchronization script, which you can save to a file or open in the internal editor for reviewing or making changes.
- When you select a scripts folder as the Source, you can execute the synchronization script directly against the target database.
- When you select a scripts folder as the Target, you can update the folder after synchronization.
To compare databases using a scripts folder:
1. Open the New Schema Comparison Wizard in one of these ways:
- In the top menu, select Comparison > New Schema Comparison.
- On the Start Page, select Database Sync > New Schema Comparison.
2. On the Source and Target page:
-
Under Source:
1. In Type, select Scripts Folder.
2. Click
to create a scripts folder and add it to schema comparison.3. In the Create Scripts Folder or Snapshot dialog, select a database and server connection as the Source.
4. Enter the full path to the destination scripts folder.
5. Optional: Select Include data to insert static data.
6. Click Create.
-
Under Target:
1. In Type, select a database or scripts folder.
2. Depending on the selected type, configure the target data source settings.
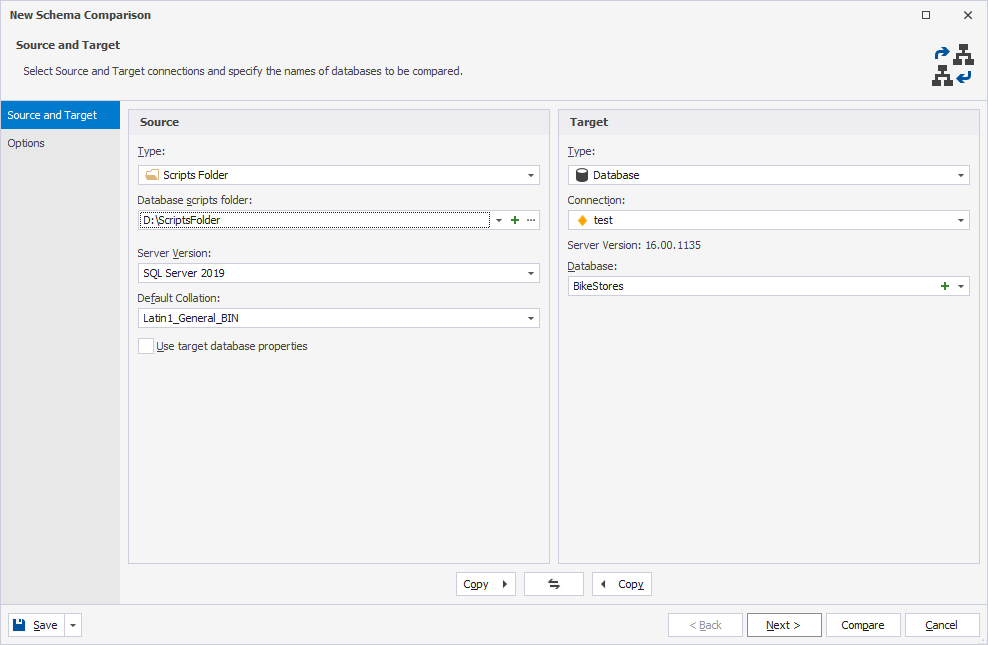
3. Optional: Configure the comparison options.
4. Click Compare.
The Schema Comparison document, displaying the comparison results.
By default, all objects are selected for synchronization. To exclude an object, clear the checkbox for it.
5. At the top of the document, click to open the Schema Synchronization Wizard.
6. Select the output option to manage a synchronization script and, optionally, configure synchronization options.
7. Click Synchronize.
Compare databases using a backup
dbForge Studio supports both full and differential backup files. Partial backups are not supported. If you use a differential backup, you must also add the associated full backup.
To compare databases using a backup:
1. Open the New Schema Comparison Wizard in one of these ways:
- In the top menu, select Comparison > New Schema Comparison.
- On the Start Page, select Database Sync > New Schema Comparison.
2. On the Source and Target page:
-
Under Source:
1. In Type, select Backup.
2. Click Add and select the backup file.
Tip
You can add multiple backup files.
-
Under Target:
1. In Type, select a database or scripts folder.
2. Depending on the selected type, configure the target data source settings.
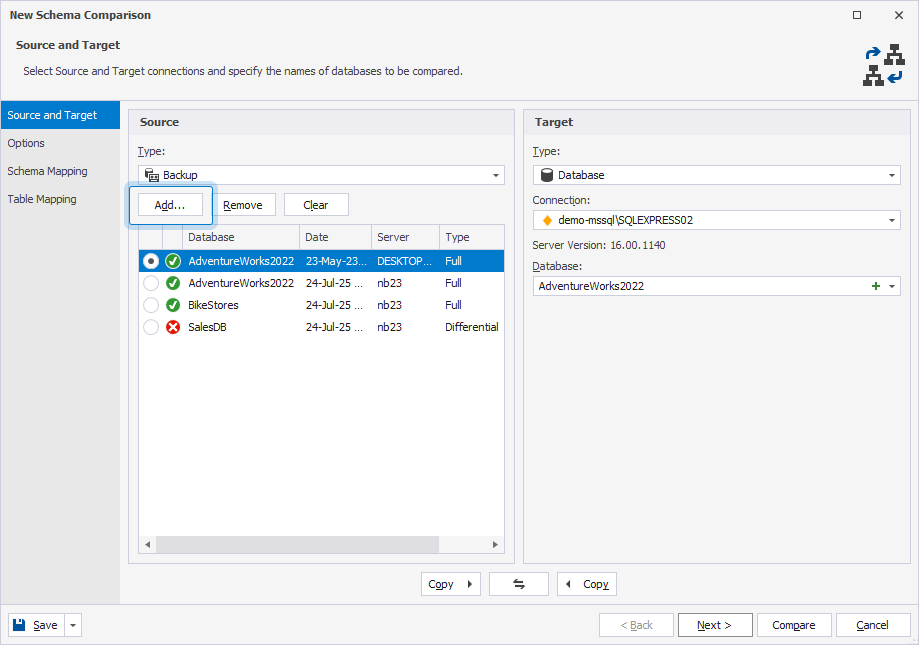
3. Optional: Configure the comparison options.
4. Click Compare.
The Schema Comparison document, displaying the comparison results.
By default, all objects are selected for synchronization. To exclude an object, clear the checkbox for it.
5. At the top of the document, click to open the Schema Synchronization Wizard.
6. Select the output option to manage a synchronization script and, optionally, configure synchronization options.
7. Click Synchronize.