Synchronize views and queries
You can synchronize views under the following conditions:
- They reference rows from a single table.
- They don’t include
IDENTITYor computed columns.
Synchronize views
To synchronize views that reference multiple tables:
2. On the Source and Target page of the New Data Comparison wizard, select the source and target data sources.
3. On the Options page, select Compare views.
4. Click Compare.
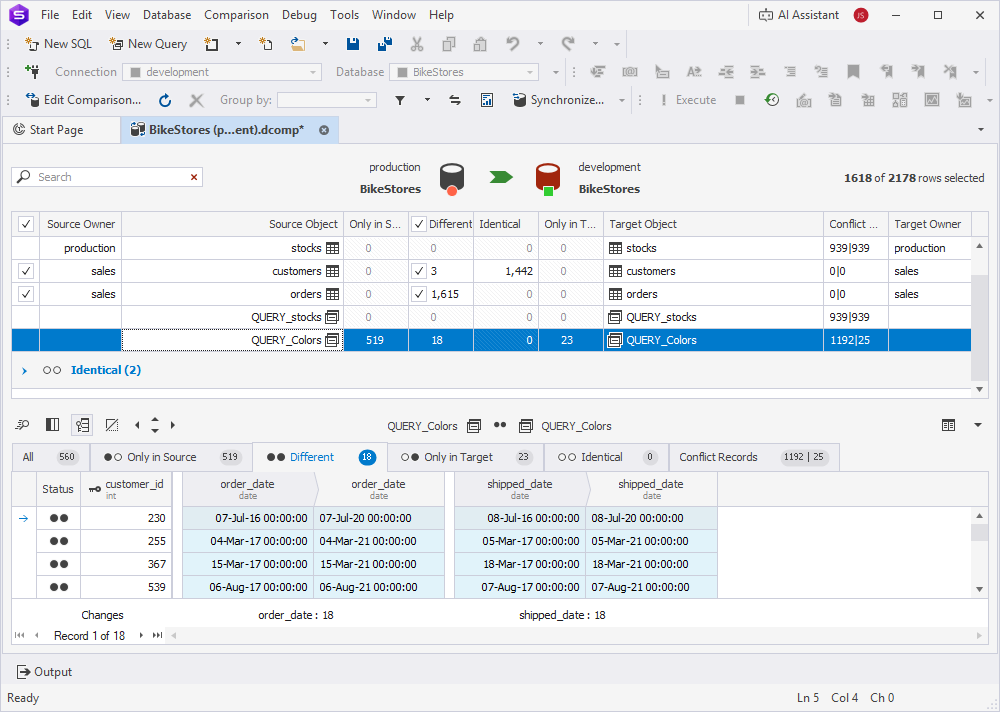
The Data Comparison document opens, displaying the comparison results.
5. Run data synchronization.
6. Select the output option to generate a synchronization script, and optionally configure the synchronization settings.
7. Click Synchronize.
8. On the SQL toolbar, click Execute, or press F5.
Synchronize queries
Queries cannot be directly synchronized, but you can generate an update script and apply it to the target database.
To synchronize queries:
2. Select the source and target data sources, and optionally configure the comparison settings.
3. Click Compare.
4. View comparison results.
5. Run data synchronization.
6. Select Open the synchronization script in the internal editor.
7. Click Synchronize.
8. On the SQL toolbar, click Execute, or press F5.
Compare custom queries
In dbForge Studio for SQL Server, you can compare custom queries instead of comparing entire database objects.
This topic describes how to compare a custom query or a table/view in the Custom Queries Mapping dialog.
Note
Custom queries can be compared but they cannot be synchronized. Generating the update script is also not supported.
If you want to compare and synchronize data using a custom query, create a database view based on the custom query.
To compare custom queries:
1. Run data comparison.
2. On the Source and Target page of the New Data Comparison wizard, select the source and target data sources.
3. Navigate to the Mapping page.
4. On the Mapping toolbar, click Custom Query to open the Custom Queries Mapping dialog.
5. Select Query for the source and target objects.
Tip
If you select Table or View, you can map tables or views from the list.
6. Specify the query names.
7. In the SQL field, enter the queries.
8. Optional: Click Validate to verify your queries.
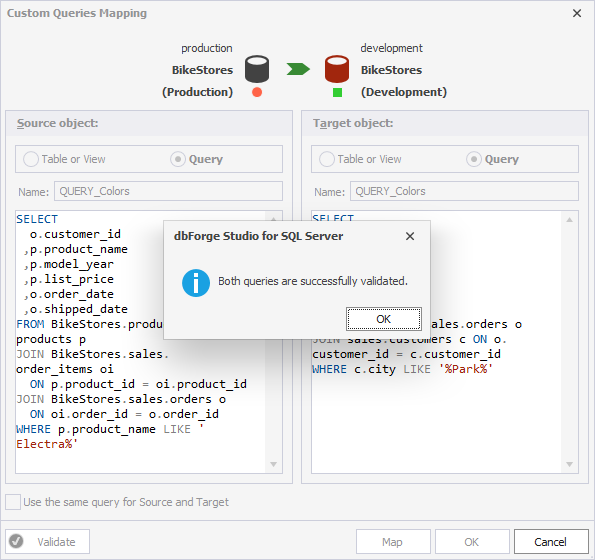
9. Click OK, then click Map > Close.
Note
If you see the warning
Objects to compare have no key column, it means that the custom comparison key is not set. You must define at least one column pair as the comparison key.
10. To set a comparison key, in the Comparison Key column for the query you have added, click the arrow and select Custom.
11. In the Column Mapping dialog, select the column as a comparison key, then click OK.
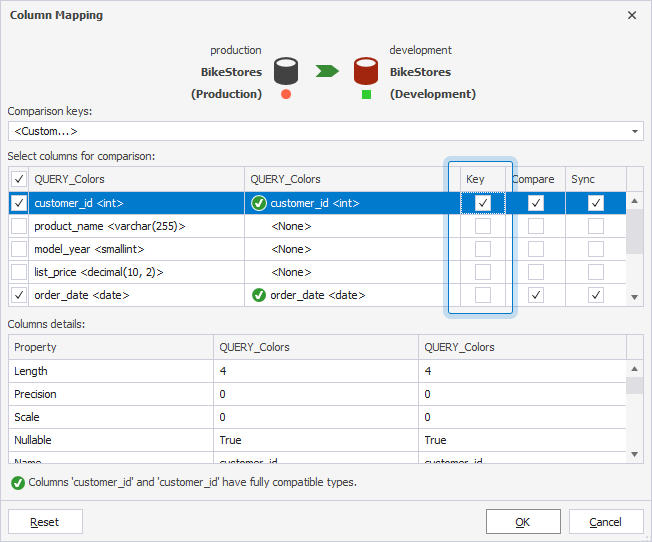
12. Click Compare.