View and manage comparison results
After you perform a schema comparison, dbForge Studio displays the results in the Schema Comparison document.
Schema Comparison document overview
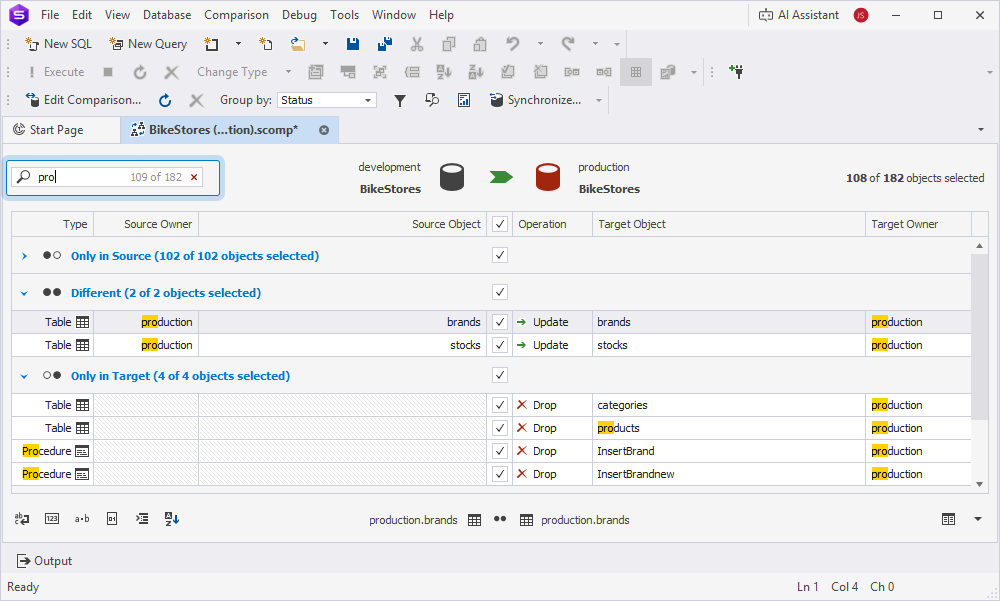
The Schema Comparison document displays the results of a schema comparison and includes the following panes:
- Synchronization direction – Shows the synchronization direction, such as from source to target or from target to source.
- Schema comparison results grid – Displays objects available for synchronization.
- Text Compare – Displays differences in object definitions and formatting.
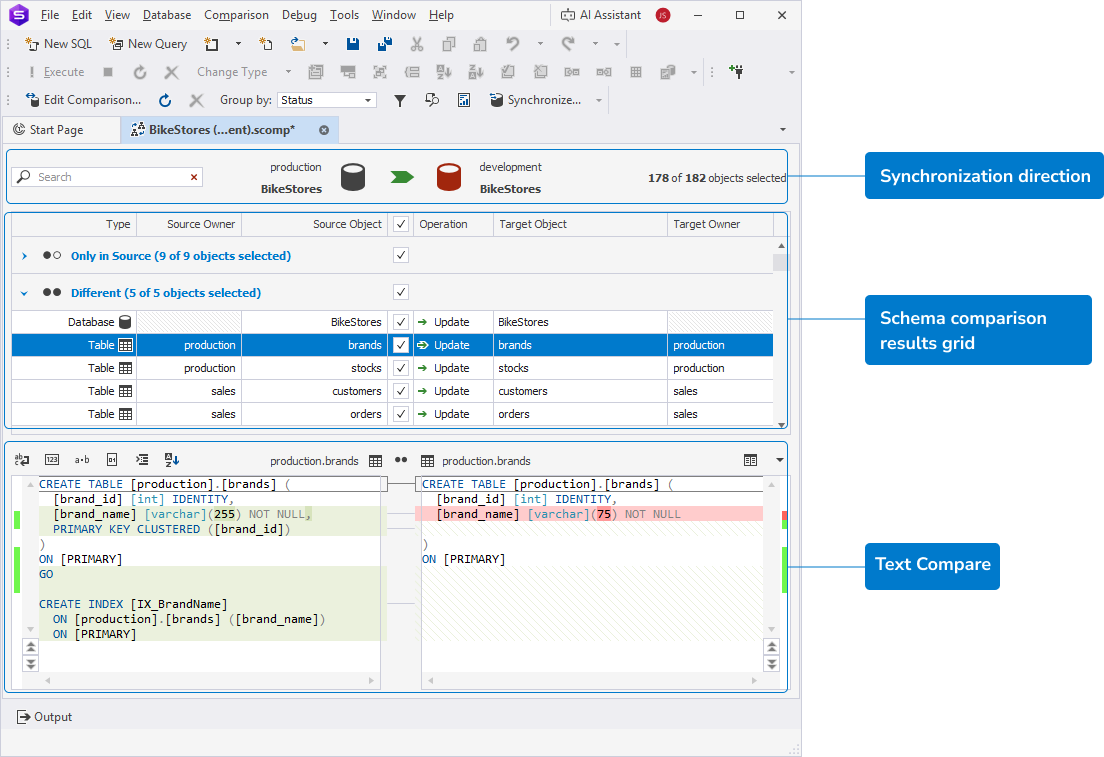
Synchronization direction
The Synchronization direction pane displays:
- The source and target data sources
- The servers where the data sources reside
- The number of schema objects selected for synchronization
- The total number of schema objects in the comparison
- A search box to find objects by name
Schema comparison results grid
The results grid displays:
- All objects selected for synchronization by default.
- Objects grouped by status – Only in Source, Different, Only in Target, Identical, Inconsistent, and Unknown
- Checkboxes to include or exclude objects from the synchronization script.
Note
dbForge Studio automatically assigns an operation for each compared object. You can change the operation in the Operation column.
The Schema comparison grid includes the following columns.
| Name | Description |
|---|---|
| Type | Type of a database object. |
| Source Owner | Schema to which the object belongs in the source database. |
| Source Object | Name of the object in the source schema. |
| Operation | Synchronization operation for the target database:
|
| Target Object | Name of the object in the target database. |
| Target Owner | Schema to which the object belongs in the target database. |
Text Compare
The Text Compare pane shows the SQL differences between source and target objects that are selected for synchronization in the results grid. Those differences are highlighted in specific colors.
Refresh the comparison results
To update the comparison results, do one of the following:
-
On the Comparison toolbar, click
 .
. -
Right-click the grid and select Refresh.
-
Press F5.
Change the comparison settings
To change the comparison settings, do one of the following:
-
On the Comparison toolbar, click
 .
. -
Right-click the grid and select Edit Comparison.
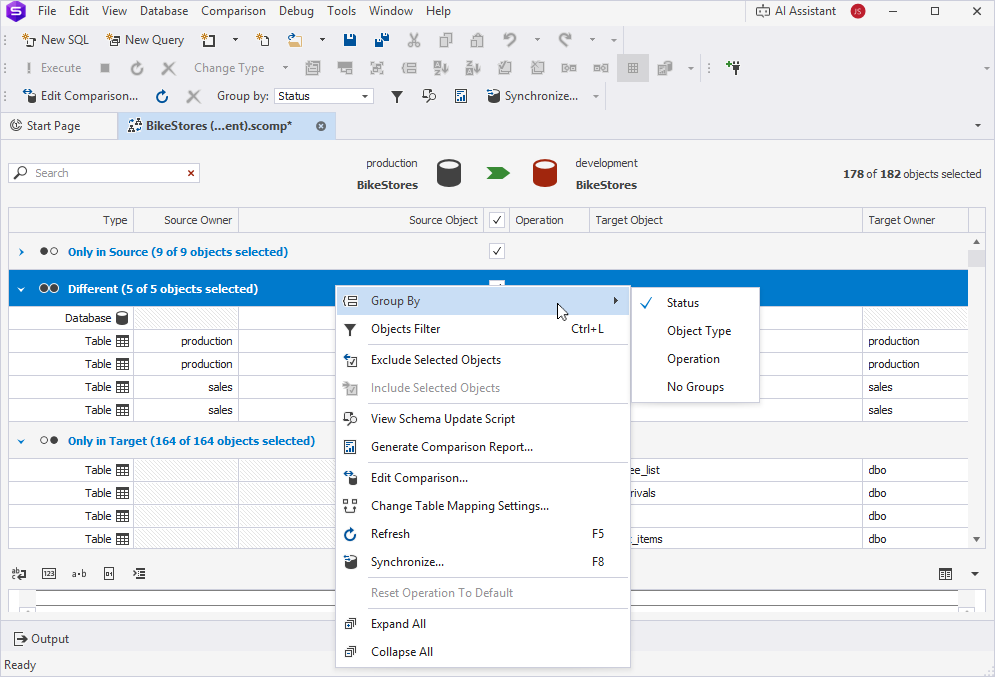
Group comparison results
To group comparison results, do one of the following:
- On the Comparison toolbar, select a grouping type from the Group by list.
- Right-click the grid, select Group by, then choose a grouping type.
Grouping options:
- Status (default) – Groups objects by their comparison status:
- Only in Source – Objects that exist only in the source schema and can be created in the target schema during schema synchronization.
- Different – Objects that exist in source and target schemas but have different DDL definitions. During schema synchronization, the object in the target schema can either be updated to match the source schema or be dropped from the target schema by selecting the Update or Drop operation for the object in the Operation column of the Schema Comparison grid.
Warning
The Drop operation is unavailable for the database object type in the Different section.
- Only in Target – Objects that exist in the target schema and can be dropped from the target schema during schema synchronization.
- Identical – Objects that are identical and exist in both schemas. During schema synchronization, the object can be dropped from the target schema by selecting the Drop operation for the object in the Operation column of the Schema Comparison grid.
- Inconsistent – Objects that exist in both schemas but are inconsistent and cannot be compared or synchronized.
- Object Type – Groups objects by a database object type, such as tables, views, stored procedures, functions, triggers, etc.
- Operation – Groups objects by a synchronization operation:
- Create – Creates objects in the target schema.
- Drop – Removes objects from the target schema.
- Update – Modifies objects in the target schema to match the source schema.
- None – Takes no action on the target object.
- No Groups – Displays all objects in a flat list without any grouping.
Note
If the source table is partitioned but the target server does not support partitioning, the comparison status depends on other structural differences:
- If the table exists only in the source or differs in other ways beyond partitioning, it will appear as Only in Source or Different, and can be synchronized (excluding partitioning).
- If the source and target tables are structurally identical except for partitioning, the partitioning is ignored, and the table is marked as Identical.
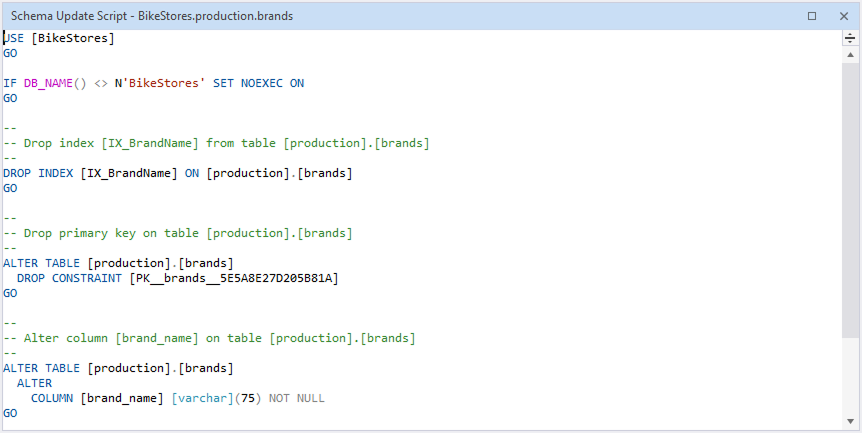
View a schema update script
To view a deployment script for the selected object, right-click the object in the grid, then select View Schema Update Script.
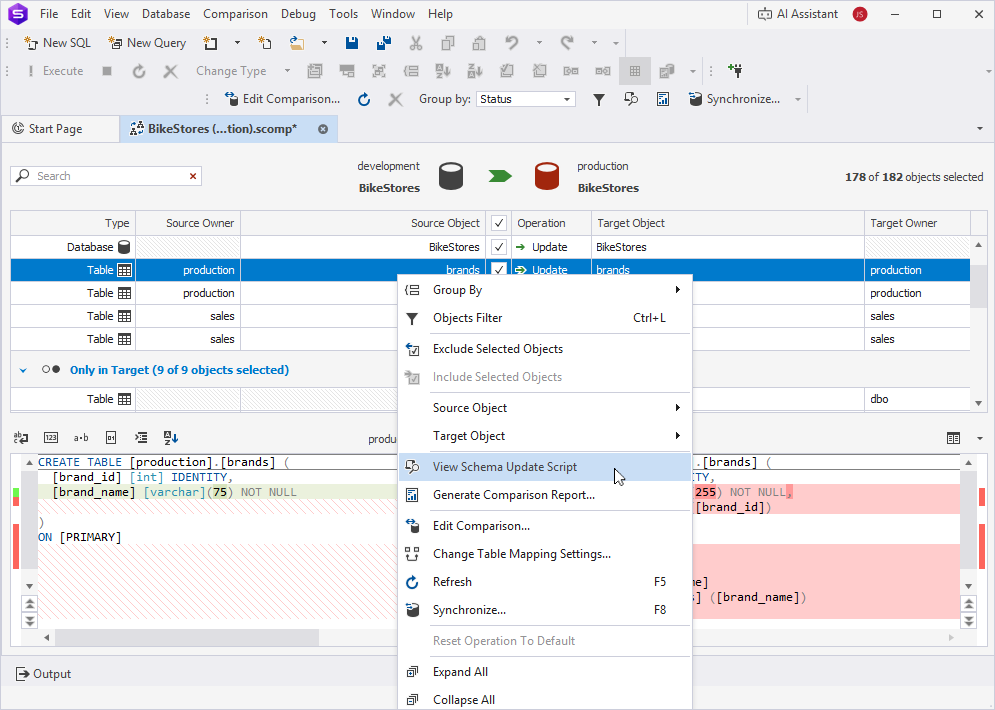
The deployment script opens in the Schema Update Script window.
Search for objects
To search for objects, type a search query in the search box.
Search behavior:
- Matching text is highlighted in yellow.
- The number of matches appears in the search box.
- The search is case-insensitive. For example, searching for pro matches both Pro and pro.
- If the query contains multiple words, each word is matched separately and all matches are highlighted.
To clear the search results, click ![]() in the search box.
in the search box.
Keyboard shortcuts in the search box
The table describes the keyboard shortcuts you can use in the search box.
| Keyboard shortcut | Description |
|---|---|
| Ctrl+A | Selects all. |
| Ctrl+Left Arrow (←) | Moves the caret to the beginning of the previous word. |
| Ctrl+Right Arrow (→) | Moves the caret to the end of the next word. |
| Ctrl+Shift+Left Arrow (←) | Selects text from the current caret position to the beginning of the current word, and moves the caret to the beginning of the word. |
| Ctrl+Shift+Right Arrow (→) | Selects text from the current caret position to the end of the current word, and moves the caret to the end of the word. |
| Ctrl+Backspace | Deletes the word to the left of the caret. |
Save settings
You can save:
- Comparison settings only.
- Comparison and synchronization settings.
Saved settings are stored in a schema comparison file (.scomp) and include:
- Source and target connection details.
- Comparison options.
- Synchronization options (optional).
- Objects included in the schema comparison or excluded from it.
Note
An asterisk (*) in the file name on the tab title indicates unsaved changes.
Save comparison settings
To save the comparison settings, do one of the following:
-
On the standard toolbar, click
 or
or  .
. -
In the top menu, select File > Save .scomp or Save All.
-
Press Ctrl+S or Ctrl+Shift+S.
Note
Saving the .scomp file before configuring synchronization preserves your comparison settings and retains the default synchronization settings.
Save comparison and synchronization settings
To save both custom comparison and synchronization settings:
1. Right-click the grid and select Synchronize, or press F8.
2. In the Schema Synchronization wizard, configure the required settings.
3. Close the wizard.
4. Save the .scomp file.
Tip
You can use this file as a project file that includes all the settings and options required to run it from the command line.