Set up a simple CI process
This article describes how to set up a simple database continuous integration (CI) process. You can download the example and run it on your computer for practice.
Prerequisites
Create a folder for database migration scripts
1. Create a main folder, for example, Demo.
2. In that Demo folder, create a subfolder for test migration scripts, for example, ScriptsFolder.
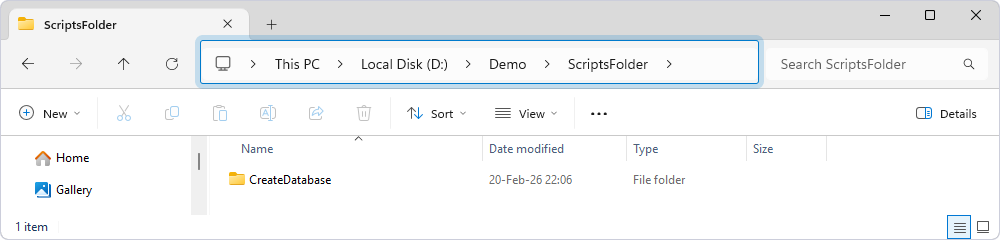
3. In the ScriptsFolder folder, create a CreateDatabase subfolder. This subfolder will store a script that creates an empty database.
4. In SQL editor, enter the following script to recreate the TestDB database.
USE [master]
GO
DECLARE @db_name NVARCHAR(255);
SET @db_name = N'TestDB';
IF EXISTS (SELECT
      1
    FROM sys.databases d
    WHERE d.name = @db_name)
BEGIN
  EXEC msdb.dbo.sp_delete_database_backuphistory @database_name = @db_name;
  EXEC (N'ALTER DATABASE ' + @db_name + N' SET SINGLE_USER WITH ROLLBACK IMMEDIATE');
  EXEC (N'DROP DATABASE ' + @db_name);
END;
EXEC (N'CREATE DATABASE ' + @db_name);
GO
5. Save this file with the .sql extension to the CreateDatabase folder. Specify its name, for example, 0001_DropAndCreateDatabase.sql.
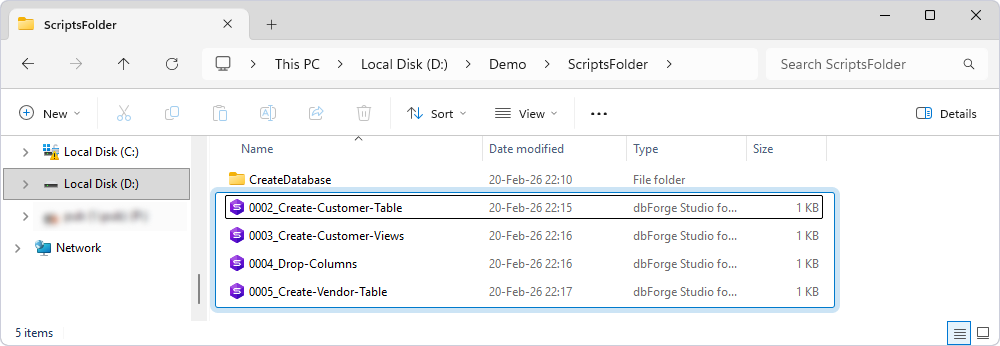
6. In the text editor, enter the following scripts and save the files with the .sql extension to the ScriptsFolder folder.
These files will be used for creating and modifying database objects.
- 0002_Create-Customer-Table.sql
CREATE TABLE Customer (
  id INT PRIMARY KEY
 ,last_name VARCHAR(50) NOT NULL
 ,first_name VARCHAR(50) NOT NULL
 ,city VARCHAR(50) NOT NULL
 ,email VARCHAR(50) NOT NULL
)
GO
- 0003_Create-Customer-Views.sql
CREATE VIEW vCustomers
AS
SELECT
  *
FROM Customer
GO
- 0004_Drop-Columns.sql
ALTER TABLE customer
DROP COLUMN city
GO
- 0005_Create-Vendor-Table.sql
CREATE TABLE Vendor (
  id INT PRIMARY KEY
 ,name VARCHAR(50) NOT NULL
)
GO
Create the folder with unit tests
1. In the Demo folder, create a new subfolder for unit tests, for example, UnitTests.
2. Open the text editor and enter the following script:
CREATE SCHEMA [DemoUnitTestClass] AUTHORIZATION [dbo]
GO

EXEC sys.sp_addextendedproperty N'tSQLt.TestClass', 1, 'SCHEMA', N'DemoUnitTestClass'
GO
This script creates a test class required for running unit tests.
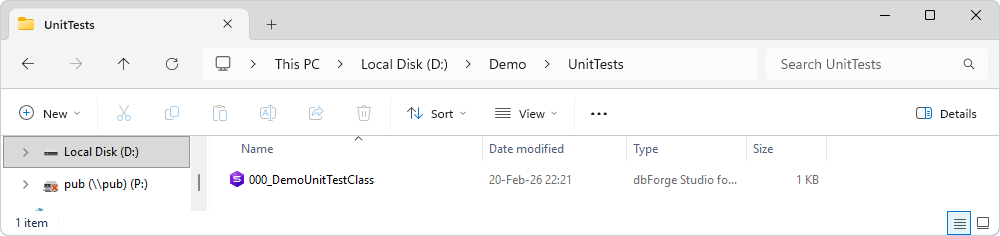
3. Save the file with the .sql extension to the UnitTests folder and specify its name, for example, 000_DemoUnitTestClass.sql.
After creating a test class, you can create test cases for it.
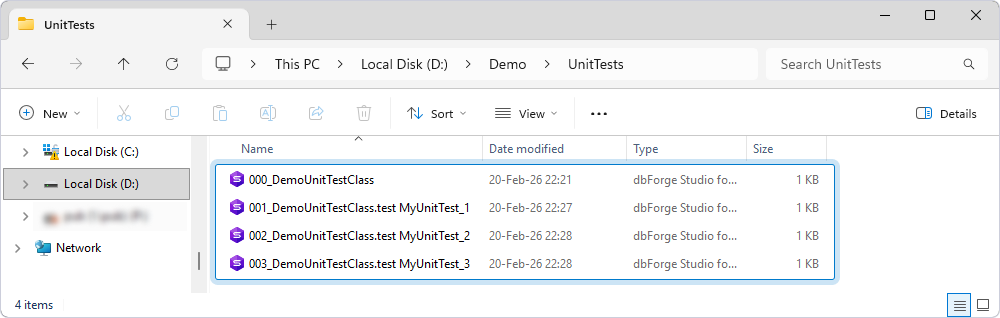
4. In the text editor, enter the following scripts and save the files with the .sql extension to the UnitTests folder.
The scripts will be used to create test cases.
- 001_DemoUnitTestClass.test MyUnitTest_1.sql
CREATE PROCEDURE [DemoUnitTestClass].[test MyUnitTest_1]
AS
BEGIN
  EXEC tSQLt.AssertEquals @Expected = 1, @Actual = 1
END;
GO
- 002_DemoUnitTestClass.test MyUnitTest_2.sql
CREATE PROCEDURE [DemoUnitTestClass].[test MyUnitTest_2]
AS
BEGIN
  EXEC tSQLt.AssertEquals @Expected = 2, @Actual = 2
END;
GO
- 003_DemoUnitTestClass.test MyUnitTest_3.sql
CREATE PROCEDURE [DemoUnitTestClass].[test MyUnitTest_3]
AS
BEGIN
  EXEC tSQLt.AssertEquals @Expected = 3, @Actual = 3
END;
GO
Create the folder with test data
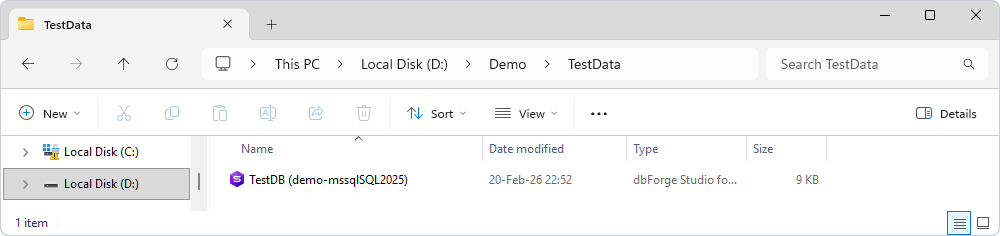
1. In your Demo folder, create the TestData folder that will contain your test data.
2. Open dbForge Studio for SQL Server.
3. Create an empty database, for example, TestDB.
4. In the database, create two tables: Customer and Vendor.
-- Create the Customer table

CREATE TABLE dbo.Customer (
    id INT NOT NULL PRIMARY KEY,
    last_name VARCHAR(50) NOT NULL,
    first_name VARCHAR(50) NOT NULL,
    email VARCHAR(50) NOT NULL
);

-- Create the Vendor table
CREATE TABLE dbo.Vendor (
    id INT NOT NULL PRIMARY KEY,
    name VARCHAR(50) NOT NULL
);
The Customer table will be populated using the Data Generator tool, and the Vendor table will be populated using the Data Export and Data Import tools (import from a file).
5. On the menu bar, select Database > Tasks > New Data Generation.
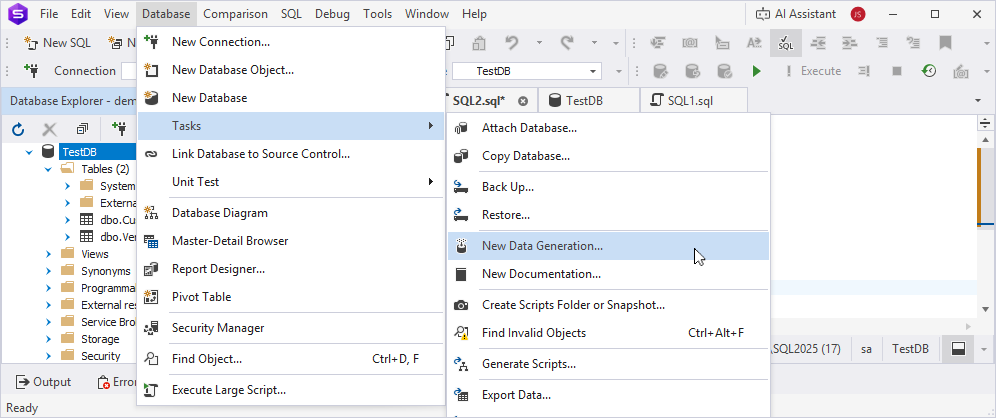
6. In the Data Generator Project Properties dialog, select the server and required database (TestDB), then click Open.
7. In the Tables and views tree, select the Customer table for data generation.
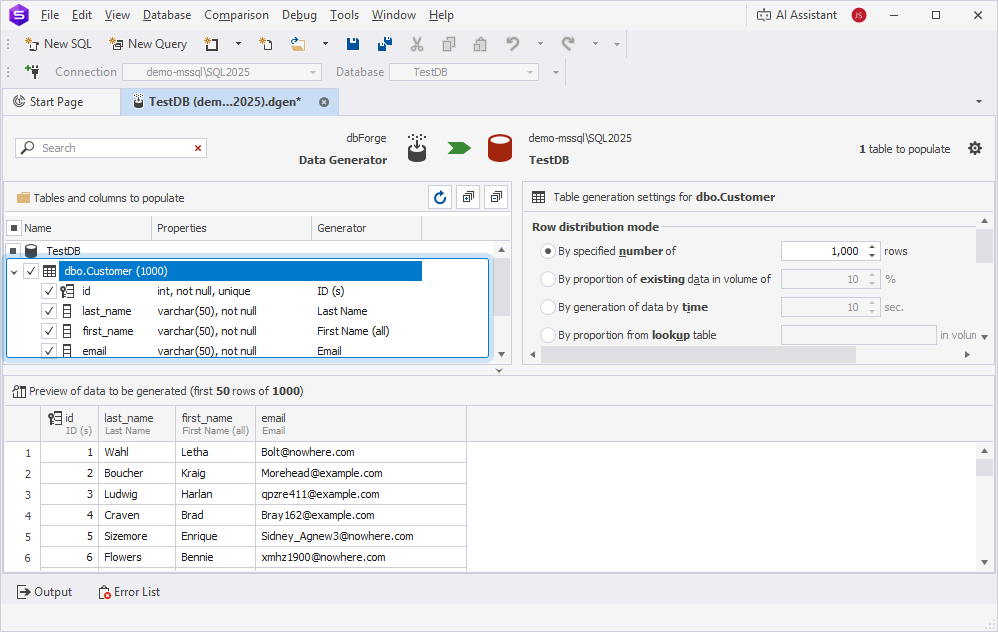
8. On the menu bar, select File > Save As and save the data generation project (.dgen) to the TestData folder.
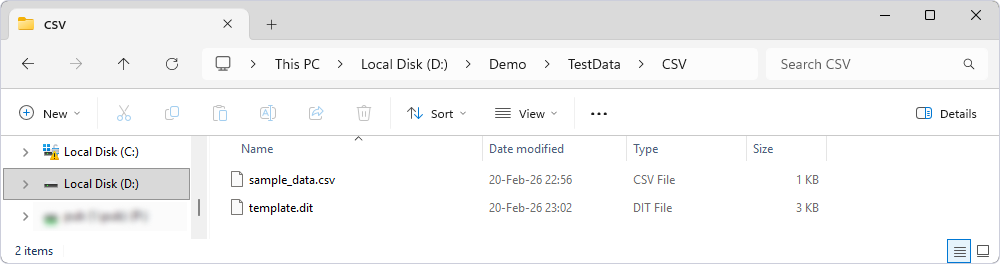
9. In the TestData folder, create the CSV subfolder that will be used for the Vendor table.
10. In the text editor, enter the following data and save the file with the .csv extension to the CSV folder. Specify the file name, for example, sample_data.csv.
This file will create test data for the Vendor table.
"id","name"
1,"Letha241"
2,"Mollie1975"
3,"Quintin5"
4,"Kather49"
5,"Felisa221"
6,"Shenita2027"
7,"Annita2004"
8,"Woodrow2009"
9,"Karl2"
10,"Chantel318"
11. Create a .dit template file, for example, template.dit, and save it to the CSV folder.
This file is aligned to import data from the sample_data.csv file to the Vendor table.
Run a PowerShell script
The following PowerShell script connects to the master database to re-create the TestDB database. Then it runs the migration scripts on the TestDB database. If any cmdlet fails, the execution stops, exit code 1 is returned (unsuccessful execution), and the exit occurs.
To run a PowerShell script:
1. Open the Windows PowerShell ISE as an administrator.
2. Open a new document and enter the following script by replacing the values with your actual data.
Click to open
# variables
$serverName = "demo-mssql\SQL2025"
$masterDatabase = "master"
$testDatabaseName = "TestDB"


$createDatabaseScriptsFolder = "D:\Demo\ScriptsFolder\CreateDatabase\"
$migrationScriptsFolder = "D:\Demo\ScriptsFolder\"


$unitTestsFolder = "D:\Demo\UnitTests\"


$importDataFileName = "D:\Demo\TestData\CSV\sample_data.csv"
$importTemplateFileName = "D:\Demo\TestData\CSV\template.dit"

$generatorFile = "D:\Demo\TestData\TestDB (demo-mssqlSQL2025).dgen"


$testReportOutputFileName = "D:\Demo\TestReport\report.xml"


$publishFileName = "Test.DevOpsAutomation.Database"
$outputFolder = "D:\Demo\Project\"


Function check {
    param($result)

    if ($result) {
        Write-Host "Success" -ForegroundColor Green; Write-host ""
    }
    else {
        Write-Host "Failed" -ForegroundColor Red;
        Exit(1)
    }
}


#region Create TestDB

    # Create master database connection
    Write-Host "Creating master database connection...`r`n"
    $masterConnection = New-DevartSqlDatabaseConnection -Server $serverName -Database $masterDatabase -WindowsAuthentication $true

    # Test master database connection
    Write-Host "Testing database connection...`r`n"
    $result = Test-DevartDatabaseConnection -Connection $masterConnection;
    check($result)


    # Recreating test database
    Write-Host "Recreating database..."
    $result = Invoke-DevartExecuteScript -Input $createDatabaseScriptsFolder -Connection $masterConnection
    check($result)

#endregion


#region Run the migration scripts against the TestDB database

    # Create TestDB database connection
    Write-Host "Creating TestDB database connection...`r`n"
    $testDBConnection = New-DevartSqlDatabaseConnection -Server $serverName -Database $testDatabaseName -WindowsAuthentication $true

    # Test TestDB database connection
    Write-Host "Testing TestDB database connection...`r`n"
    $result = Test-DevartDatabaseConnection -Connection $testDBConnection;
    check($result)


    # Run the migration scripts against the TestDB database
    Write-Host "Run migration scripts..."
    $result = Invoke-DevartExecuteScript -Input $migrationScriptsFolder -Connection $testDBConnection
    check($result)

#endregion


# Restore unit tests on the database

Write-Host "Restoring unit tests..."
$result = Invoke-DevartExecuteScript -Input $unitTestsFolder -Connection $testDBConnection
check($result)

#endregion


#region Import sample data from a file to a certain table

Write-Host "Importing sample data from a file...`r`n"
$result = Invoke-DevartDataImport -InputFile $importDataFileName -TemplateFile $importTemplateFileName
check($result)

#endregion


#region Fill database with sample data and run unit tests

Write-Host "Filling database with sample data and running unit tests..."
$result = Invoke-DevartDatabaseTests -InputObject $testDBConnection -InstalltSQLtFramework -IncludeTestData -DataGeneratorProject $generatorFile -OutReportFileName $testReportOutputFileName -ReportFormat JUnit -RewriteReport
check($result)

#endregion


# region Export zip package

Write-Host "Exporting a database project..."
$project= New-DevartDatabaseProject $migrationScriptsFolder
Set-DevartPackageInfo -Project $project -Id $publishFileName -Version 3.0.0
$result = Export-DevartDatabaseProject -Project $project -Format Zip -OutputDirectory $outputFolder -Overwrite
check($result)

#endregion
Required parameters
| Variable | Description |
|---|---|
$serverName |
The full path to the server. |
$masterDatabase |
The name of the master database. |
$testDatabaseName |
The name of the test database. |
$createDatabaseScriptsFolder |
The full path to the folder that will create the database. |
$migrationScriptsFolder |
The full path to the database migration scripts folder. |
$unitTestsFolder |
The full path to the folder with unit tests. |
$importDataFileName |
The full path to the file with the test data. |
$importTemplateFileName |
The full path to the template file (.dit) containing the data import settings. |
$generatorFile |
The full path to the data generation project (.dgen). |
$testReportOutputFileName |
The full path to the report file that will be generated automatically upon the script execution. |
$publishFileName |
The name of the output file (.zip package) containing the migration scripts. |
$outputFolder |
The full path to the folder that will store the output file. |
To download a complete example, use the link.
Result
The script should:
- Recreate the test database
- Execute migration scripts
- Populate test data
- Run unit tests
- Generate a report
- Create an output artifact (ZIP package)
If any step fails, the script stops execution and returns a non-zero exit code.