Configure schema mapping
dbForge Studio automatically maps objects that share the same name and schema.
If you need to compare objects with the same name from different schemas, you can map these schemas on the Schema Mapping page of the New Schema Comparison wizard. For example, if you want to compare objects in a development database owned by HR with objects in a production database owned by Staff, map HR to Staff.
Open the Schema Mapping page
In the New Schema Comparison wizard, navigate to the Schema Mapping page.
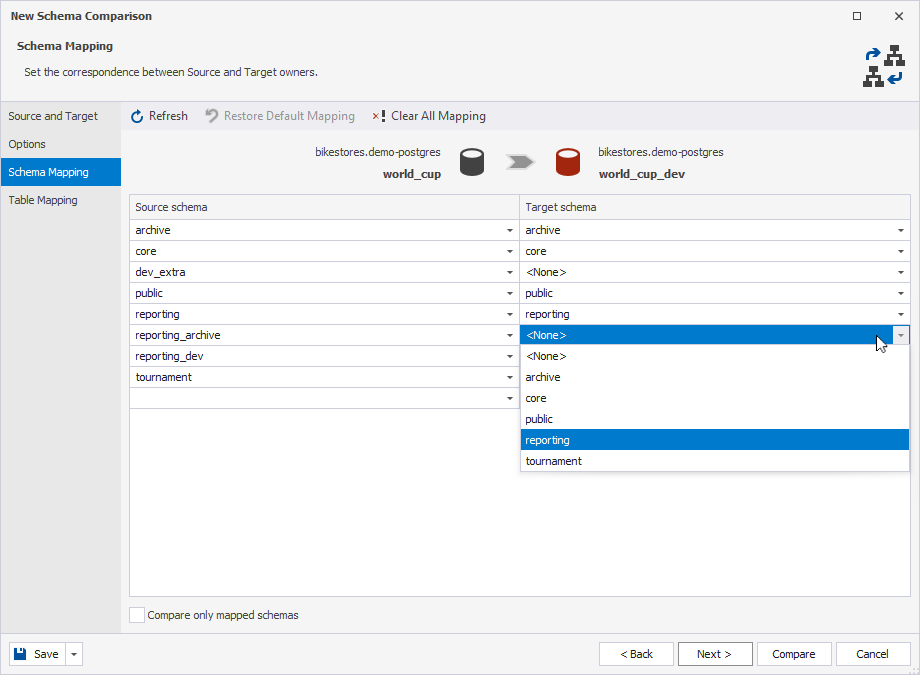
Manage schema mapping
To add or change schema mapping, click the row or the expander arrow in the column and select a schema from the list. You can repeat this process for both the source and target schemas.
To update a list of schemas, click Refresh.
To undo all mapping, click Clear All Mapping.
To undo a specific mapping, click the required schema name, then select None.
To reset schema mapping to its original state, click Restore Default Mapping.
Compare only mapped schemas
To compare only the schemas that have been mapped automatically, select Compare only mapped schemas.
Unmapped schemas are excluded from the comparison.
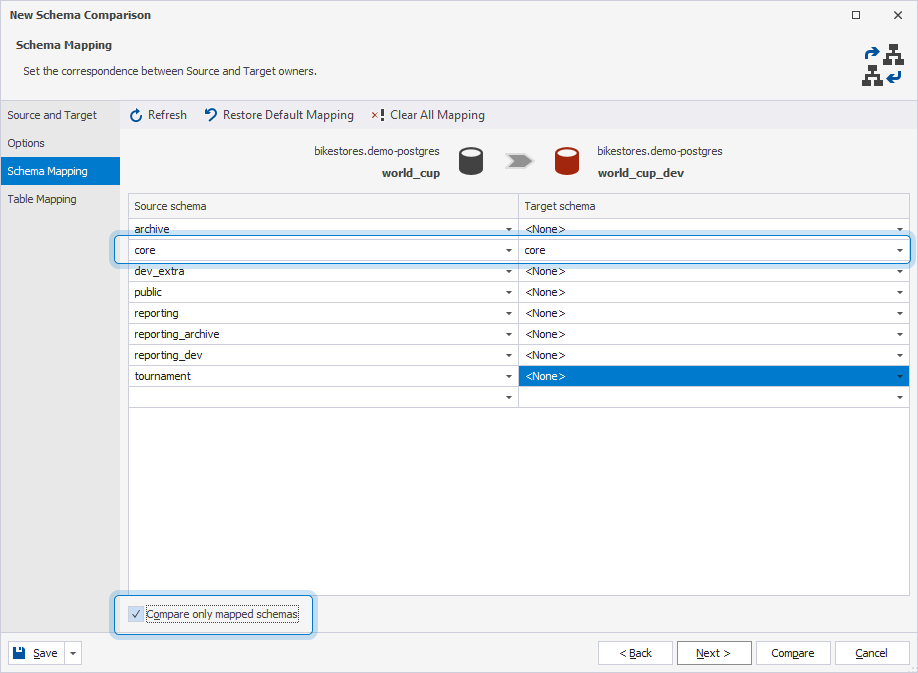
The mapping results may be as follows.
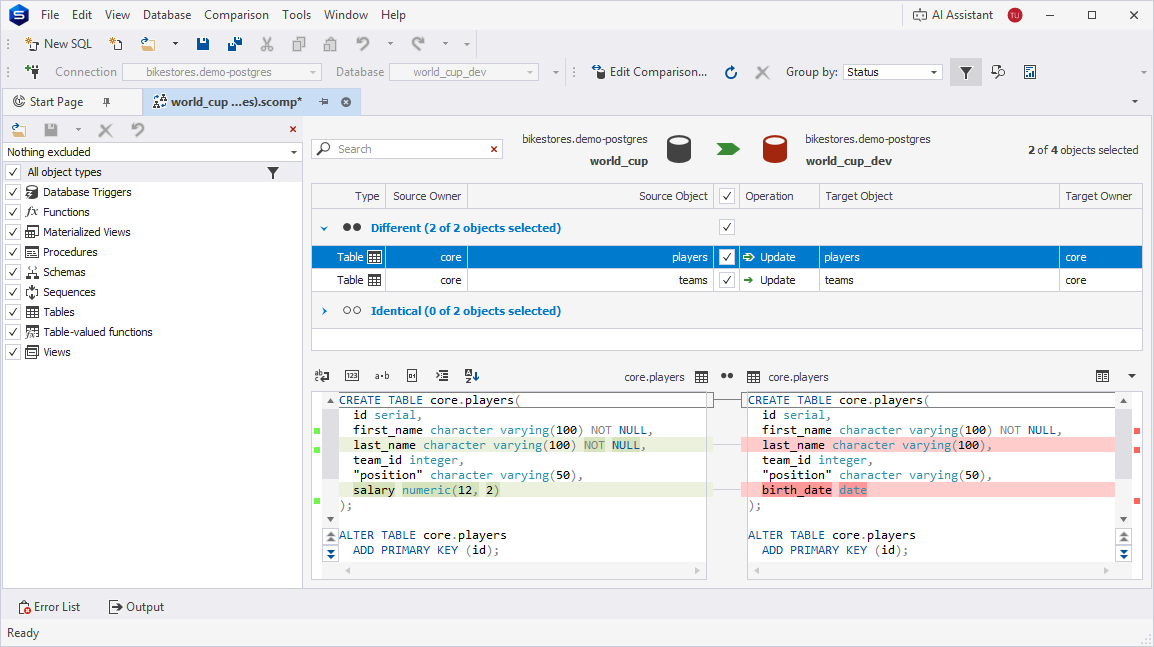
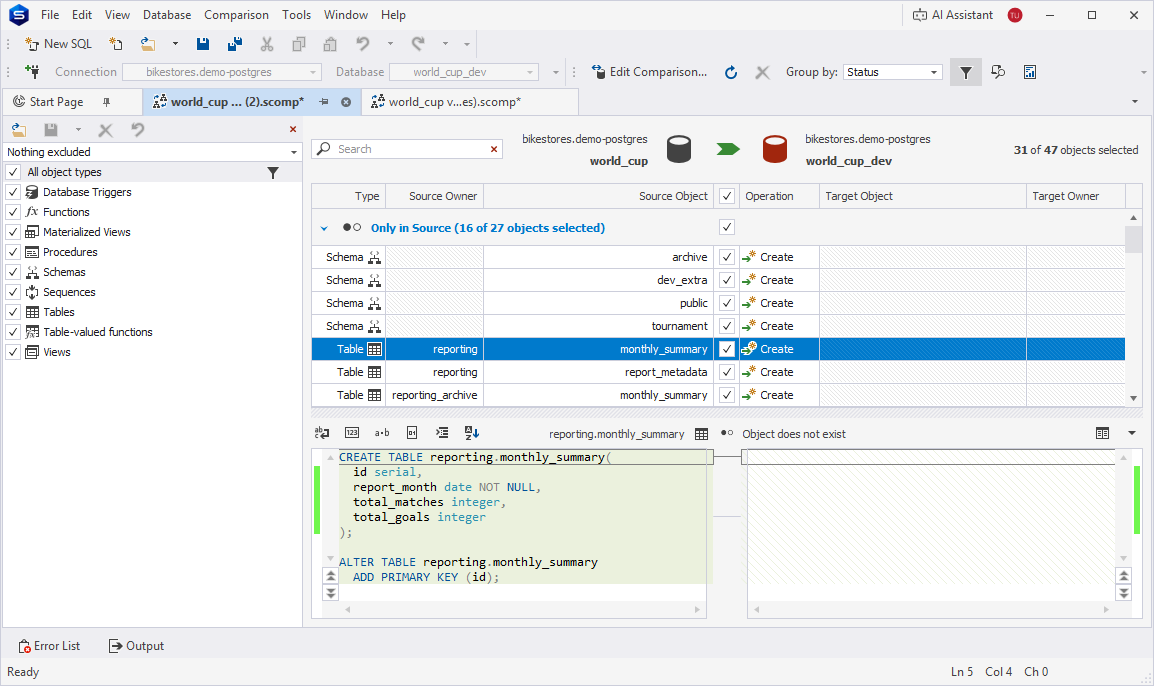
Many-to-one schema mapping
To map multiple source schemas to a single target schema, select the same target schema for each source schema you want to map in the Target schema list.
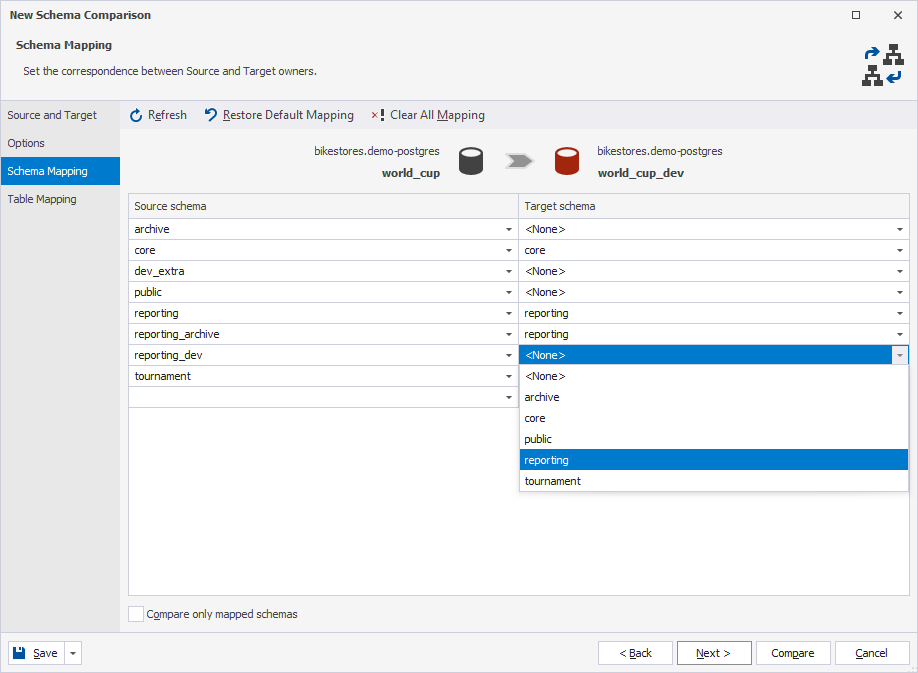
The mapping result may be as follows.
One-to-many schema mapping
You can map one source schema to multiple target schemas.
Case 1: Source tables exist in the target schema
In the Source schema list, select the same source schema next to each target schema.
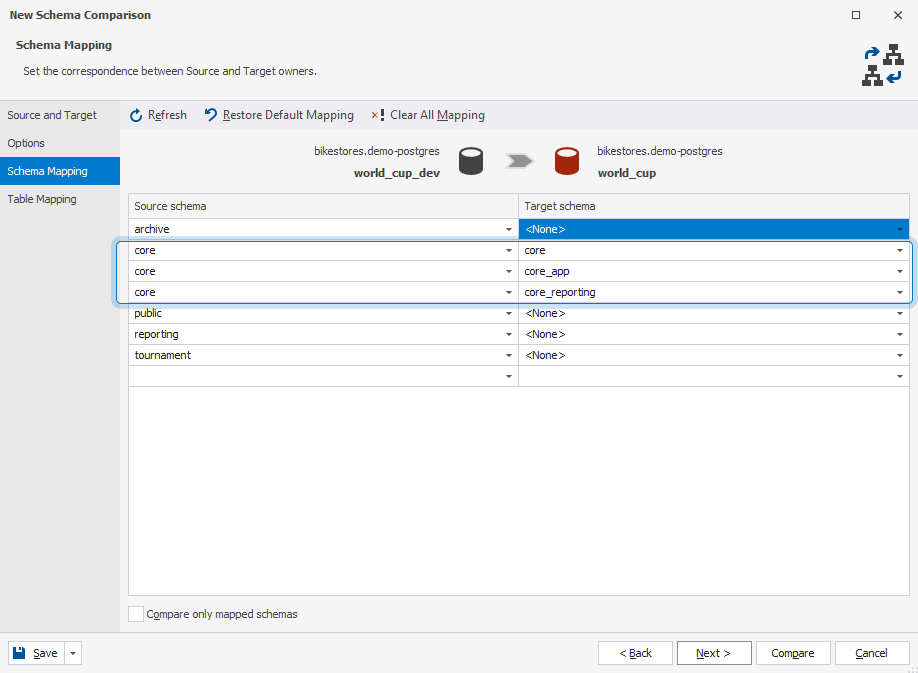
Case 2: Source tables don’t exist in the target schema
If the tables don’t exist in the target schema, they will be created in all mapped target schemas after synchronization.
To exclude the creation of duplicated objects:
1. In the Source schema list, select the same source schema next to each required target schema as you did in Case 1.
2. Click Compare.
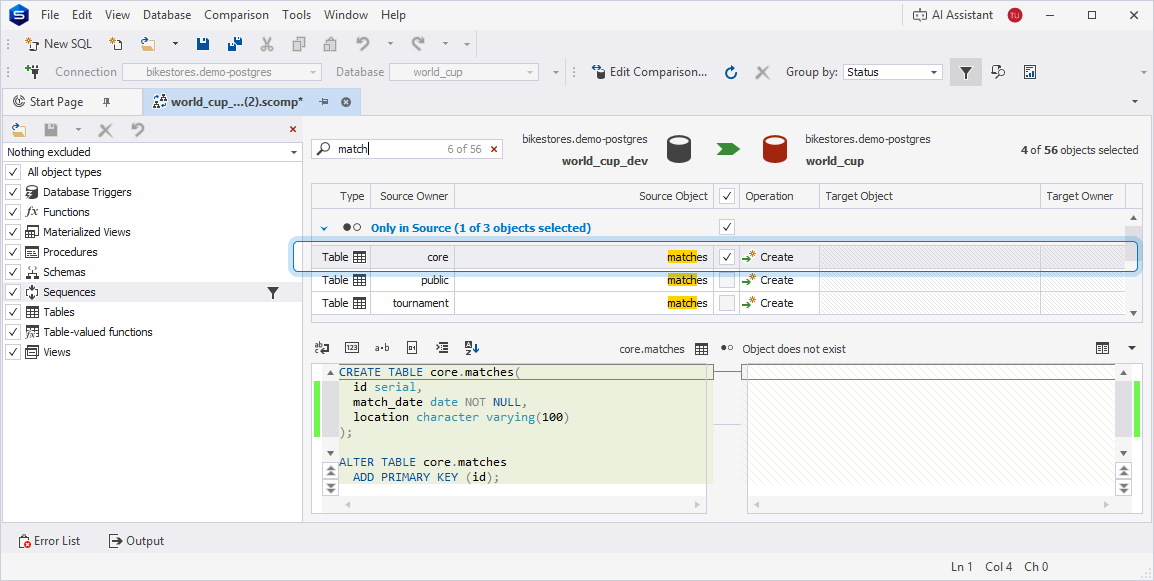
3. In the search box, enter the required table name.
4. Select the checkbox next to the target schema where you want to include the creation of this table.
For example, when mapping the source core schema to the target core, core_app, and core_reporting schemas, select the checkbox for the matches table in the core schema to ensure that the table appears only in the target core schema and is excluded from the target core_app and core_reporting schemas.
Tip
If you don’t remove duplicates during mapping, you may need to delete them manually after synchronization.
5. At the top of the schema comparison document, click  .
.
6. Optional: Configure synchronization settings.
7. Click Synchronize.
Note
To automate or schedule schema comparison tasks, create a .bat or .scomp files on the Schema Mapping page of the wizard.