Creating a table in Table Editor
In this example we will create a new table that does not contain any data. Nevertheless, while creating the table you must decide what types of data you want to store in it. The data is held in fields, and each field can be declared as one of the data types that are available.
The sakila database contains the film table. We are going to create a table that will store film ratings descriptions.
To create a table:
1. You must be connected to a database. For more information about how to create a server connection see Connecting to a Database.
2. In Database Explorer, double-click a required database wherein you need to create a table.
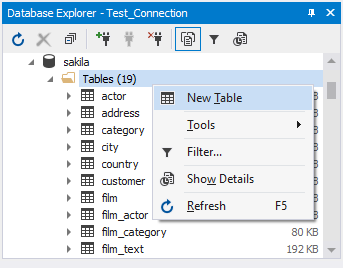
3. Right-click the Tables folder and select New Table. The Table Editor opens.
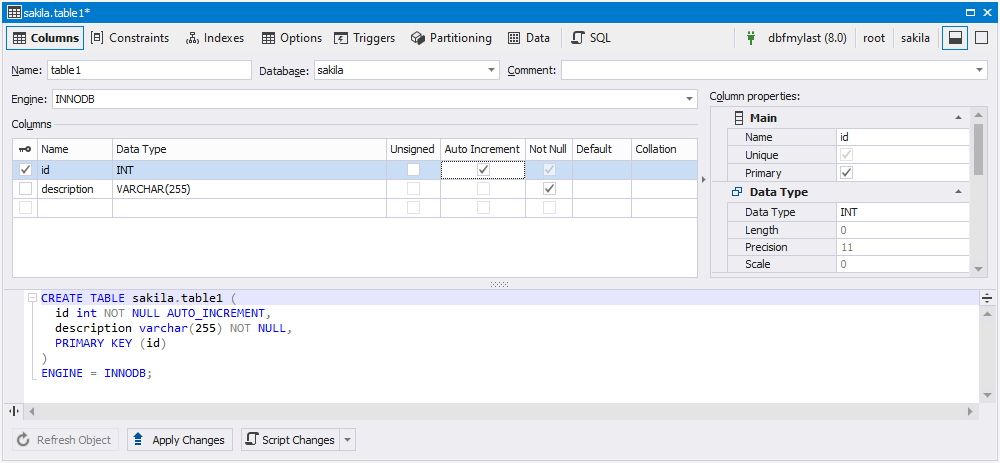
4. In the Name text box, enter a table name. You can give it a name such as ratings_description.
5. In the grid below, click the first empty cell and enter the column name. You can give it a name such as id. Note that the data type for that column is defined automatically. Select the check box next to id, in order to set this column as the primary key.
6. Click next empty cell and enter the column name. You can give it a name such as description. Note that the data type for that column is defined automatically.
7. Click Apply Changes.
The new empty table is created. It now appears in the Database Explorer in the Tables folder.
Note
You can also use dbForge AI Assistant to generate database tables.