Exporting Salesforce Attachments and Files

This tutorial requires SQL Server Integration Services 2012 or higher with SQL Server Data Tools installed. You need to add them yourself as described in Installation and Requirements.

The tutorial demonstrates how to export Salesforce Attachments into local files.


ExpandedToggleIcon        Adding Data Flow Components

For the purpose of this tutorial, we create a Devart Salesforce Source and an OLE DB Destination.

1.After you have created a new Integration Services project, in the Control Flow tab, drag Data Flow Task from the SSIS Toolbox window and to the design area. The Data Flow Task is created.
2.Switch to the Data Flow tab, go to the Toolbox docking window, in the Data Flow Sources list select Devart Salesforce Source (by default, in the Common tab) and drag it to the design area.
3.From the SSIS Toolbox window drag Derived Column (by default, in the Common tab) to the design area.
4.From the SSIS Toolbox window drag Export Column (by default, in the Other Transforms tab) to the design area.


ExpandedToggleIcon        Creating Connections

For this example we need a Salesforce connection for the Devart Salesforce Source. To create a connection to Salesforce, do the following:

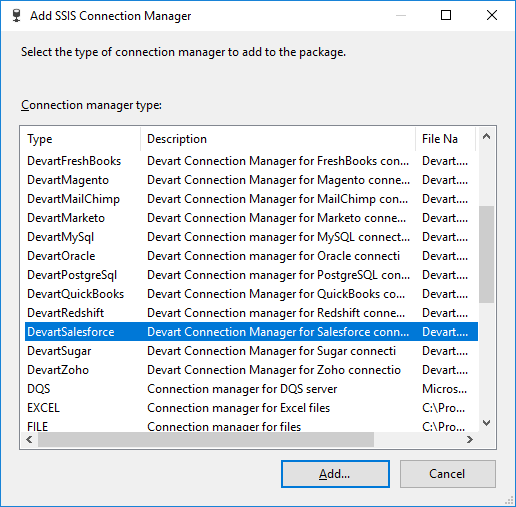
1.Right-click in the Connection Managers pane and select New Connection from the shortcut menu. The Add SSIS Connection Manager dialog box is displayed:
 
attachments-tutorial-3-add-connection-manager
2.In the Connection manager type list click DevartSalesforce and click Add. The Devart Salesforce Connection Manager Editor dialog box is displayed.
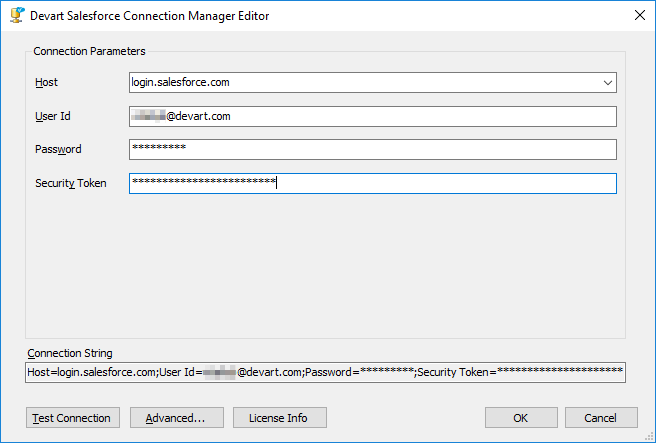
3.Specify the User name (email address) and Password, and Security Token you have received when registering at the Salesforce website. If necessary, click Advanced and specify other connection parameters.
 
attachments-tutorial-4-salesforce-connection

The connection for the Salesforce database is now created.


ExpandedToggleIcon        Configuring DataFlow Components

After the two required connections are created, we can proceed to customizing the data flow components.


First, let's configure the Devart Salesforce Source.

1.Double-click the Devart Salesforce Source data flow object.
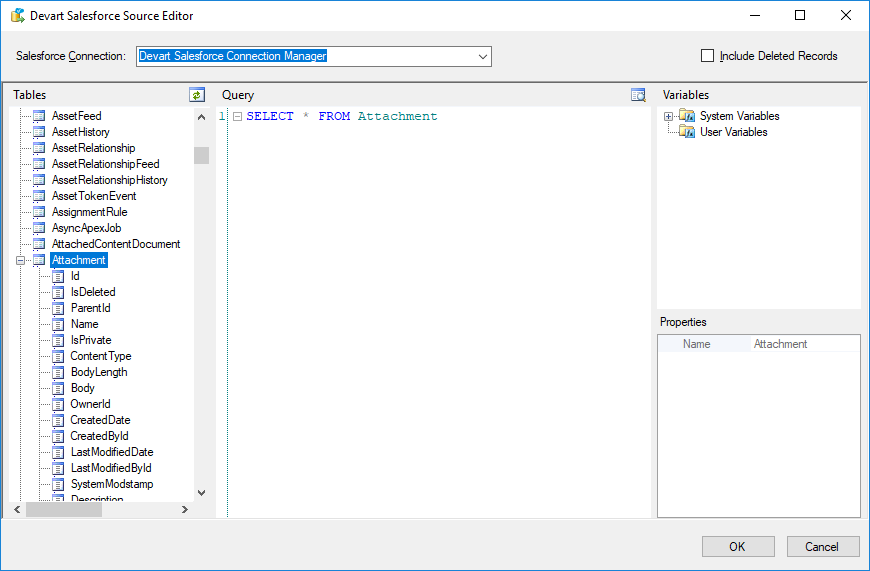
2.The Devart Salesforce Source Editor dialog box is displayed. Select the created Devart Salesforce Connection Manager in the Salesforce Connection list.
3.Drag the required table (in our example we use the Attachment table) from the Tables area to the Query area:
 
attachments-tutorial-4-salesforce-source-start
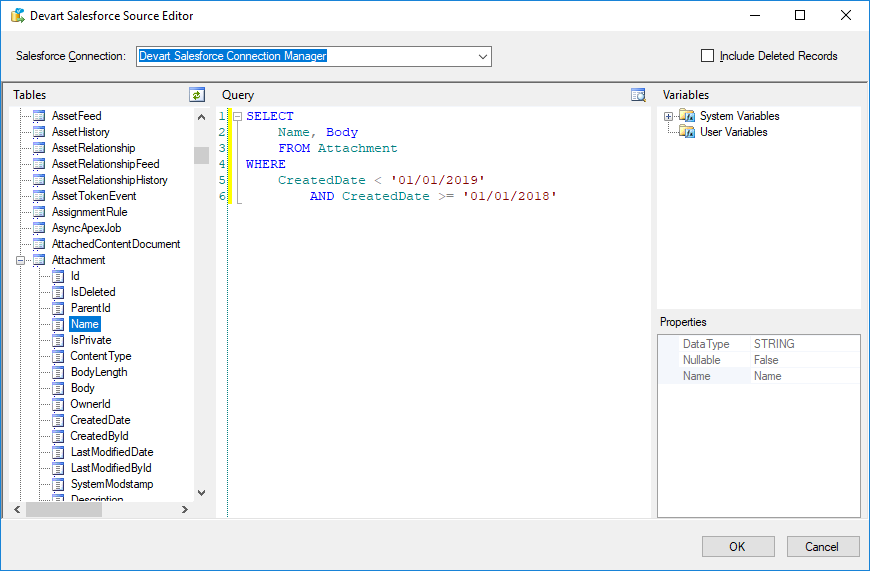
4.If you have a lot of attachments in Salesforce, Salesforce API may limit the number of attachments you can retrieve for one day. You may need to limit the number of attachments, retrieved for one package run. For this, you can add a WHERE clause for the query, for example, selecting only attachments, created within the specified period.
5.We may also edit the query in such a way that only the necessary columns are selected. We need only Name and Body columns. Thus, we get the following query:
 
attachments-tutorial-5-salesforce-source-filled
6.In the editor dialog box click OK.


If all options are set correctly, the red marker on the data flow object disappears. Connect the source component with the Derived Column with a Data Flow path and proceed to customizing the Derived Column:

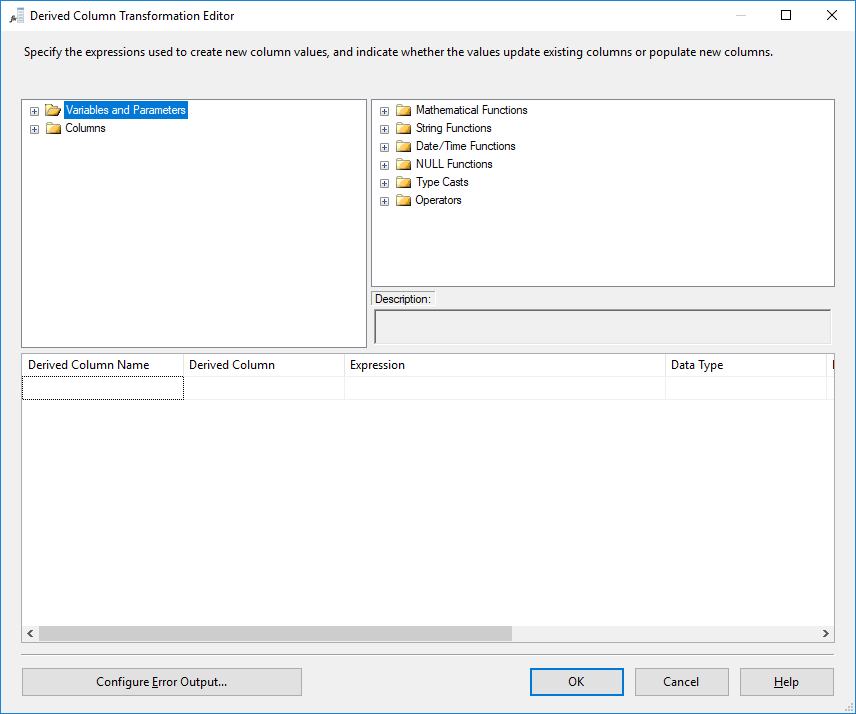
1.Double-click the Derived Column data flow object. The Derived Column Transformation Editor dialog box is displayed.
 
attachments-tutorial-6-derived-column-editor-start
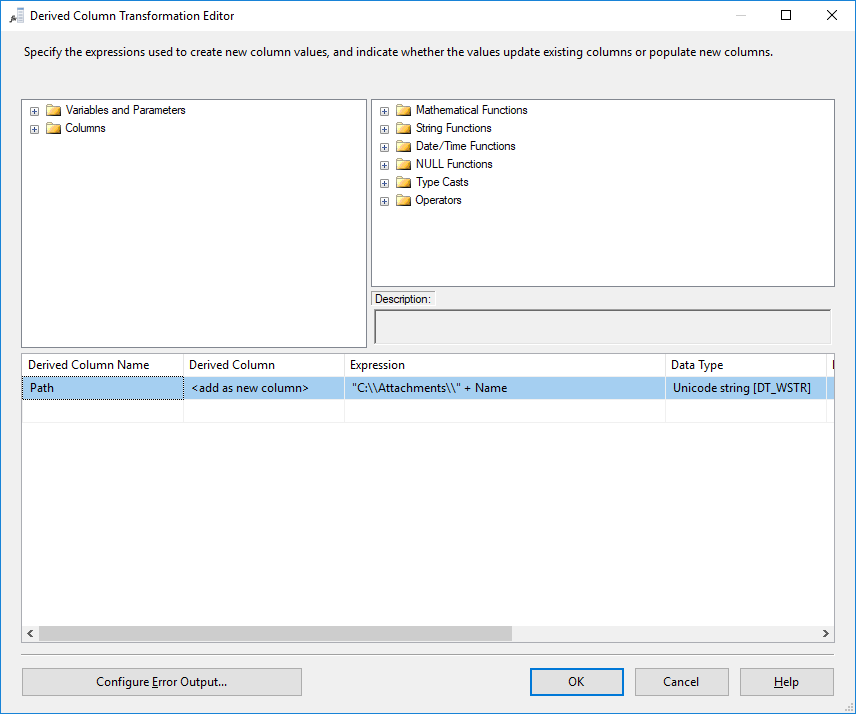
2.In the grid at the bottom of the editor, in the Derived Column Name column enter a name for the new column that will determine the file name with the path to export attachment to. For example, name it Path.
3.Leave <add as new column> in the Derived Column column.
4.In the Expression column, we must specify the expression that results in a full file name with the path to save the attachment to. File names will be taken from the Salesforce Name field, so we should add path to a folder to export attachments to. This must be an existing path. In our example, we use the following expression:
 
"C:\\Attachments\\" + Name
 
attachments-tutorial-7-derived-column-editor-filled
 
5.After all options are set, click OK.


Connect the Derived Column with the Export Column with a Data Flow path and proceed to customizing the Export Column:

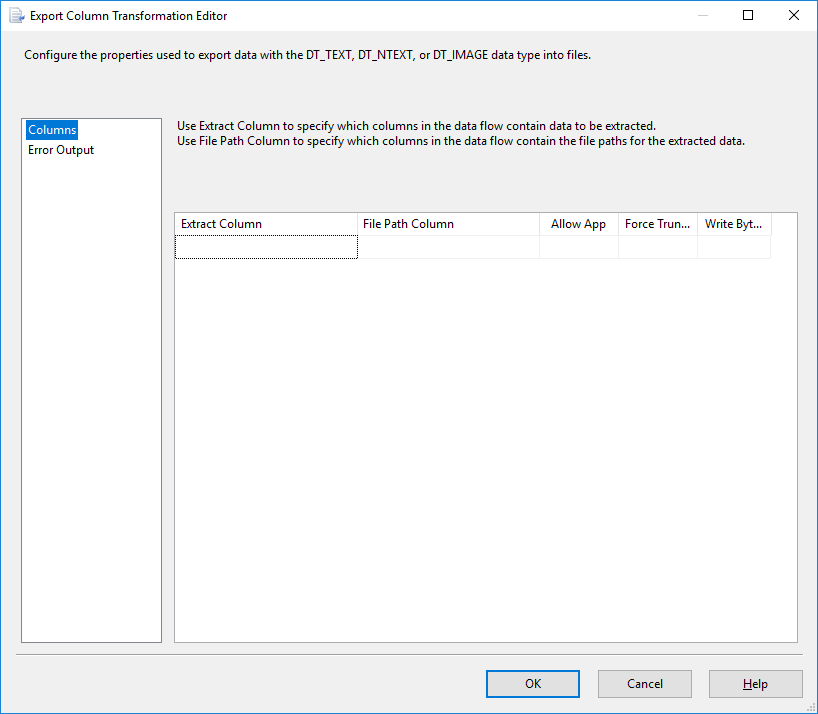
1.Double-click the Export Column component. The Export Column Transformation Editor dialog box is displayed.
 
attachments-tutorial-8-export-column-start
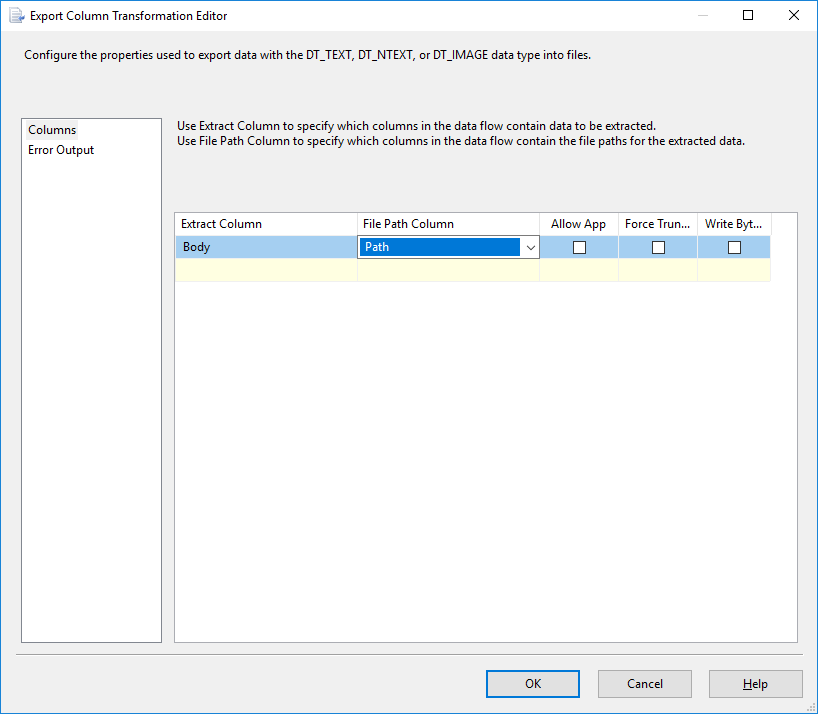
2.In the grid, in the Extract Column column, select Body.
3.In the File Path column, select Path.
 
attachments-tutorial-9-export-column-filled
4.After all options are set, click OK.


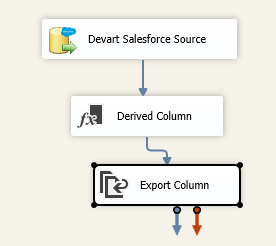
Make sure that there are no red error markers on the data flow diagram.

attachments-tutorial-10-attachments-export-diagram

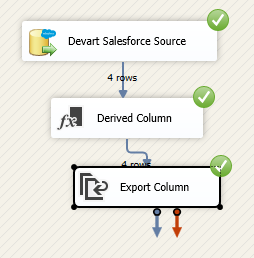
Right-click the design area and then click Execute Task. The green marks on the data flow objects indicate that the data flow process is completed successfully:

attachments-tutorial-11-attachments-export-diagram-running


ExpandedToggleIcon        Exporting Files

Currently, Salesforce uses the Files feature instead of Attachments. These files are stored in different Salesforce objects than Attachments. The most important of them are ContentDocument, storing file name, type, etc., and ContentVersion, storing actual file content.

This tutorial can easily be modified to export Salesforce Files instead of Attachments. For this, we only need to modify the query in the Source component and the expression in the Derived Column component.

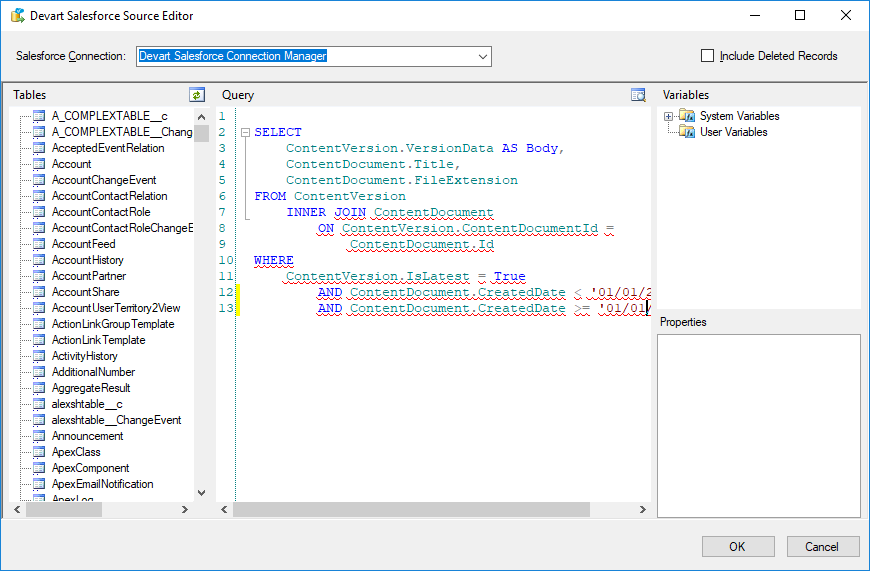
Use the following query for the Source component:


SELECT ContentVersion.VersionData AS Body, ContentDocument.Title, ContentDocument.FileExtension
  FROM ContentVersion
INNER JOIN ContentDocument ON ContentVersion.ContentDocumentId = ContentDocument.Id
WHERE ContentVersion.IsLatest = True AND ContentDocument.CreatedDate < '01/01/2019' AND ContentDocument.CreatedDate >= '01/01/2018'


attachments-tutorial-12-source-for-files

You may modify the WHERE clause to specify the necessary period, for which to export files.

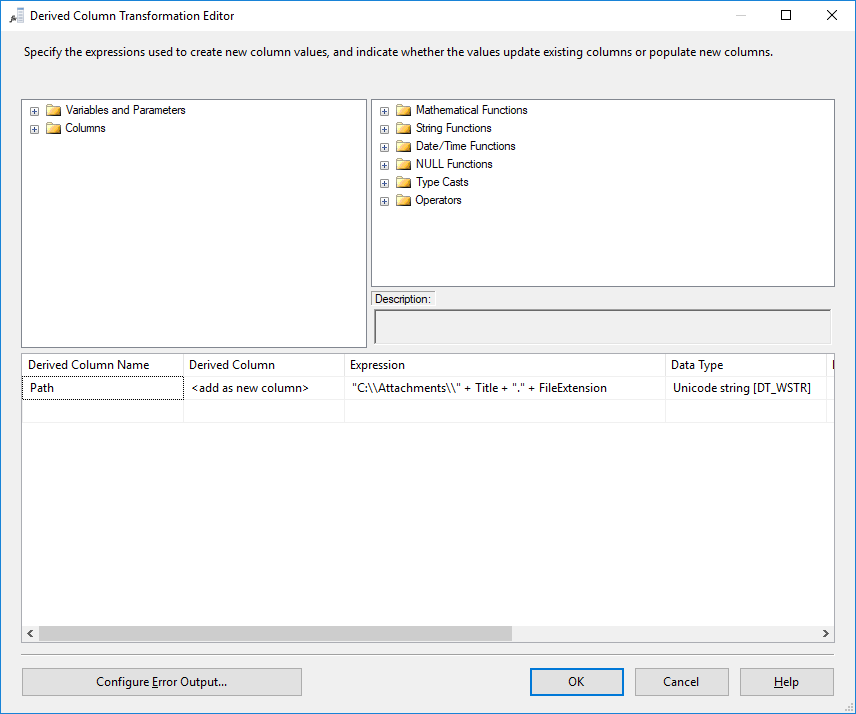
As for the expression of the derived column, you can use the following expression:

"C:\\Attachments\\" + Title + "." + FileExtension


attachments-tutorial-13-derived-column-for-files


Note that if you are going to use already existing components, already configured for Attachments, you may need to open the Advanced Editor for the Derived Column and Export Column components and correct settings on the Input Columns tab.