How to create a migration script
Regularly updating a database to maintain data integrity is one of its fundamental requirements. There are two approaches to storing database changes in repositories:
dbForge Schema Compare provides the flexibility to use either of these approaches based on the databases you are working with and your professional requirements.
To gain a more comprehensive understanding of the state-based and migration-based approaches in software architecture, refer to the State-based vs. Migration-based blog article.
State-based approach (declarative)
The state-based approach involves maintaining the database schema in its final state within the code repository. When a source database is updated, a new script is created. This script allows for the recreation of the database to match its state at the time the script was generated.
Here are two ways to generate a state-based script:
Scenario 1
1. On the toolbar, click New Schema Comparison to open the wizard.
2. On the Source and Target page of the wizard, select the source database and server connection and select an empty Scripts Folder as Target.
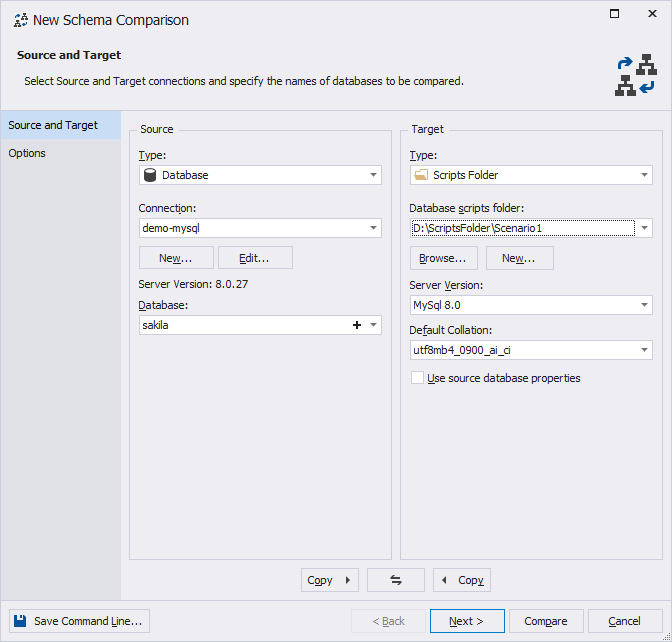
3. Click Compare to run the schema comparison.
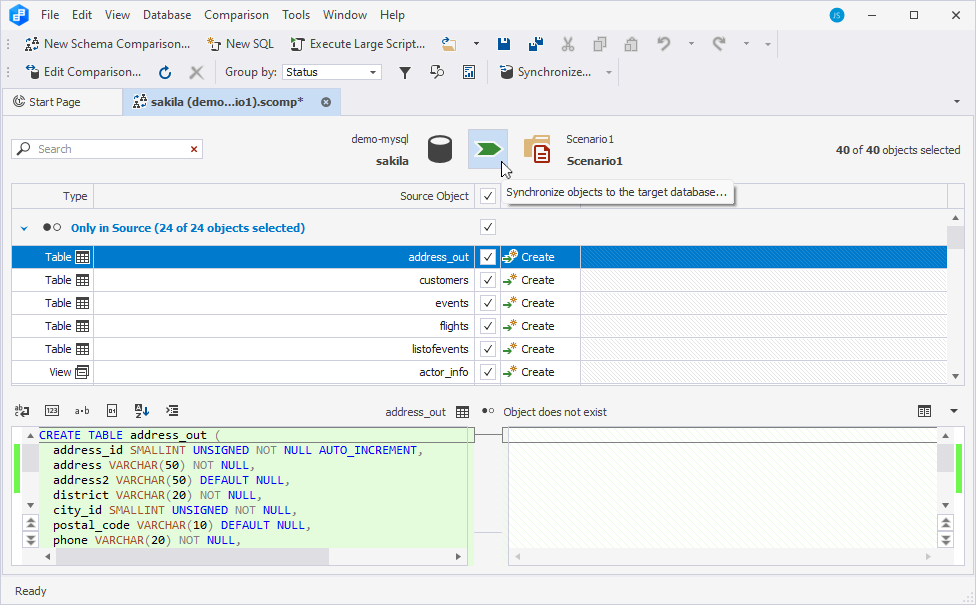
4. In the comparison results grid, click Synchronize objects to the target database to open the Schema Synchronization Wizard.
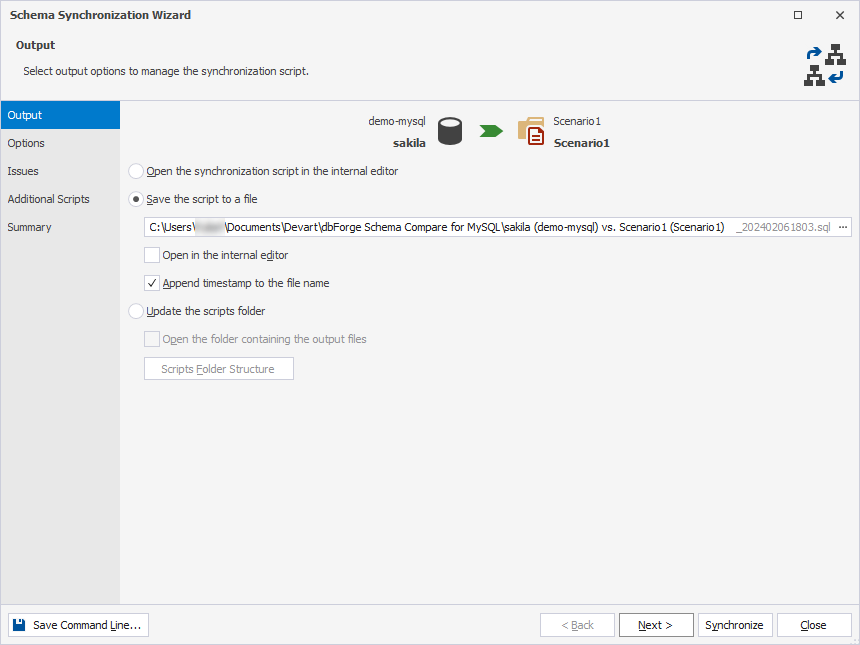
5. On the Output page of the wizard, select Save the script to a file and click Next.
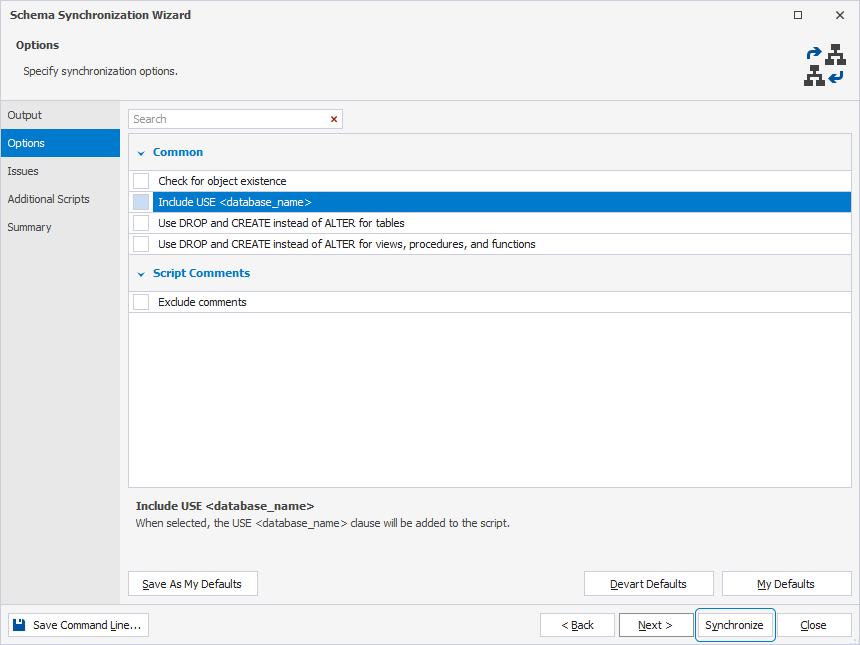
6. On the Options page of the wizard, clear the Include USE checkbox under Common and click Synchronize to run the schema synchronization.
This way, all database objects are consolidated into a single SQL script, which includes the Data Definition Language (DDL) statements for each object, organized based on their dependencies. This makes it possible to create database objects in the correct order when executing the script.
Note
To include table data in a scripts folder, use dbForge Data Compare.
Scenario 2
1. On the toolbar, click New Schema Comparison to open the wizard.
2. On the Source and Target page of the wizard, select the source database and server connection and select an empty Scripts Folder as Target.
3. Click Compare to run the schema comparison.
4. In the comparison results grid, click Synchronize objects to the target database to open the Schema Synchronization Wizard.
5. On the Output page of the wizard, select Update the scripts folder and click Synchronize to run the schema synchronization.
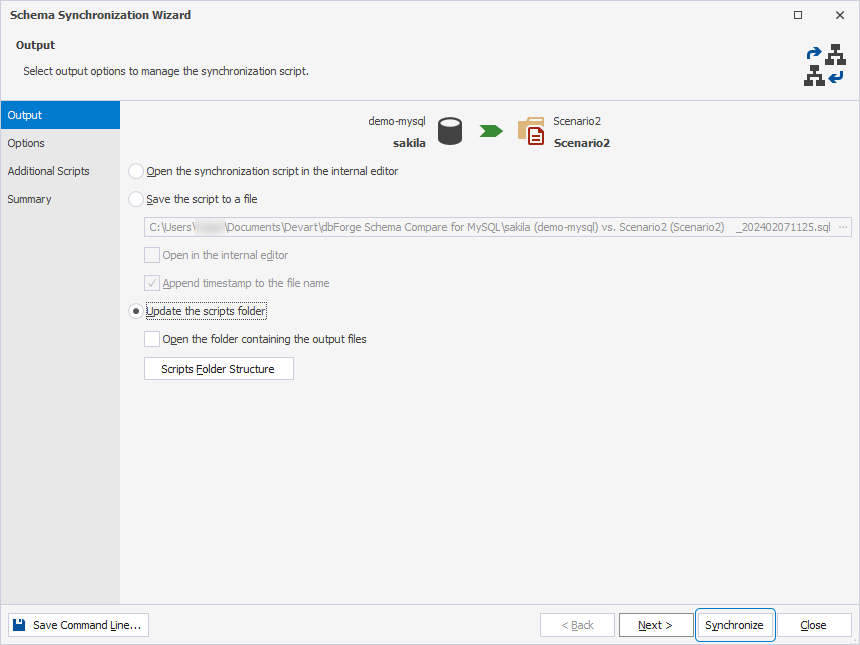
Each database object is saved as a separate SQL file, organized into folders by object type, similar to a Database Project.

Migration-based approach (imperative)
Unlike the state-based approach, the migration-based method follows a different methodology. Instead of depending on a single snapshot of an ideal database, it utilizes a series of migration scripts. These scripts facilitate the transfer of the existing database from one version to another.
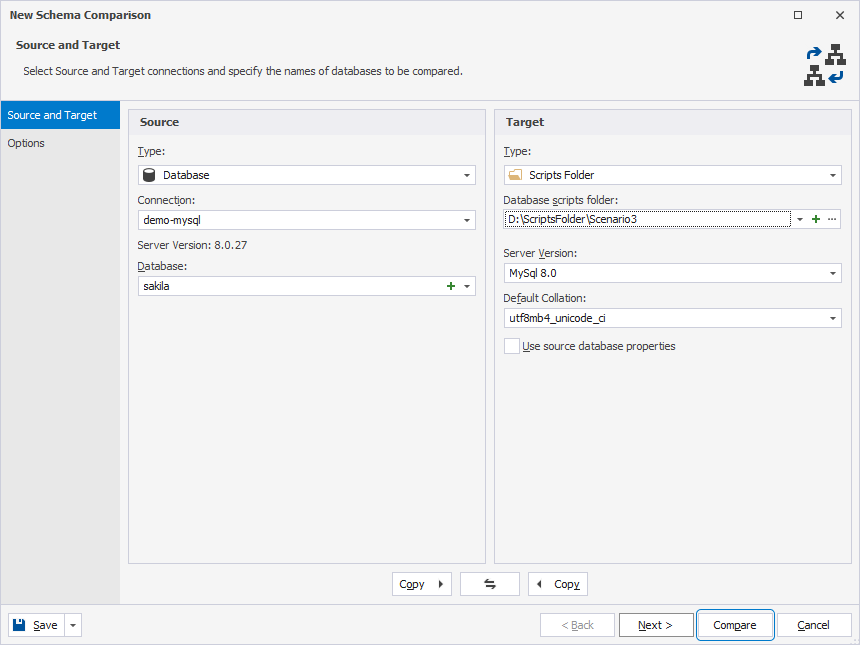
1. On the toolbar, click New Schema Comparison to open the wizard.
2. On the Source and Target page of the wizard, select the Source database and server connection and select a non-empty Scripts Folder as Target. The folder should contain the previously generated scripts, which include the Data Definition Language (DDL) statements for all objects as they existed at the time of generation.
Note
To obtain a migration script, at least one element in the Source must be modified to differ from the version saved in the Scripts Folder.
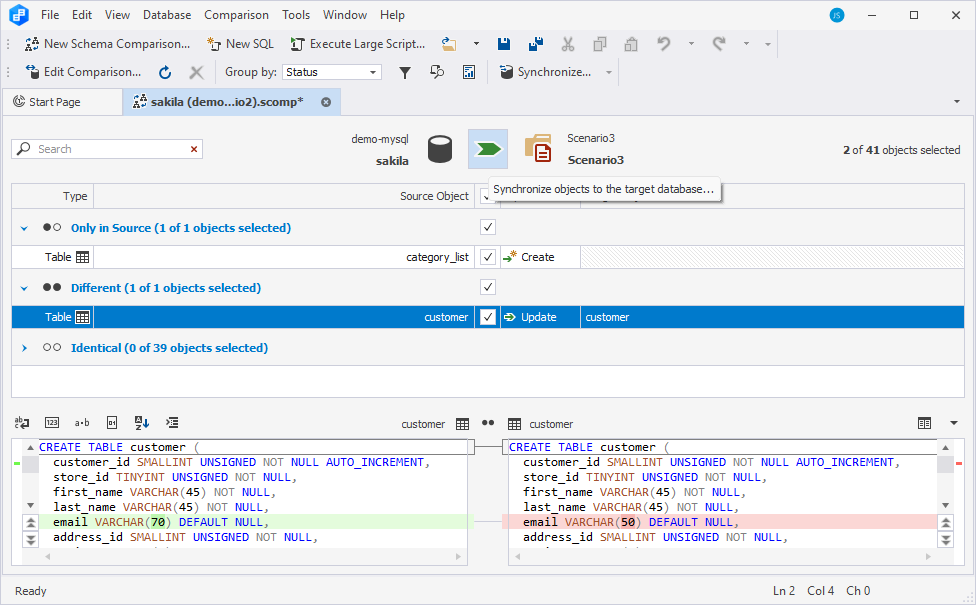
3. Click Compare to run the comparison.
4. In the comparison results grid, click Synchronize objects to the target database to open the New Schema Synchronization wizard.
6. On the Output page of the wizard, select Save the script to the file and click Synchronize.

Note
dbForge Schema Compare for MySQL supports command-line operations. Hence, you can also create and save the migration script from the command line. To do this, provide a path to the desired directory after the
/syncargument. For example:/sync:"C:\sync_script_name.sql"
Cases to use migration scripts
When comparing the actual database with the version in source control, sometimes, it is impossible to distinguish if the schema changes require any data changes. Therefore, deploying data changes from source control can result in deployment failure or data loss.
Migration scripts can be of great assistance to ensure correct database deployment. The required steps are to create your deployment script and execute it during automated deployment from source control.
Here are some examples of using migration scripts to deploy the database correctly:
| Examples | Description | Solution |
|---|---|---|
| Adding a NOT NULL constraint to a column | When you insert a NOT NULL constraint into a column holding NULL entries without providing a default value, the deployment process may fail because the new constraint conflicts with the existing NULL values in the column. | Create a migration script to update all the NULL entries of the column with a NOT NULL value and execute it before adding a NOT NULL constraint. |
| Splitting a column | If you split a column into two columns and drop the original column along with its data, the deployment will lead to data loss of the dropped column. | Create a migration script to copy data to the new columns and execute it before dropping the original column. |
| Merging columns | When you merge a column, a new column is created, while the original column is dropped. In this case, the deployment will also lead to data loss of the dropped column. | Create a migration script to transfer data to the new columns and execute it before dropping the original column. |
| Splitting a table | If you split a table into two tables and drop the original table along with its data, the deployment will lead to data loss of the dropped table. | Create a migration script to transfer data to the new table and execute it before dropping the original table. |
| Merging tables | When you merge a table, a new table is created, while the original table is dropped. In this case, the deployment will lead to data loss of the dropped table. | Create a migration script to copy data to the new tables and execute it before dropping the original table. |
| Changing the data type or size of a column | When you change the column data type or size, the data will be truncated during the deployment. | Create a migration script to modify rows in such a manner to avoid truncation. |
| Renaming a table | When you rename a SQL table, it is dropped and then recreated. In this case, the deployment will lead to data loss of the renamed table. | Create a migration script to rename the table using the ALTER TABLE ... RENAME TO ... statement. |