Use Objects Filter
Objects Filter enables you to include or exclude database objects in schema comparison results and synchronization. You can filter objects by type, name, or other criteria. You can also apply multiple filters and create custom filters with Filter Editor.
With Objects Filter, you can:
- Select database objects for synchronization.
- Create or modify filter rules.
- Open and apply custom filters.
- Revert filter settings to the last saved or loaded state, or reset them to their default values.
Open Objects Filter
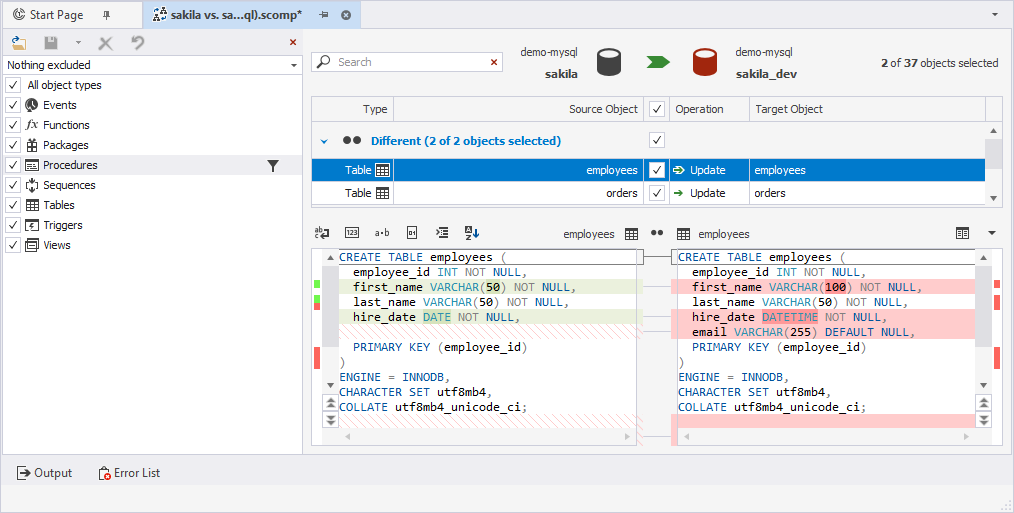
Objects Filter opens automatically after you run a schema comparison.
If Objects Filter is closed, you can open it in one of these ways:
-
On the Comparison toolbar, click
 .
. -
Right-click the schema comparison grid and select Objects Filter.
-
Press Ctrl+L.
Note
Objects Filter retains your filter selections even when it is closed, and preserves them when you update or re-run a schema comparison.
Objects Filter toolbar
You can use the toolbar to manage filters.

The table describes the toolbar options.
| Icon | Name | Description |
|---|---|---|
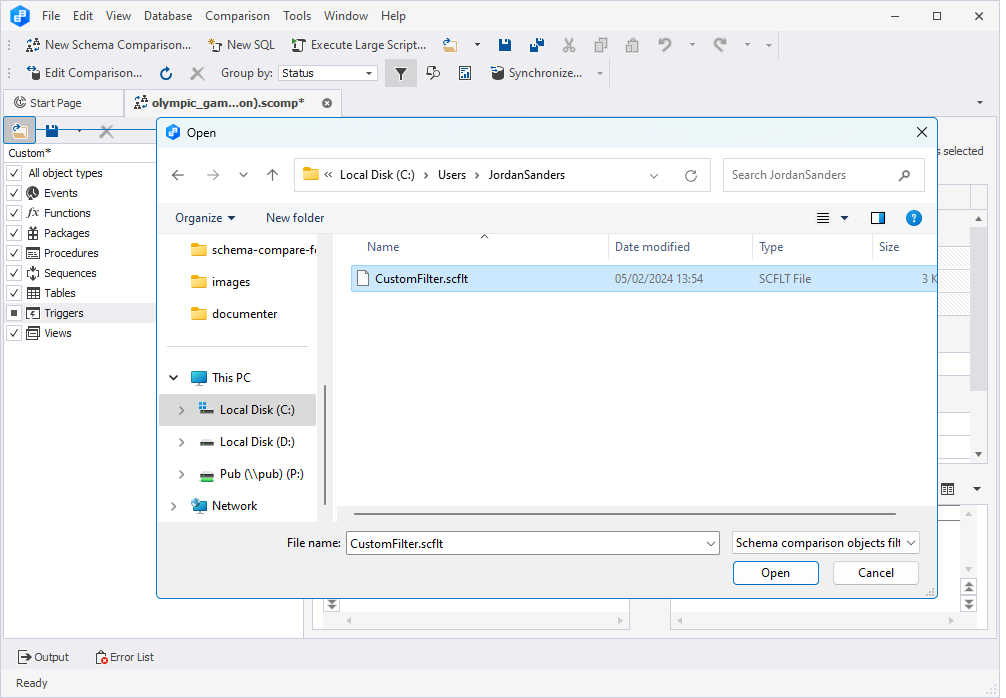 |
Open an existing filter | Loads a previously saved custom filter. |
| Save | Saves the schema comparison object filter to an .scflt file, either by creating a new file or by updating the current filter file. | |
| Delete the current file | Deletes the current user-defined schema comparison object filter file. | |
 |
Discard Changes | Reverts the filter settings:
|
 |
Closes Objects Filter. |
Note
is available for filter settings saved to the filer or opened from it but is unavailable for the Nothing excluded and Custom* filters.
is unavailable only for the Nothing excluded filter.
Warning
If you reload the same filter, the message
This filter has already been loaded. Overwrite?appears. Click Yes to confirm the operation. Click No to cancel.
Filter box
The Filter box shows the available filters:
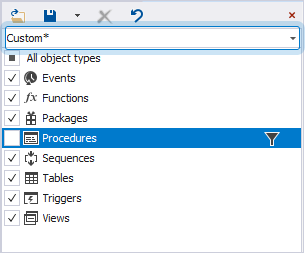
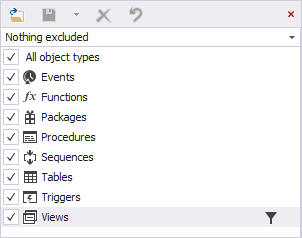
- Nothing excluded – The default filter.
- Custom* – A modified version of the Nothing excluded filter.
- User-defined filter (for example, MyFilter) – A filter saved as an .scflt file and loaded by a user.
An asterisk (*) in the filter name indicates unsaved changes.
You can select a filter directly from the Filter box.
Warning
Switching to another filter or closing Objects Filter discards any unsaved changes, including changes to Custom* filters. Save your changes before switching filters or closing the tool.
When you edit a filter, you can either overwrite the existing filter or save it with a new name to create a new filter.
Objects Filter tree
The Objects Filter tree lists the database objects on the specified server. The objects appear in alphabetical order.
Filter objects by types
By default, all object types are included in the comparison results and synchronization.
Include object types
To include an object type, select the checkbox for the corresponding type, or click its name.
To include all object types, select All object types, or click its name.
Exclude object types
To exclude an object type, clear the checkbox for this type, or click its name.
To exclude all object types, clear All object types, or click its name.
Note
Excluding an object or object type removes it from the comparison results and prevents it from being selected for synchronization.
Warning
If an object selected for synchronization references an excluded object, you can include the excluded object later on the Dependencies page of the Schema Synchronization Wizard.
Save filters
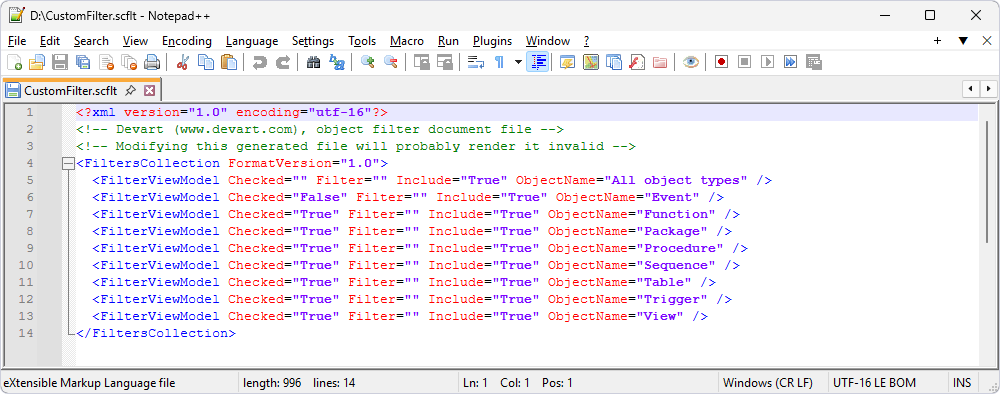
You can save the schema comparison object filter to an XML file with the .scflt file extension.
To save a filter:
1. On the Objects Filter toolbar, click ![]() , then select Save or Save As.
, then select Save or Save As.
2. In the Save As dialog, specify the file name and select the folder to store the file.
3. Click Save.
The .scflt file is a regular XML file that can be edited with any text editor. It stores all object types, their synchronization status (True for included, False for excluded), and any associated filter rules. The filter settings are located within the FiltersCollection tag.
- Checked – Shows whether the database object type is included (
True) in the comparison or not (False). It can be left empty when included but modified with a certain filter rule. - Filter – Contains an object name mask to filter objects by. It is empty by default.
- Include – Indicates whether the filter rule includes (
True) or excludes (False) objects. - ObjectName – The name of the database object type that the filter refers to.
Create a filter rule
1. In the Objects Filter tree, click for an object type to open the Filter Editor dialog.
2. In Filter rule for, select the object type to which the filter applies, or select All object types to apply the filter to all objects.
3. Select Include objects if (default) to include objects that meet the condition, or select Exclude objects if to exclude objects that meet the condition.
4. Click the logical operator placeholder, then select the operator:
- And – Displays the records when both conditions are
True. - Or – Displays the records when at least one of the conditions is
True. - Not And/Not Or – Reverses the logic of the specified conditions.
Note
When you click the upper-level operator, you can also add a new condition or a new condition group, or clear all conditions.

5. To add a filter rule, click ![]() .
.
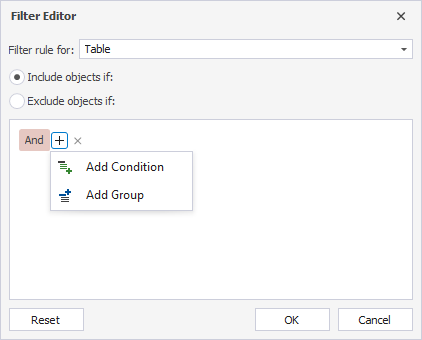
6. Click the Source Object placeholder and select the item.
The table describes the source objects supported in the editor.
| Name | Description |
|---|---|
| Operation | A synchronization operation for the target database:
|
| Source Object | A name of the object in the source schema. |
| Target Object | A name of the object in the target database. |
| Source Owner | A schema to which the object belongs in the source database. |
| Target Owner | A schema to which the object belongs in the target database. |
| Status | A status of the object as the result of schema comparison.
|
| Type | A type of the database object. |
Tip
For instructions on how to exclude objects with the Only in Target status from the schema comparison, see Exclude all objects with the Only in Target status.
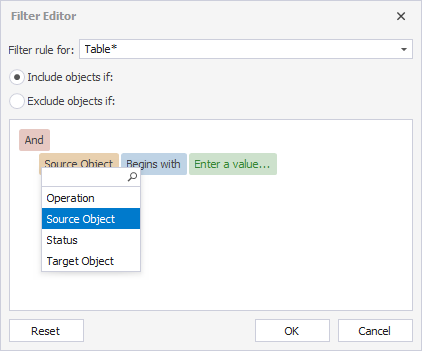
7. Click the operator placeholder (default: =) and select the filter operator for the condition, such as =, <, or <>.

8. Click the value placeholder and select the value from the list.
9. Click OK to save the changes.
Remove conditions
To remove a condition, use one of these ways:
-
Click
 for the required condition.
 -
Press the Minus Sign key.
Remove condition groups
To remove a condition group, click ![]() for the required condition group.
for the required condition group.
Note
Pressing the Minus Sign key removes only one filter rule in the group.
Reset to default state
To clear all conditions and revert the editor to its default state, in the Filter Editor, click Reset.
Discard changes
To close the dialog without saving changes, click Cancel.
Revert filter settings
To revert filter settings to the last saved or loaded state, or to the defaults values, on the toolbar, click .
Filters and synchronization
A filter determines which objects appear in the comparison results and are available for synchronization.
When you exclude an object or object type by using a filter, it does not appear in the comparison results and cannot be selected for synchronization.
If an excluded object is referenced by an object that you selected for synchronization, dbForge Studio notifies you about the dependency. You can then choose to synchronize the excluded object on the Dependencies tab of the Schema Synchronization wizard.
Filters and search
If an object matches the search string but is excluded by the filter, it does not appear in the comparison results.
Use filters from the command line
You can filter objects from the command line using the /filter switch:
/filter:<filepath>
where <filepath> is the path to the file (.scflt) that stores the filter.
For example, you can run schema comparison by using a schema comparison file (.scomp) that will schema comparison options and filter settings stored in a .scflt file.
schemacompare.com /schemacompare /compfile:"D:\SchemaComparison.scomp" /filter:"D:\FilterSettings.scflt"