How to export SQL Server data to PDF
PDF (Portable Document Format) was introduced by Adobe as a standard for representation of documents in a format that is independent from software, hardware, or operating systems.
To export data to PDF:
1. In Database Explorer, right-click the required table or selected data in the grid, and then select Export Data from the shortcut menu.
Note
Query Builder comes with Paginal Mode enabled by default, limiting data selection to the first 1000 records. To export more records, disable the Paginal Mode and press Ctrl+End to fetch all the selected data at once. Then, click
Export Data at the top of the grid to open the Data Export Wizard.
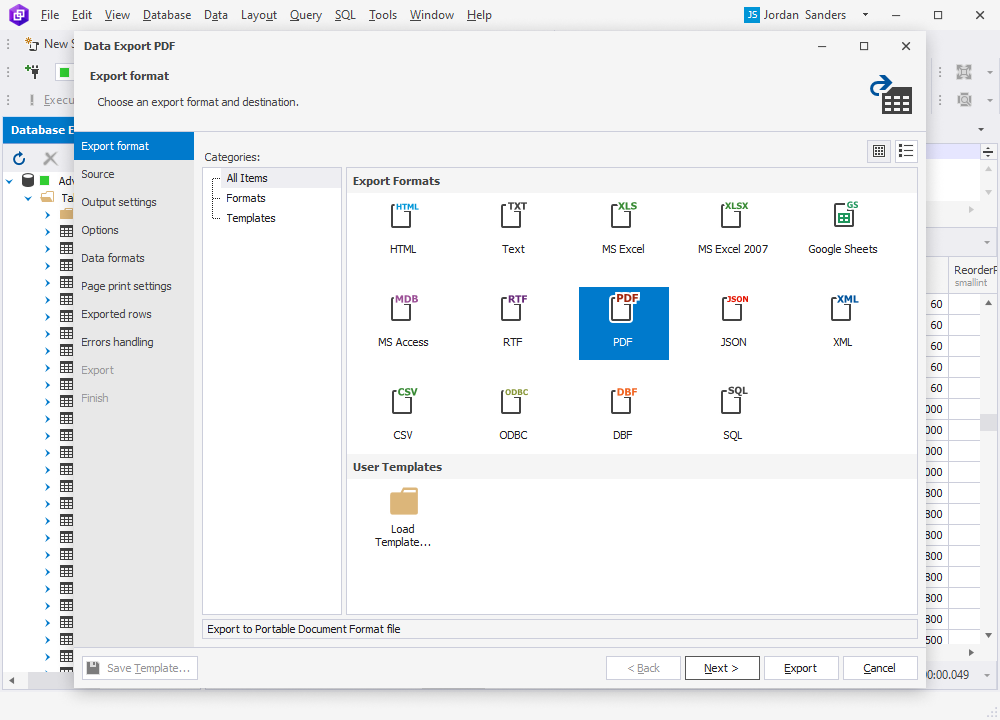
2. On the Export format page, select the PDF export format or load export options from a template file if you saved it previously. Click Next.
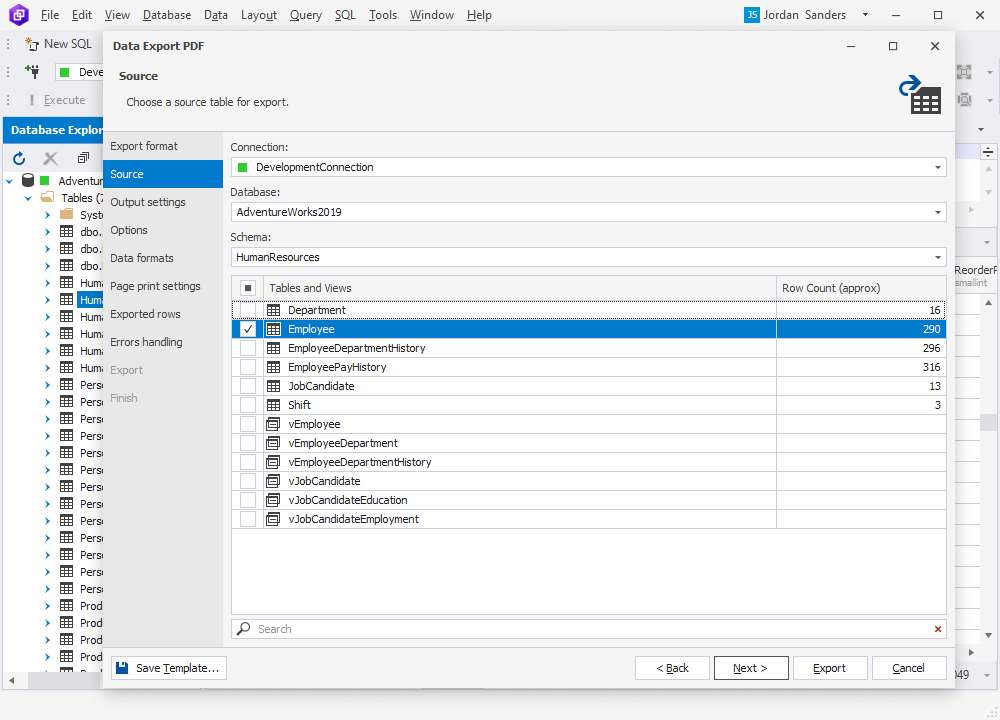
3. On the Source page, select a server connection, a database and its schema, table(s) and view(s) that you want to export, and click Next.
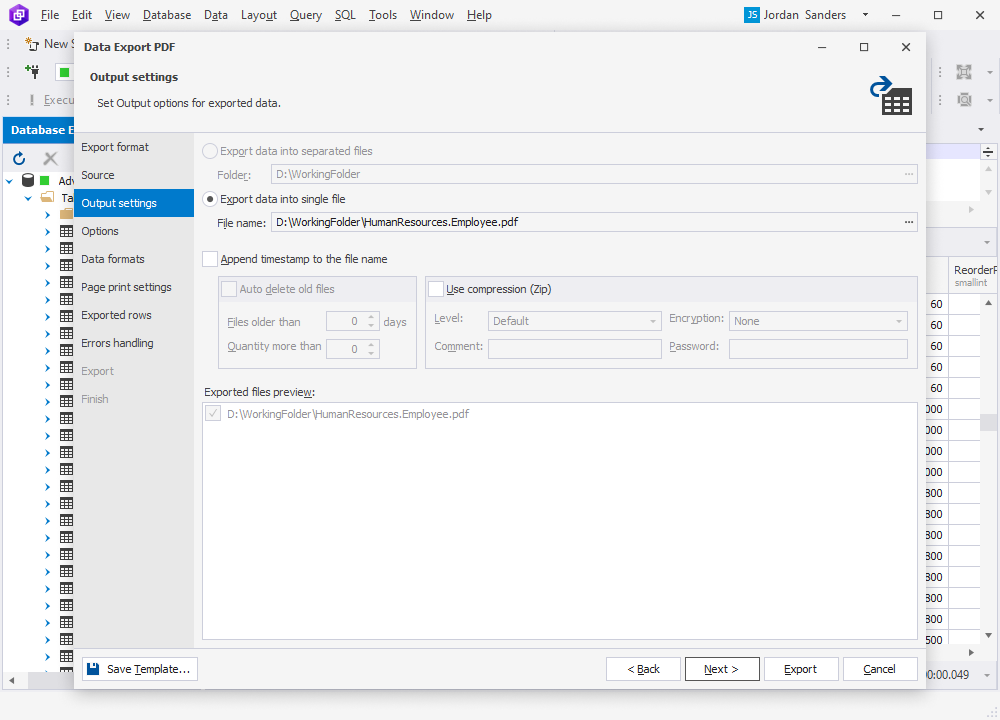
4. On the Output settings page, you have two main options:
-
Export data into separated files, where you specify the path to the folder that they will be saved to.
-
Export data into single file, where you specify the path and the file name.
You will find the list of files to be exported in the Exported files preview box.
You can also enable three additional options:
-
Append timestamp to the file name.
-
Auto delete old files to auto-delete exported files that are older than a specified number of days.
-
Use compression (Zip) to create an archive file with your exported files. Additionally, you can specify the compression level (No Compression, Best Speed, Fast, Default, Good, or Maximum), add a comment, and encrypt your archive with AES128 or AES256 encryption and specify a decryption password.
If the destination folder does not exist, the application will prompt you to create it. Click Yes to proceed.
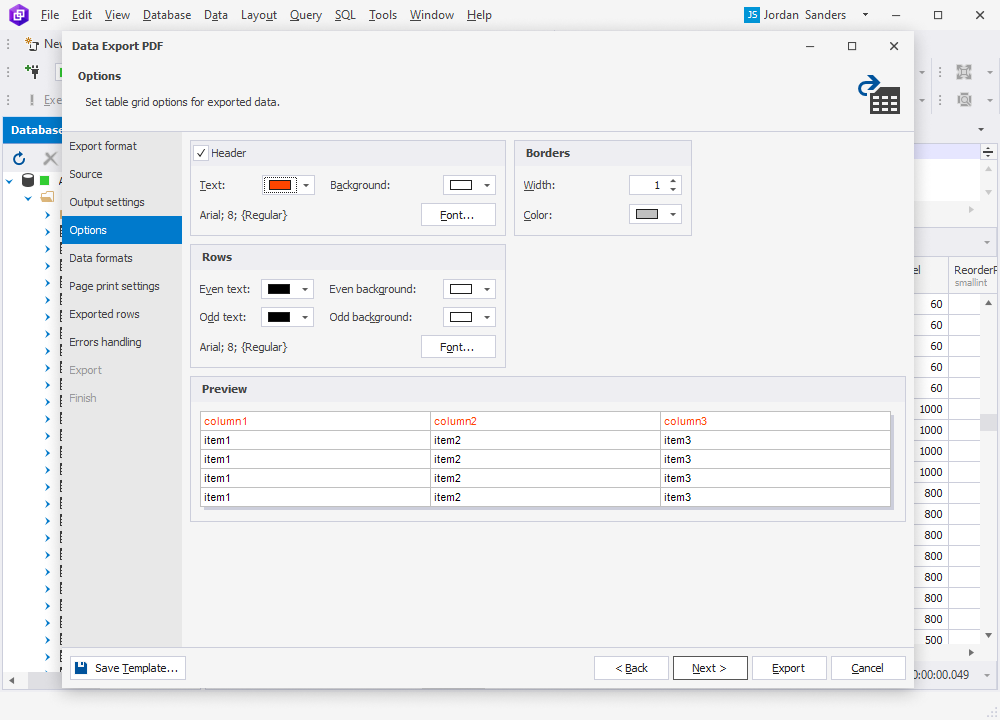
5. On the Options page, you can set the table grid options for exported data: text and background colors and fonts in Header and Rows, as well as width and color of Borders. The results of your configuration are shown in Preview.
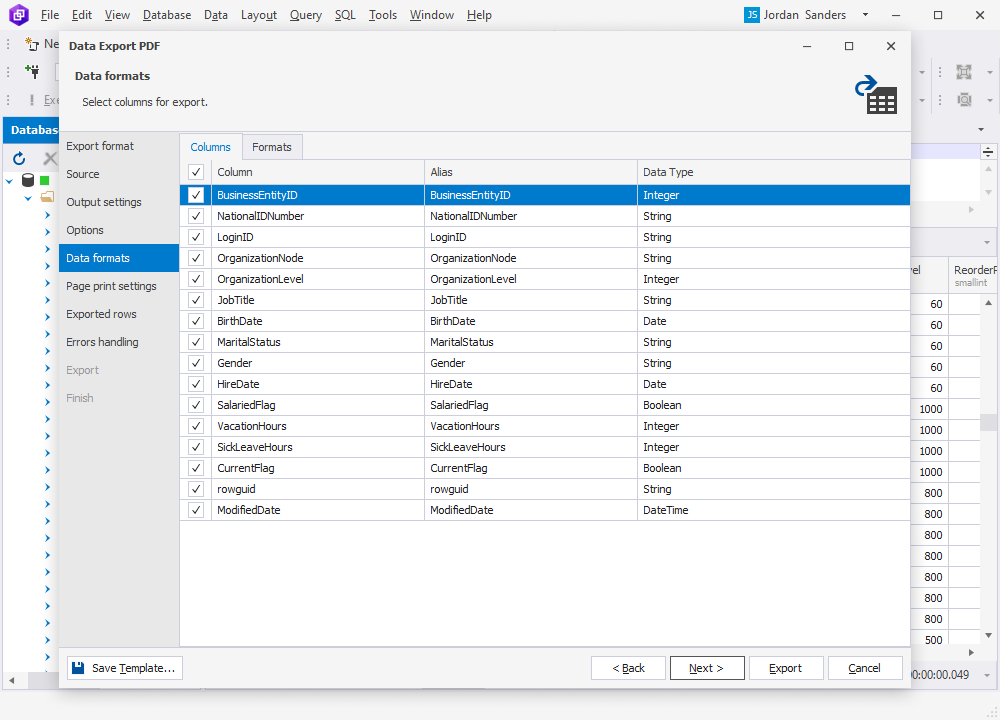
6. On the Data formats page, you have two auxiliary tabs. The first one is Columns, where you can select columns for export and check their aliases and data types.
The second one is Formats, where you can change the default format settings for Date, Time, Date Time, Currency, Float, Integer, Boolean, Null String, as well as select the required binary encoding from the drop-down list.
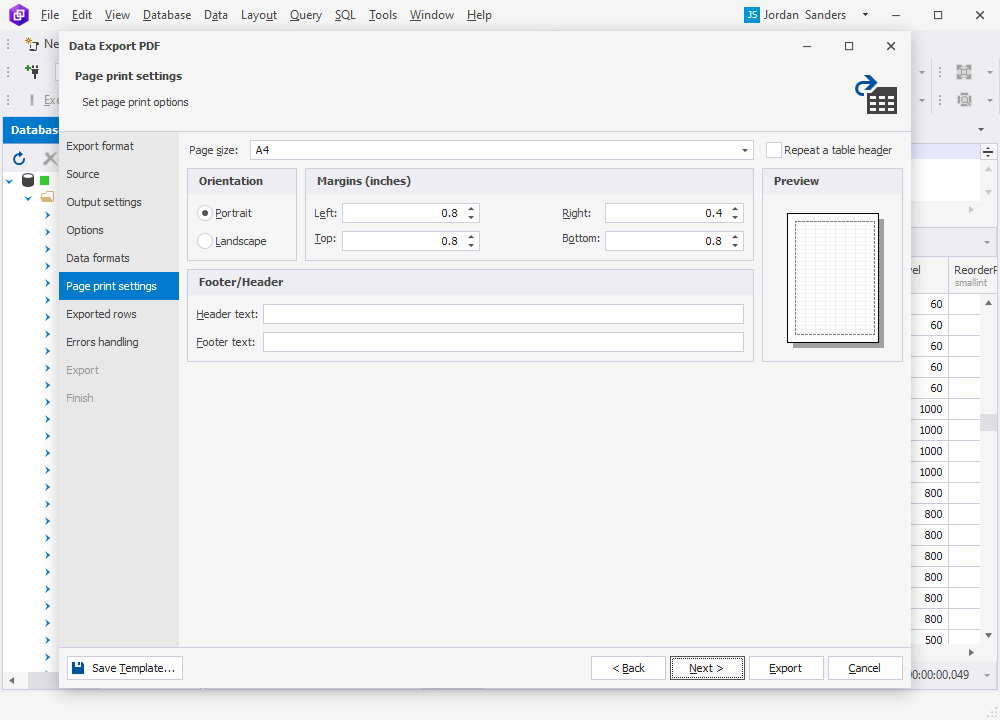
7. On the Page print settings page, you can configure the page size, orientation, margins, header and footer text (including the option to repeat the table header). You also get a preview of your configurations.
8. On the Exported rows page, you can select to export all rows, export the rows selected on the Data formats page, or export a specified range of rows.
9. On the Errors handling page, you can specify the error processing behavior (using one of the three available options: Prompt the user for an action, Ignore all errors, or Abort at the first error) and opt to write reports to a log file with a specified path.
Note
If you want to save your export settings as templates for recurring scenarios, click Save Template.
10. Click Export. When your data export is completed, you have several options: you can open the exported file or folder, perform another export operation, view the log file, or simply click Finish.