Connecting to NetSuite Using OAuth 2.0 Authentication
You can connect to NetSuite using OAuth 2.0 authentication by providing your account ID, client ID, and client secret.
This method eliminates the need for user credentials, ensuring secure and seamless integration with NetSuite services.
Perform the following actions to enable Oauth 2.0 authentication in NetSuite.
Enabling Oauth 2.0 Authentication
-
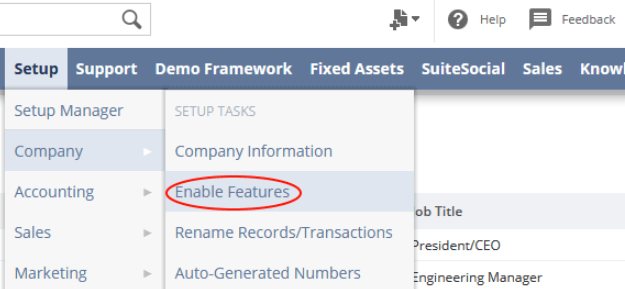
Select Setup > Company > Enable Features.
-
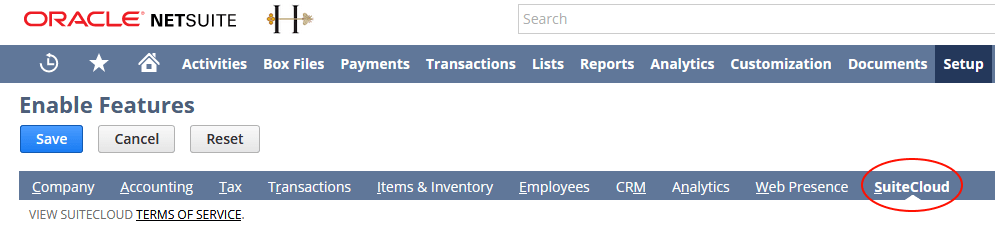
Then click SuiteCloud.
-
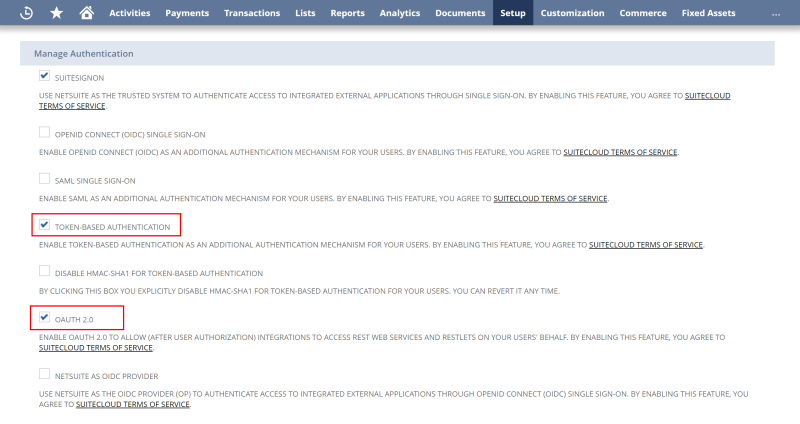
In the Manage Authentication pane, select the Oauth 2.0 checkbox.
Creating a Role
Create a role with the necessary permissions for the objects you would like to use. Then, assign this role to the user, who will be used for authentication.
-
Select Setup > User/Roles > Manage Roles > New.
-
Assign the SuiteAnalytics Workbook permission in the Reports section.
Note: You can grant the following permissions in
Setup to allow API calls:
- REST Web Services
- User Access Tokens
- Custom Record Types
- Custom Lists
- Custom Fields
All available permissions can be found in the
Transactions and
Lists sections.
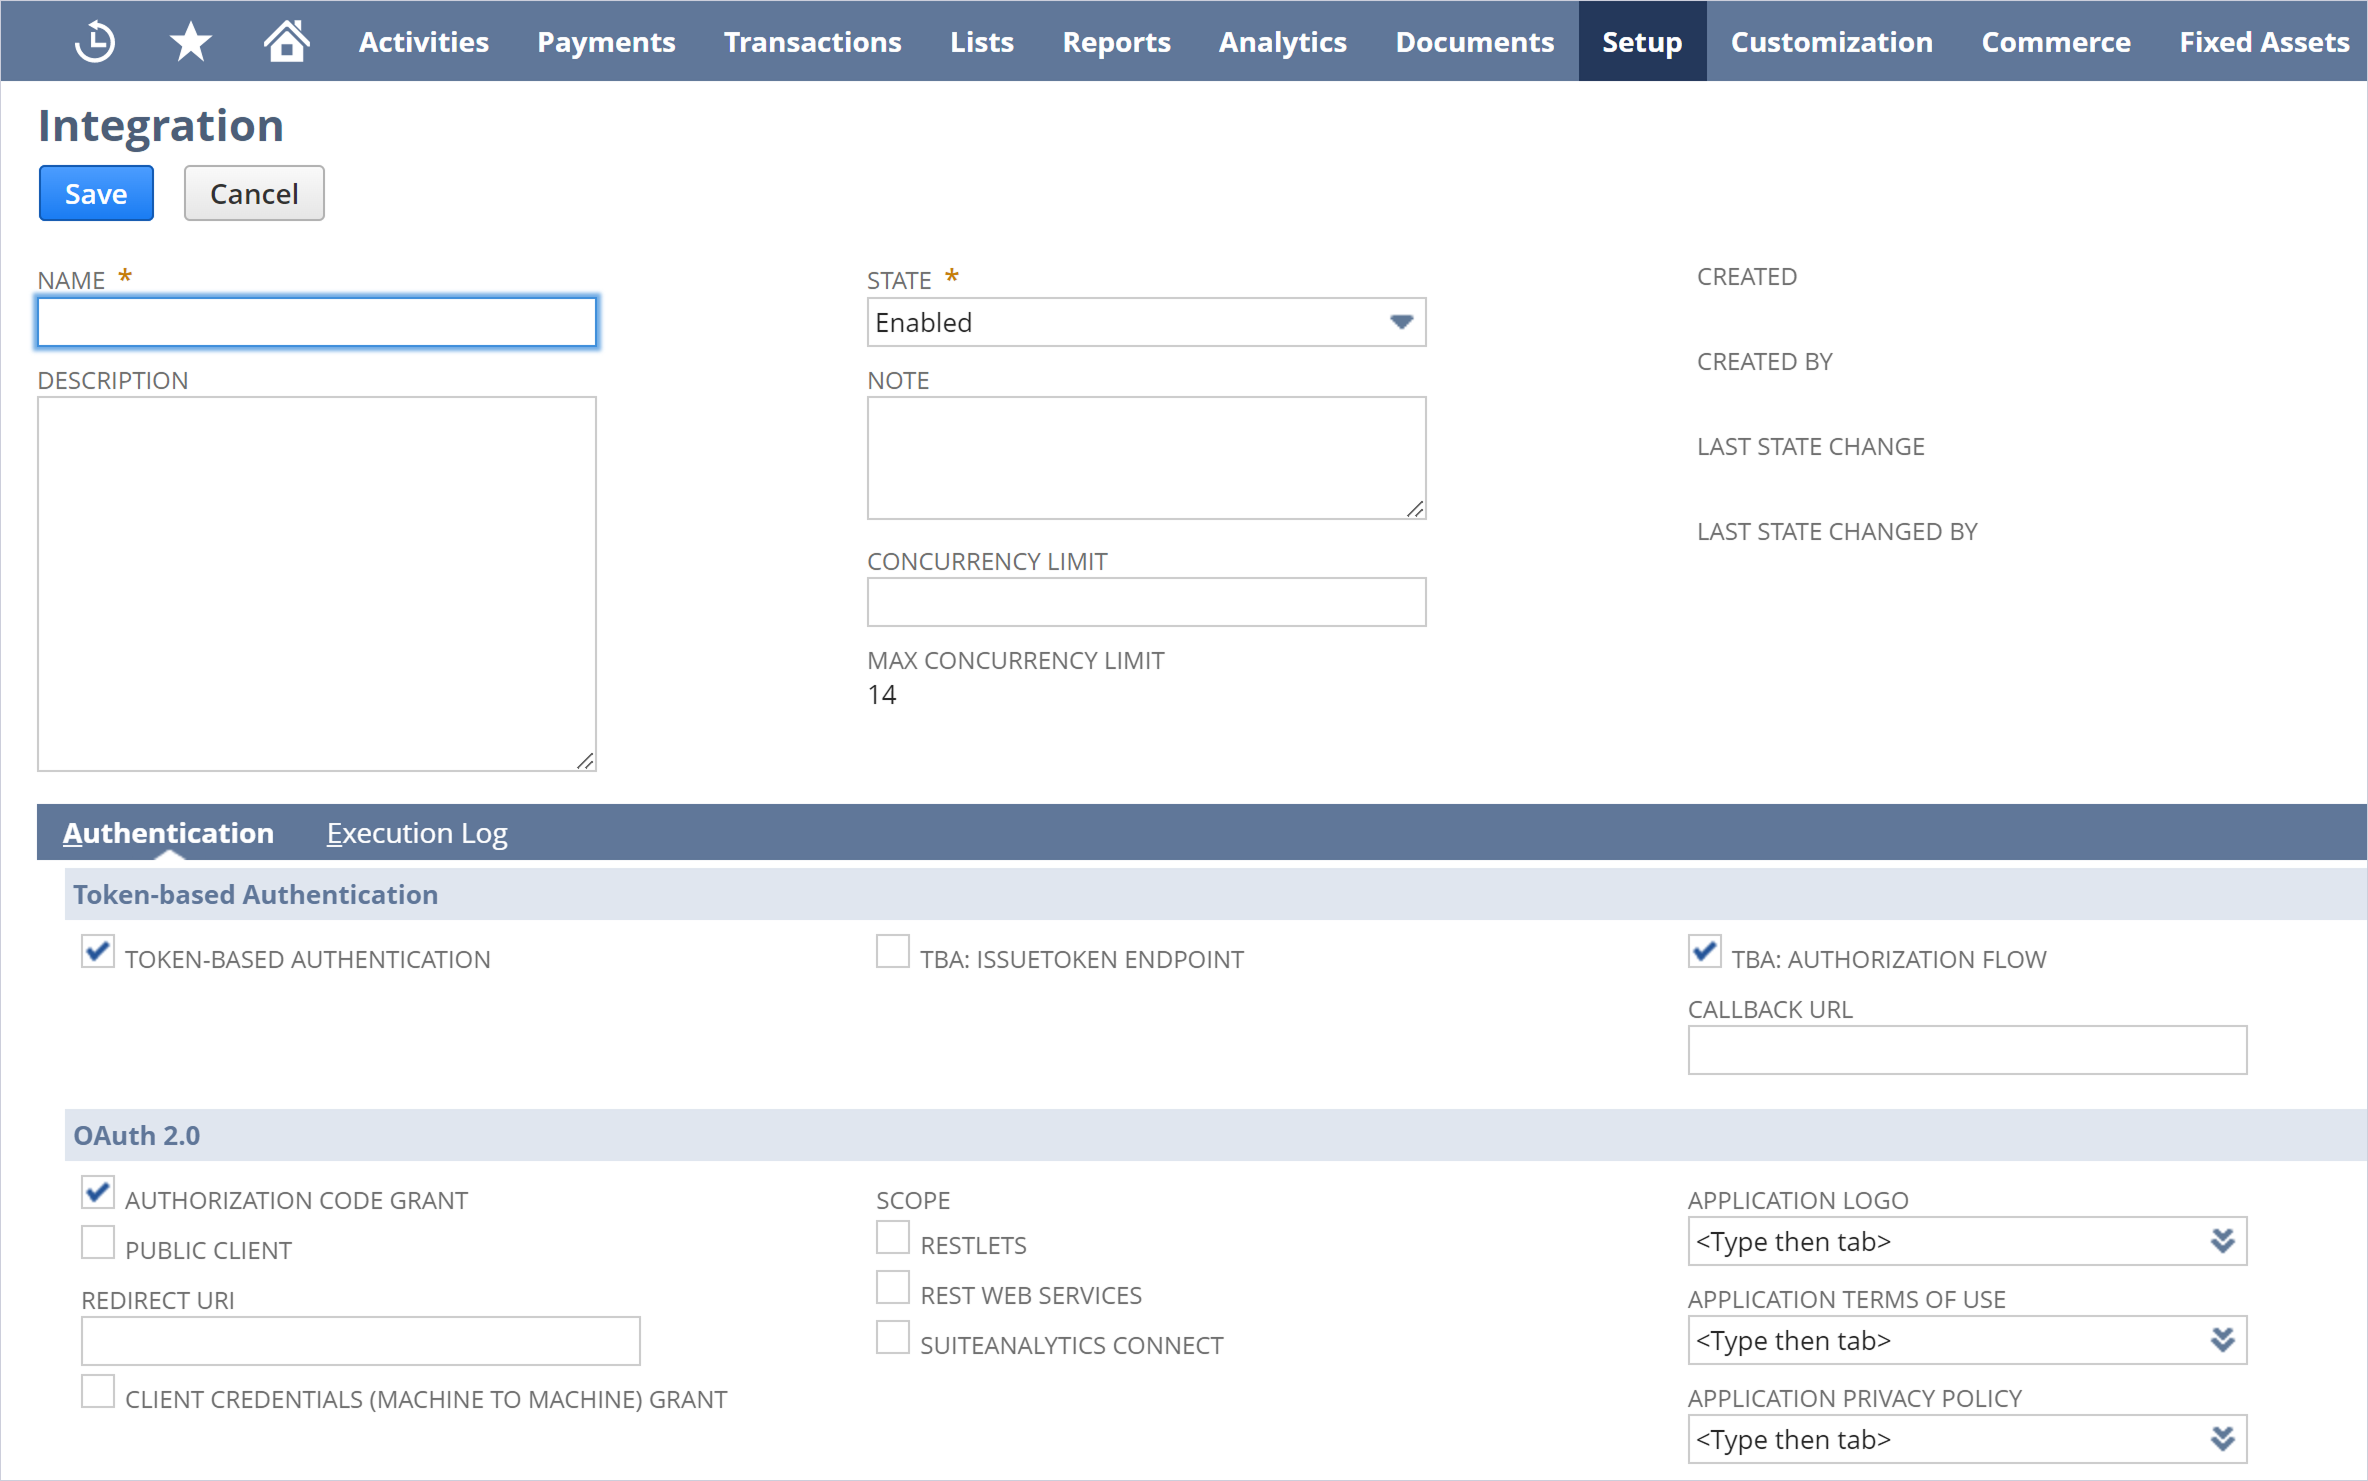
Creating an Integration Record
-
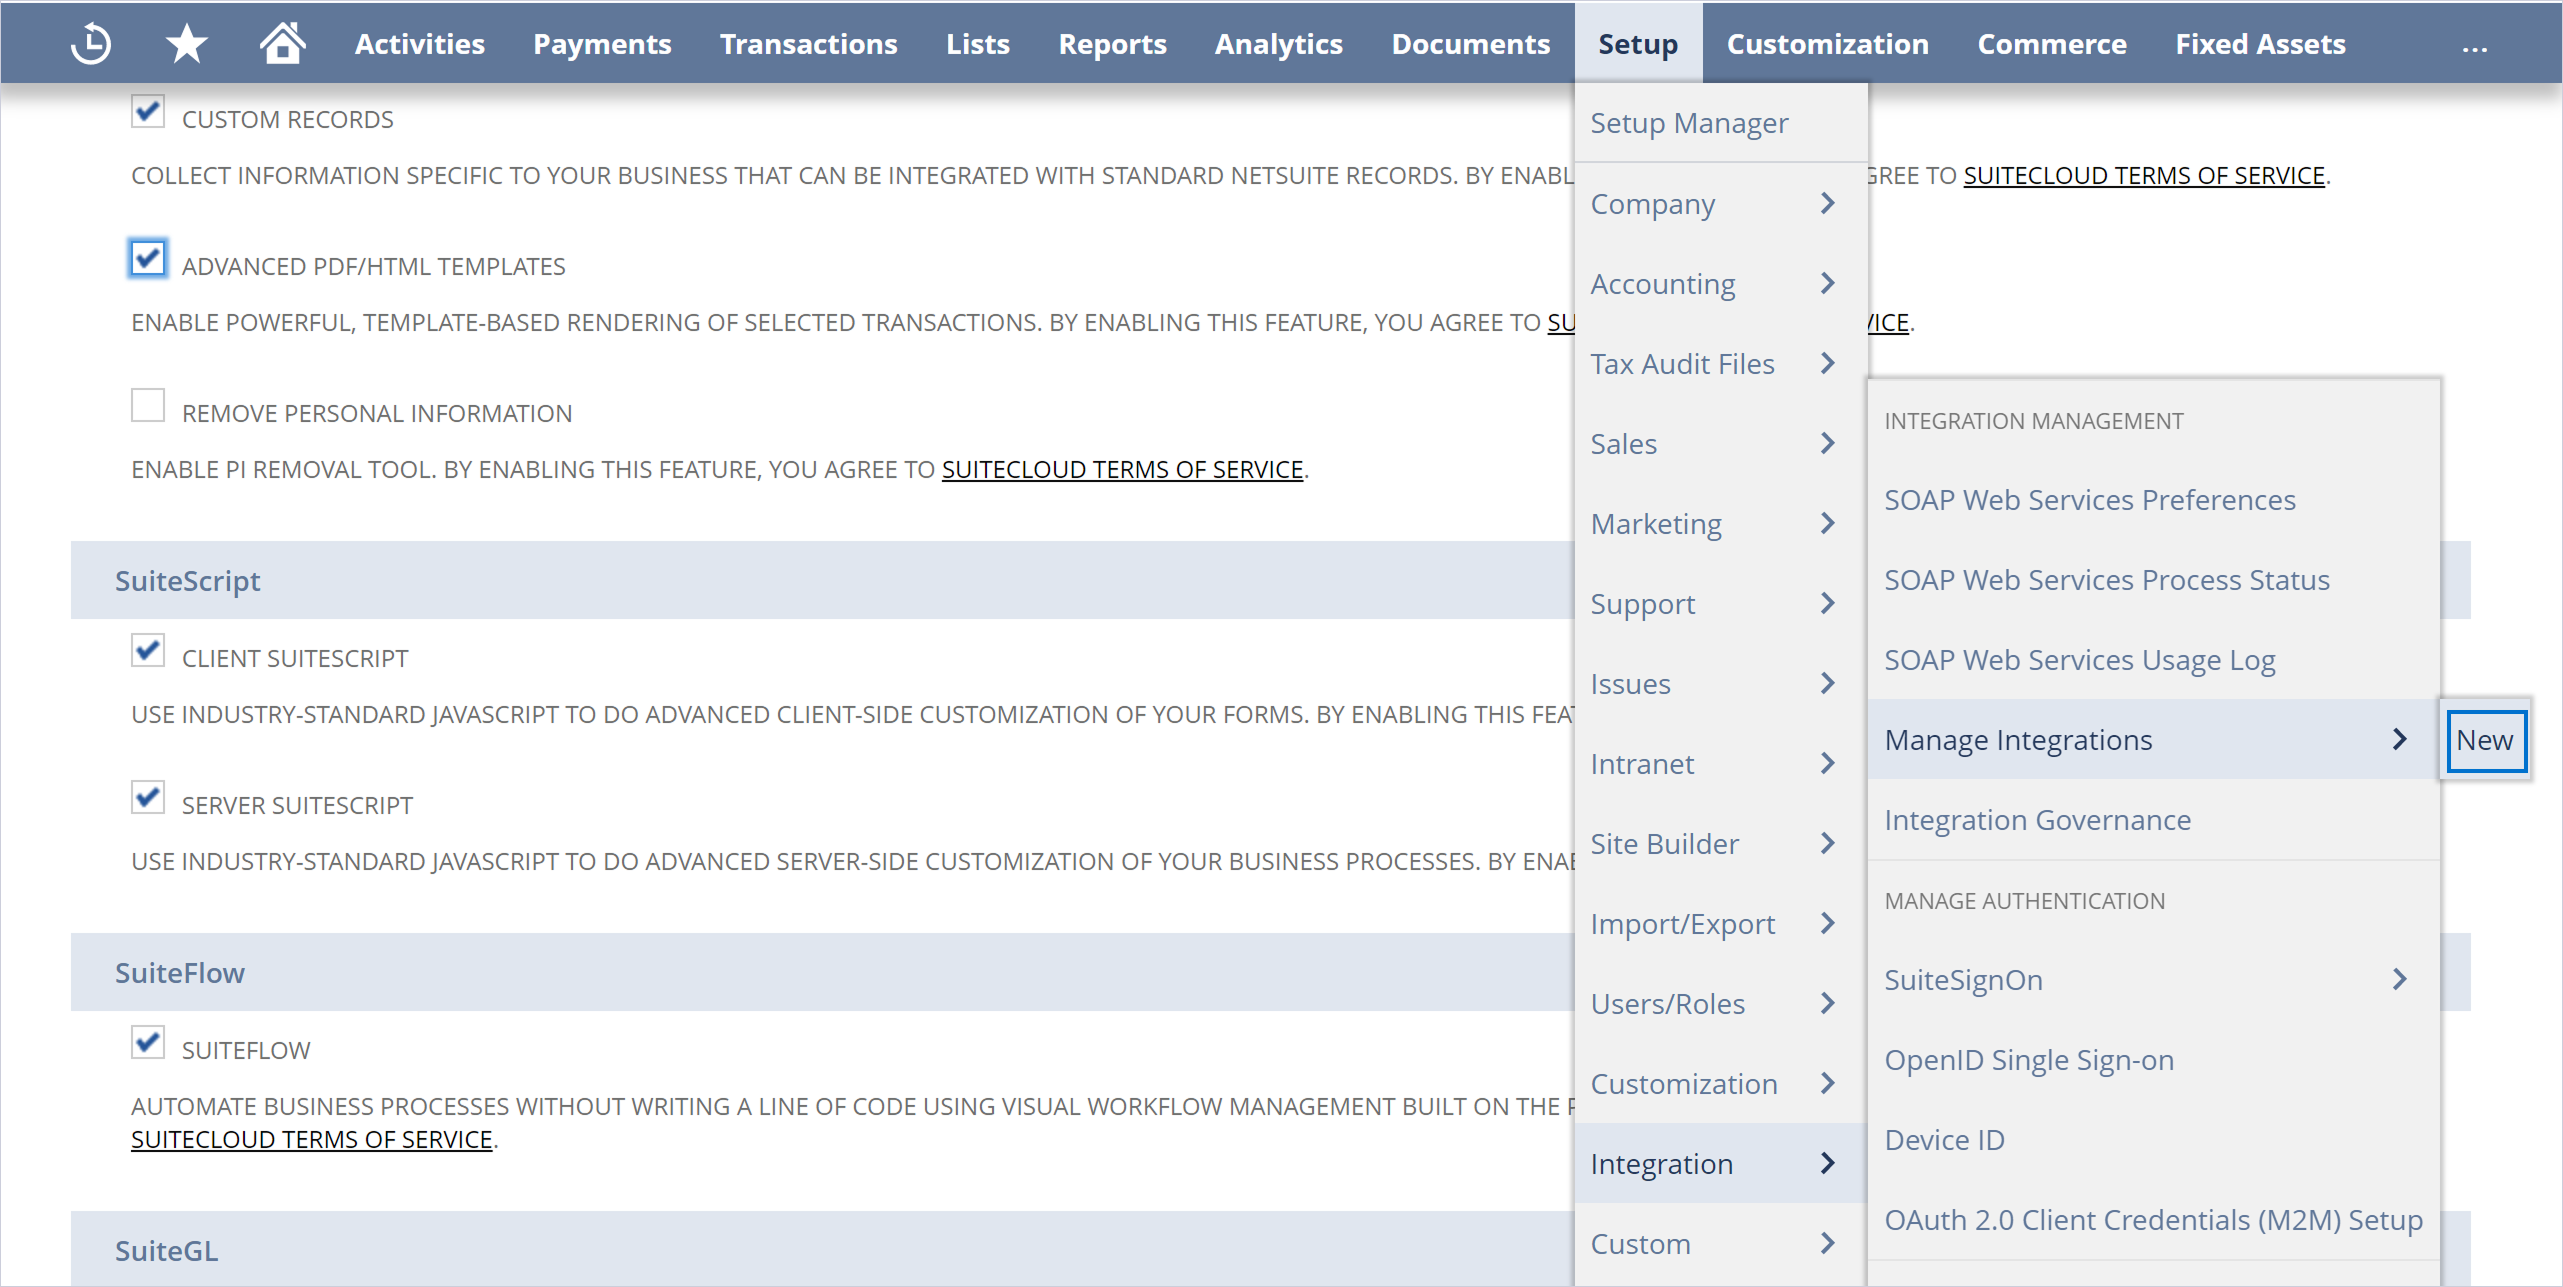
Select Setup > Integration > Manage Integrations > New.
-
Enter a Name for the application.
-
Configure the following property fields for the OAuth 2.0 authentication:
-
Select the Authorization Code Grant checkbox in the OAuth 2.0 pane.
-
In the Redirect URI field, enter https://localhost:60500
-
Select the REST Web Services checkbox.
-
Select the Public Client checkbox.
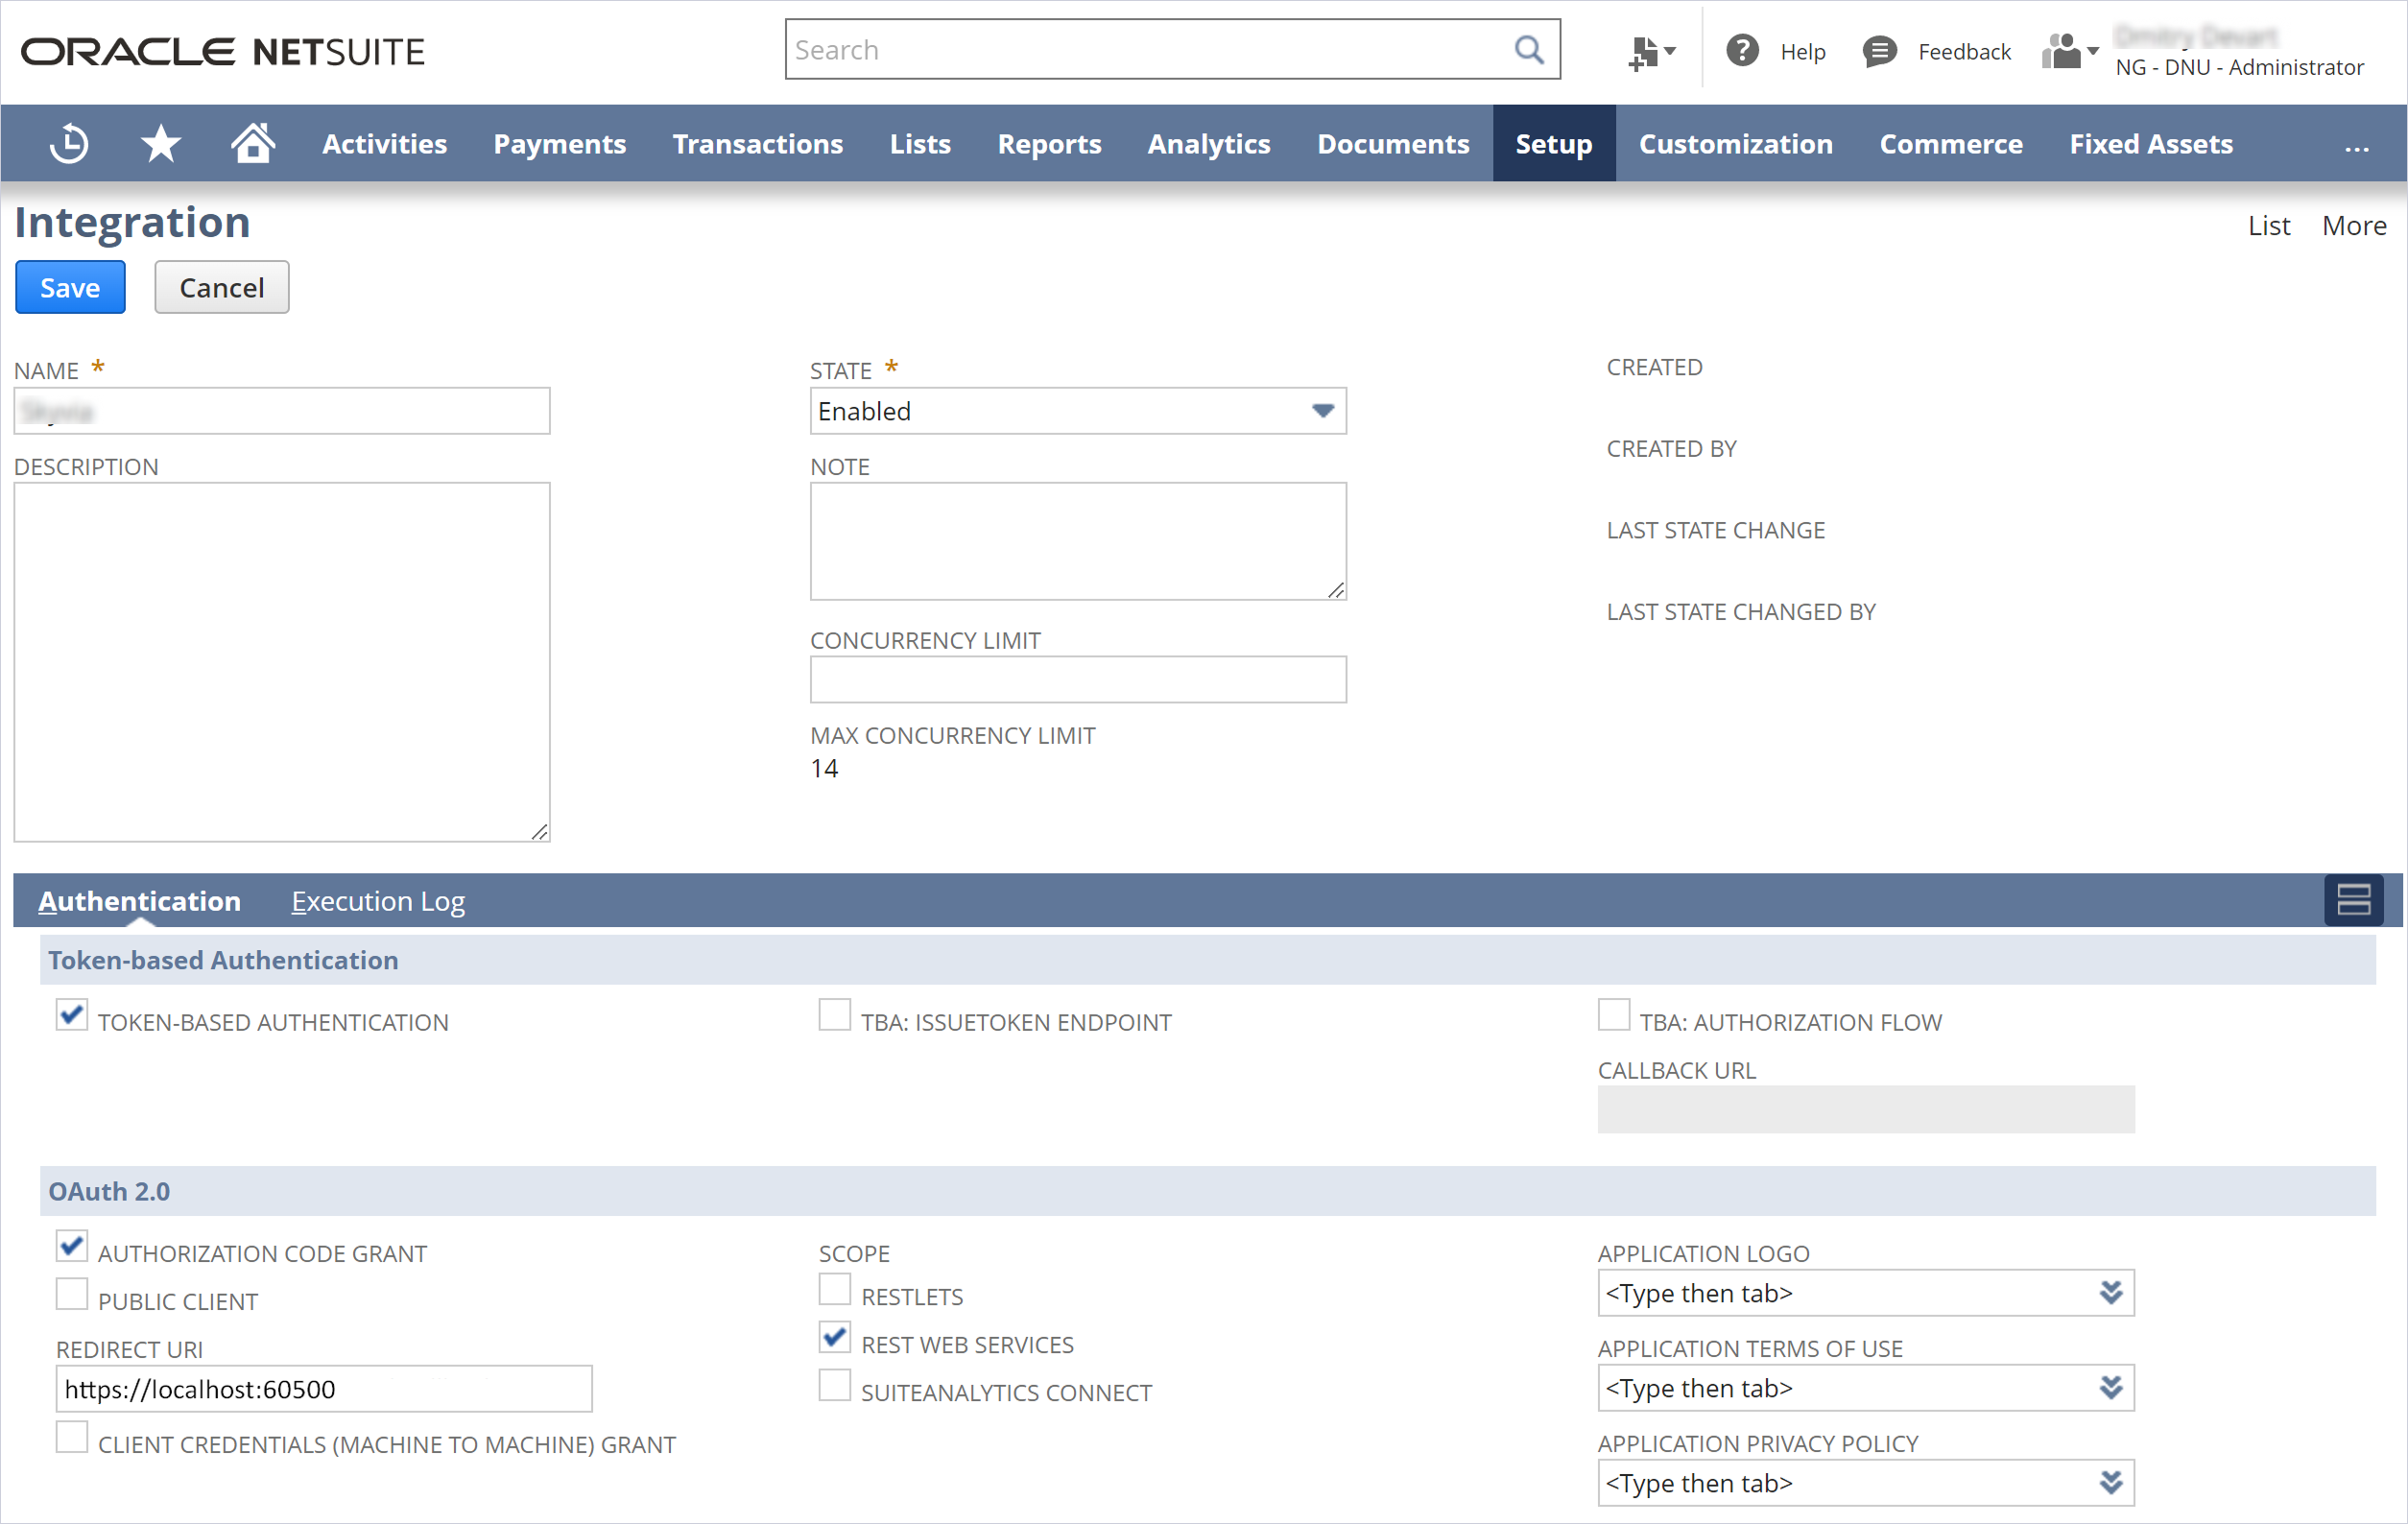
-
Click Save.
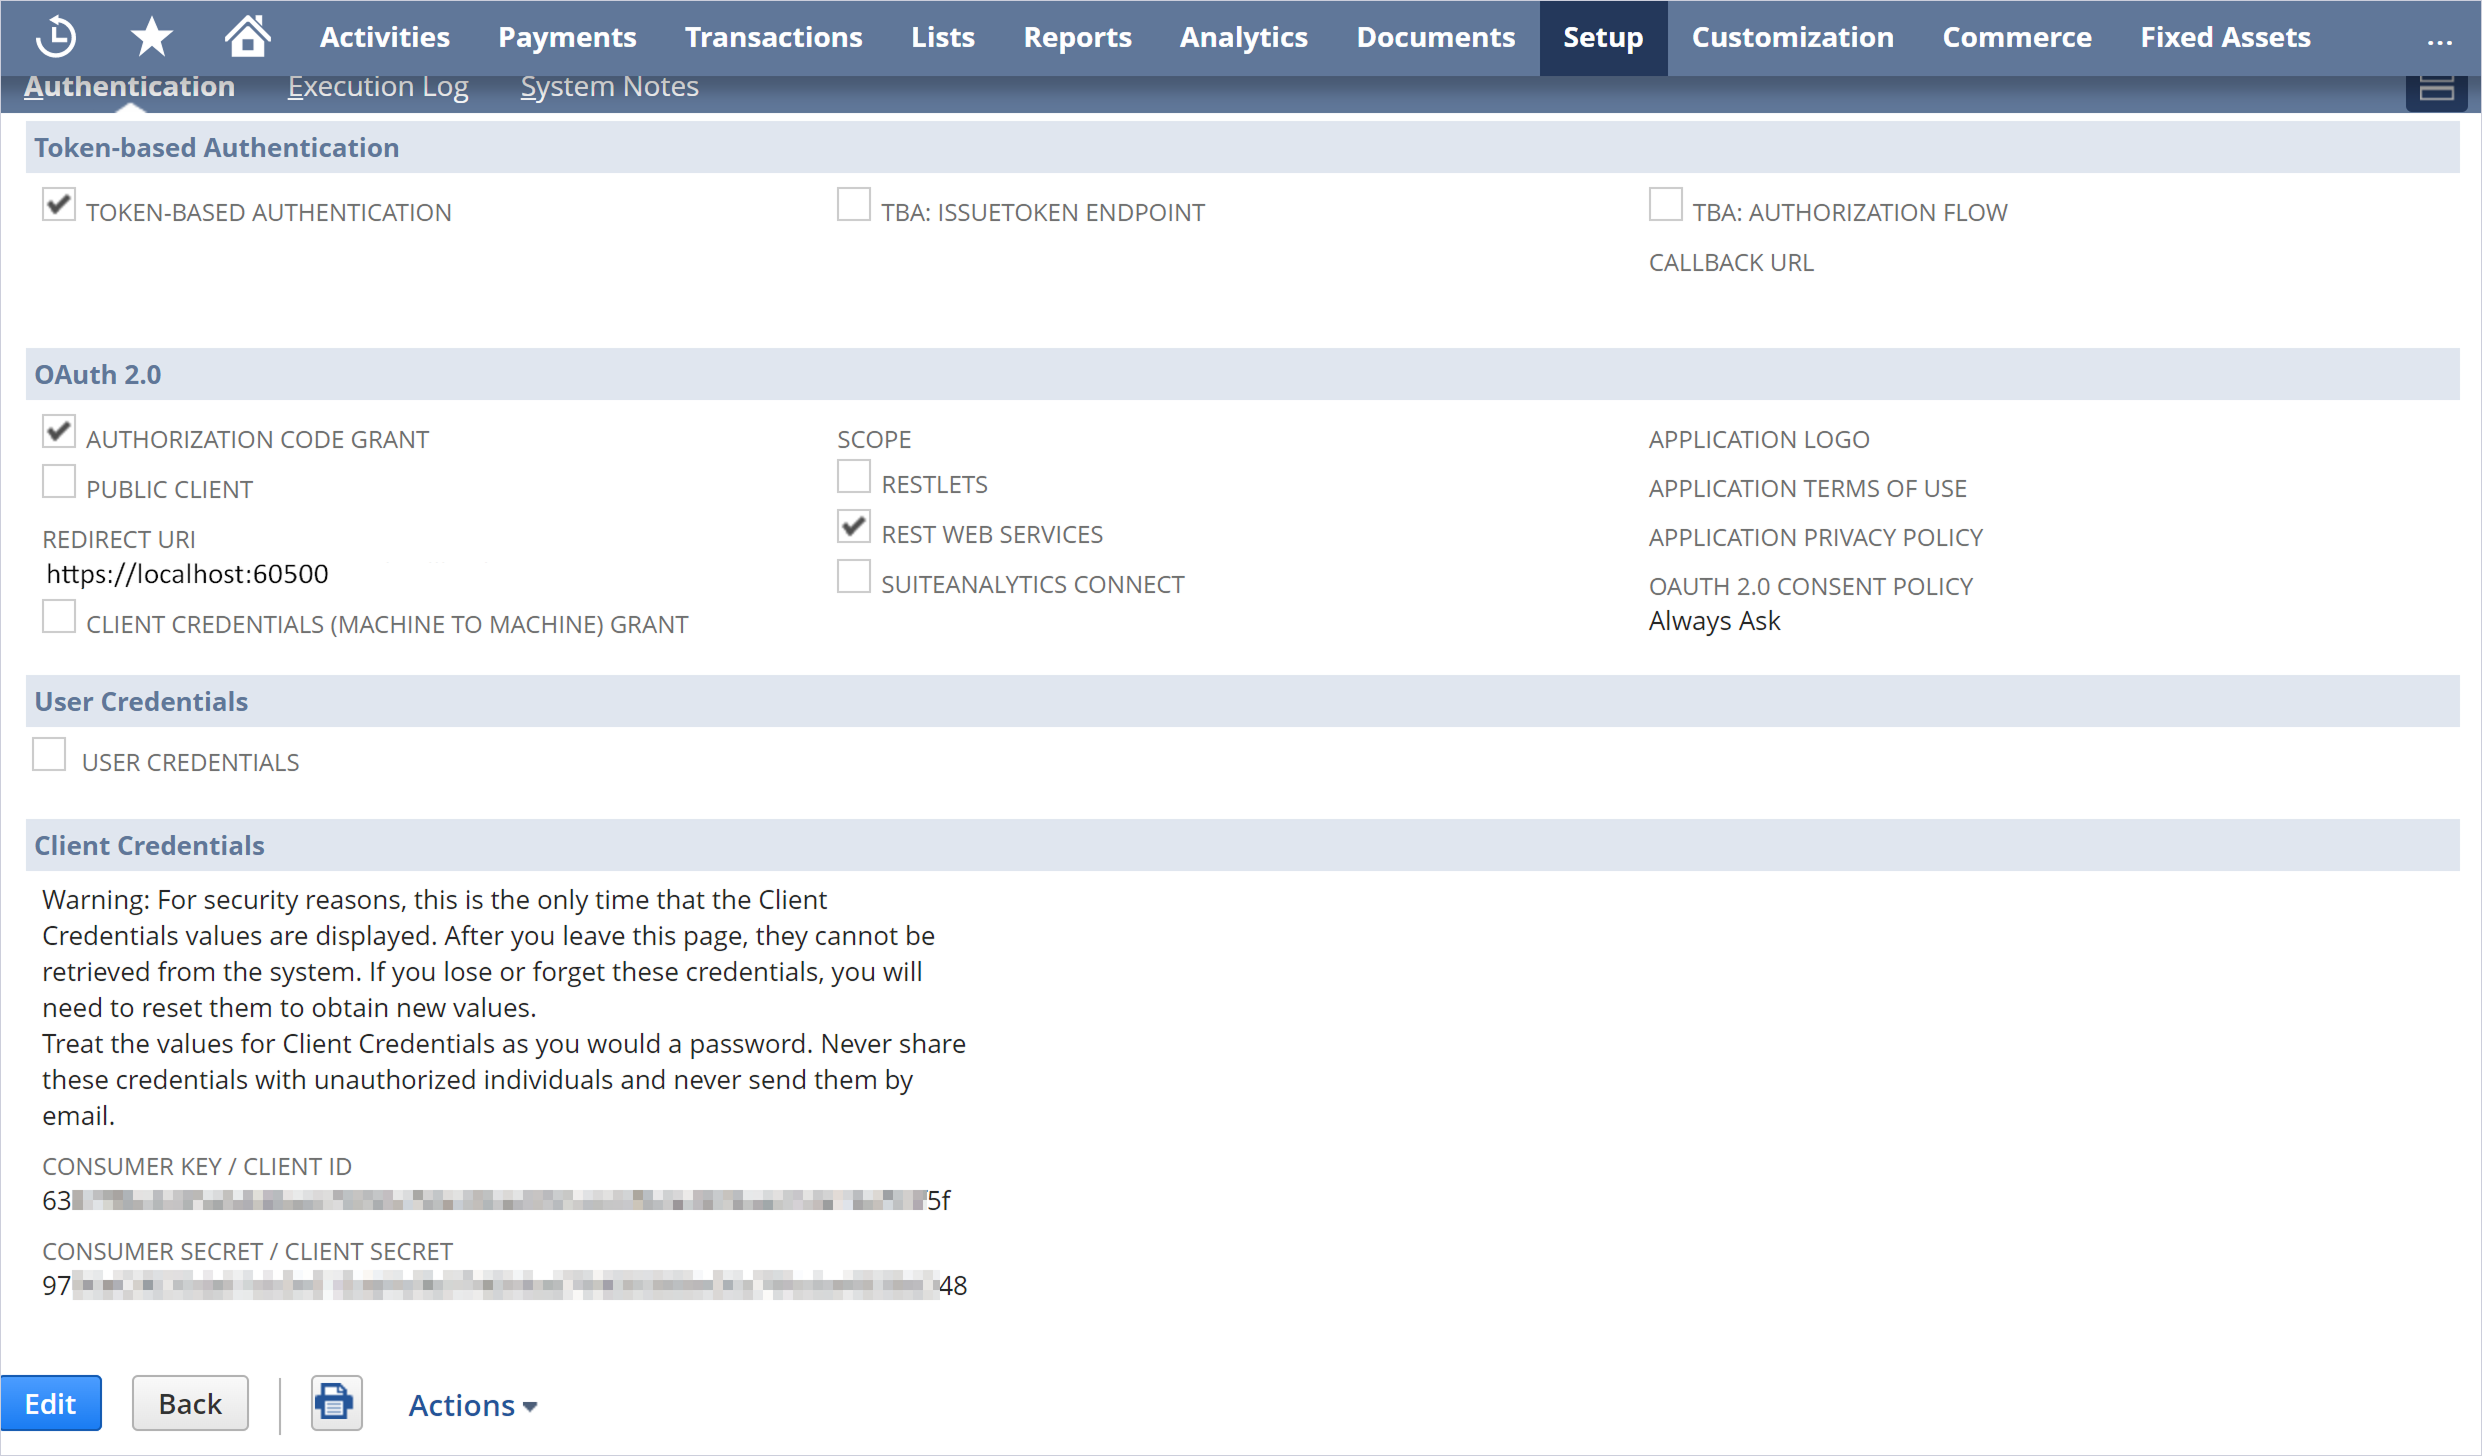
-
In the Client Credentials pane, copy the generated Consumer Key / Client ID and Consumer Secret / Client Secret.
Save these values somewhere because you will not be able to retrieve them after leaving this page. If you need these values again, you will have to re-generate them, which makes the old ones stop working.
On finishing the steps outlined earlier, fill in the necessary fields with the acquired Consumer Key / Client ID, Consumer Secret / Client Secret as you configure your DSN settings.
See Also
Windows DSN Configuration