Setting Up Schema Comparison
Comparing Two Schemas
-
Open the New Schema Comparison wizard by doing any of these actions:
- Highlight two schemas in the Database Explorer window, holding the CTRL key, and select the New Schema Comparison option from the right-click menu.
- On the Comparison menu, click New Schema Comparison.
- Open a project and in the Solution Explorer window, right-click the top node of the project tree. Select the New Schema Comparison option from the menu.
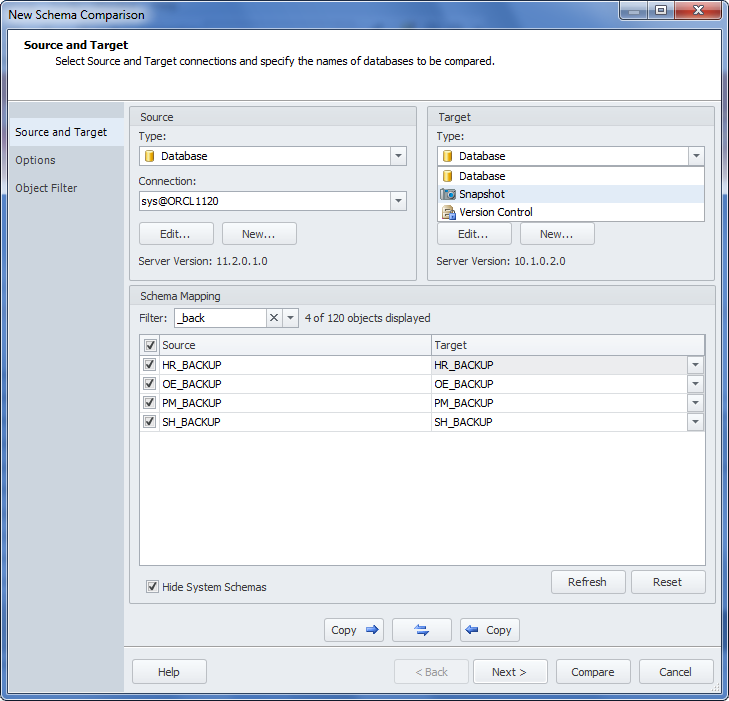
- Click the Type fields and select what you are going to compare (two databases, or a database and a snapshot, or two revisions in your version control system) from the drop-down lists.
-
In the Connection fields, type or select the names of Oracle Server(s) connections required for comparison.
Note
- If no connections are found, click the New button to create new ones.
- You can edit the selected Source and Target connections by clicking the Edit buttons.
- In the drop-down lists of the Connection fields you can click the Manage… link to open the Connection Manager dialog box. It will help you to create, edit, and delete database connections.)
- In the Schema Mapping grid, specify the required objects mapping.
- (Optional) If you want to ignore some schema options during comparison, go to the Options wizard page.
- Click the Compare button to close the wizard and start the comparison.
Tip:
- To save your time while selecting Source and Target databases, you can copy the details from one side of the wizard to the other by clicking the Copy buttons:
 - to copy Source database details,
  - to copy Target database details
 - To swap the Source and Target databases, click the swap_button Swap button.
- To close the wizard and cancel the comparison, click the Cancel button.