To create a model from your existing database, perform the following sequence of actions:
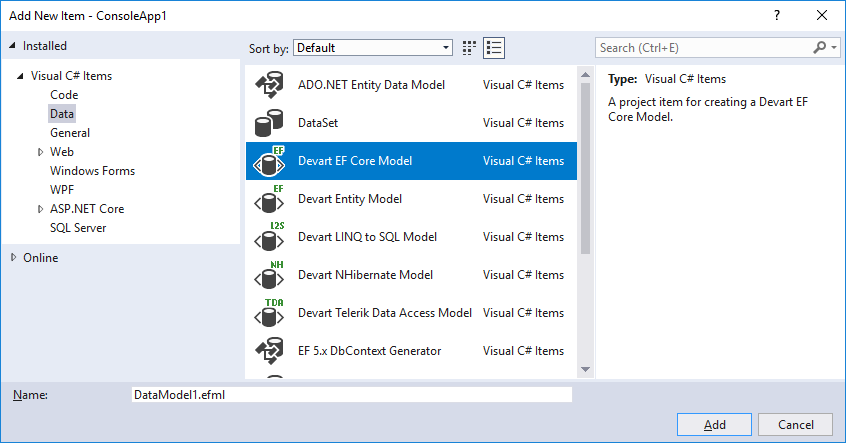
| 1. | In the Solution Explorer window, right-click the name of your project. |
| 2. | From the shortcut menu, select the Add command and select the New Item option. |
|
|
In the standalone application click the Create New Model button on the Entity Developer toolbar.
|
|
|
In projects, targeting .NET Framework, you can find Devart EF Core Model in the Visual C# Items -> Data node.
In projects, targeting .NET Core or .NET Standard, you can find Devart EF Core Model in the Visual C# Items -> ASP.NET Core -> Data node.
|
| 3. | In the Installed Templates column of the Add New Item window, select Data. |
| 4. | In the central column of the Add New Item window, select Devart Entity Framework Core Model. |
|
|
In the standalone application in the displayed New Model dialog select Devart Entity Framework Core Model and click Create.
|
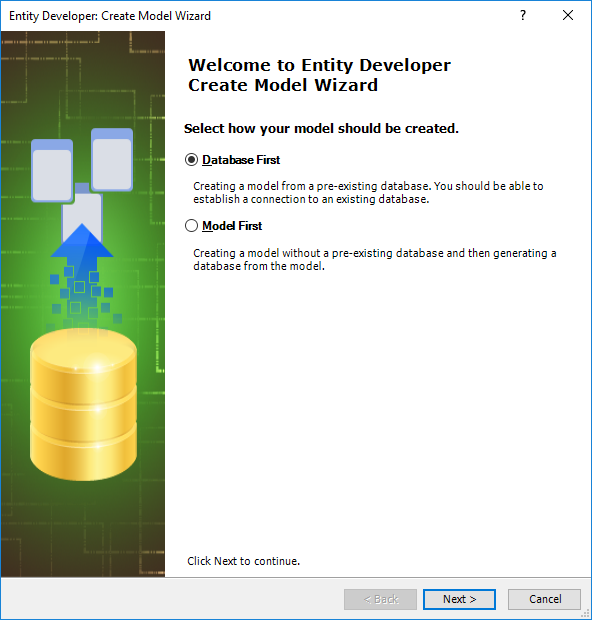
| 6. | Ensure that the Database First option is selected and click Next. |
|
|
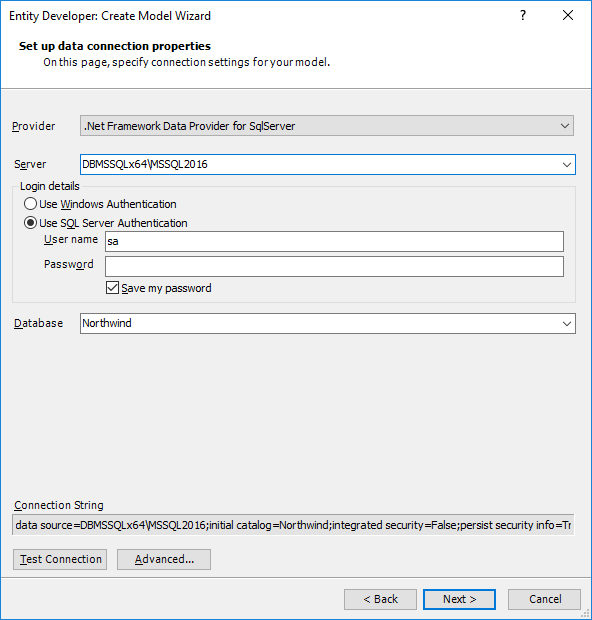
This page may differ from the one pictured above, depending on which provider is selected.
|
| 7. | On the Set up data connection properties page, set up the connection to the database. |
| 8. | (Optional) To check that the connection is valid, click Test connection. If the connection cannot be established, correct the entered data and repeat this step. |
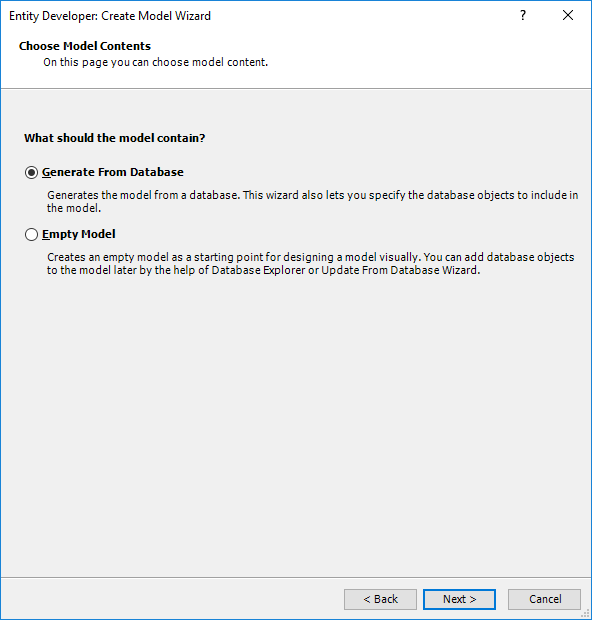
| 10. | On this page, select the Generate From Database option and click Next. |
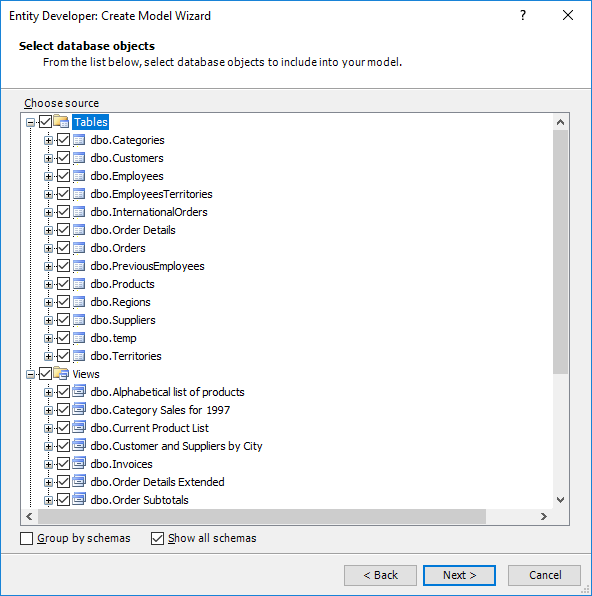
| 11. | On the Select database objects page, select the tables and/or views that are to be included in the model and click Next. |
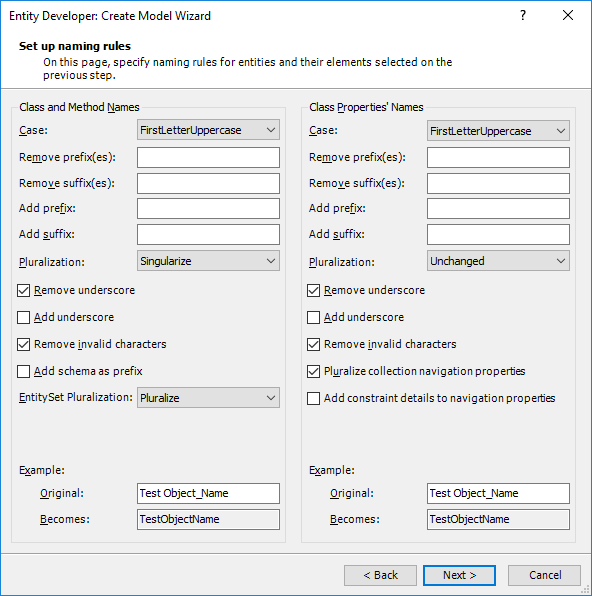
| 12. | On the Set up naming rules page, define the naming rules for your model and click Next. |
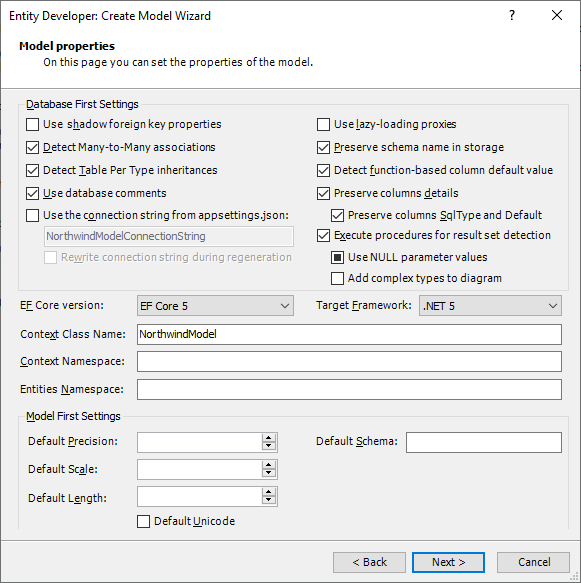
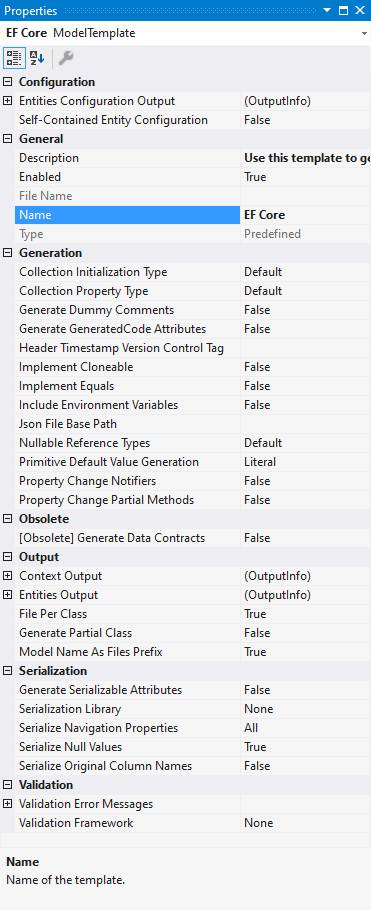
| 13. | On the Model properties page, define the settings of your model. Here you can select the target Entity Framework Core version from the ones, supported by the target .NET Framework of your project. In the standalone application, you also need to select the target .NET Framework.
You can also set some model settings, affecting model generation from database on this page.
|
|
|
On the Model Properties page, you may preserve either full information about the column or only full information about the type to obtain a database-independent model using the Preserve columns details and Preserve columns SqlType and Default check boxes. After creating such a database-independent model, you can easily create a database on a different server using the Update to Database functionality.
|
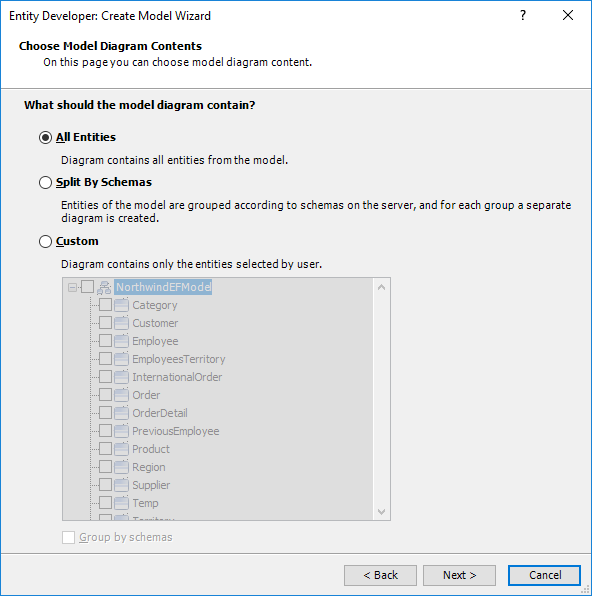
| 15. | On the Choose Model Diagram Contents page, select, which entities should be displayed on the diagram. There are three options: All Entities (all entities are displayed on the diagram), Split by Schemas (entities of a schema are displayed on a separate diagram), or Custom (manually select the required entities). |
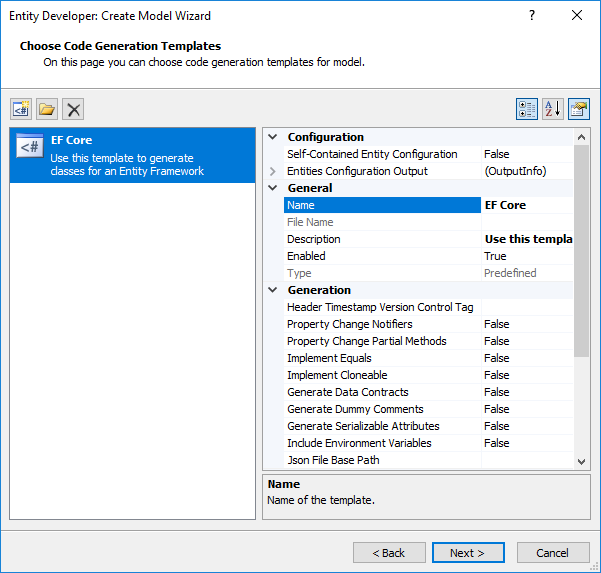
| 17. | The Choose Code Generation page allows you to select code generation templates you want to add to the new model. By default this page contains the most frequently used template; the properties area of this page allows you to configure the properties of the selected template. Three buttons at the top of this page allow you to add more templates from gallery, add existing templates from disk and remove templates from the list. |
| 18. | Click the Add template button. |
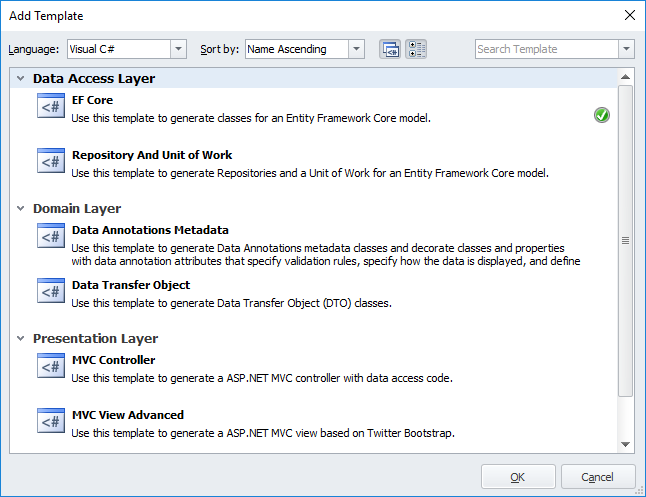
| 19. | The Add Template dialog box lists all predefined and shared templates. Choose the required one and click OK. The selected template will be added to the list on the Choose Code Generation page together with all related templates (without which the template would work incorrectly). |
| 20. | After all the required templates are added to the list on the Choose Code Generation page of the wizard, click Next. |
| 21. | On the final page of the wizard click Finish. This page also allows you to automatically load the required Entity Framework Core NuGet package and install it to your project. |
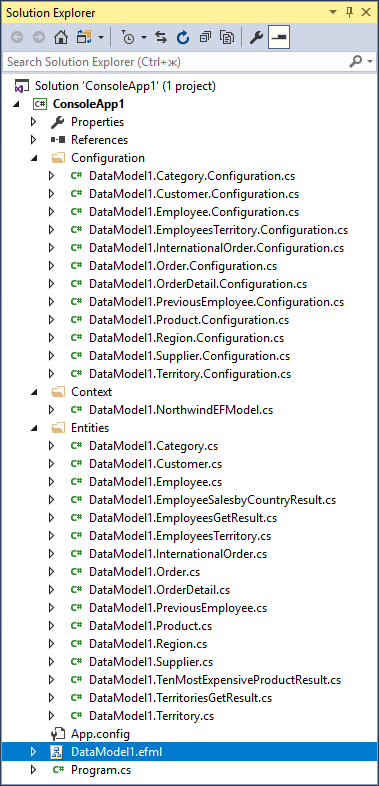
The model is successfully created:
|
 Prerequisites