Secure Sockets Layer (SSL) is an industry-standard protocol for secure access to a remote machine over untrusted networks. It runs on top of TCP/IP to secure client-server communications by allowing SSL-enabled clients and servers to authenticate each other.
During server authentication, an SSL-enabled client application uses standard public-key cryptography techniques to verify the server's identity by checking that the server's certificate was issued by a trusted Certificate Authority (CA) and proves the ownership of the public key. SSL also supports client authentication, allowing the server to verify the client's identity.
After establishing an SSL connection, the client and server can exchange messages that are symmetrically encrypted using the shared secret key. SSL is the recommended method for establishing a secure connection to Oracle because it is easier to configure and performs better than SSH.
You can establish a secure connection to an Oracle server using SecureBridge, a solution provided by Devart. It allows you to embed an SSL client into a Delphi or C++ Builder application.
This page demonstrates how to connect a client application to Oracle using UniDAC with SSL as the encryption method.
Connect using an Oracle wallet
Prerequisites:
- Install SecureBridge.
- Install the TCRSSLIOHandler component in RAD Studio to bind UniDAC with SecureBridge. For instructions, see
Readme.html—by default, it is located in C:\Users\<user>\Documents\Devart\UniDAC for RAD Studio XX\Demos\TechnologySpecific\SecureBridge.
An Oracle wallet is a container for storing authentication and signing credentials, including certificates and keys needed by SSL. For information on creating and obtaining an Oracle wallet, see the official documentation for Oracle Database or Oracle Cloud.
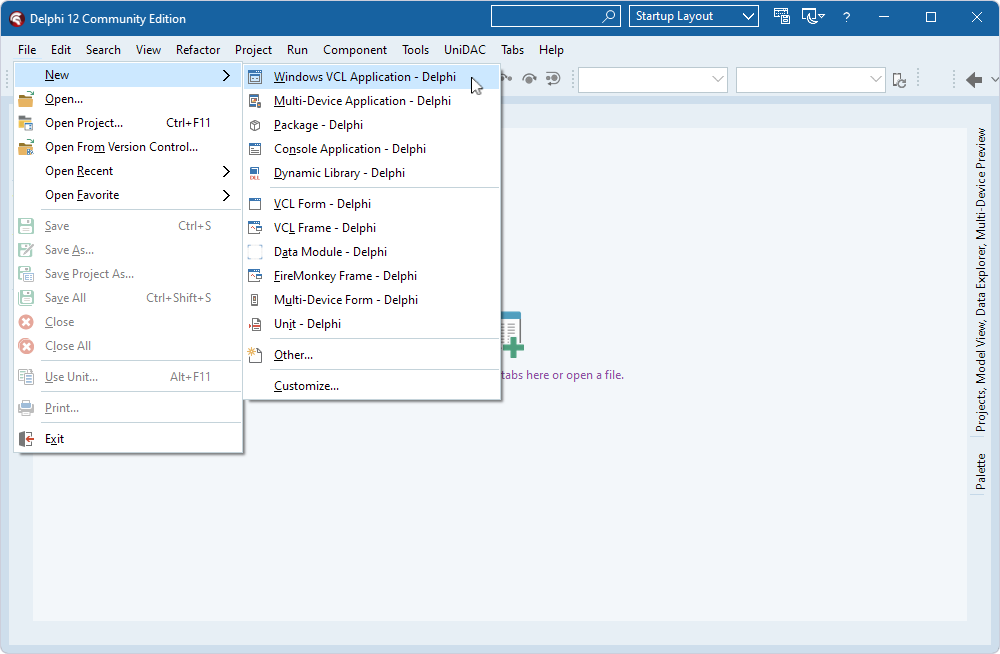
- In RAD Studio, select File > New > Windows VCL Application - Delphi.
-
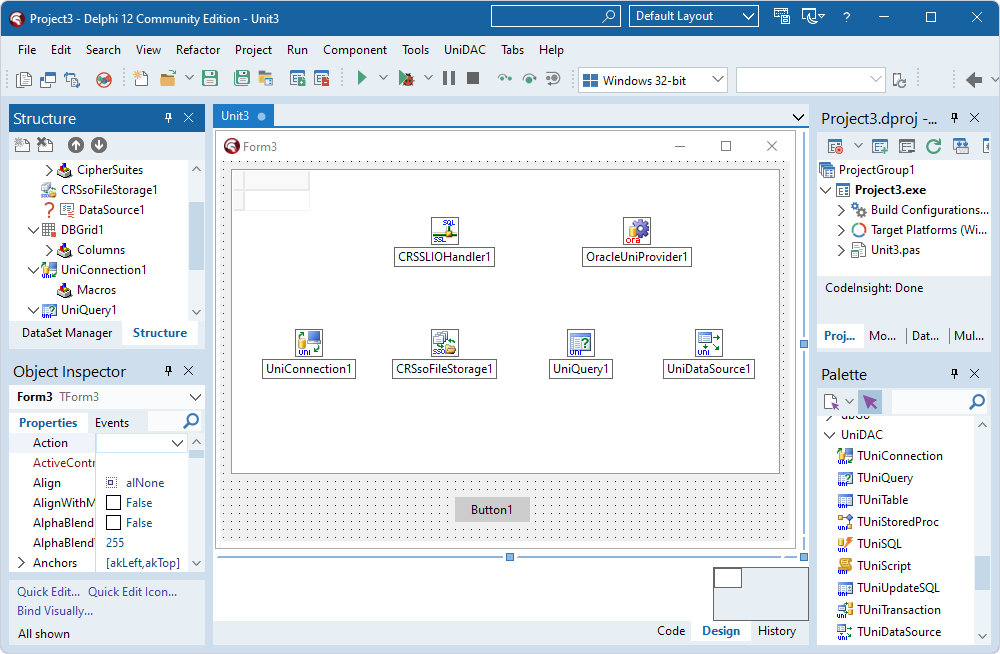
Place the following components from the Palette on the form:
- TDBGrid
- TButton
- TCRSSLIOHandler
- TOracleUniProvider
- TUniConnection
- TCRSsoFileStorage
- TUniQuery
- TUniDataSource
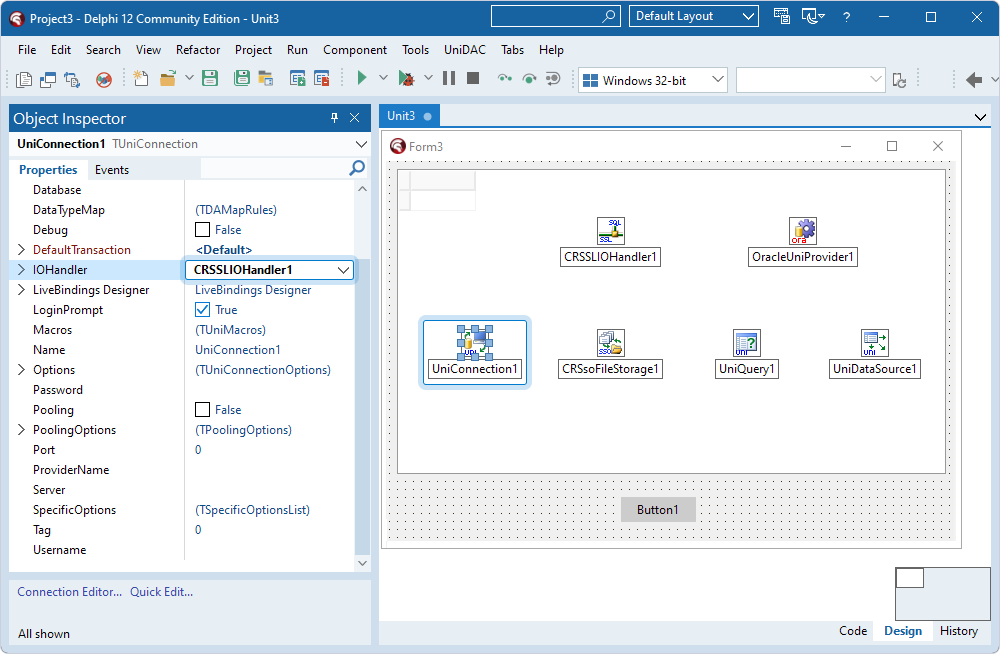
- Select the TUniConnection component and, in the Object Inspector, set the IOHandler property to the instance of TCRSSLIOHandler (CRSSLIOHandler1).
- Double-click the TUniConnection component.
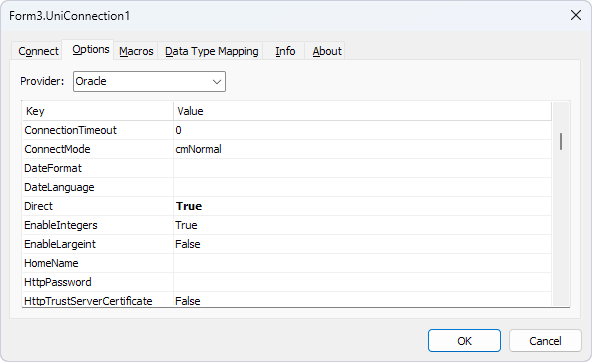
- On the Options tab, fill out the fields:
- Provider – Select Oracle.
- Direct – Select True.
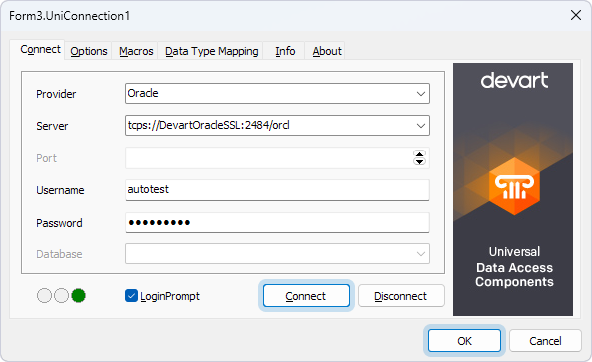
- On the Connect tab, fill out the fields:
- Provider – Select Oracle.
- Server – Enter the host name or IP address of the Oracle server, port, and service name.
- Username – Enter the username for the account on the Oracle server.
- Password – Enter the password for the account on the Oracle server.
- Click Connect to test the connection to the Oracle server, then click OK to close the dialog.
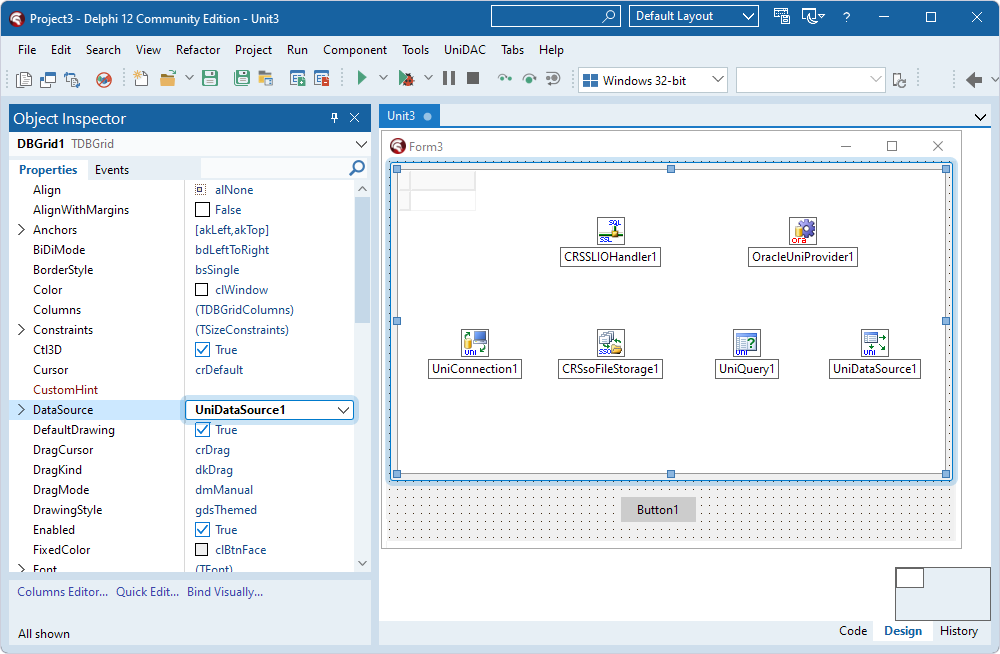
- Select the TDBGrid component and set the DataSource property to the instance of TUniDataSource (UniDataSource1).
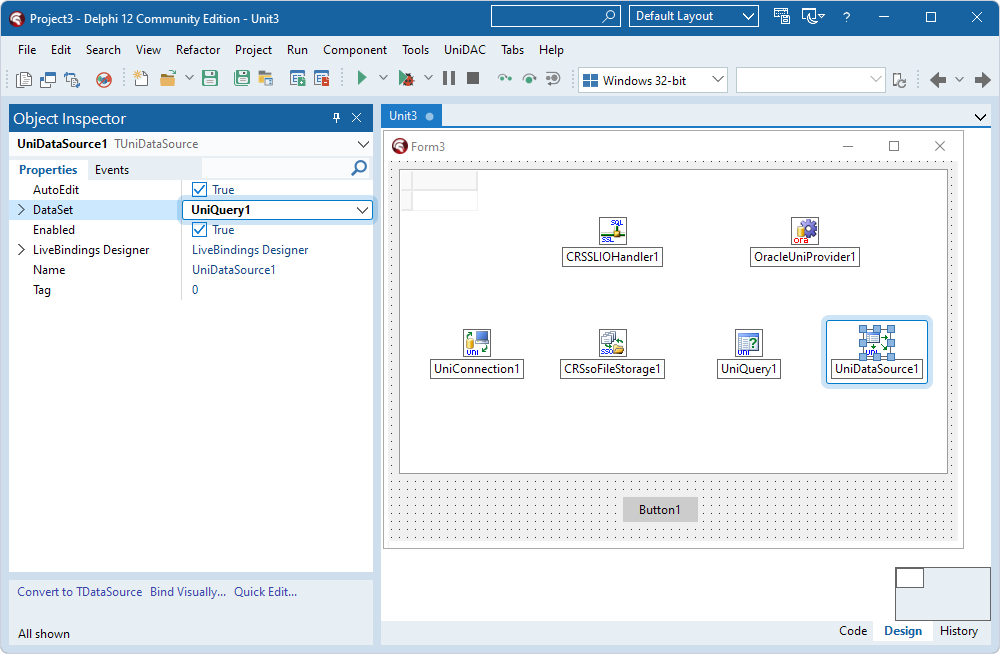
- Select the TUniDataSource component and set the DataSet property to the instance of TUniQuery (UniQuery1).
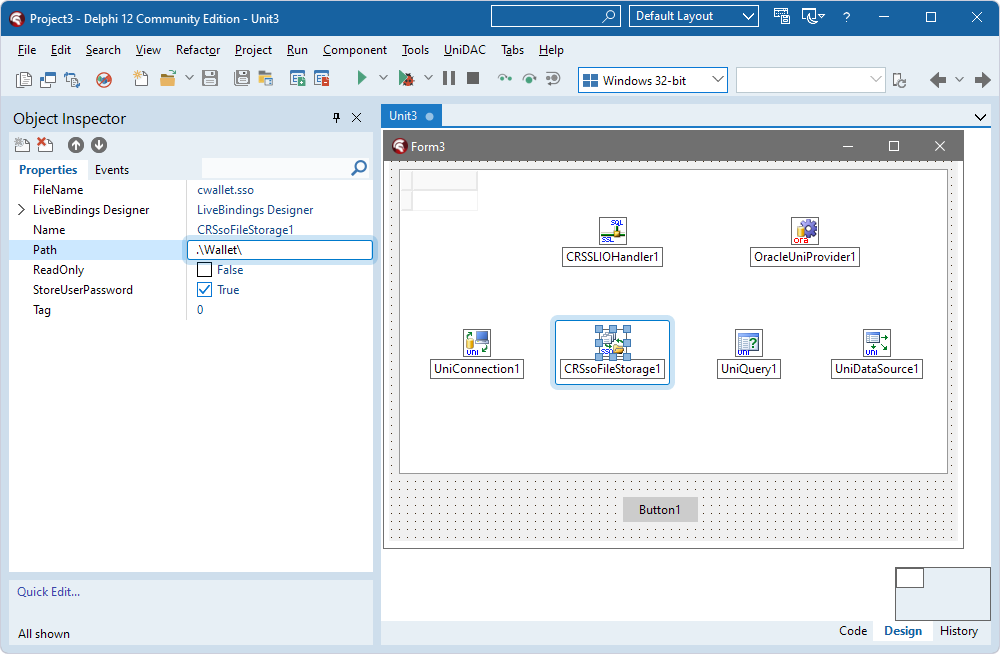
- Select the TCRSsoFileStorage component and specify the path to the Oracle wallet file in the Path property.
- Select the TCRSSLIOHandler component and set the Storage property to the instance of TCRSsoFileStorage (CRSsoFileStorage1).
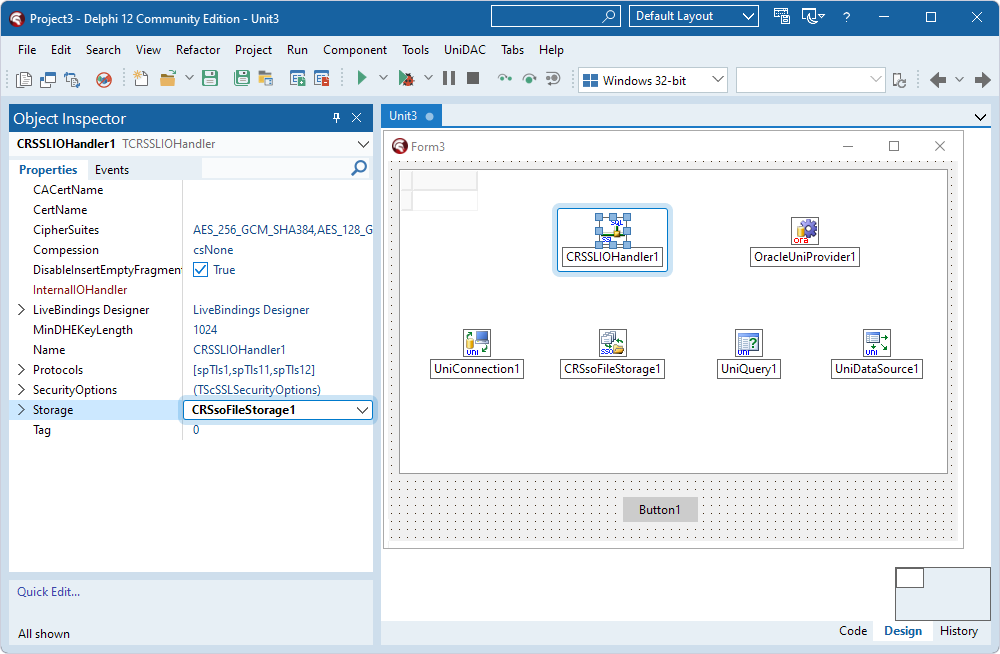
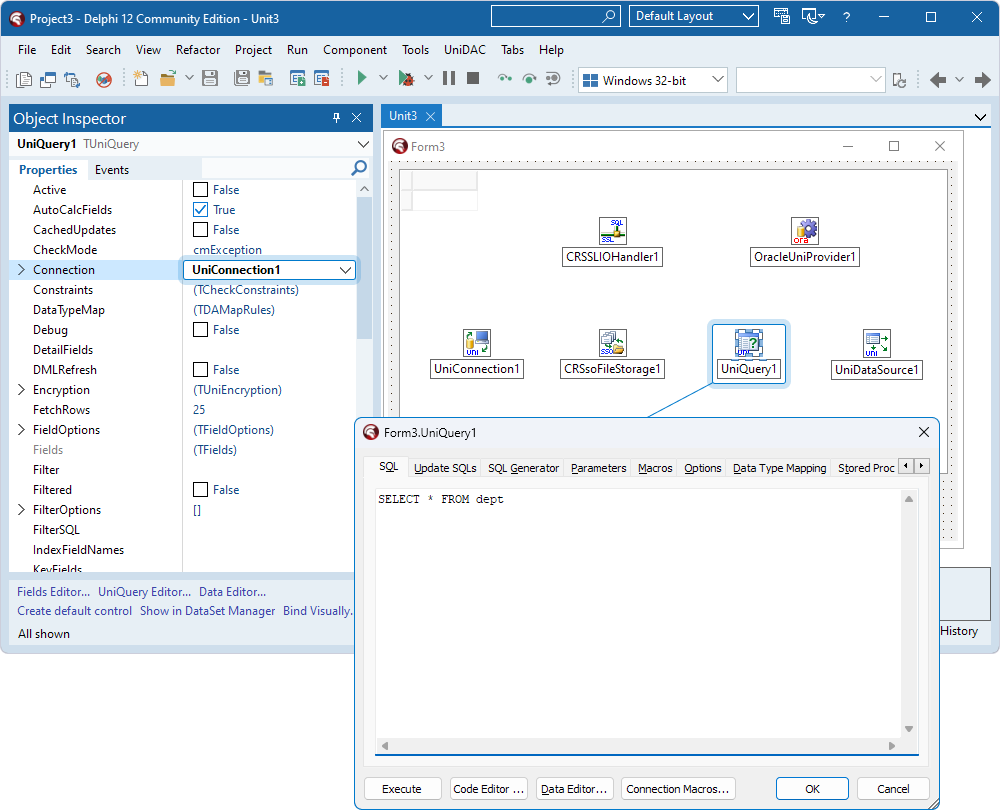
- Select the TUniQuery component and set the Connection property to the instance of TUniConnection (UniConnection1).
- Double-click the TUniQuery component, enter a SQL query to be run against the Oracle database, and then click OK.
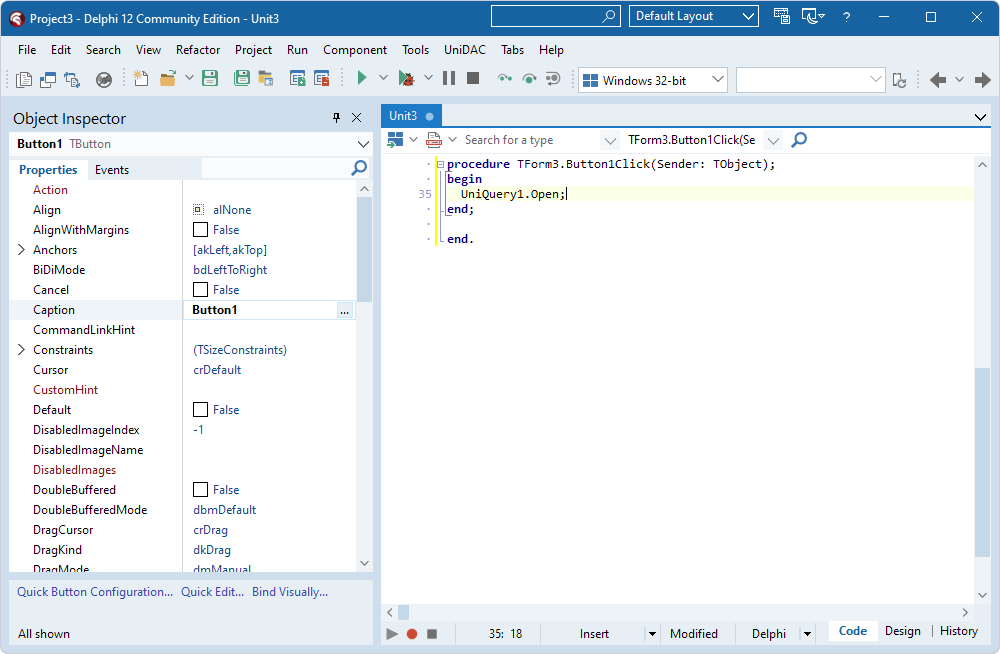
- Double-click the TButton component and add code to call the Open method on the TUniQuery component instance to activate the dataset when the button is clicked.
- Press F9 to compile and run the application.
- In the form that appears, click Button1 to run the query. Data appears in the grid.

Connect using SSL certificates and keys
If you want to use SSL certificates and keys instead of an Oracle wallet, follow the steps in the previous section with the following modifications:
- In step 2, don't add the TCRSsoFileStorage component.
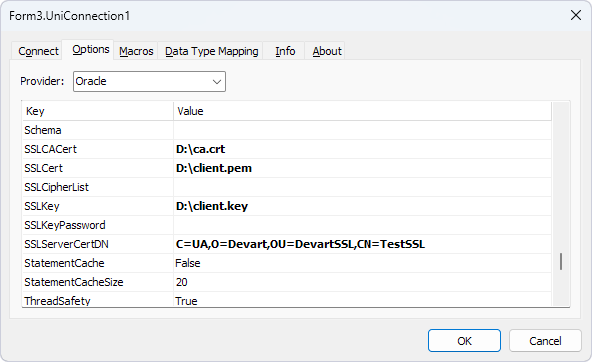
- In step 5, fill out the fields on the Options tab as follows:
- Provider – Select Oracle.
- SSLCACert – Specify the full path of the Certificate Authority's certificate file.
- SSLCert – Specify the full path of the client certificate file.
- SSLKey – Specify the full path of the client private key file.
- SSLServerCertDN – Specify the server's distinguished name (DN) to enable server DN matching. It is used to check whether the server is genuine by matching the server's global database name against the DN from the server certificate.
- Skip steps 12 and 13.