SSH is a protocol that allows users to securely log in and interact with remote systems on the internet by connecting a client program to an SSH server. SSH provides a mechanism for establishing a cryptographically secured connection between two endpoints, a client and a remote server, which authenticate each other and exchange messages. It employs different forms of symmetrical encryption, asymmetrical encryption, and hashing.
You can use SSH to secure the network connection between a Delphi application and a MySQL server. An SSH connection enables you to run shell commands as if you were physically operating the remote machine.
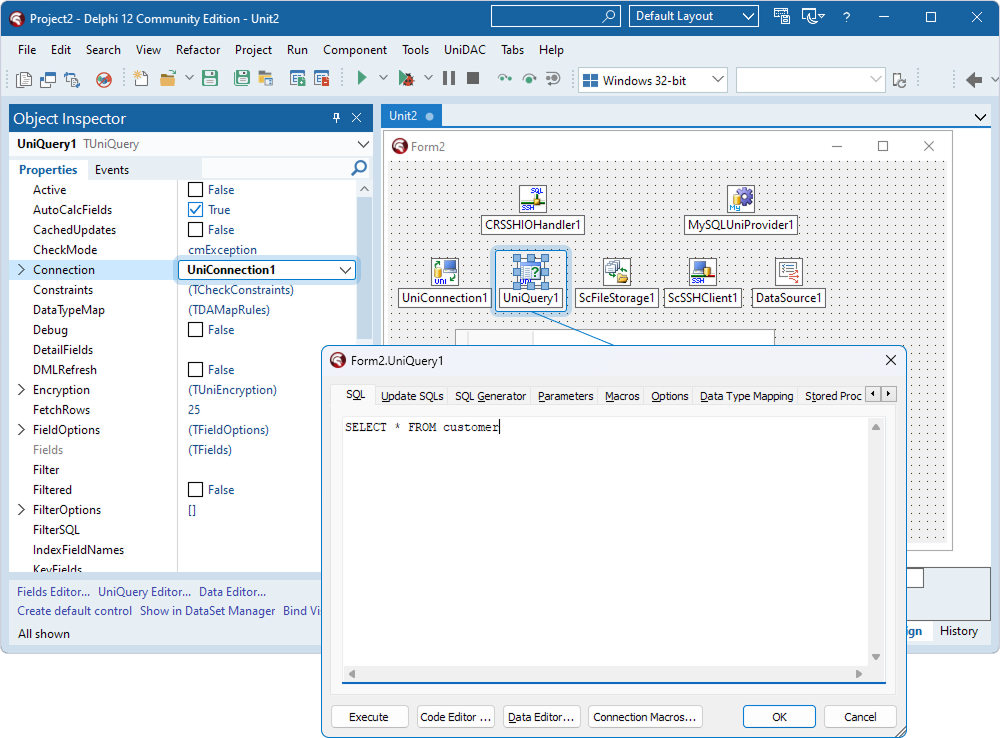
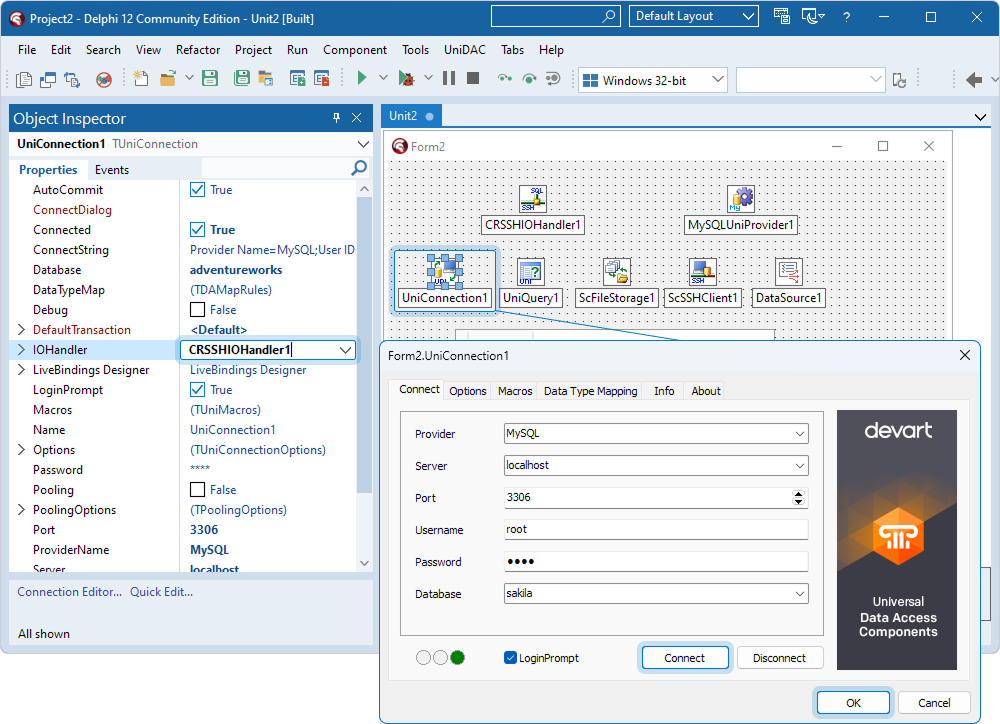
This page demonstrates how to use UniDAC to connect to a MySQL server securely via an SSH tunnel.
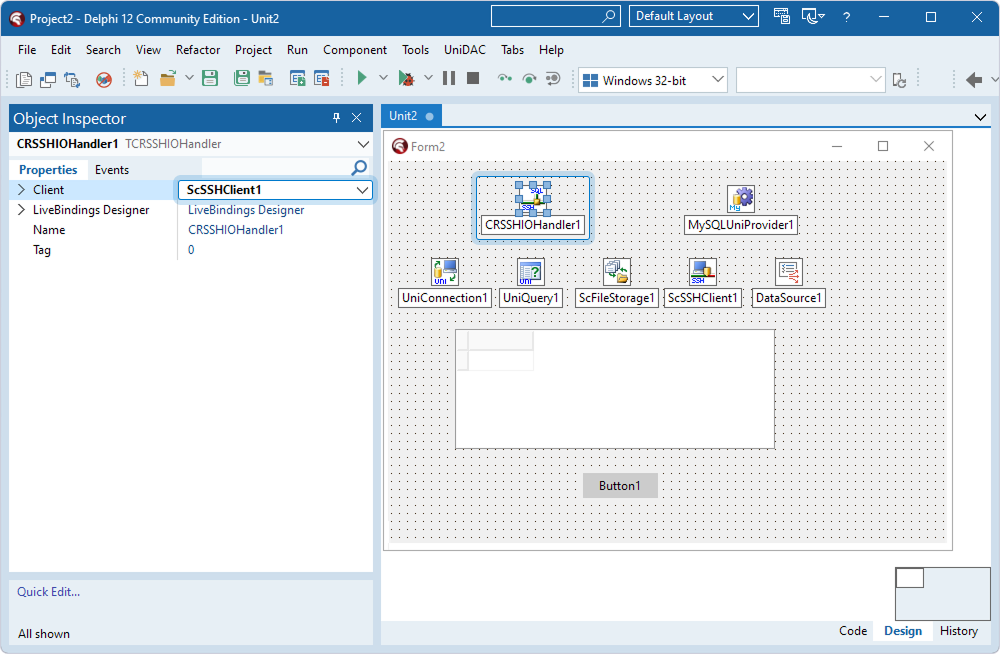
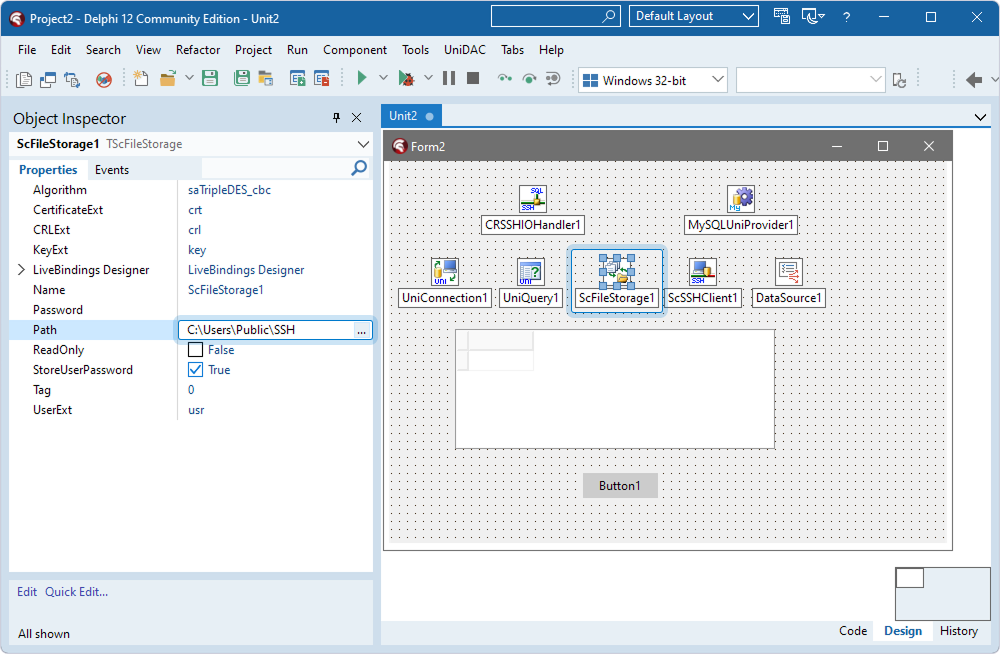
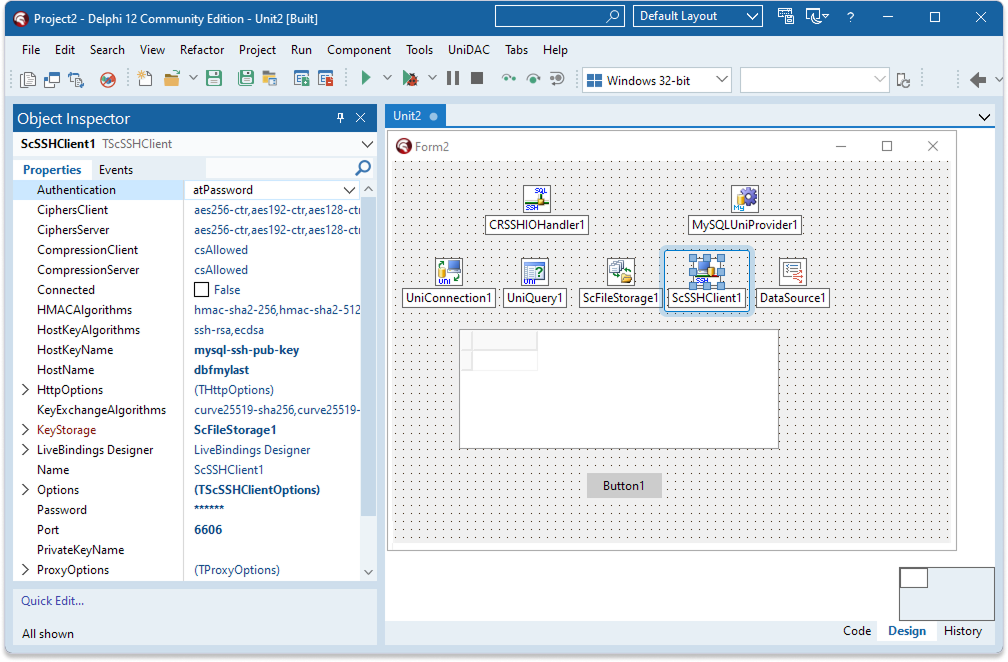
To follow the steps on this page, you need an SSH client and an SSH server. You can create them using SecureBridge, a solution provided by Devart. It enables you to embed an SSH client into your Delphi application and, if needed, configure an SSH server. For more information, see the SecureBridge tutorial on configuring an SSH server. You can also build the SSHServer demo project, which is distributed with SecureBridge.
Your MySQL server must be configured to accept connections from the SSH tunnel.
Connect Using SecureBridge
You can establish a secure SSH tunnel using SecureBridge without the need for third-party applications. SecureBridge provides all the necessary components to create an SSH client within your Delphi application.
Prerequisites:
- Install SecureBridge.
- Install the TCRSSHIOHandler component in RAD Studio to bind UniDAC with SecureBridge. For instructions, see
Readme.html
—by default, it is located in C:\Users\<user>\Documents\Devart\UniDAC for RAD Studio XX\Demos\TechnologySpecific\SecureBridge
.
- In RAD Studio, select File > New > Windows VCL Application - Delphi.

- Place the following components from Palette on the form:
- TCRSSHIOHandler
- TMySQLUniProvider
- TUniConnection
- TUniQuery
- TScFileStorage
- TScSSHClient
- TDataSource
- TDBGrid
- TButton
These components are required to establish an SSH connection to a MySQL server using UniDAC, execute a query, and display the retrieved data in a grid.

- Select the TDBGrid component and, in Object Inspector, set the DataSource property to the instance of TDataSource (DataSource1).

- Select the TDataSource component and set the DataSet property to the instance of TUniQuery (UniQuery1).

- Select the TUniQuery component and set the Connection property to the instance of TUniConnection (UniConnection1).
- Then, double-click the TUniQuery component, enter a SQL query to be run against the MySQL database, and click OK.

- Select the TCRSSHIOHandler component and set the Client property to the instance of TScSSHClient (ScSSHClient1).

- Select the TScFileStorage component and, in the Path property, specify the directory where the keys are stored.

- Select the TScSSHClient component and assign values to the following properties:
- Authentication – Select the value depending on the authentication method applicable for your SSH server: atPassword or atPublicKey.
- HostKeyName – Specify the filename of the SSH server public key.
- Hostname – Enter the host name or IP address of the SSH server.
- KeyStorage – Set the property to the instance of TScFileStorage (ScFileStorage1).
- Password – For password authentication, enter the password for the account on the SSH server.
- Port – Specify the SSH port.
- PrivateKeyName – For public key authentication, specify the filename of the client private key.
- User – Enter the username for the account on the SSH server.

- Select the TUniConnection component and set the IOHandler property to the instance of TCRSSHIOHandler (CRSSHIOHandler1).
- Double-click the TUniConnection component and fill out the fields on the Connect tab:
- Provider – Select MySQL.
- Server – Enter the host name or IP address of the MySQL server. If the SSH server and MySQL server are both running on the same machine, use localhost.
- Port – Specify the port of the MySQL server.
- Username – Enter the username for the account on the MySQL server.
- Password – Enter the password for the account on the MySQL server.
- Database – Select the database.
- Click Connect to test the connection to the MySQL server, then click OK to close the dialog.

- Double-click the TButton component and add code to call the Open method on the UniQuery1 object to activate the dataset when the button is clicked.

- Press F9 to compile and run the application.
- In the form that appears, click Button1 to run the query. Data appears in the grid.

Connect Using OpenSSH or Any Other Third-Party SSH Tunneling Tools
Using SecureBridge and its components is not obligatory—you can use any other server that implements the SSH protocol.
The following steps describe a simple case of using OpenSSH for Windows. For a detailed description of each command, see the OpenSSH documentation.
- Download OpenSSH for Windows.
- Install an SSH server:
- Choose a machine that will be used as the SSH server. It does not have to be the same machine as a MySQL server, but the communication channel between the SSH server and the MySQL server must be protected.
- Using the Windows Control Panel, create a user (for example, SSH_user) and set a password for the user (for example, SSH_pass).
- Install OpenSSH. It is enough to install only the server components.
- Open the
OpenSSH/bin
folder.
- Add SSH_user to the list of allowed users.
mkpasswd -l -u SSH_user >> ..\etc\passwd
- Use
mkgroup
to create a group permissions file.
mkgroup -l >> ..\etc\group
- Run the OpenSSH service.
net start opensshd
- Install an SSH client:
- Choose a machine that will be used as the SSH client. It does not have to be the same machine where the MySQL client is running, but the communication channel between the SSH client and the MySQL client must be protected.
- Install OpenSSH to the SSH client. You do not need to install the server components.
- Run the SSH client.
ssh.exe -L <SSH_port>:<MySQL_server>:<MySQL_server_port> <SSH_user>@<SSH_server>
<SSH_port>
– The port number of the SSH client that will be redirected to the corresponding port of the MySQL server.
<MySQL_server>
– The name or IP address of the machine where the MySQL server is installed.
<MySQL_server_port>
– The number of the MySQL server port, usually 3306.
<SSH_user>
– The name of the user created at step 2.
<SSH_server>
– The name or IP address of the machine where the SSH server was installed at step 2.
For example, ssh.exe -L 3307:server:3306 [email protected]
.
At first launch, you'll be prompted to confirm the connection with the specified SSH server. Enter yes
for confirmation.
At each launch of SSH, you must enter the password set at step 2.
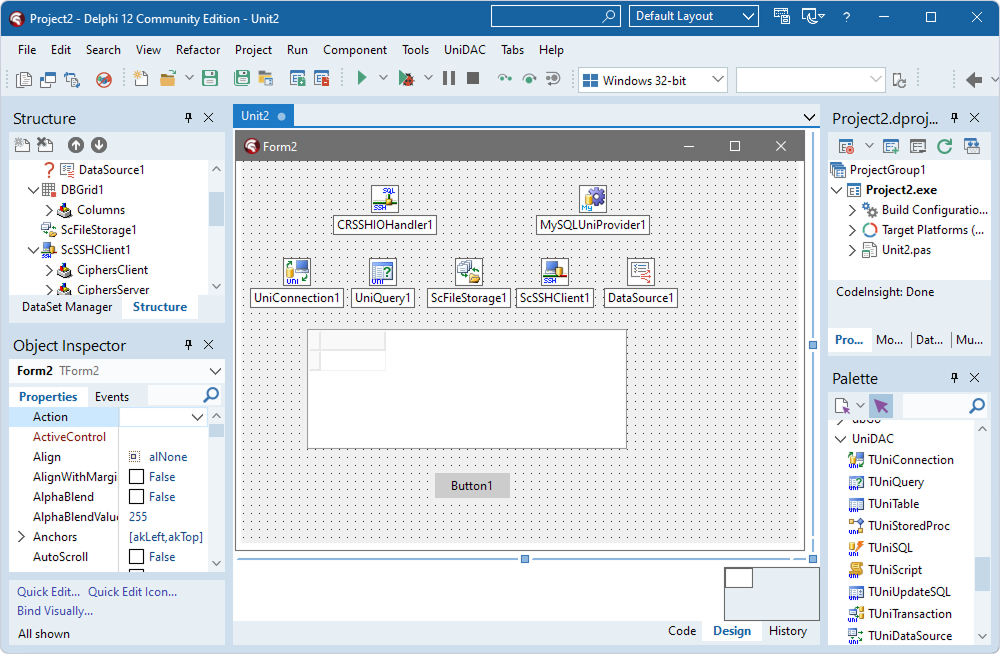
- Configure
TUniConnection
.
UniConnection1.Server := <SSH_client>;
UniConnection1.Port := <SSH_port>;
If the SSH client was installed on the same machine as the MySQL client, you can assign localhost
to UniConnection1.Server
.
Note that in the provided steps, Windows checks the SSH_user authentication. For information about the methods of higher protection (key authentication, etc.), see the OpenSSH documentation.
For more information on using encrypted connections, see MySQL Reference Manual.