Compare and synchronize snapshots
The New Schema Comparison wizard enables you to:
- Compare snapshots with other data sources, such as a database, a snapshot, a scripts folder, or a version control revision.
- Create a synchronization script from a snapshot.
In schema comparison, you can use snapshots as:
- Source – Generates a script to deploy the snapshot schema to a target database.
- Target – Creates a script to update a database based on its previous snapshot.
Note
The Database snapshot feature is available only in the Enterprise and Professional editions of dbForge Studio for SQL Server.
Compare and synchronize snapshots as the source
1. Open the New Schema Comparison wizard in one of these ways:
- In the top menu, select Comparison > New Schema Comparison.
- On the Start Page, select Database Sync > New Schema Comparison.
2. Under Source:
2.1. In Type, select Snapshot.
2.2. In Snapshot, select one of the following options:
-
Select the previously added snapshot.
-
Click
 to create a snapshot and add it to schema comparison.
 -
Click the ellipsis (…) and select the .snap file.
3. Under Target, select the target data source to compare with the snapshot, then configure the data source settings.
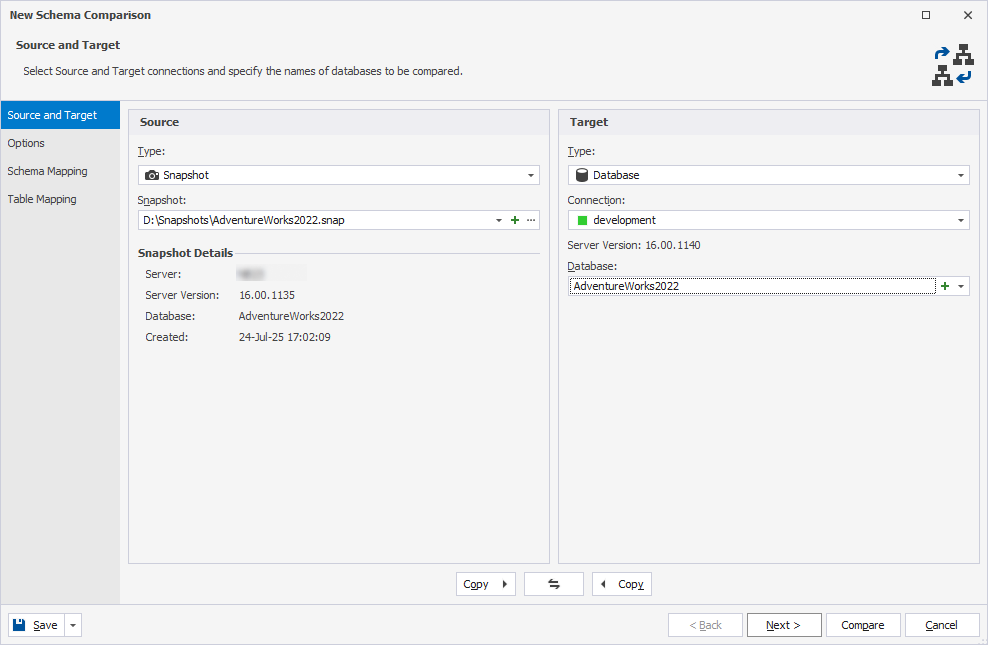
4. Optional: On the Options page, configure the comparison settings.
5. For Database, Backup, or Snapshot:
5.1. On the Schema Mapping page, map schemas.
5.2. On the Table Mapping page, map tables and columns.
Note
The database objects with the same names are mapped automatically.
6. Click Compare.
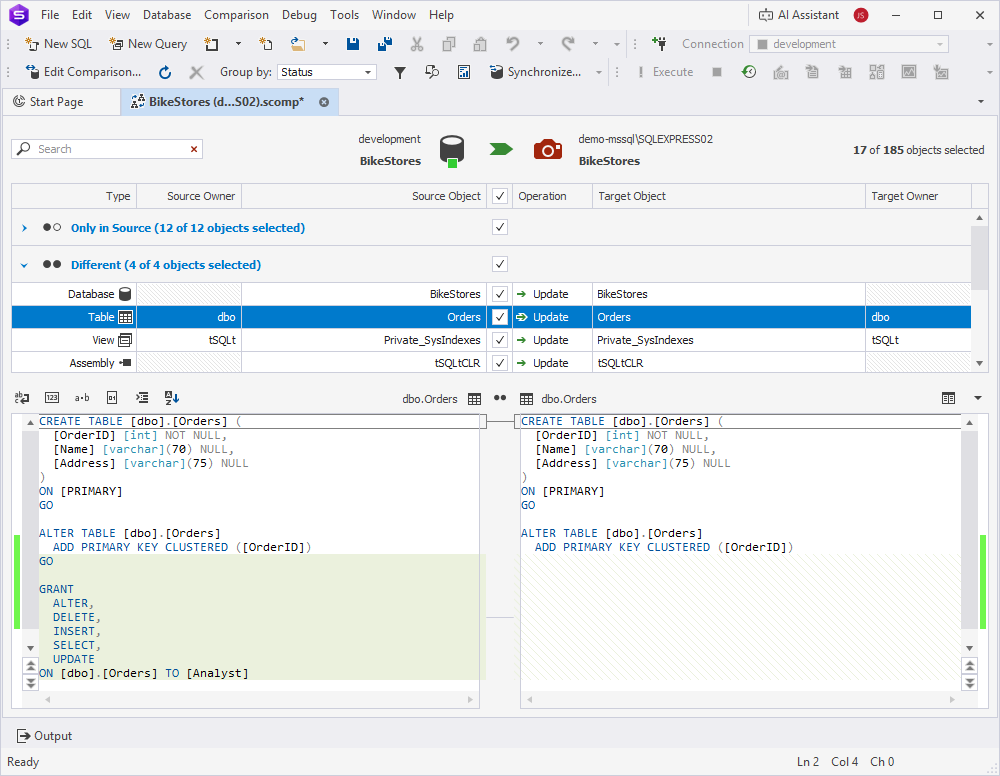
The comparison results appear in the Schema Comparison document.
By default, all objects are selected for synchronization. To exclude any objects from synchronization, clear the checkboxes next to the corresponding objects.
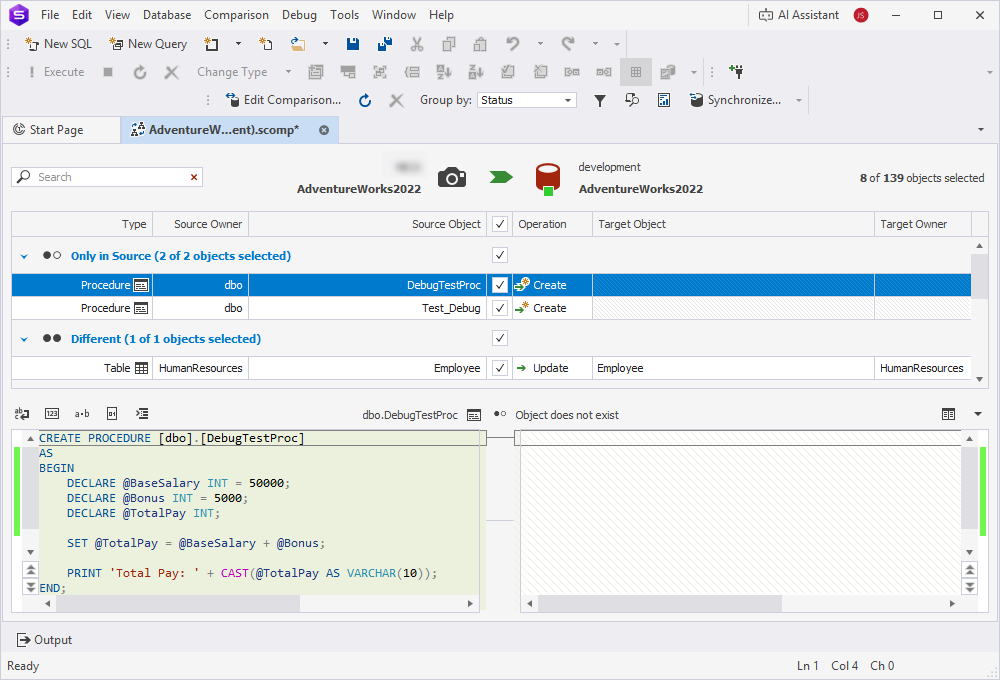
7. At the top of the document, click  to open the Schema Synchronization Wizard.
8. Select an output option to generate a synchronization script, and optionally configure the synchronization settings.
9. Click Synchronize.
Compare and synchronize snapshots as the target
1. Open the New Schema Comparison wizard in one of these ways:
- In the top menu, select Comparison > New Schema Comparison.
- On the Start Page, select Database Sync > New Schema Comparison.
2. On the Source and Target page, under Source, select the source data source to compare with the snapshot, then configure the data source settings.
3. Under Target:
3.1. In Type, select Snapshot.
3.2. In Snapshot, select one of the following options:
-
Select the previously added snapshot.
-
Click
to create a snapshot and add it to schema comparison. -
Click the ellipsis (…) and select the .snap file.
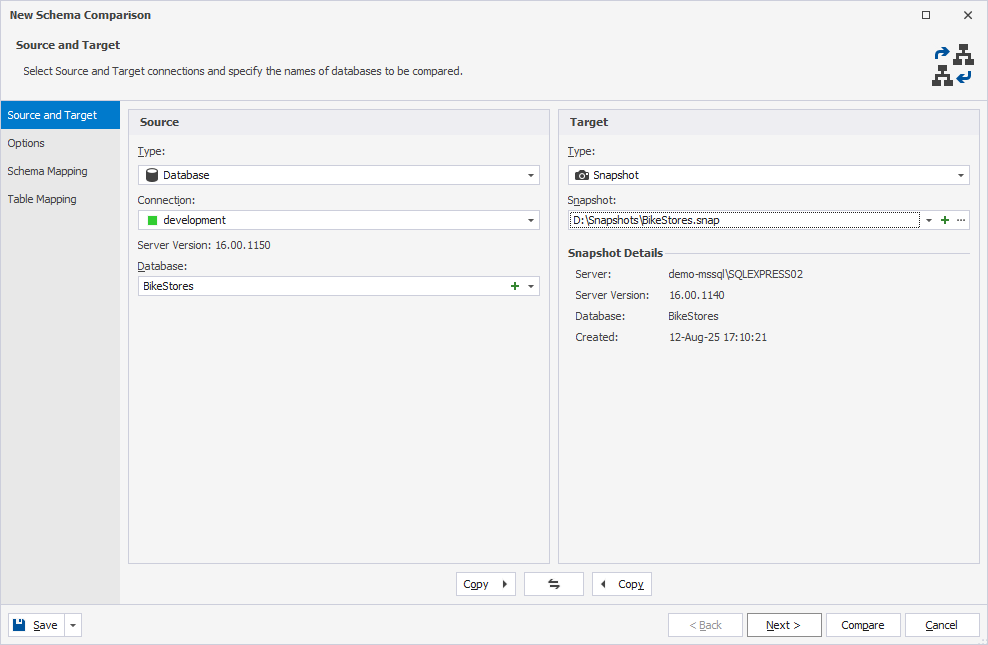
4. Optional: On the Options page, configure the comparison settings.
5. For Database, Backup, or Snapshot:
5.1. On the Schema Mapping page, map schemas.
5.2. On the Table Mapping page, map tables and columns.
Note
The database objects with the same names are mapped automatically.
6. Click Compare.
The comparison results appear in the Schema Comparison document.
By default, all objects are selected for synchronization. To exclude any objects from synchronization, clear the checkboxes next to the corresponding objects.
7. At the top of the document, click to open the Schema Synchronization Wizard.
8. Select an output option to generate a synchronization script, and optionally configure the synchronization settings.
9. Click Synchronize.
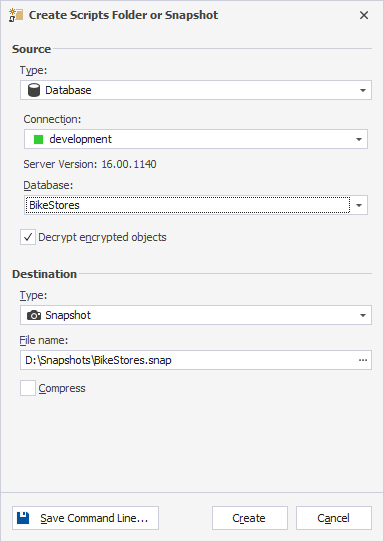
Create a snapshot in the New Schema Comparison wizard
1. On the Source and Target page of the wizard, in Type, select Snapshot as the source or target.
2. In Snapshot, click .
3. In the Create Scripts Folder or Snapshot dialog:
3.1. In Source > Type, select the source type and configure the data source settings.
3.2. In Destination > Type, select Snapshot and enter the path to the .snap file you want to create.
Note
You can create a snapshot from a database, scripts folder, or another snapshot.
4. Click Create.