Create custom pre- and post-execution scripts
You can create custom scripts that will run before or after schema synchronization on the Additional Scripts page of the Schema Synchronization Wizard.
Open the Schema Synchronization Wizard
Open the Schema Synchronization Wizard in one of these ways:
-
At the top of the Schema Comparison document, click
 .
. -
Right-click the Schema Comparison grid and select Synchronize.
-
Press F8.
-
On the Comparison toolbar, click Synchronize.

Set additional scripts
1. Navigate to the Additional Scripts page.
2. To add the script to run before schema synchronization:
2.1. Select Scripts to execute before.
2.2. Select one of the following options:
- Use embedded script – Enter a script you want to execute in the text box.
- Use external script – Specify the path to the file that stores the script, or click the ellipsis (…) to browse for the script.
- To add the
USE database_nameclause, select Include USE < database_name >.
- To add the
Example: Suppose you need to create partition tables in the target database. However, the database does not contain the required files and filegroups. Since dbForge Studio works only with database-level objects, server-level objects are excluded from both comparison and synchronization.
In such cases, you can run a custom script before schema synchronization to create the necessary files and filegroups in advance.
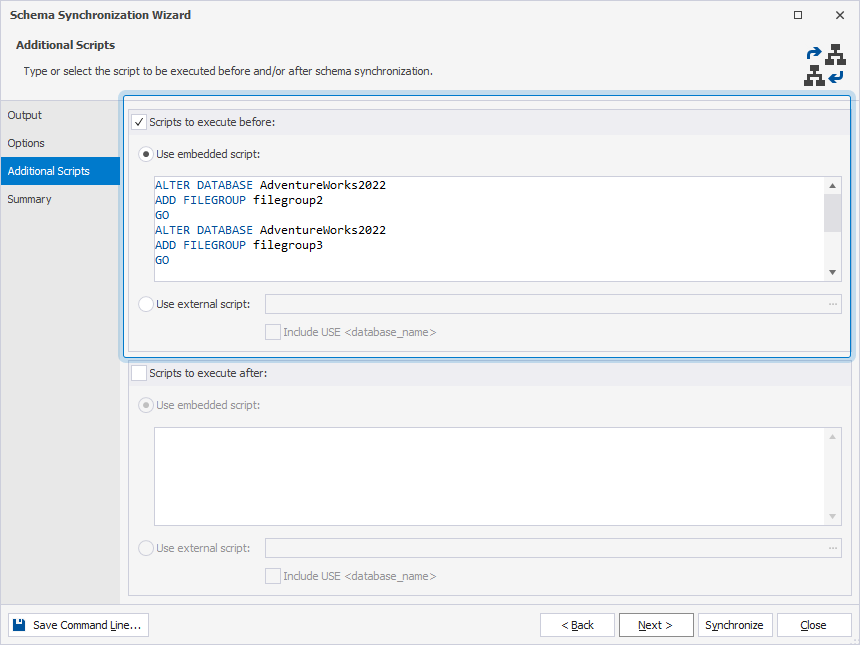
3. To add the script to run after schema synchronization:
3.1. Select Scripts to execute after.
3.2. Choose one of the following options:
- Use embedded script – Enter a script you want to execute in the text box.
- Use external script – Specify the path to the file that stores the script, or click the ellipsis (…) to browse for the script.
- Optional: To add the
USE database_nameclause, select Include USE < database_name >.
- Optional: To add the
4. Optional: Go to the Summary page and verify the synchronization options.
5. Click Synchronize.