Custom schema mapping
When you create a schema comparison project and select your data sources, dbForge Studio automatically maps objects that share the same name and schema.
If you need to compare objects with the same name from different schemas, you can map these schemas on the Schema Mapping page of the New Schema Comparison wizard. For example, to compare objects in a test database owned by HR with objects in a production database owned by Staff, map HR to Staff.
Open the Schema Mapping page
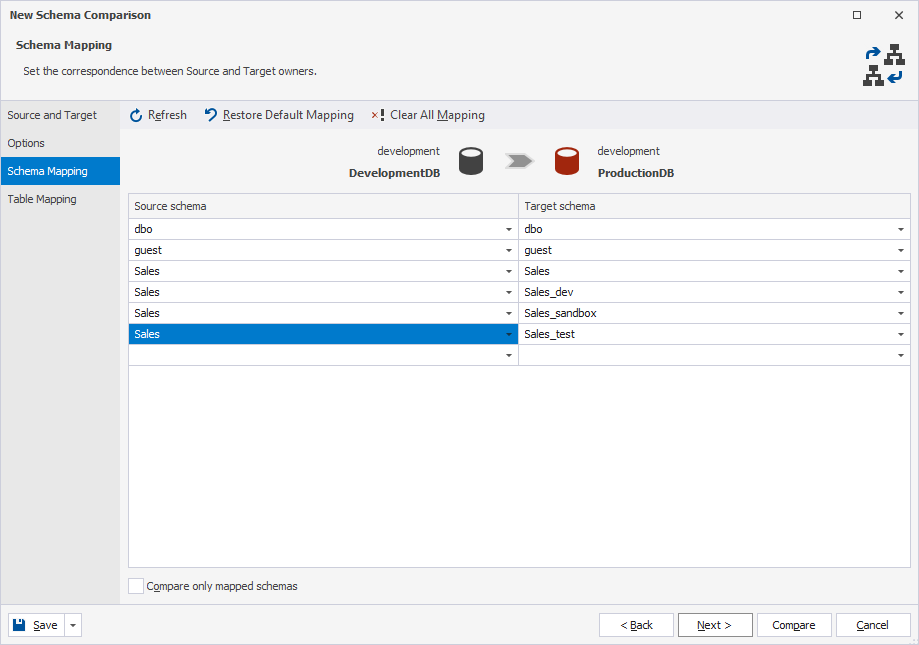
In the New Schema Comparison wizard, navigate to Schema Mapping.
Manage schema mapping
To add a new schema mapping, click the empty row at the end of the list and select a source schema from the list. Then, select a target schema from the corresponding target list.
To undo all mapping, click Clear All Mapping.
To undo one specific mapping, under the schema name, select the mapping list, then select None or another schema.
To restore the default mapping, click Restore Default Mapping.
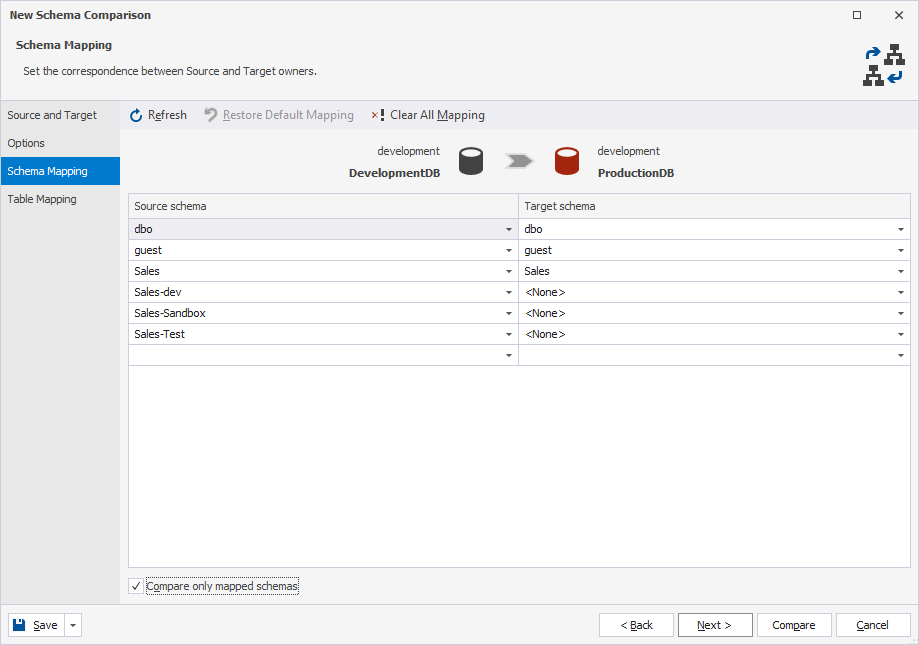
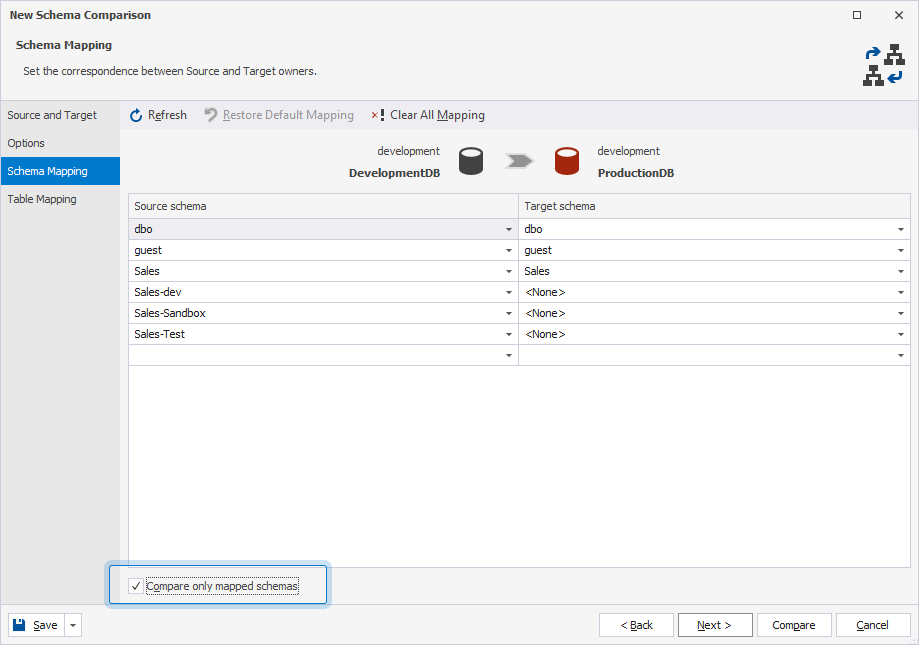
Compare only mapped schemas
To compare only the schemas that have been mapped automatically, select Compare only mapped schemas. Unmapped schemas are excluded from the comparison.
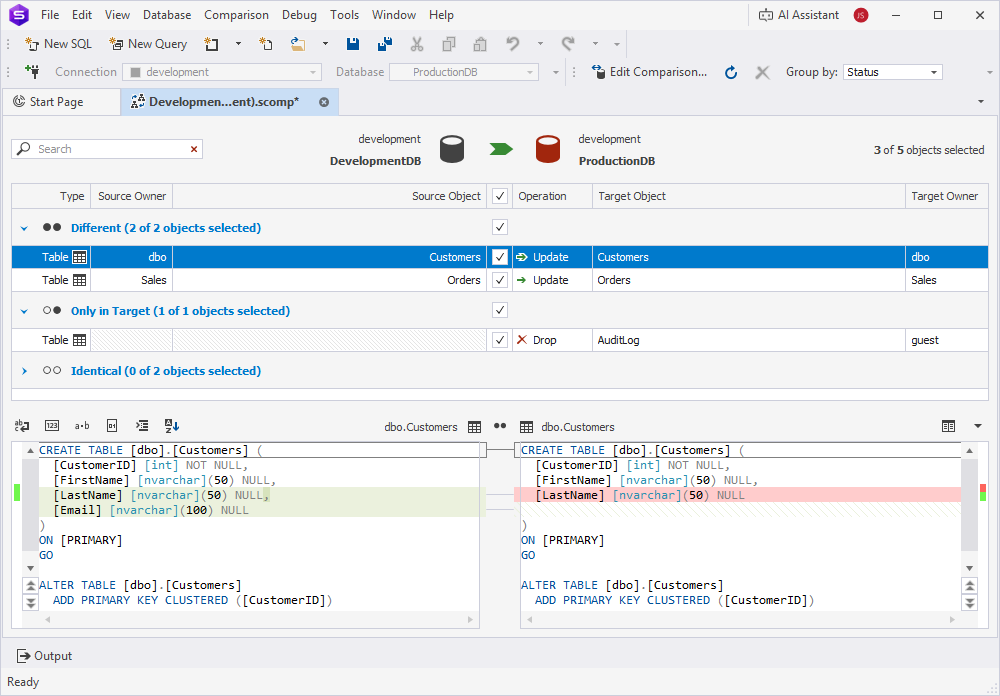
The mapping results may be as follows.
Many-to-one schema mapping
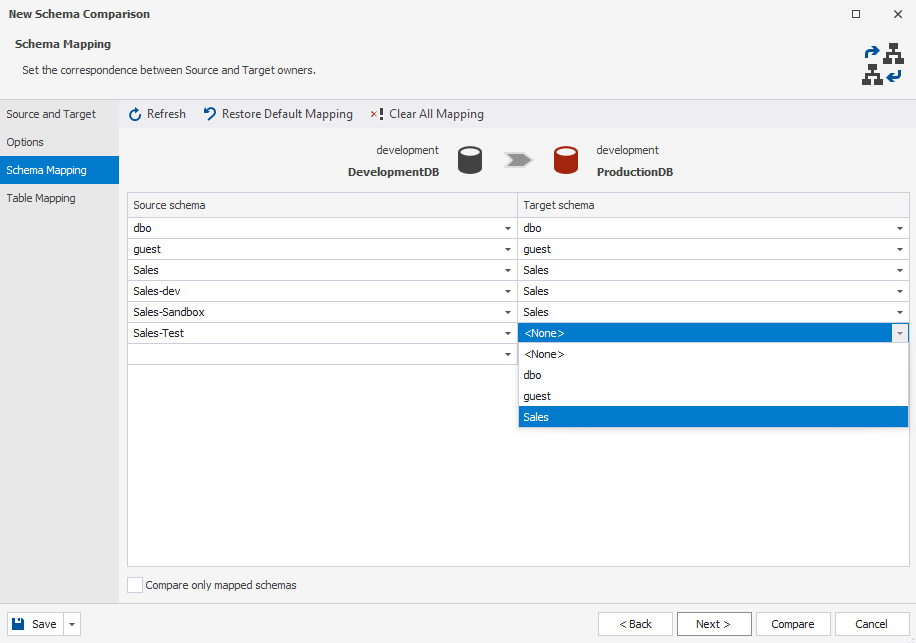
To map multiple source schemas to a single target schema, select the same target schema for each source schema you want to map from the Target schema list.
The mapping result may be as follows.
One-to-many schema mapping
You can map one source schema to multiple target schemas.
Case 1: Source tables exist in the target schema
Select the same source schema next to each target schema in the Source schema list.
Case 2: Source tables don’t exist in the target schema
If the tables don’t exist in the target schema, they will be created in all mapped target schemas after synchronization. To avoid creating unwanted duplicates:
1. From the Source schema list, select the same source schema next to each required target schema.
2. Click Compare.
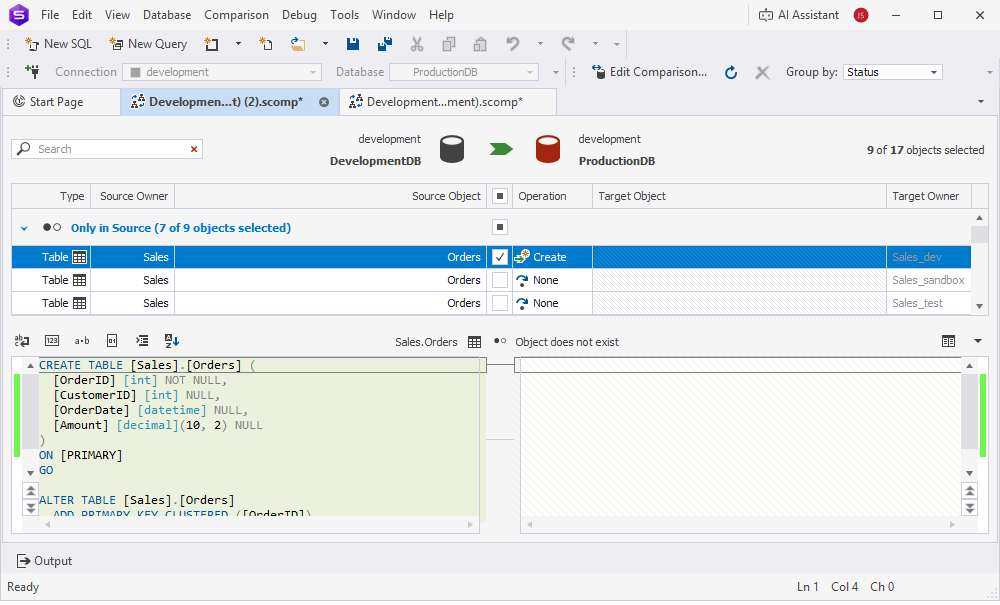
3. In the filter box, enter the table name, then clear the checkboxes next to the target schemas where you don’t want the table to be created.
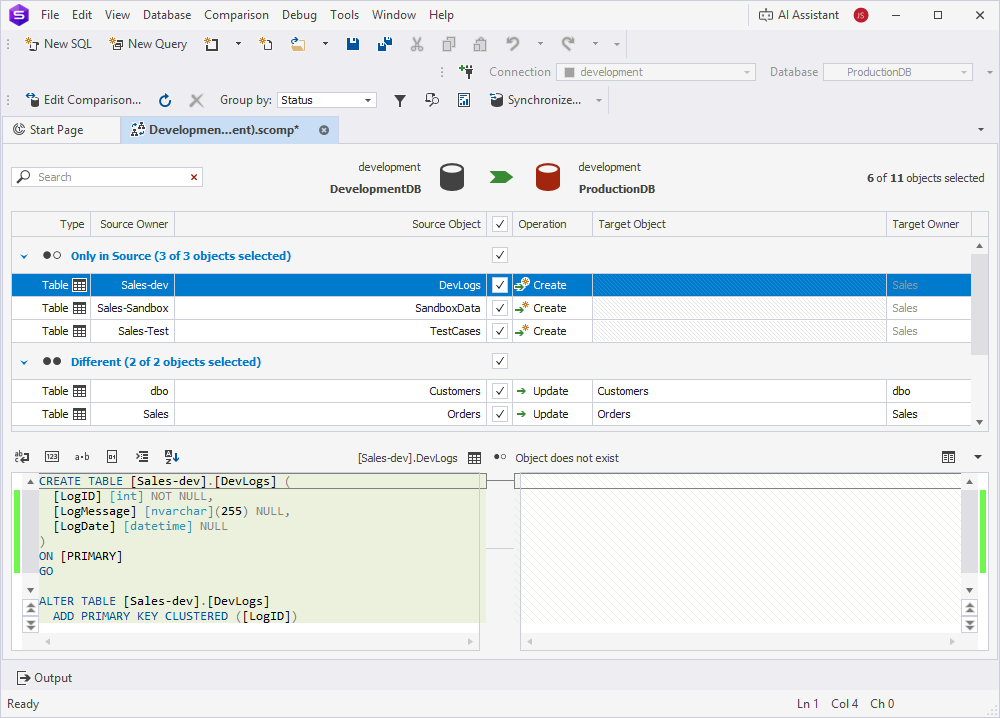
For example, mapping the Sales schema to Sales_dev, Sales_Sandbox, and Sales_Test to ensure a table appears only in Sales_dev requires filtering out Sales_Sandbox and Sales_Test.
4. When you filter out all the unwanted duplicates, you will get a result similar to the following.

Note
If you don’t remove unwanted duplicates during mapping, you may need to delete them manually after synchronization.
5. On the top menu, select Comparison > Synchronize to open the Schema Synchronization Wizard.
6. Configure additional synchronization settings as needed.
7. Click Synchronize.
Keyboard shortcuts in the search box
The table describes the keyboard shortcuts you can use in the search box.
| Keyboard shortcut | Description |
|---|---|
| Ctrl+A | Selects all. |
| Ctrl+Left Arrow (←) | Moves the caret to the beginning of the word. |
| Ctrl+Right Arrow (→) | Moves the caret to the end of the word. |
| Ctrl+Shift+Left Arrow (←) | Selects text from the current caret position to the beginning of the current word and moves the caret to the beginning of the word. |
| Ctrl+Shift+Right Arrow (→) | Selects text from the current caret position to the end of the current word and moves the caret to the end of the word. |
| Ctrl+Backspace | Deletes the word to the left of the caret. |