Select synchronization output
On the Output page of the Data Synchronization Wizard, you can choose how to handle the synchronization script.
Note
Changes made during data synchronization are applied only to the target database. The source database is not affected.
Open the Data Synchronization Wizard
Open the Data Synchronization Wizard in one of these ways:
-
At the top of the document, click
 .
. -
Right-click the grid and select Synchronize.
-
Press F8.
-
On the Comparison toolbar, click
 .
.
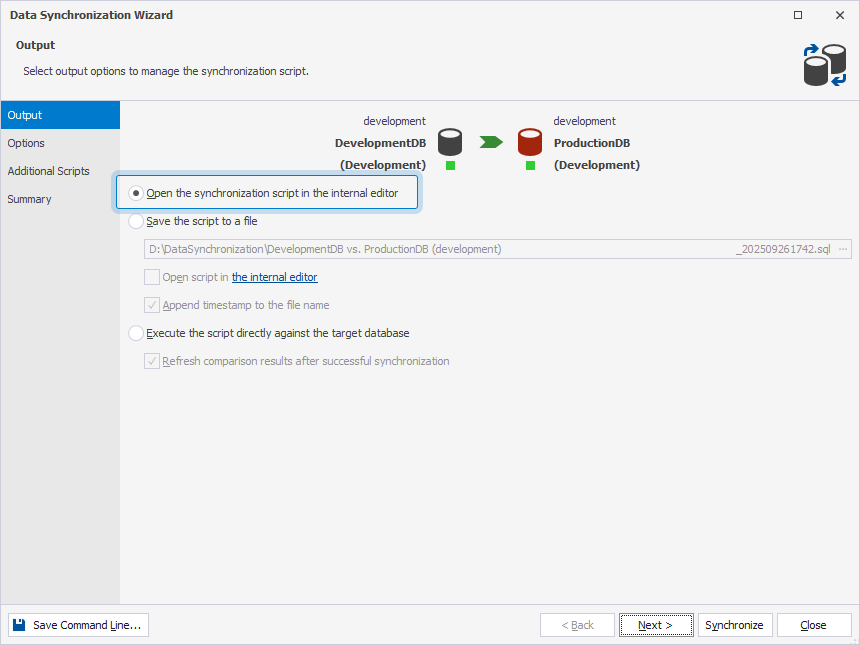
Output page
On the Output page, you can select one of the output options to manage the synchronization script.
Warning
The synchronization script executes within a single transaction. If any part of the process fails, all changes are rolled back, and no data are written to the database. For example, if the script contains three
INSERTstatements and one fails, no data are inserted into any table.
Open the synchronization script in the internal editor
Select the option to open the generated synchronization script in the internal SQL Editor after data synchronization. You can review and edit the script. To synchronize the databases, click Execute on the SQL toolbar (or press F5).
Note
The option is selected by default.
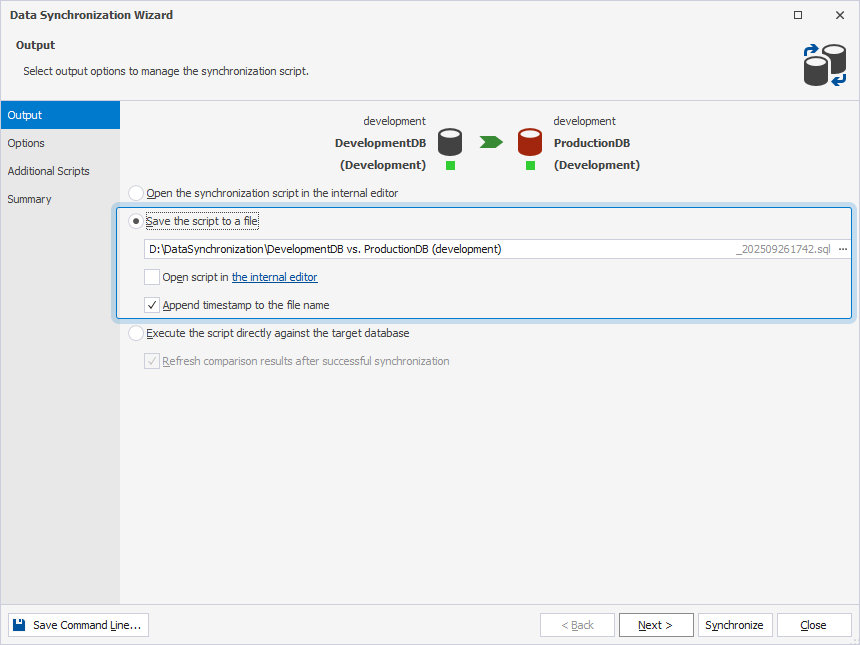
Save the script to a file
Select the option to save the synchronization script locally on your machine after you run data synchronization.
Under Save the script to a file:
- Specify the path to the file or click the ellipsis (…) and select the required folder.
- Optional: To open the script for review and editing before deployment, select Open script in the internal editor.
- Optional: To remove the date and time from the file name (added by default), clear the Append timestamp to the file name checkbox.
Note
To change the editor used to open the file, click the internal editor link. In the Options > Synchronization dialog, select the required editor and click OK.
Tip
By default, synchronization scripts are saved with a file name that includes the source and target database names. If you re-synchronize the same databases, the existing file may be overwritten. To avoid this, select Add timestamp to the file name to generate a unique name for each script.
Execute the script directly against the target database
Select the option to run the synchronization script automatically without opening it for review.
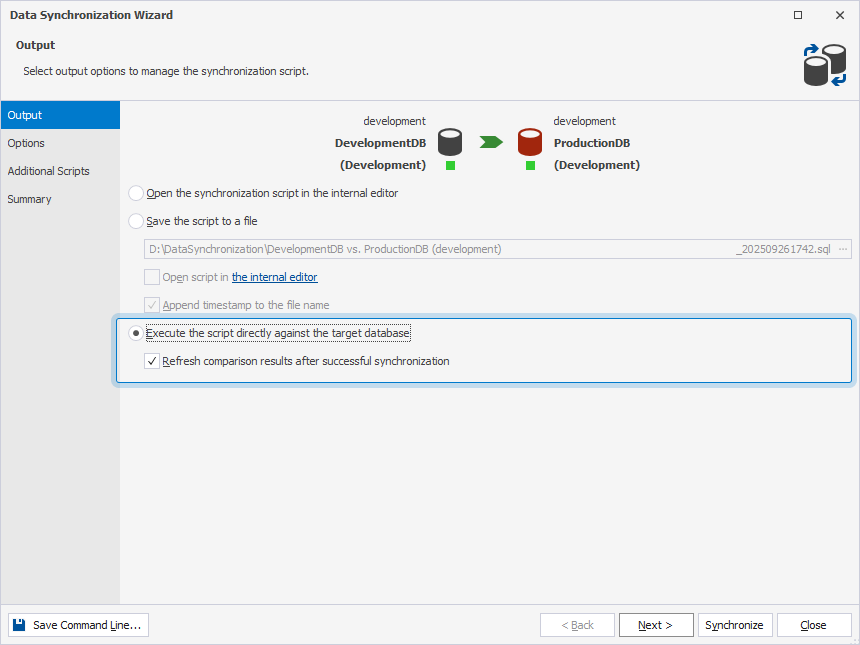
Optional: Clear the Refresh comparison results after successful synchronization checkbox to prevent the results from updating automatically.
Synchronize backups
When you select a backup as the target, the synchronization wizard creates a script to update the database from which the backup was created. You can open the script in the internal editor or save it to a file.
Note
When a backup is selected as the target, the Execute the script directly against the target database option is unavailable. You can’t modify backups directly.
Synchronize scripts folders
When you select a scripts folder as the target, the Update the scripts folder option appears. Select it to update the local scripts folder with SQL scripts from the source database.
Warning
Updating a script folder may overwrite local changes. Back up or commit your changes before deployment.
Optional: Select Open the folder containing the output files to open the folder where the generated files are stored. This also refreshes the comparison results after a successful schema deployment.
Create a command-line executable file
In the lower-left corner of the wizard, click Save Command Line to create a command-line executable .bat file to automate data synchronization tasks. In the Command line execution file settings dialog, configure the settings and save the file.
Note
You can create the command-line file from any page of the wizard.