Selecting objects to synchronize
After you have reviewed the comparison results, you can select the objects you want to synchronize and run the synchronization wizard.
Selecting objects to synchronize
By default, all objects are selected for synchronization.
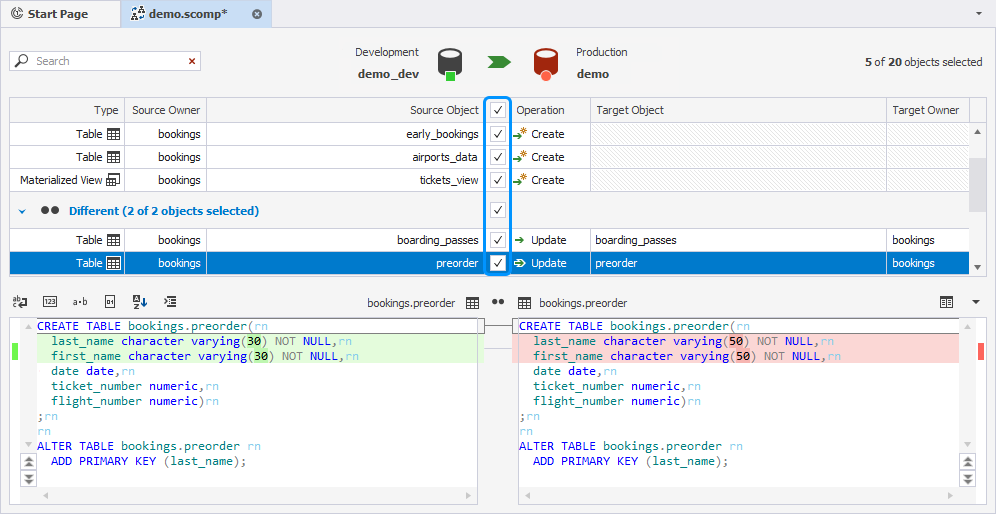
Use the checkboxes to undo the selection of objects for synchronization.
You can also use the Operation drop-down menu to select objects:
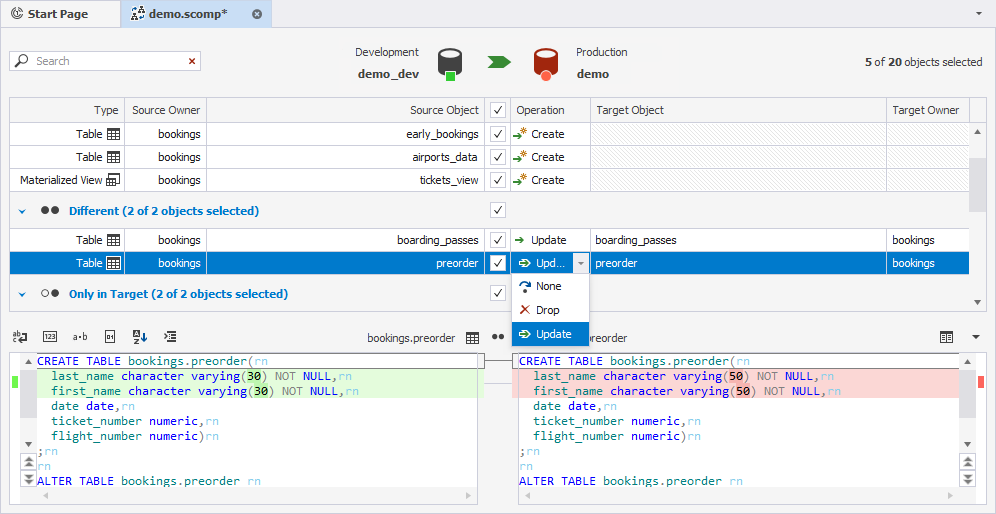
-
None is set by default for identical objects and cancels the selection of an object for synchronization. If you change it to Drop, this object will be deleted in Target but will remain intact in Source during the synchronization.
-
Drop is set by default for objects with the Only in Target status. Drop means that the object will be dropped in the target schema. If you change the action to None, this object will remain intact in Target during the synchronization.
-
Create is set by default for objects with the Only in Source status. Create means that the object will be created in the target schema. If you change the action to None, this object will remain intact in Target during the synchronization.
-
Update is set for objects with the Different status and changes the target object according to the source object. You can change it to Drop or None. If you change the action to None, this object will remain intact in Target during the synchronization.
Object status
dbForge Studio for PostgreSQL automatically sets different statuses for compared objects to help you quickly analyze the differences. The statuses are as follows:
- Only in Source - schema object exists in the source schema and does not exist in the target schema.
- Only in Target - schema object exists in the target schema and does not exist in the source schema.
- Different - schema objects with the same names exist in both schemas but have different DDL.
- Equal - identical objects exist in both schemas.
- Unknown - object metadata cannot be retrieved, so its status is unknown.
Synchronizing databases
Note
Schema synchronization can not be rolled back. It may alter or drop schema objects in your target schema. It is highly recommended to back up the target database before synchronization.
After you have selected objects, you can run the process of synchronization.
To synchronize the objects
1. To open the Schema Synchronization Wizard, click  Synchronize objects to the target database.
2. Select one of the output options to manage the synchronization script:
- Open the synchronization script in the internal editor
- Save the script to a file
- Execute the script directly against the target database
Tip
When you perform a database comparison and save the synchronization script using the default file name, which includes the source and target database names, re-synchronizing the same databases with the same file-saving option may overwrite the existing script. To avoid this, enable the Add Timestamp option when saving the script. This appends a timestamp to the file name, ensuring each synchronization script remains distinct.
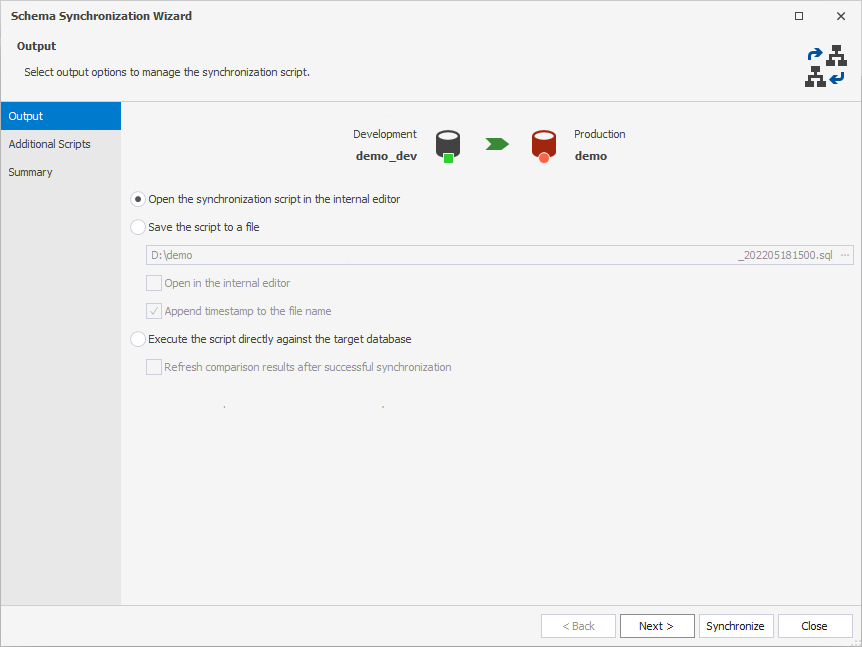
3. To close the wizard and proceed with the synchronization process, click Synchronize.
4. Review the sync script, and then execute it by clicking the Execute button on the SQL toolbar.