Using Oracle Export and Import Utility Wizards
dbForge Studio for Oracle has Export Utility and Import Utility wizards for exporting and importing database objects. It allows to transfer data objects between Oracle databases, even if they reside on the platforms with different hardware and software configurations. dbForge Studio Export Utility Wizard allows to extract the object definitions and table data from an Oracle database and stores them in an Oracle binary-format export dump file. Import Utility Wizard allows to insert extracted objects from export dump files to Oracle database.
dbForge Studio uses Oracle export and import utilities for export and import. So these utilities are required for export and import operations. These utilities are installed with Oracle Client software.
Note
It is recommended to use Oracle Client with version less or equal to the lowest version between source and target Oracle servers.
How to Export Data using Oracle Data Export Utility
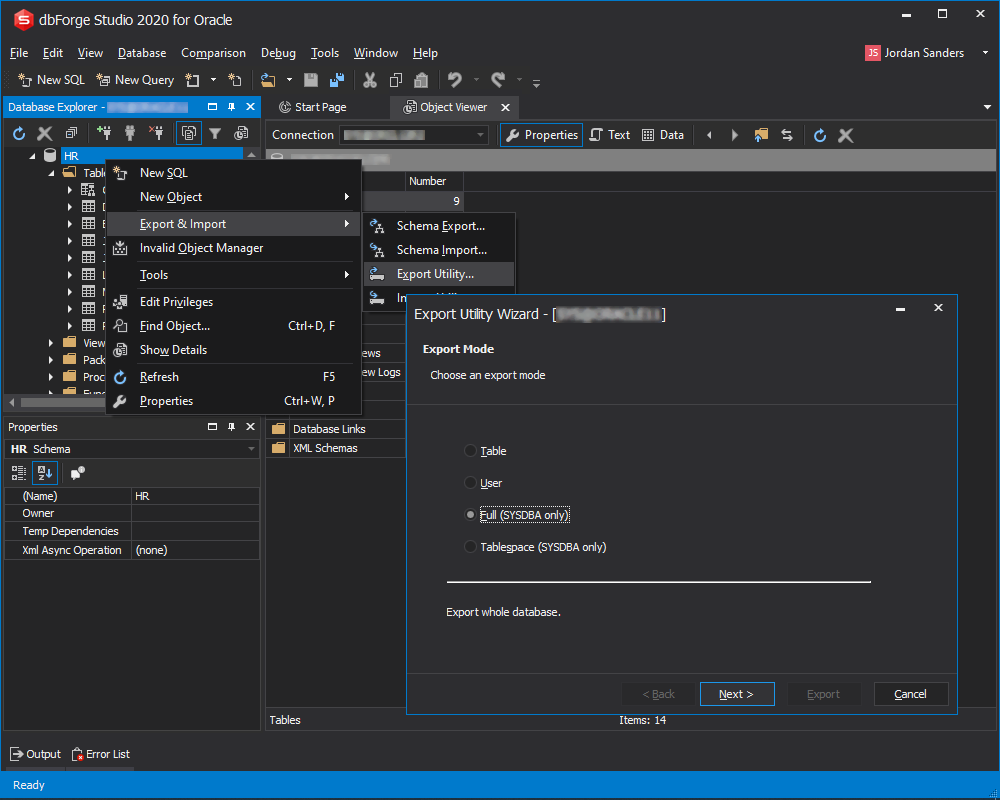
To call the Export Utility Wizard, on the Database menu, select Export & Import, and then click Export Utility.
Note
To export tables owned by another user, you must have enough privileges.
There are four modes of export: Table, User, Full, and Tablespace. You must connect as SYSDBA to use the Full and Tablespace modes.
Table mode
The Table mode allows to export particular tables. In the Table mode you can select tables and set additional queries to select a subset of rows from a set of tables for export.
To export particular tables:
- Call the Export Utility Wizard.
- Click the Next button if the Export Mode page is active.
- Select tables to export.
- Click the Additional query button and enter a condition to select a subset of rows from a set of tables if necessary. Condition must be the WHERE clause for the SELECT statement applicable for all selected tables.
- Click the Next button.
- Select additional objects and settings to export and click the Next button.
- Enter or select export dump and configuration files location and names. Click the Export button.
- Wait for export finish, select the check box if you want to view the export log, and click the Finish button.
User mode
The User mode allows extracting data objects of one ore more (for SYSDBA) users. It can be useful for users who want to back up their data or who want to move objects from one owner to another.
To export all data of one or more users:
- Call the Export Utility Wizard.
- Click the Back button if the Export Tables page is active.
- Select the User mode and click the Next button.
- Select the users whose data you want to export, and click Next. Only SYSDBA can export another user data.
- Select additional objects and settings to export. Click Next.
- Enter or select export dump and configuration files location and names. Click Export.
- Wait for export finish, select the check box if you want to view the export log. Click Finish.
Full mode
In the Full mode an entire database can be exported to the file with all GRANTS and all data.
To export a whole database:
- Call the Export Utility Wizard.
- Click Back if the Export Tables page is active.
- Select the Full mode. Click Next. If the Full option is not available, you have not enough privileges to use the Full mode. You must connect as SYSDBA to use this mode.
- Select additional objects and settings to export. Click Next.
- Enter or select export dump and configuration file locations and names. Click Export.
- Wait for the export finish, select the check box if you want to view the export log. Click Finish.
Tablespace mode
To move or copy a set of tablespaces you must copy the datafiles of these tablespaces, and export their metadata using Export Wizard in the Tablespace mode. The Tablespace mode allows to move a set of tablespaces from one Oracle database to another. Tablespaces to export must be ONLINE and READONLY. dbForge Studio can temporarily make exporting tablespaces ONLINE and READONLY and restore their state after export.
To export tablespaces metadata:
- Call the Export Utility Wizard.
- Click Back if the Export Tables page is active.
- Select the Tablespace mode and click Next. If the Tablespace option is not available, you have not enough privileges to use the Tablespace mode. You must connect as SYSDBA to use this mode.
- Select tablespaces to export. Click Next.
- Select additional objects and settings to export. Click Export.
- Enter or select export dump and configuration files location and names. Click Next.
- Wait for export finish, select the check box if you want to view the export log. Click Finish.
How to Import Data using Oracle Data Export Utility
There are four modes of import: Table, User, Full and Tablespace. You must connect as SYSDBA to use the Tablespace mode. To call Import Utility Wizard, choose Export & Import, and then click Import Utility on the Database menu .
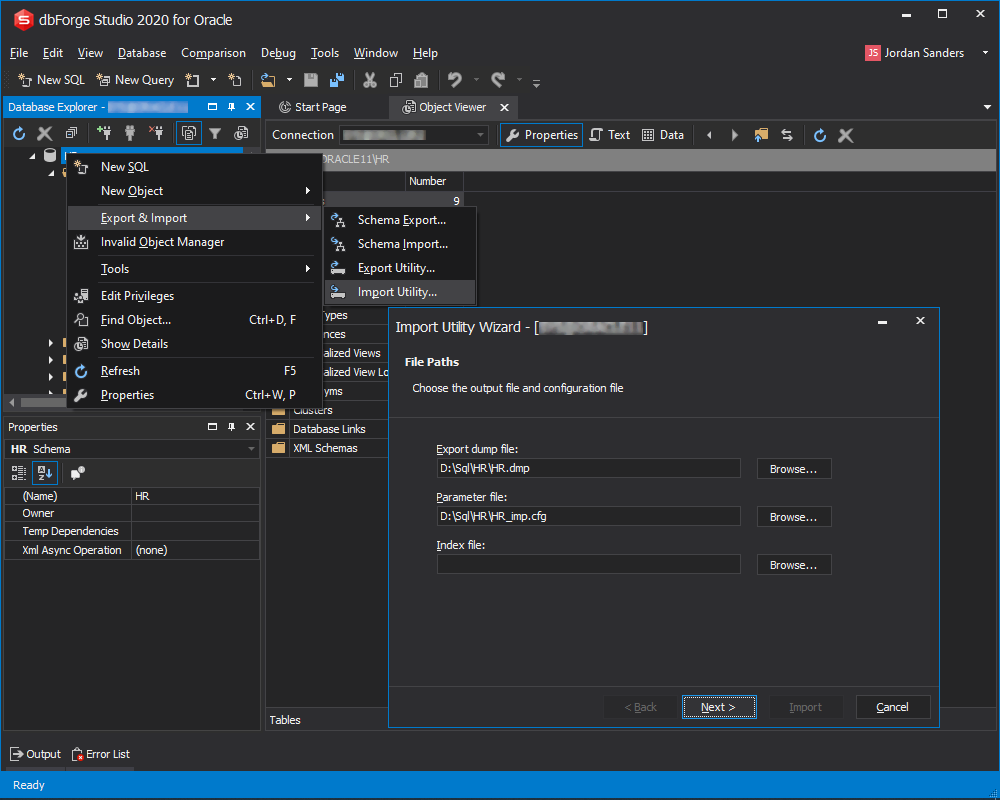
Table mode
This mode allows you to import specific tables. You can import either all tables from dump file or select particular tables.
To import specific tables:
- Call the Import Utility Wizard.
- Select the export dump file and the configuration file location. Click Next. You can optionally select the index file for indexes import.
- Select the Table mode. Click Next.
- Select what tables to import, source and target schemas. You can import all tables from the file, enter table names manually or select table names from existing tables. Click Next.
- If you have chosen the Select from existing option, select tables from the existing tables list. Only table names but not owners will be selected. Table owners have been selected at the previous step.
- Select additional objects to import and import settings on this page. Click Import.
- Wait for import finish, select the check box if you want to view the import log. Click Finish.
User mode
This mode allows you to import all objects that belong to you (such as tables, grants, indexes, and procedures). If you are connected as SYSDBA, you can import all the objects in the schemas of a specified set of users to the specified schemas.
To import data in the User mode:
- Call Import Utility Wizard.
- Select export dump file and configuration file location. Click Next. You can optionally select index file for indexes import.
- Select the User mode. Click Next.
- Select source and destination schemas. Click Next.
- Select additional objects to import and import settings on this page. Click Import.
- Wait for import finish, select the check box if you want to view the import log. Click Finish.
Full mode
This mode allows you to import all data objects from the dump file. It also allows to use incremental import. Incremental import can be used for database restore.
To import the whole dump file:
- Call the Import Utility Wizard.
- Select the export dump file and the configuration file location. Click Next. You can optionally select the index file for indexes import.
- Select the Full mode. Click Next.
- Select the destination schema and incremental import type. Click Next.
- Select additional objects to import and import settings on this page. Click Import.
- Wait for import finish, select the check box if you want to view the import log. Click Finish.
Tablespace mode
This mode allows to move a set of tablespaces from one Oracle database to another.
To import tablespaces:
- Call the Import Utility Wizard.
- Select the export dump file and configuration file location. Click Next. You can optionally select the index file for indexes import.
- Select the Tablespace mode. Click Next. If the Tablespace option is not available, you have not enough privileges to use the Tablespace mode. You must connect as SYSDBA to use this mode.
- Select tablespaces’ datafiles, owners and tablespaces’ names to import. Click Next. You can select tablespaces’ owners from existing ones.
- If you have selected the Select from existing option, select tablespaces’ source and target owners from existing users. Click Import.
- Wait for import finish, select the check box if you want to view the import log. Click Finish.
You can download a trial version of dbForge Studio for Oracle as well as learn more about its feature-rich Data Export/Import utilities on the Devart website.