Working with Master-Detail Browser Document
This topic explains how to work with the Master-Detail Browser document. The document is divided into two views - Design and Data. It is described how to work with each of these views below.
Working with Design View
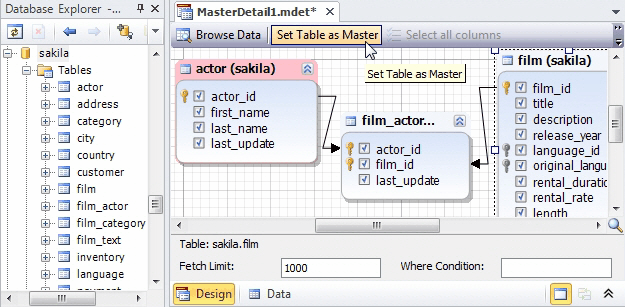
To add one or more tables/views to the diagram drag them from the Database Explorer window onto the designer surface.
Note
The first table/view that you drag will be automatically set as master table/view and marked with a peach color. To set another table/view as master, you can select this table/view and click Set Table as Master on the document toolbar or right-click it and select the same command on the shortcut menu.
Note
Arrows between tables/views indicate any existing relationships between these tables/views.
Note
At least one parent table/view (without any arrows pointing to it) must be added to the document, or an error message will be displayed if you try to view results.
When dragging tables onto the designer surface, relationship lines are automatically created if a relationship exists in the database for the added tables.
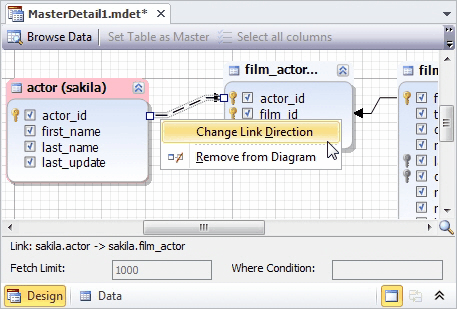
A line with an arrow pointing in the direction of the link indicates a one to one relationship. But you can also create links between different columns yourself. To create a link, simply drag a column from one object to a column in the second object that you want to link. You can change the direction of a created or an existing link by right-clicking on it and selecting Change Link Direction on the shortcut menu.
Note
You can not make links between columns of different types.
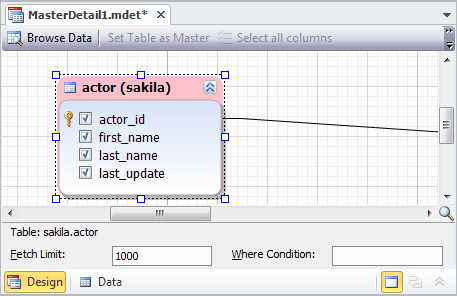
Now you can select columns you want to include into or exclude from your result by selecting or clearing checkboxes near the columns. You can also select all columns by clicking the Select All Columns on the document toolbar or selecting this option in the table/view shortcut menu. To clear all columns, click the Unselect All Columns option on the document toolbar or select this option on the table/view shortcut menu.
You can also sort columns in tables/views in ascending or descending order using the Sort Ascending or Sort Descending options from the document toolbar or the shortcut menu correspondingly.
Under the designer area you can specify a fetch limit for the result set, and a field to specify a WHERE condition. Also you can view the name of the currently selected table/view or link here.
To view results, click the  Browse Data button on the document toolbar or press F5. After this, the Data view with result set will be opened.
To send the available relation to Query Builder, click the Send to Query option on the menu.
Working with Data View
In the upper part of the Data view the data of the parent table/view is shown. The lower part of the document is occupied by data available in the child tables/views. You can navigate through the records of the parent table/view, and the corresponding data of the child tables/views will be shown in the lower part of the view. If there is more than one child table/view, click + to view data of these child tables/views.
For the parent table/view, you can change the order of the available records. For the child tables/views, you can also change the records order and also apply filtering. To learn more about sorting and filtering data in parent and child tables/views, refer to the Sorting and Filtering Data in Master-Detail Browser topic.
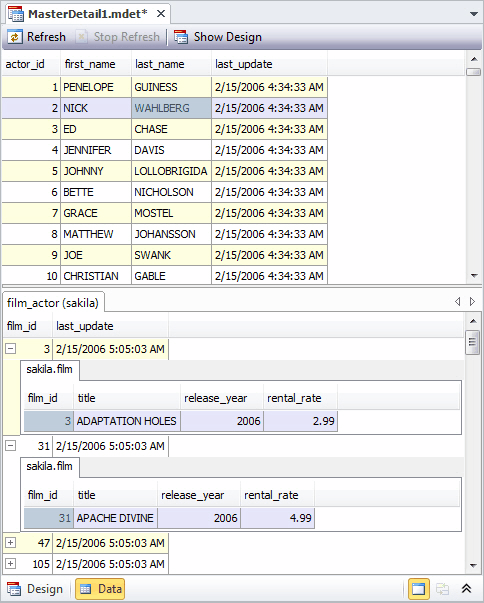
In this view, you can click the Refresh button to refresh data or Stop Refresh to stop refreshing.
Click  Show Design to return to the design view.
Note
In the split document view document is divided in two parts - Design and Data. If you’ve designed the required relationship and you are ready to work with data, you can hide the Design view by clicking the