Filtering Rows Included into Comparison
By default, dbForge Studio compares all the rows in the selected tables or views. If they contain a large amount of data, the comparison can take a lot of time and even result in running out of disk space. You can simply avoid such things by filtering the rows to compare specific ranges.
Note:
You can only filter rows if a database is selected as the data source. You can not use WHERE clauses for backups and Scripts folders.
- Open the Data Comparison Wizard and specify Source and Target. Click Next.
- On the Mapping wizard page, select a required object in the grid and click the Filter button. The WHERE Filter dialog opens. It is divided into Source section (on the left) and Target one (on the right). If you want to filter Source rows, use the left section. To filter Target rows, use the right section.
-
Right-click either Source or Target section and select Insert Column and a required column from the right-click menu. Type a filter expression.
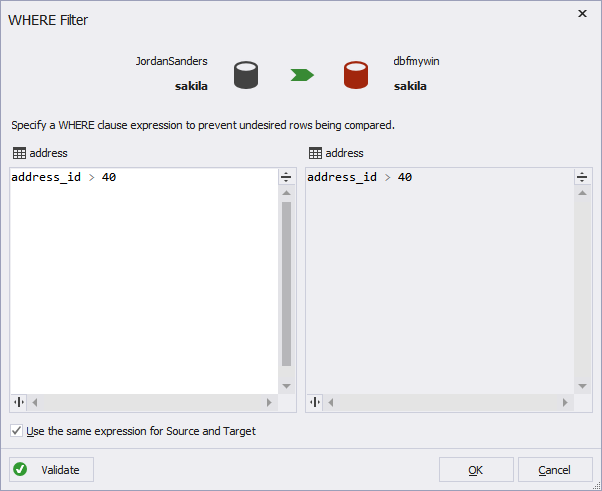
- If you want to apply the expression to both Source and Target rows, type the expression and select Use the same expression for source and target.
- To apply the filtering expression, click OK. The filtered object will be marked with the ? icon in the Mapping wizard page grid.