Configuring a notification email for a database backup
This article describes how to create a database backup and send a notification email with the backup file attached.
Step 1: Configure backup settings
1. In Database Explorer, right-click the database you want to back up and select Tasks > Backup Database.
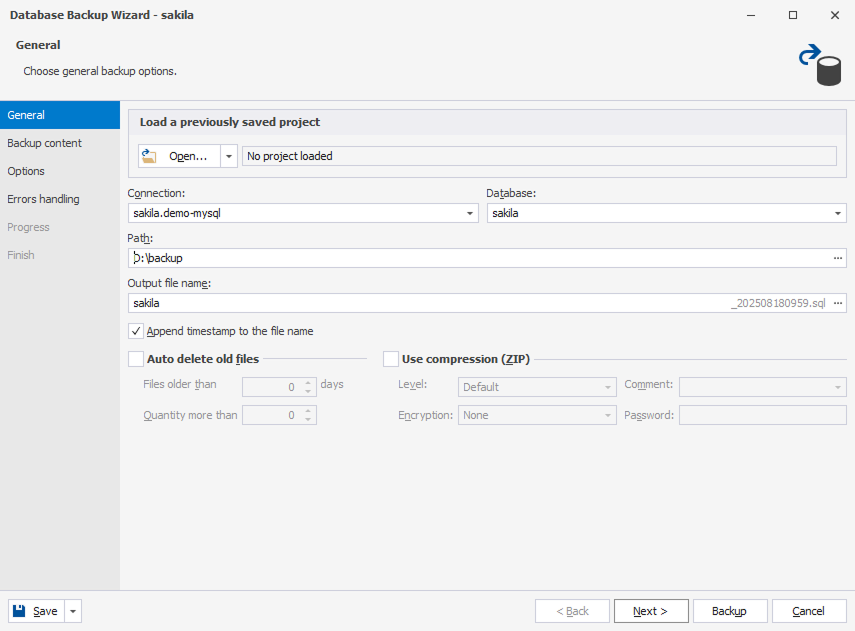
2. On the General page of the Database Backup Wizard, configure the script generation options:
2.1. Verify the connection and database names.
2.2. Specify the destination directory for the generated script file.
2.3. Enter the output file name.
2.4. Optional: Select Append timestamp to the file name.
2.5. Optional: Configure automatic deletion of old backup files.
2.6. Optional: Configure compression settings.
2.7. Click Next.
3. On the Backup content page, select the database objects you want to back up, then click Backup.
Step 2: Generate a project file
To generate the backup project file that contains the data and settings required to restore your database:
1. In the Database Backup Wizard, click Save > Save Project.
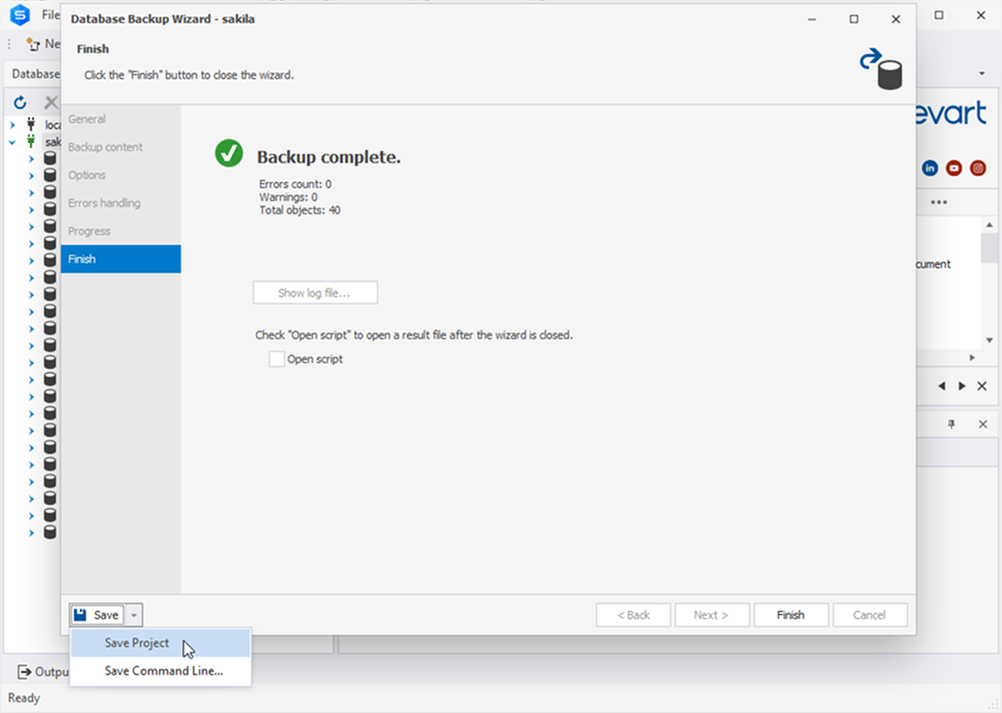
2. Specify the destination folder for the project backup file.
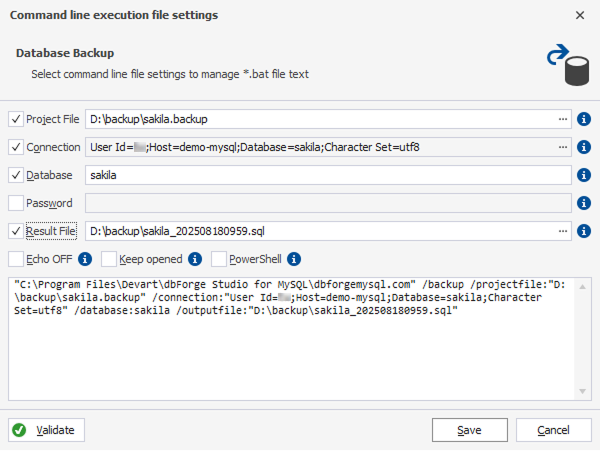
Step 3: Save command-line settings
1. In the Database Backup Wizard, click Save > Save Command Line.
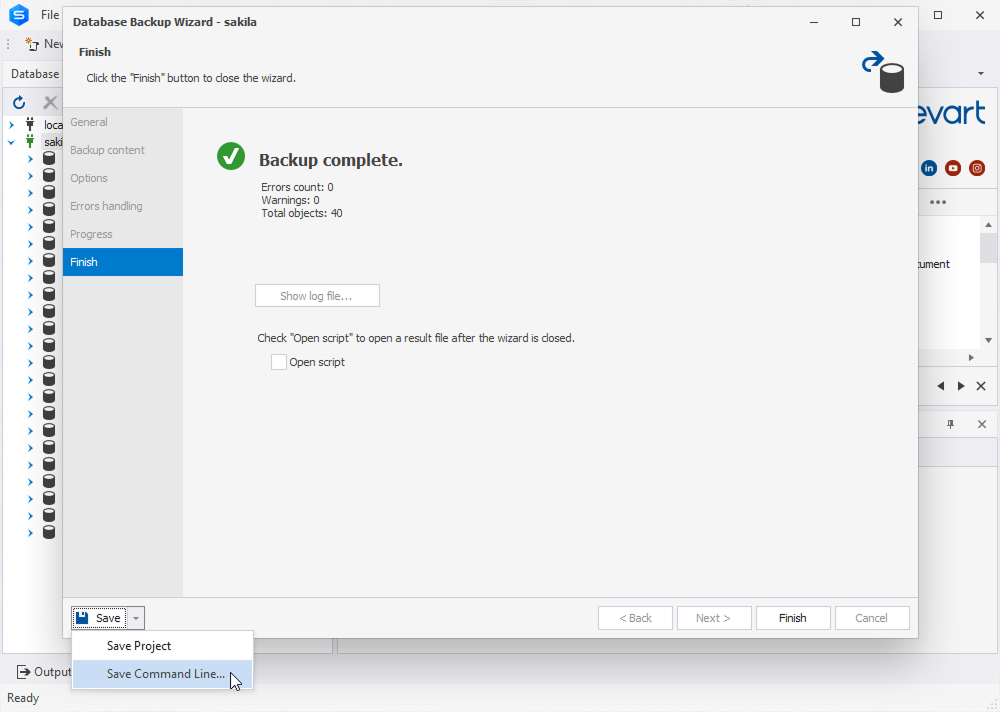
2. On the Command line execution file settings page, click Save, then enter a name for the batch file (.bat) where the settings will be stored. These settings will be required for use in the following step.
Step 4: Set up email notification
To send an email notification when the export finishes, create a Windows PowerShell script (.ps1).
1. Open a text editor.
2. Enter the following code:
# ── SMTP / RECIPIENT SETTINGS ──────────────────────────────────────────────────
$smtpServer   = "smtp.yourdomain.com"
$smtpPort     = smtpPortNumber
$smtpUser     = "[email protected]"
$smtpPassword = "smtpPassword"

$from         = "[email protected]"
$to           = "[email protected]"

# ── EXIT‑CODE LOOK‑UP TABLE ────────────────────────────────────────────────────
$exitCodes = @{
    0   = "Success."                                  ; 10  = "Command‑line usage error."
    11  = "Illegal argument duplication."             ; 12  = "Unsatisfied dependency."
    20  = "Trial expired."                            ; 40  = "Server connection failed."
    105 = "Resource unavailable."
}

# ── COMPLETE COMMAND (UNCHANGED) ───────────────────────────────────────────────
$commandLine = '"C:\Program Files\Devart\dbForge Studio for MySQL\dbforgemysql.com" /backup /projectfile:"path_to_backup_file" /connection:"User Id=User;Host=HOST;Database=database_name;Character Set=utf8"'

# ── RUN EXPORT ────────────────────────────────────────────────────────────────
$null = cmd /c $commandLine 2>&1
$code = $LASTEXITCODE

# ── PREPARE MAIL ──────────────────────────────────────────────────────────────
if ($exitCodes.ContainsKey($code)) {
    $description = $exitCodes[$code]
} else {
    $description = "Unknown exit code $code."
}

$subject = "emailSubject $code"
$body = @"
Time   : $(Get-Date -Format "u")

Command:
$commandLine

Exit code: $code
Meaning  : $description
"@

$backupFolder = 'pathToBackupFolder'
$attachments = @()

if ($code -eq 0 -and (Test-Path $backupFolder)) {
    $attachments += Get-ChildItem -Path $backupFolder -Filter 'fileName' | Select-Object -ExpandProperty FullName
}

# ── SEND MAIL ─────────────────────────────────────────────────────────────────
$securePw = ConvertTo-SecureString $smtpPassword -AsPlainText -Force
$cred     = New-Object System.Management.Automation.PSCredential($smtpUser, $securePw)

if ($attachments.Count -gt 0) {
    Send-MailMessage -SmtpServer $smtpServer -Port $smtpPort -UseSsl `
                     -Credential $cred -From $from -To $to `
                     -Subject $subject -Body $body -Attachments $attachments
} else {
    Send-MailMessage -SmtpServer $smtpServer -Port $smtpPort -UseSsl `
                     -Credential $cred -From $from -To $to `
                     -Subject $subject -Body $body
}

# ── CONSOLE OUTPUT ────────────────────────────────────────────────────────────
Write-Host "Exit code $code – $description"
3. Replace the following parameter values with your own.
-
$smtpServer = "smtp.yourdomain.com"– The SMTP server address. -
$smtpPort = smtpPortNumber– The SMTP port number. -
$smtpUser = "[email protected]"– The email address used to authenticate with the SMTP server. -
$smtpPassword = "smtpPassword"– The password used to authenticate with the SMTP server. -
$from = "[email protected]"– The sender email address. -
$to = "[email protected]"– The recipient email address. -
$subject = "emailSubject $code"– The subject of the notification email. -
$backupFolder = 'pathToBackupFolder'– The path to the folder containing the backup file. -
$backupFolder -Filter 'fileName'– The backup file name to send. -
$commandLine– Your actual command-line configuration from Step 3.
4. Save the file with the PS1 extension.
Step 5: Execute the script
1. Open Windows PowerShell ISE as an administrator.
2. In the terminal, type the path to the generated PS1 file and press Enter.
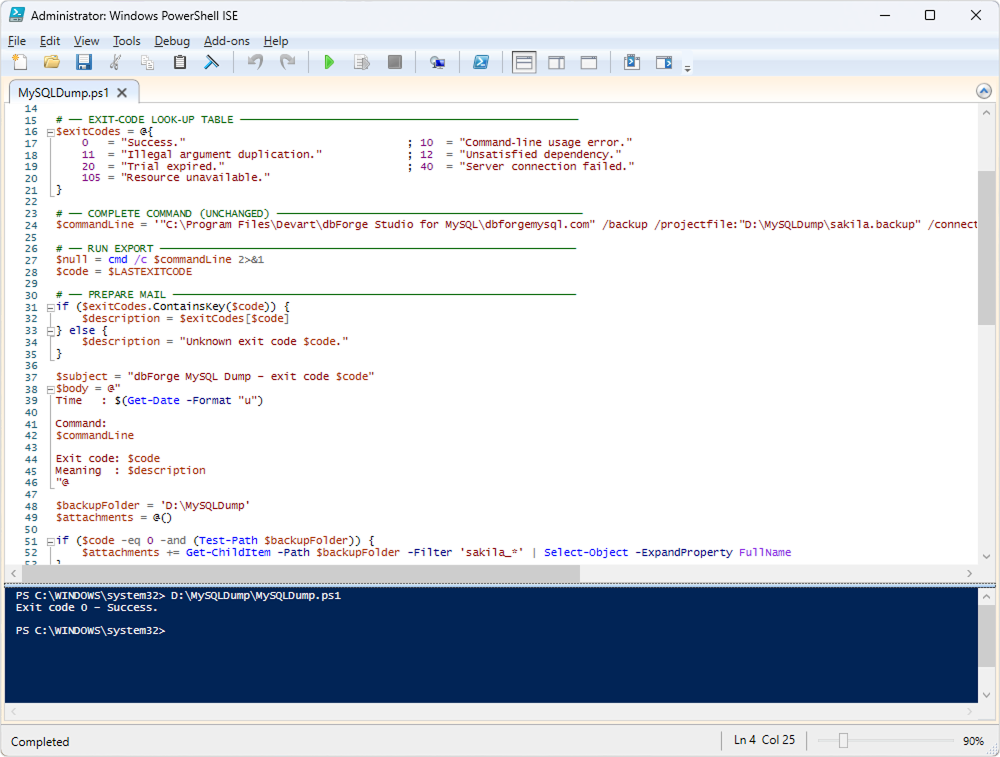
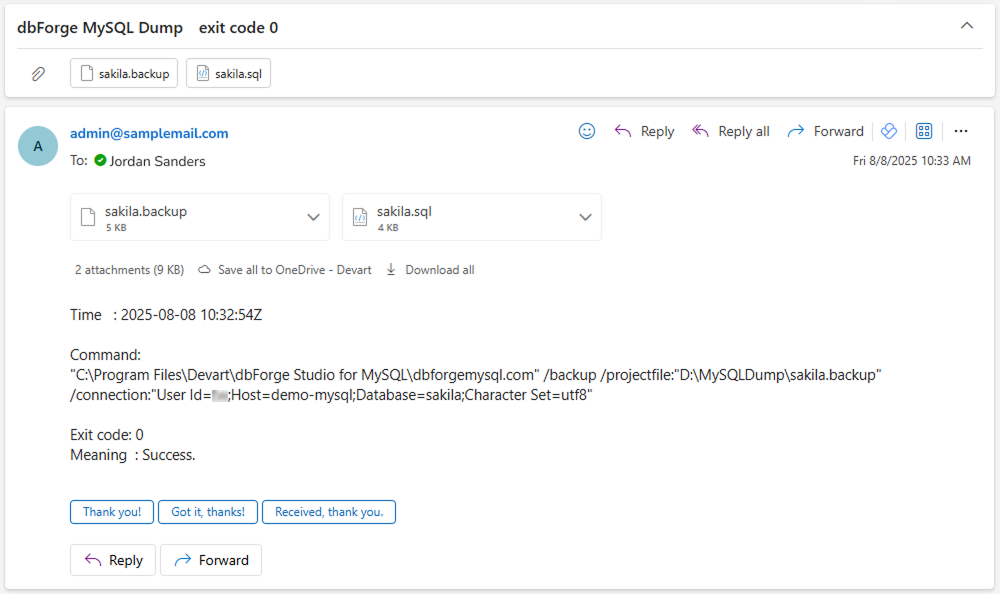
Once executed, the script displays an exit code. If the exit code is 0, the email notification is sent to the recipient.