This tutorial requires SQL Server Integration Services 2012 or higher with SQL Server Data Tools installed.
This tutorial demonstrates how to use Devart Salesforce Lookup component to perform an UPSERT to the Contacts, when an existing contact to update is determined not by a provided ID, but by another field, for example, Email. The Contacts data to upsert is stored in a CSV file. This file must have at least two columns - LastName and Email.
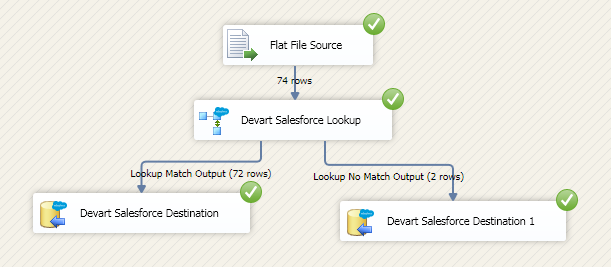
We will import Salesforce Contacts from a CSV file using a Flat File Source, determine whether there is a Contact in Salesforce with the same email using Devart Salesforce Lookup, and, depending on this, perform either insert or update to Salesforce with two Devart Salesforce Destinations.
| 1. | After you have created a new Integration Services project, in the Control Flow tab, drag Data Flow Task from the SSIS Toolbox window and to the design area. The Data Flow Task is created. |
| 2. | Switch to the Data Flow tab, go to the Toolbox docking window, in the Data Flow Sources list select Devart Salesforce Source and drag it to the design area. |
| 3. | From the SSIS Toolbox window drag Flat File Source, Devart Salesforce Lookup, and two Devart Salesforce Destinations. |
|
For this example we need two connections - one for the Devart Salesforce components, the other one for the Flat File Source. To create a connection for Salesforce, do the following:
| 1. | Right-click in the Connection Managers pane and select New Connection from the shortcut menu. The Add SSIS Connection Manager dialog box is displayed:
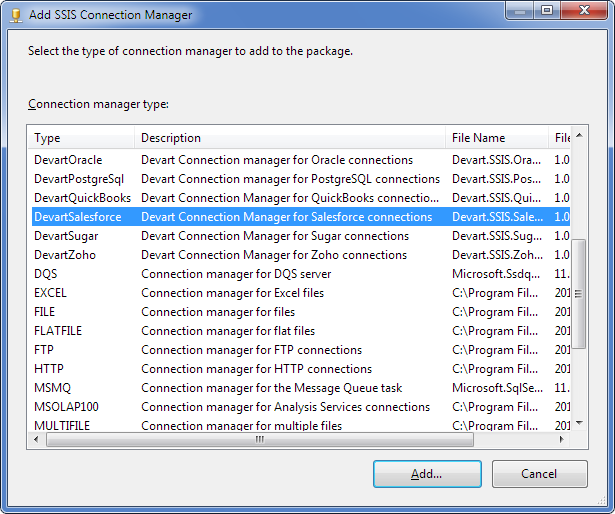 |
| 2. | In the Connection manager type list click DevartSalesforce and click Add. The Devart Salesforce Connection Manager Editor dialog box is displayed. |
| 3. | Specify the User name (email address) and Password, and Security Token you have received when registering at the Salesforce website. If necessary, click Advanced and specify other connection parameters.
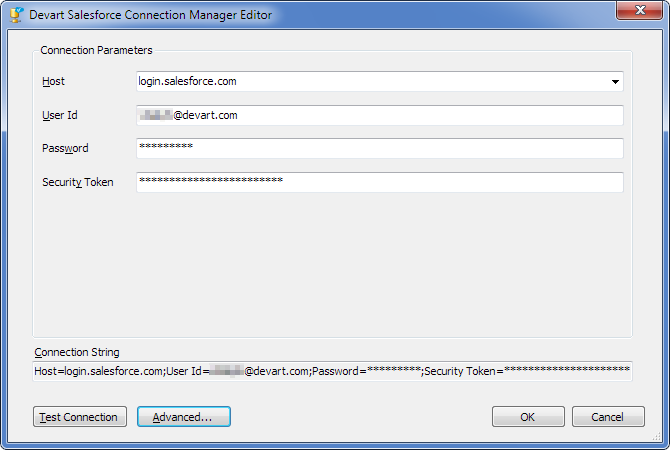 |
The connection for the Salesforce database is now created.
To create a connection for the Flat File Source we do the following:
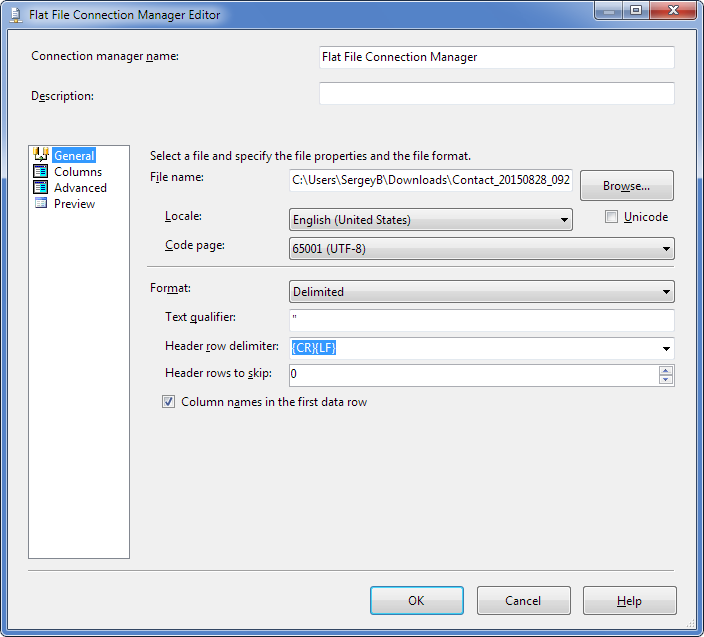
| 1. | Right-click the Connection Managers pane and then click New Flat File Connection. The Flat File Connection Editor dialog box is displayed. |
| 2. | Click Browse and open the CSV file with the Contacts to import. |
| 3. | Specify the file Locale, Code page, and Format settings.
 |
| 4. | Click Columns.
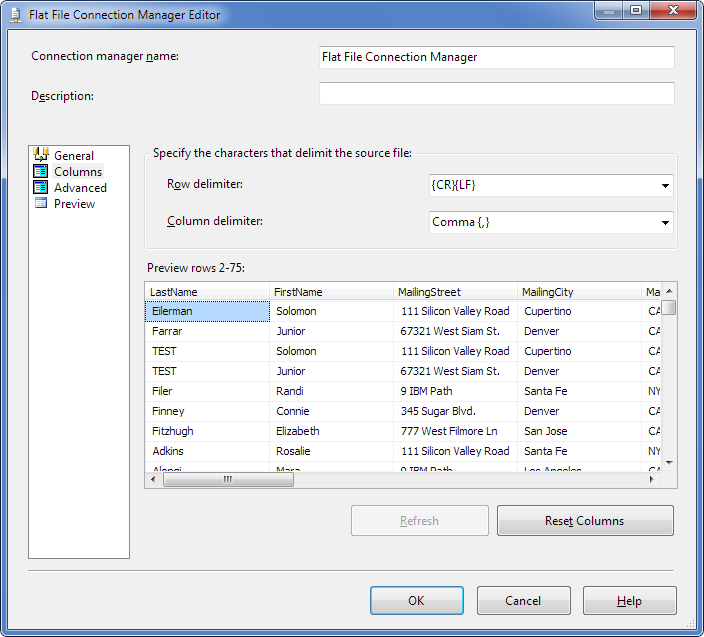 |
| 5. | In the Preview rows make sure that the data is displayed correctly. If necessary, specify the Row delimiter and Column delimiter characters or switch back to the General tab and reconfigure the Format settings. After the data is displayed correctly, click Advanced. |
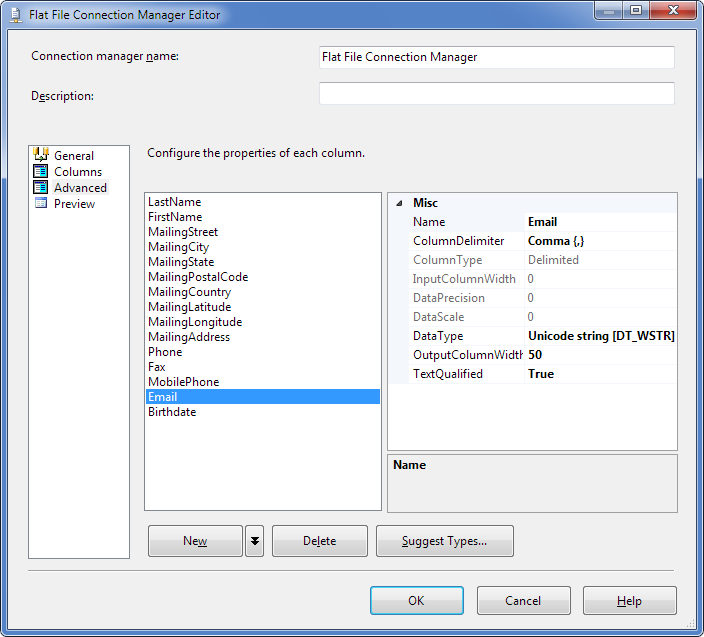
| 6. | Click the Email column and make sure its DataType property is Unicode string [DT_WSTR]. If not, change it to Unicode string [DT_WSTR].
 |
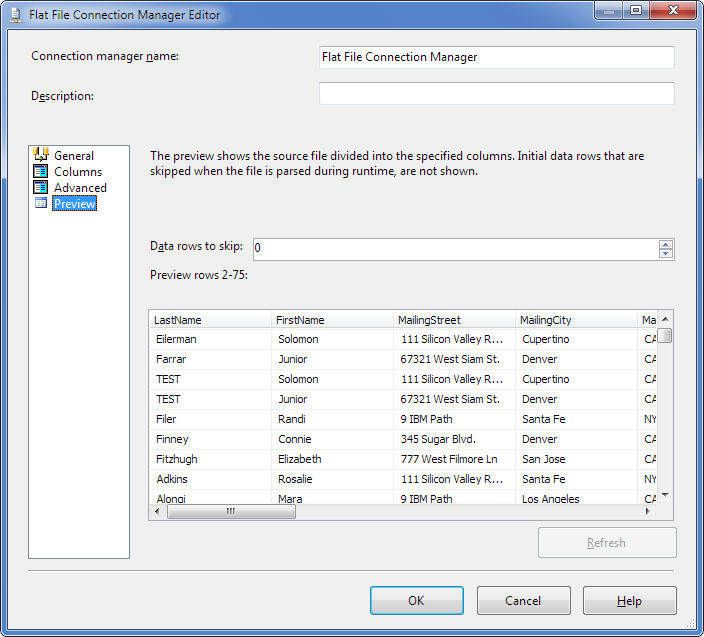
| 7. | You may optionally switch to the Preview tab and preview the file data. Here you can set a number of initial Data rows to skip.
 |
The connection for the Flat File Source is now created.
|
After the two required connections are created, we can proceed to customizing the data flow components.
Configuring Flat File Source
| 1. | In the Data Flow design area, double-click the Flat File Source data flow item. |
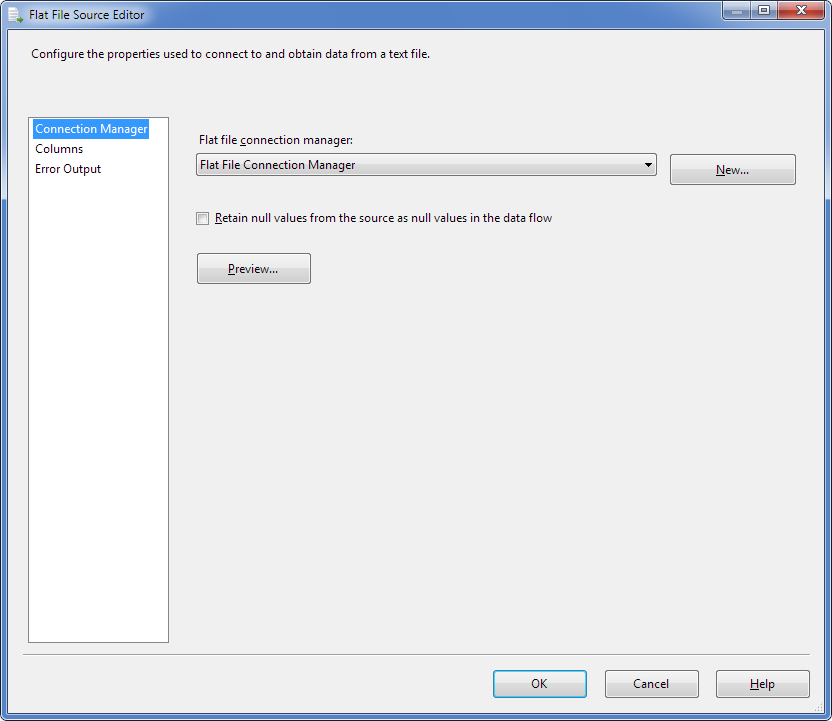
| 2. | The Connection Manager tab of the Flat File Source Editor dialog box is displayed. |
| 3. | Select the required connection in the Flat file connection manager drop-down list. |
| 4. | Select the Retain null values from the source as null values in the data flow check box in case there are empty values in the source CSV file.
 |
| 5. | Switch to the Columns tab. |
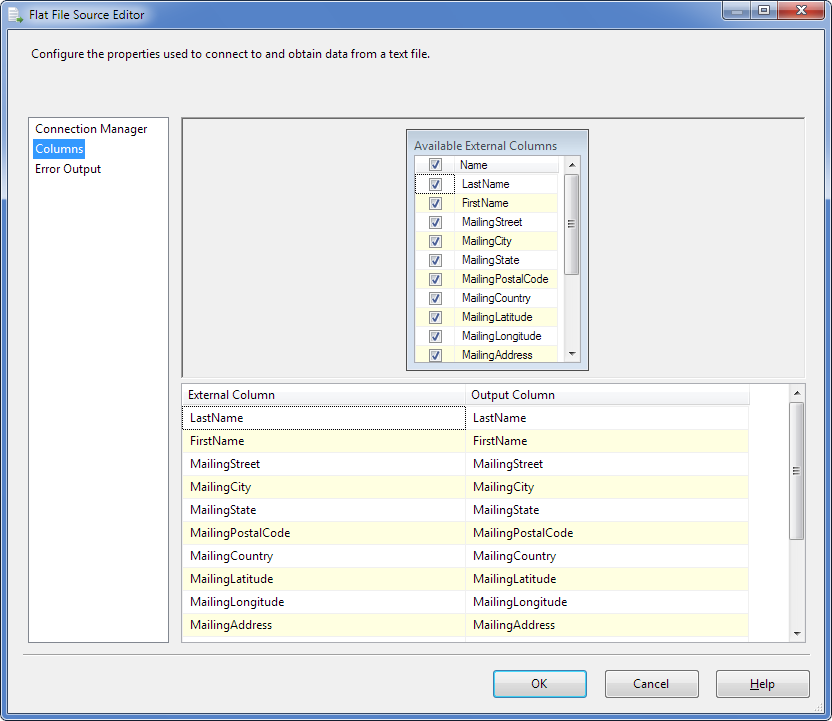
| 6. | Select the columns to import in the Available External Columns lists. |
| 7. | Configure Output Column names, if necessary.
 |
| 8. | Switch to the Error Output tab.
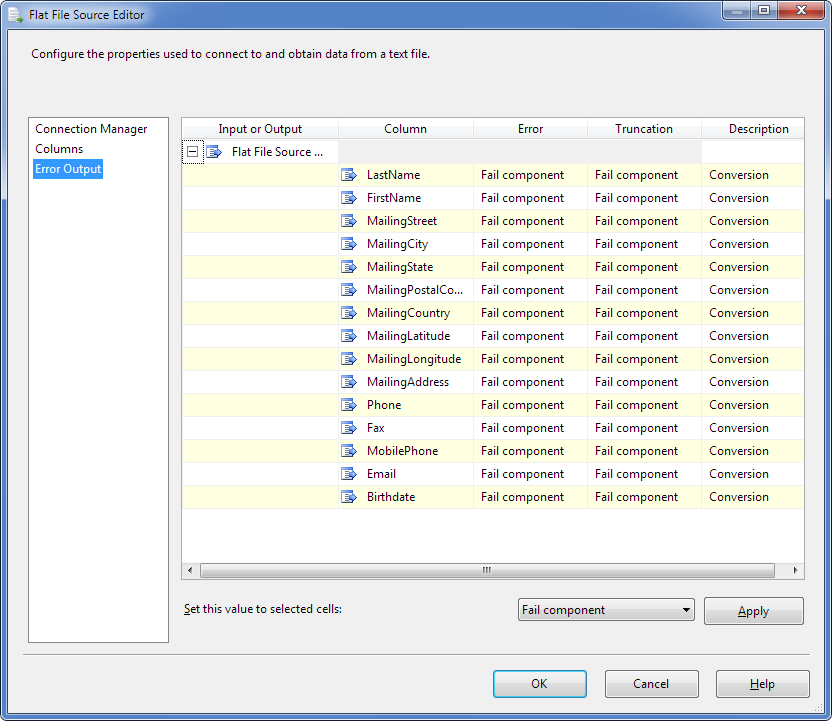
This tab allows you to specify in what way component failure should be treated; the following options are available: Fail component, Redirect row, Ignore failure. After all options are set, click OK. |
If all options are set correctly, the red marker on the data flow object disappears.
Configuring Devart Salesforce Lookup
Proceed to customizing the Devart Salesforce Lookup data flow object.
| 1. | Connect the Flat File Source output to Devart Salesforce lookup. |
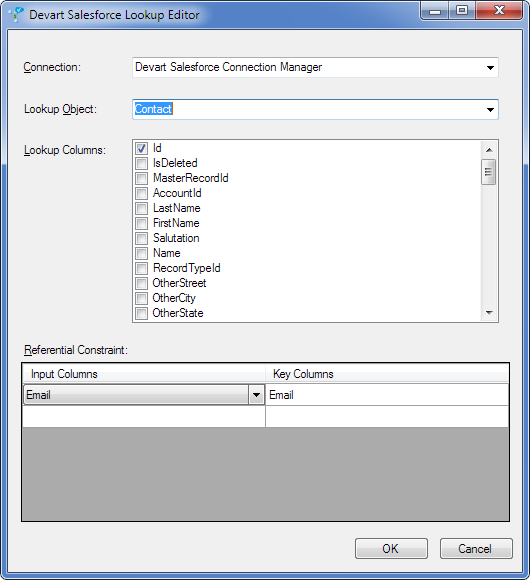
| 2. | Double-click the Devart Salesforce Lookup in the design area. Devart Salesforce Lookup Editor dialog box is displayed. |
| 3. | In the Connection list select the required Devart Salesforce Connection Manager. |
| 4. | In the Lookup Object list select Contact. |
| 5. | To perform an update operation, Devart Salesforce Destination requires an ID field to be mapped, so we need to get the ID values of the contacts to update. Select the ID check box in the Lookup Columns list. |
| 6. | In the first row of the Referential Constraint grid select the Email columns in both Input Columns and Key Columns columns.
 |
| 8. | Connect Devart Salesforce Lookup output to one of the Devart Salesforce Destinations. Input Output Selection dialog box is displayed.
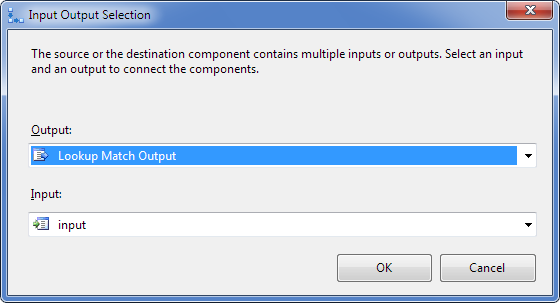 |
| 9. | In the Output list select Lookup Match Output. |
| 10. | Connect Devart Salesforce Lookup output to another Devart Salesforce Destination. Lookup No Match Output is selected automatically. |
If all options are set correctly, the red marker on the data flow object disappears.
Configuring Devart Salesforce Destinations
Proceed to customizing the Devart Salesforce Destination data flow objects.
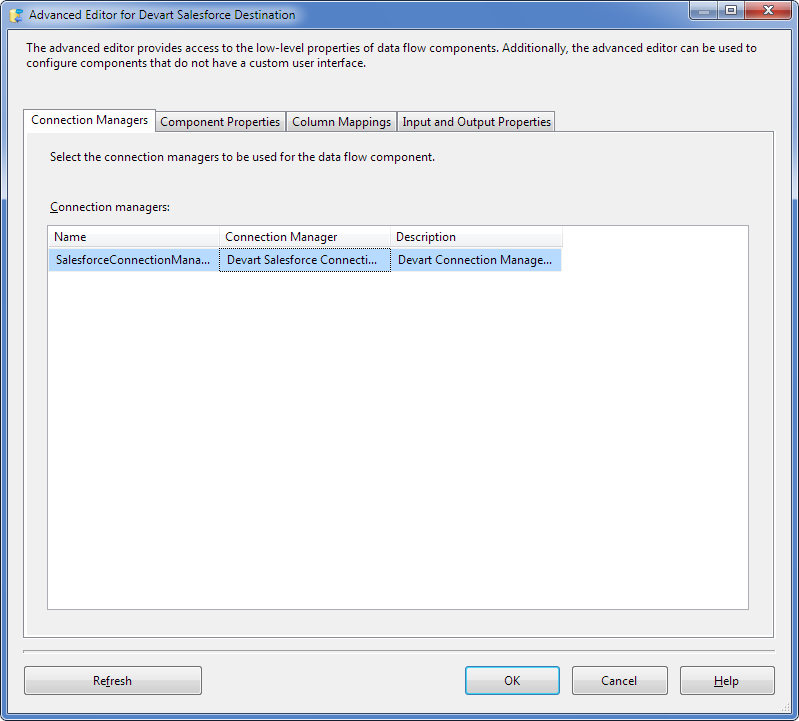
| 1. | Double-click the Devart Salesforce Destination to which the Lookup Match Output is connected in the design area. The Connection Managers tab of the Advanced Editor for Devart Salesforce Destination dialog box is displayed. |
| 2. | Select the Devart Salesforce Connection Manager in the Connection Manager drop-down list and switch to the Component Properties tab.
 |
| 3. | Here you can customize the data flow component properties. Select the Contact in the ObjectName property. In the Operation property select Update.
|
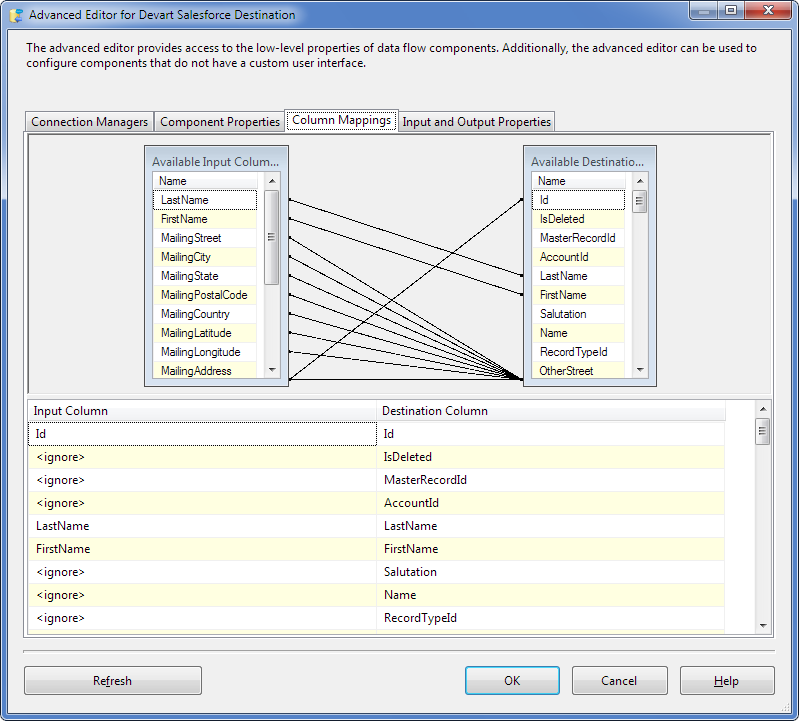
| 4. | Switch to the Column Mappings tab. |
| 5. | SSIS automatically maps columns having the same names. If necessary, specify mapping between the source and destination columns either using the Input Columns drop-down lists, or just by drawing lines between the corresponding columns:
 |
| 6. | Double-click the Devart Salesforce Destination to which the Lookup No Match Output is connected in the design area. The Connection Managers tab of the Advanced Editor for Devart Salesforce Destination dialog box is displayed. |
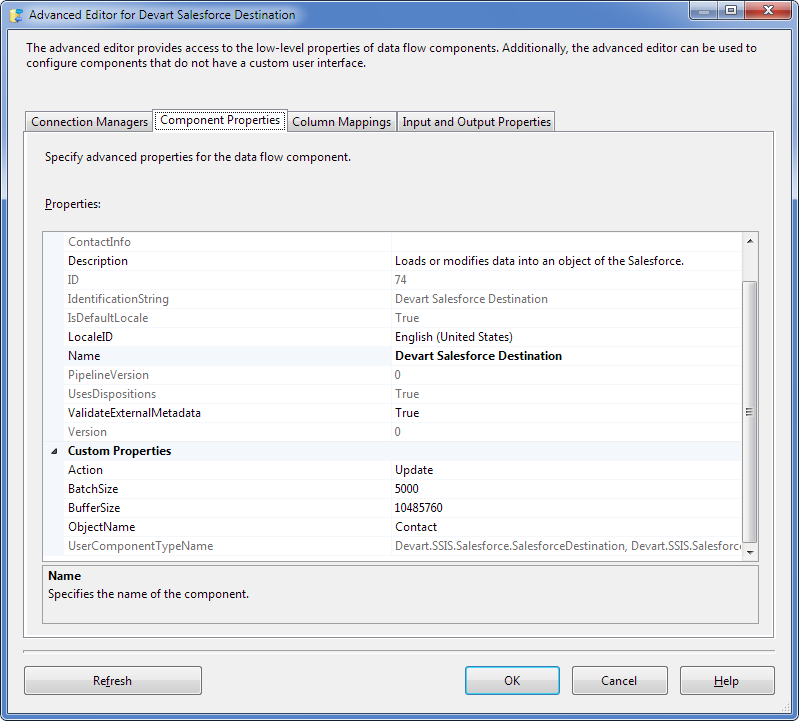
| 7. | Select the Devart Salesforce Connection Manager in the Connection Manager drop-down list and switch to the Component Properties tab. |
| 8. | Here you can customize the data flow component properties. Select the Contact in the ObjectName property.
 |
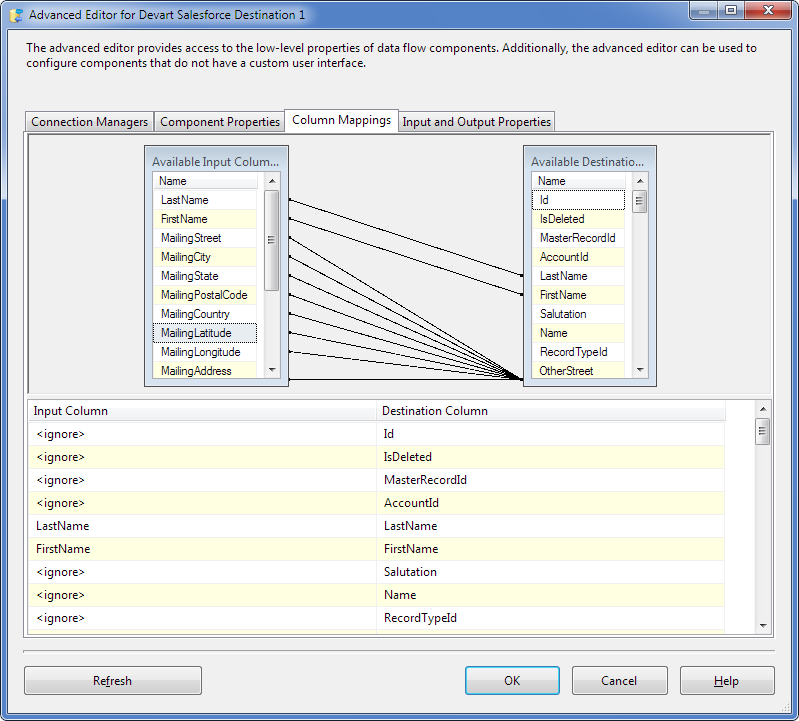
| 9. | Switch to the Column Mappings tab. |
| 10. | SSIS automatically maps columns having the same names. If necessary, specify mapping between the source and destination columns either using the Input Columns drop-down lists, or just by drawing lines between the corresponding columns.
 |
Make sure that the red marker is absent on both Devart Salesforce Destination data flow objects.
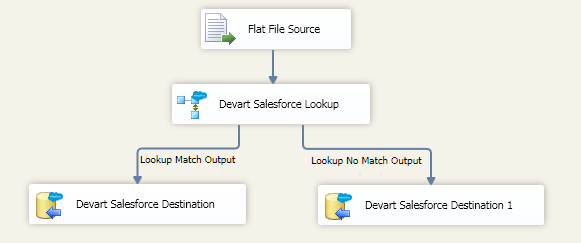
Right-click the design area and then click Execute Task. The green marks on the data flow objects indicate that the data flow process is completed successfully:
|
 Adding DataFlow Components
 Creating Connections
 Configuring DataFlow Components


