Deploying Devart SSIS Data Flow Components on Azure Data Factory

Azure Data Factory is a cloud data integration service for creating data-driven workflows, automating data movement and data transformation. It allows users to create and schedule data-driven workflows (called pipelines) that can collect data from various data sources, process and transform them, and publish output data to data stores, like Azure Synapse Analytics.

SInce v2, Azure Data Factory supports deployment of SSIS Data Flow Component projects, using custom SSIS Components, including Devart SSIS Data Flow Components. This topic will guide you in configuring your Azure Data Factory and all the necessary features in Azure Cloud and deploying your Integration Services packages, using Devart SSIS Data Flow Components, to Azure Data Factory.


ExpandedToggleIconDeployment of Custom SSIS Components

In brief, to deploy a third-party SSIS components on Azure Data Factory, you need to place all the necessary files (like installer of these custom components) to an Azure Storage Blob container, together with a command file with the fixed name main.cmd. This command file should perform the necessary actions for custom SSIS components deployment during Integration Runtime creation. This Azure Storage Blob container should be referenced in the IR creation process with a Shared Access Signature URI. The main.cmd file will be run every time whenever an Integration Runtime node is instantiated.

For Devart SSIS Data Flow Components, you should place the following files to the Azure Storage Blob container:

The Devart SSIS Data Flow Components installation file
The corresponding runtime license key files.
 
Please note that you cannot use the trial license keys, generated on your computer automatically when installing Devart SSIS Data Flow Components. If you want to try Devart SSIS Data Flow Components on Azure Data Factory, please contact us at [email protected], and we will send you the necessary key files.
 
This is not necessary if you have purchased Devart SSIS Data Flow Components. In the latter case, you can use the key files from your computer, generated by Devart SSIS Data Flow Components when activating Devart SSIS Data Flow Components with the license keys, retrieved after purchase.
main.cmd file. For deploying, for example, Devart SSIS Data Flow Components for Salesforce, it must contain the following lines:
 

devartssis.exe /azure /silent /log=%CUSTOM_SETUP_SCRIPT_LOG_DIR%\install.log /COMPONENTS="crm\salesforce" 
 
if not exist "%ALLUSERSPROFILE%\Devart\SSIS Data Flow\License" mkdir "%ALLUSERSPROFILE%\Devart\SSIS Data Flow\License" 
copy /Y ssissalesforce30.key "%ALLUSERSPROFILE%\Devart\SSIS Data Flow\License" 

For other data sources, you can use the following values of the /COMPONENTS parameter:

Data source

Parameter value

MySQL

databases\mysql

Oracle

databases\oracle

PostgreSQL

databases\postgresql

DB2

databases\db2

Dynamics 365

crm\dynamics

Salesforce

crm\salesforce

SugarCRM

crm\sugar

Zoho CRM

crm\zoho

QuickBooks Online

accounting\quickbooks online

FreshBooks

accounting\freshbooks

Bigcommerce

ecommerce\bigcommerce

Adobe Commerce

ecommerce\adobe commerce

Mailchimp

marketing\mailchimp

Salesforce Marketing Cloud

marketing\ExactTarget

Marketo

marketing\marketo

Google BigQuery

datawarehouse\bigquery

Azure Synapse Analytics (formerly, Azure SQL Data Warehouse)

datawarehouse\azure synapse analytics

Amazon Redshift

datawarehouse\redshift

Below you can find a detailed tutorial on configuring Azure Data Factory and deploying all the necessary files and components to it.


ExpandedToggleIcon        Azure Data Factory Configuration

For this tutorial, yoг will need the following:

Devart SSIS Data Flow Components installer and runtime license key files. You can download the installer from our website https://www.devart.com/ssis/download.html. As for runtime license keys, please contact our support at [email protected].
Azure subscription.
SQL Server Management Studio 2012 or higher, the most recent version is recommended. You can get it from Microsoft website.
In this tutorial, the package is deployed from Visual Studio 2017 with SQL Server Data Tools.


If you want to use an existing Azure resource group, skip this step.


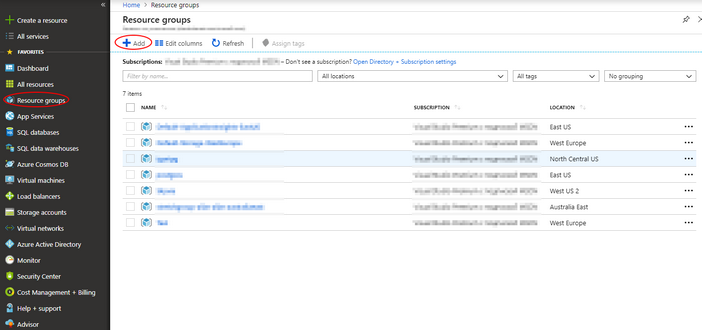
1.In the Azure Portal, on the menu of services, click Resource groups.
2.Click Add (+) to create a new resource group. The Create Resource Group blade is displayed.
 
1-1-resource-groups_zoom50
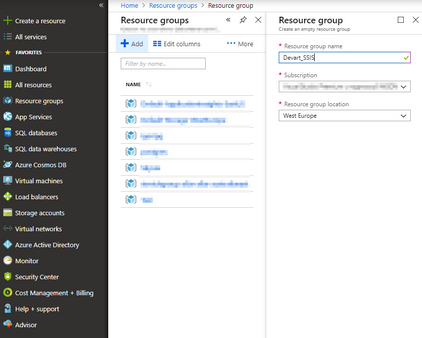
3.Enter the resource group name. In our example, we will use the name Devart_SSIS. Specify other parameters, if necessary.
 
1-2-new-resource-group_zoom50
4.Click Create.


If you want to use an existing Azure SQL Server, skip this step.


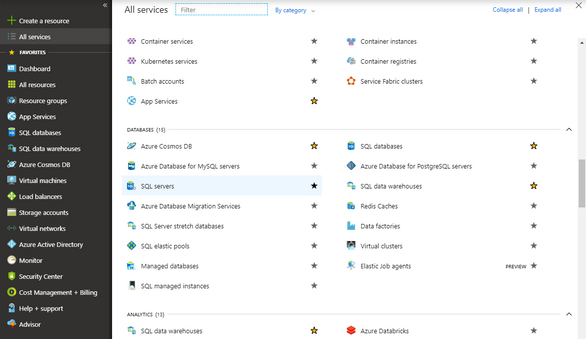
1.In the Azure Portal, on the menu of services, click All services.
 
2-1-all-resources_zoom50
2.In the Databases category click SQL servers.
 
2-2-sql-servers_zoom50
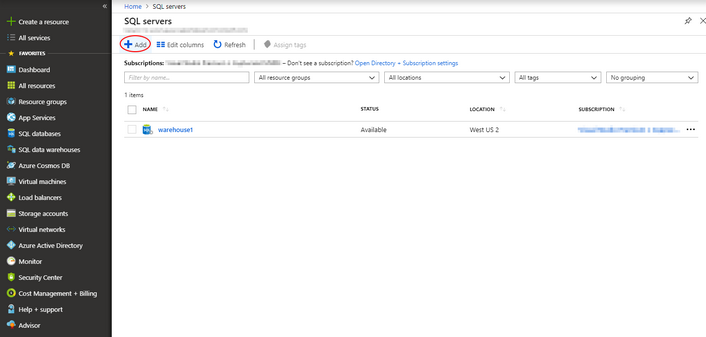
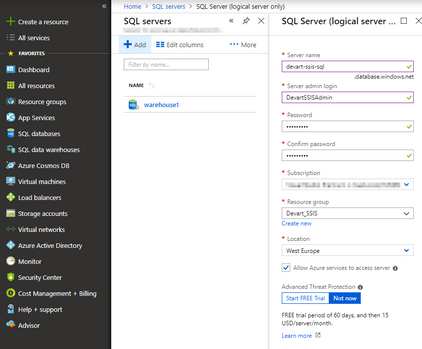
3.Click Add (+) to create a new SQL server.
4.Specify the server name (in our example, devart-ssis-sql) and server admin login parameters.
5.In the Resource group box select your resource group.
 
2-3-new-sql-server_zoom50
6.Click Create.
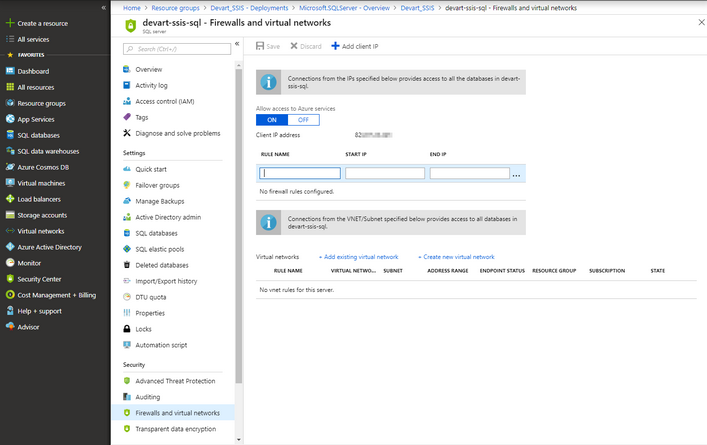
7.Open the result SQL Server details and, in the menu on the left, click Firewalls and virtual networks.
 
2-4-firewall_zoom50
8.If necessary, add a rule to allow access from your IP.
9.Click Save.


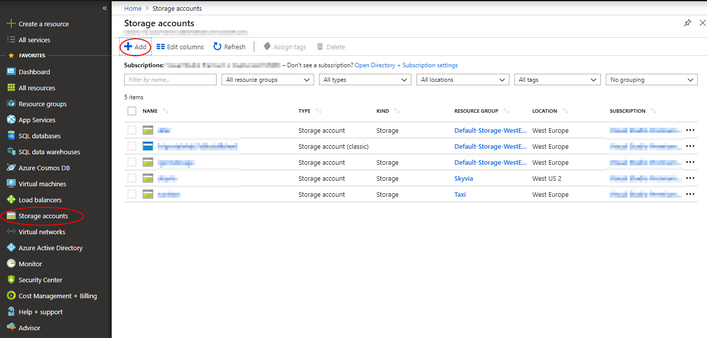
1.In the Azure Portal, on the menu of services, click Storage accounts.
2.To create a new storage account, Click Add (+). If you want to use an existing one, click the corresponding storage account and skip the steps 3 - 7.
 
3-1-storage-accounts_zoom50
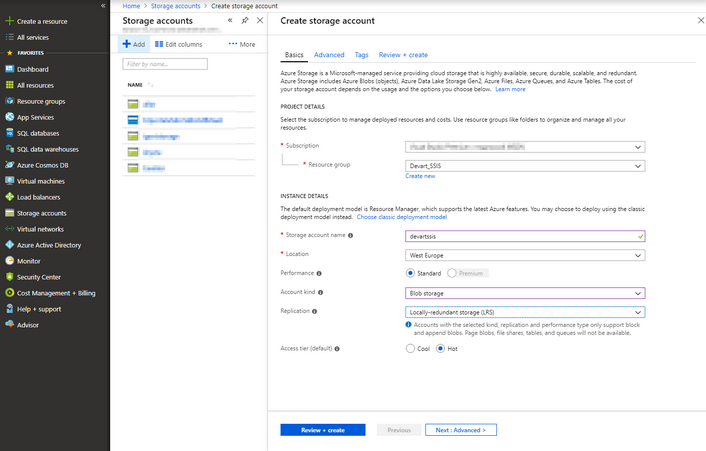
3.Select your Resource group and enter the Storage account name.
 
3-2-create-storage-account_zoom50
4.In the Account kind box select Blob storage.
5.Optionally set other parameters.
6.Click Review + create, then click Create.
7.When the storage account finishes its deployment, click it.
 
3-3-containers_zoom50
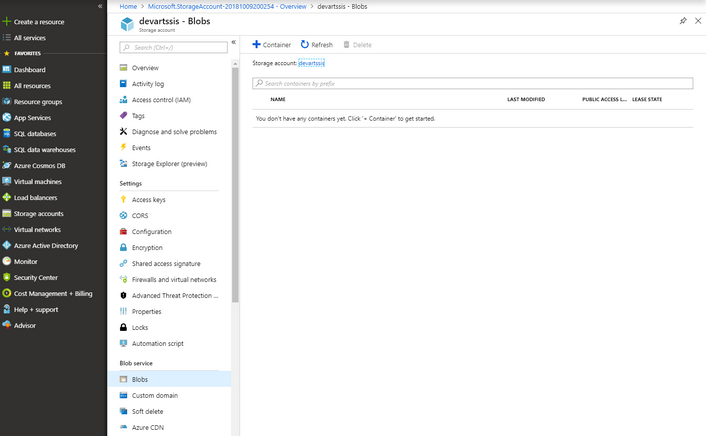
8.In the menu on the left, under Blob service, click Blobs.
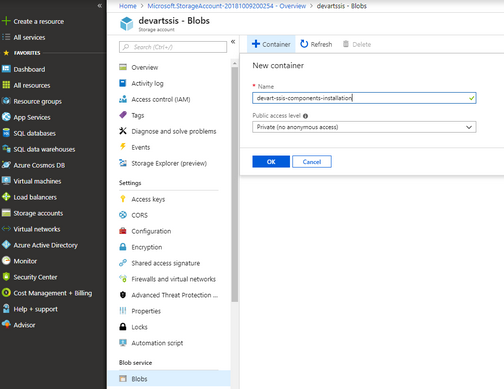
9.Click + Container to create a new storage blob container.
 
3-4-create-container_zoom50
10.Click OK.
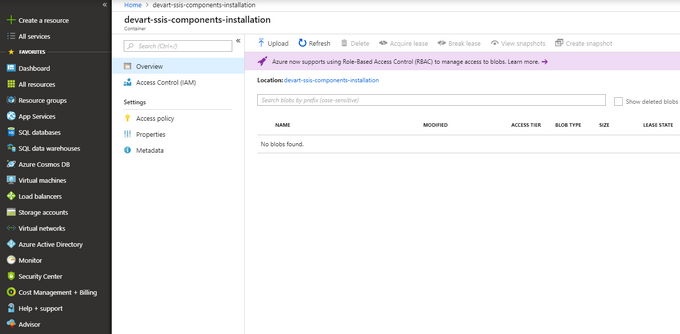
11.Click the container name to open the container.
 
3-5-container_zoom50
12.Prepare the main.bat file with the following content:
 
devartssis.exe /azure /silent /log=%CUSTOM_SETUP_SCRIPT_LOG_DIR%\install.log /COMPONENTS="crm\salesforce"
 
if not exist "%ALLUSERSPROFILE%\Devart\SSIS Data Flow\License" mkdir "%ALLUSERSPROFILE%\Devart\SSIS Data Flow\License"
copy /Y ssissalesforce30.key "%ALLUSERSPROFILE%\Devart\SSIS Data Flow\License"
 
This is an example file for installing Devart SSIS Data Flow Components for Salesforce. If you need to install components for another source, you will need to modify a value for the /COMPONENTS parameter and the key file name. To install Devart SSIS Data Flow Components Components for multiple sources, list them in the /COMPONENTS parameter, separated with commas, and add the corresponding lines for all the necessary license keys.
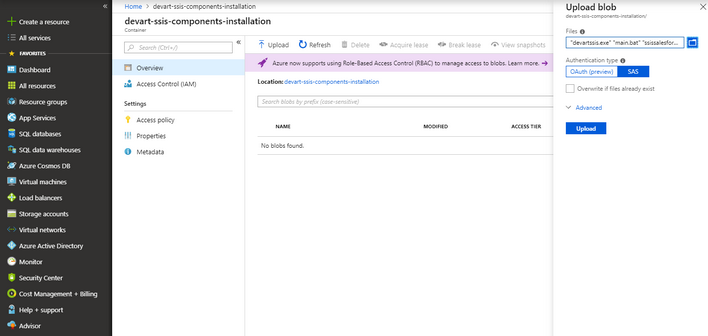
13.In the Azure Portal, in the created container, click Upload and upload all the necessary files: the main.bat file, the Devart SSIS Data Flow Components installer file (devartssis.exe), and all the necessary license key files.
 
3-6-upload_zoom50
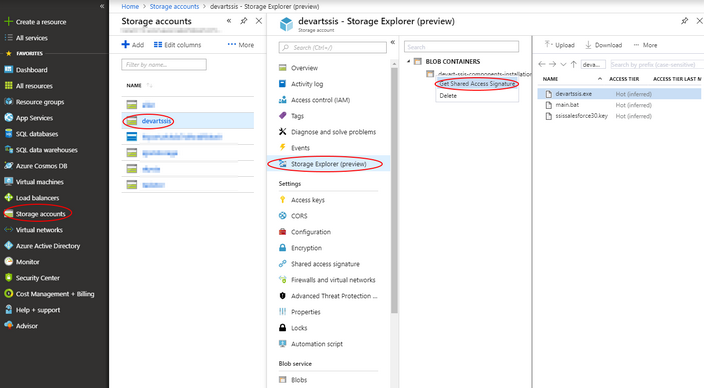
14.Get the Shared Access Signature URI of the container. For this, you either may download and use the Azure Storage Explorer tool, as described in the Microsoft documentation (the Instructions section, item 3.), or get it from the Azure Portal:
a.Open your storage account with the necessary Blob Storage container.
b.In the storage account, in the menu on the left, click Storage Explorer (preview).
 
3-7-storage-explorer_zoom50
c.Expand the BLOB CONTAINERS node and right-click the container with the necessary files.
d.Click Get Shared Access Signature.
 
3-8-generate-sas_zoom50
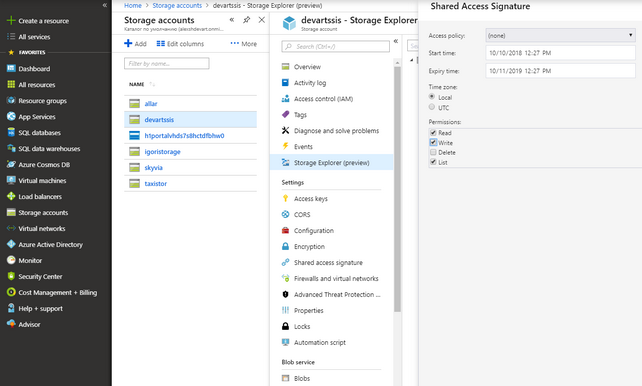
e.Set a sufficiently long expiry time and select check boxes for at least Read, Write, and List permissions.
f.Click Create.
15.Copy the generated URL and save it somewhere. You will need it when configuring Azure Data Factory.


You can find a detailed instruction on how to create an Azure Data Factory and provision an Azure-SSIS integration runtime in Microsoft documentation. Here we provide only the required steps in brief:


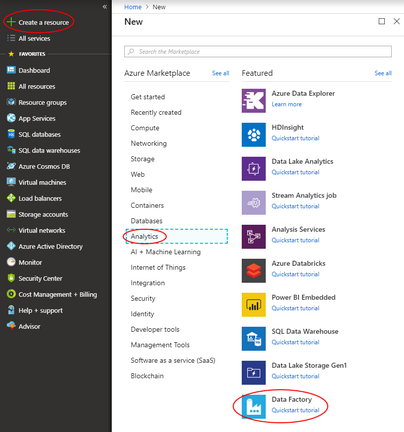
1.In the Azure Portal, on the menu of services, click + Create a resource.
2.Select Analytics and click Data Factory.
 
4-1-create-data-factory_zoom50
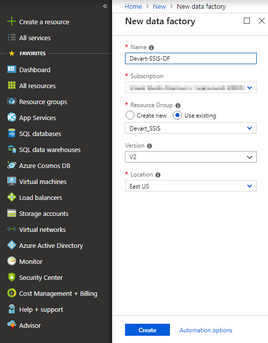
3.Enter a globally unique Name, select your Resource Group, and change other parameters if necessary.
 
4-2-new-data-factory_zoom50
4.Click Create.
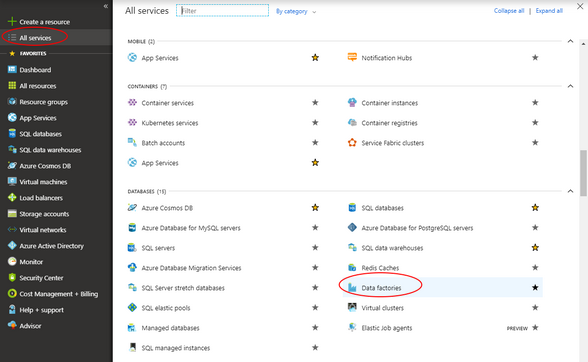
5.After the creation is complete, open the data factory page (you can do it by clicking All services on the menu of the services, then clicking Data factories in the Databases category, and then clicking your data factory).
 
4-3-data-factories_zoom50
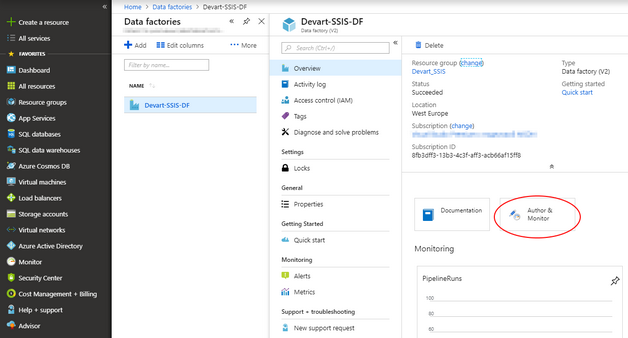
6.Click Author & Monitor. A new browser tab will open.
 
4-4-data-factory_zoom50
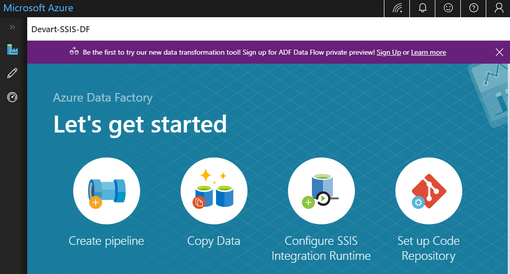
7.Click Configure SSIS Integration Runtime.
 
4-5-data-factory-page_zoom50
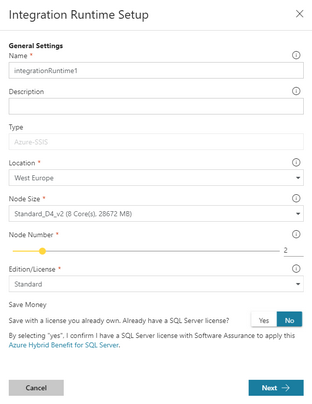
8.Specify the necessary settings and click Next.
 
4-6-data-factory-general-settings_zoom50
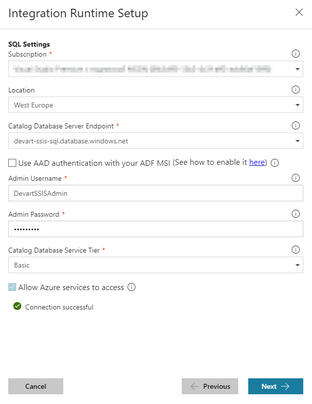
9.Enter the necessary SQL Server parameters (that you used when creating your Azure SQL Server) and click Next.
 
4-7-data-factory-sql-server_zoom50
10.Into the Custom Setup Container SAS URI box, paste your Shared Access Signature URI of the container with the Devart SSIS Data Flow Components setup files.
11.Click Finish.


After this, Azure will start the integration runtime (note that it takes some time) and you may deploy your SSIS packages to it.


ExpandedToggleIcon        Deploying SSIS Packages on Azure Data Factory

There are different ways to deploy and run an Integration Services package, deployed on the Azure SQL Server. You can see more details about it in Microsoft documentation. In this tutorial, we deploy it directly from Visual Studio and use Azure Data Factory pipeline to run the package. See also more details here: https://docs.microsoft.com/en-us/azure/data-factory/how-to-invoke-ssis-package-ssis-activity


Prior to deployment, you need to create a folder for your project in your Integration Services catalog on SQL Server. You can use SQL Server Management Studio to create the necessary folder:


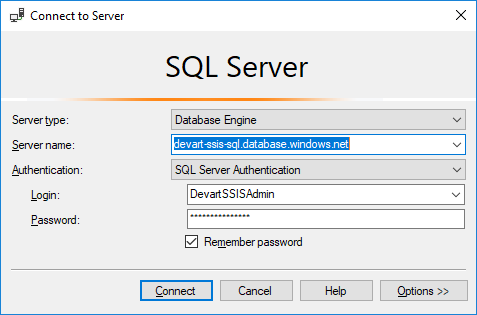
1.On the File menu click Connect Object Explorer.
2.Specify the Server name and authentication parameters.
 
5-1-ssms-connect
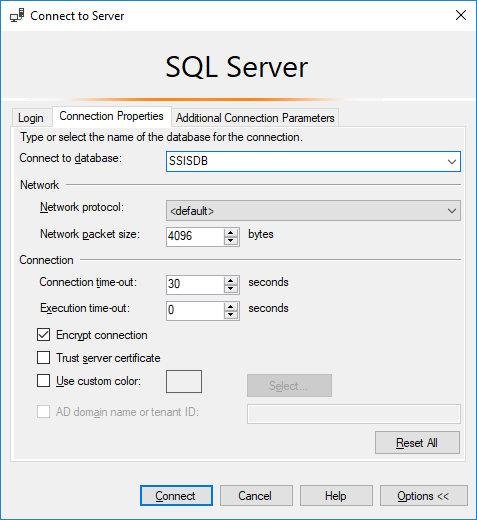
3.Click Options >>.
4.On the Connection properties tab, in the Connect to database box, select the Integration Services catalog (by default, SSISDB). Note that this step is required in order to be able to create folders in the catalog.
 
5-2-ssms-database
5.Click Connect.
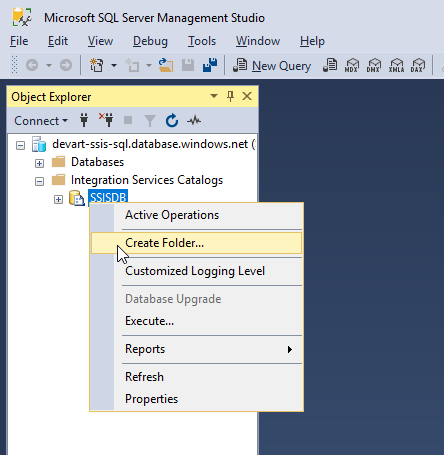
6.Expand the corresponding connection node in Object Explorer.
7.Expand the Integration Services Catalogs node.
8.Right-click your catalog and then click Create Folder.
 
5-3-ssms-create-folder
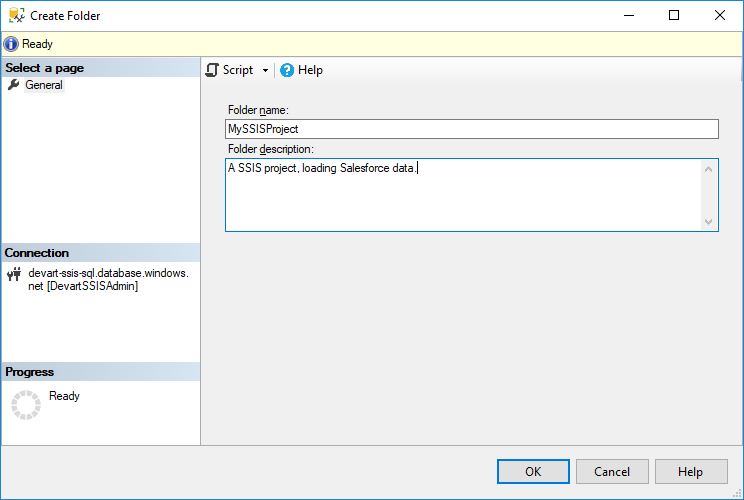
9.Specify the folder name and, optionally, folder description.
 
5-4-ssms-create-folder-dialog
10.Click OK, and the folder will be created.


After you have configured an Integration Runtime on Azure, you may use SQL Server Management Studio to deploy SSIS packages to it or deploy them directly from Visual Studio. For this, open your package in Visual Studio and on the Project menu click Deploy. Then, in the Integration Services Deployment Wizard, perform the following steps:


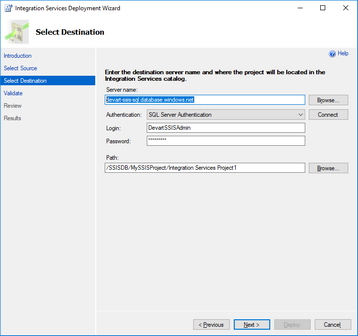
1.Click Next.
2.Select your SSIS project as a source.
3.Specify the necessary parameters to log in to your Azure SQL Server and click Connect.
 
6-1-deploy-target_zoom50
4.Specify the Path to your Integration Services catalog folder to deploy the project to.
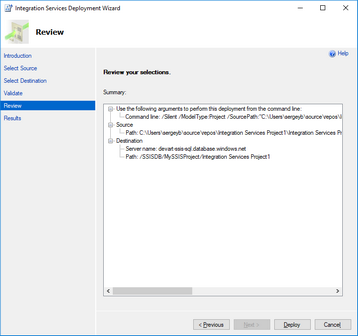
5.Click Next to validate the project, then click Next to review deployment actions, and then click Deploy.
 
6-3-deploy-review_zoom50


Note that after the project deployment, data source connection credentials, like passwords, tokens, secrets, etc. are reset. You need to re-configure your package on your Azure SQL Server and re-enter the necessary credentials. For this, connect to your Integration catalog with the SQL Server Management Studio, as described above, and perform the following steps:


1.Expand the Integration Services Catalogs node.
2.Expand the Projects node.
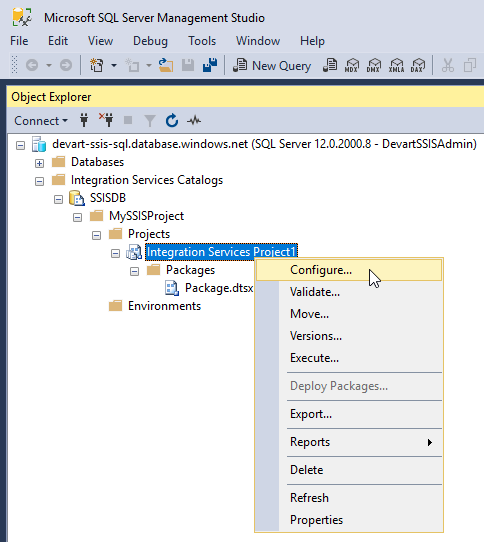
3.Right-click your deployed Integration Services project and then click Configure.
 
6-5-configure
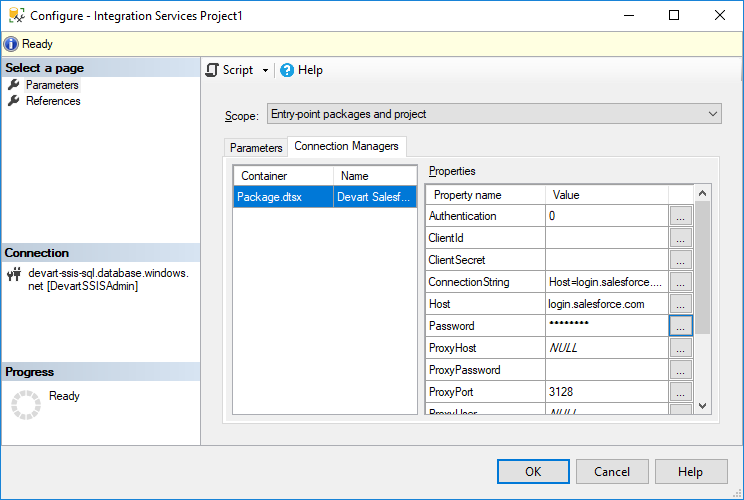
4.In the Configure dialog box switch to the Connection Managers tab.
 
6-6-configure-connection-manager
5.For all the connection managers reenter the necessary security parameters. For example, for Devart Salesforce Connection Manager, you need to re-enter Password and Security Token parameters (for UserNamePassword authentication).
6.Click OK.


A pipeline in Azure Data Factory is a logical grouping of activities that together perform a task. You can find more information about pipelines and activities in Microsoft documentation. To create a pipeline for running a deployed integration package, perform the following steps:


1.Open the overview page of your data factory (you can do it by clicking All services on the menu of the services, then clicking Data factories in the Databases category, and then clicking your data factory).
2.On this page, click Create pipeline.
 
4-5-data-factory-page_zoom50
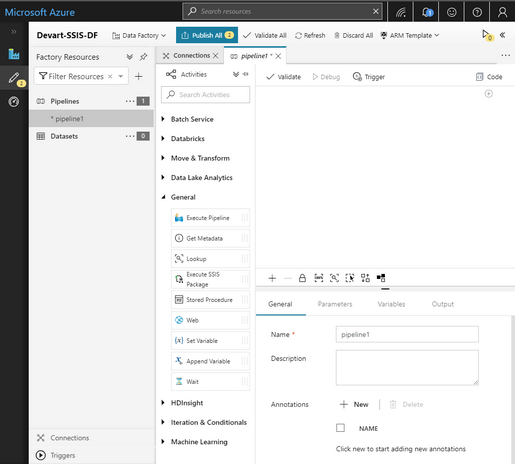
3.In the Activities toolbox, expand General, and drag the Execute SSIS Package activity to the pipeline designer.
 
7-2-new-pipeline_zoom50
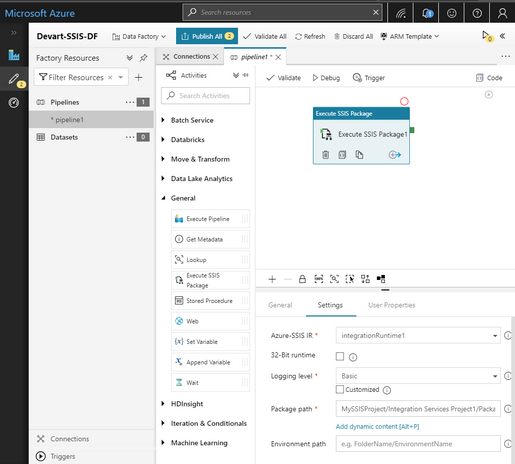
4.Below the designer, optionally specify General parameters for this activity, and switch to the Settings tab.
 
7-4-package_zoom50
5.Select your Integration Runtime in the Azure-SSIS IR box.
6.Enter your package path in the Package path box. Note that this path should start from the folder name, not the Integration catalog name, and should include the name of the package (not project). In our example it is MySSISProject/Integration Services Project1/Package.dtsx
7.Optionally specify other parameters and click Publish All to save changes.
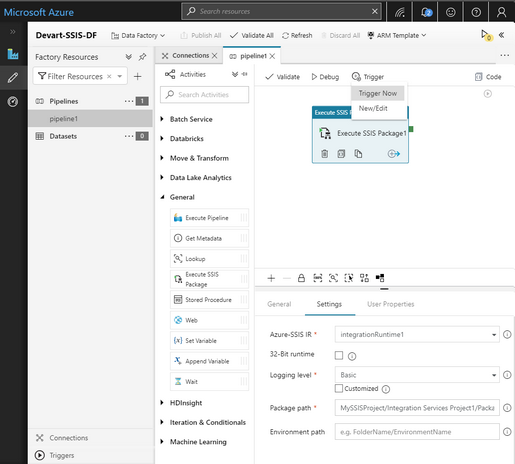
8.Click Trigger and then Trigger Now to start the pipeline.
 
7-5-trigger_zoom50
9.Specify values for package parameters, if any, and click Finish.


After this, the pipeline is started, and you can monitor its execution and see the results on the Monitor page of your data factory.


7-6-monitor_zoom50