How to connect with Microsoft Entra ID authentication
Microsoft Entra ID is a Microsoft solution with a single or multi-factor authentication that ensures more secure access to the database.
After Microsoft Entra authentication is set up for your Azure SQL instance, you can connect to the Azure database using SQL Server Management Studio (SSMS). From there, you can perform SQL operations using dbForge SQL Complete, an ultimate SSMS add-in.
Connect with Microsoft Entra ID authentication
To connect with Microsoft Entra ID authentication, you have the following authentication options available:
Connect to Azure SQL with Microsoft Entra Password
This method lets you authenticate using your Microsoft Entra (Azure AD) username and password.
1. Open SSMS.
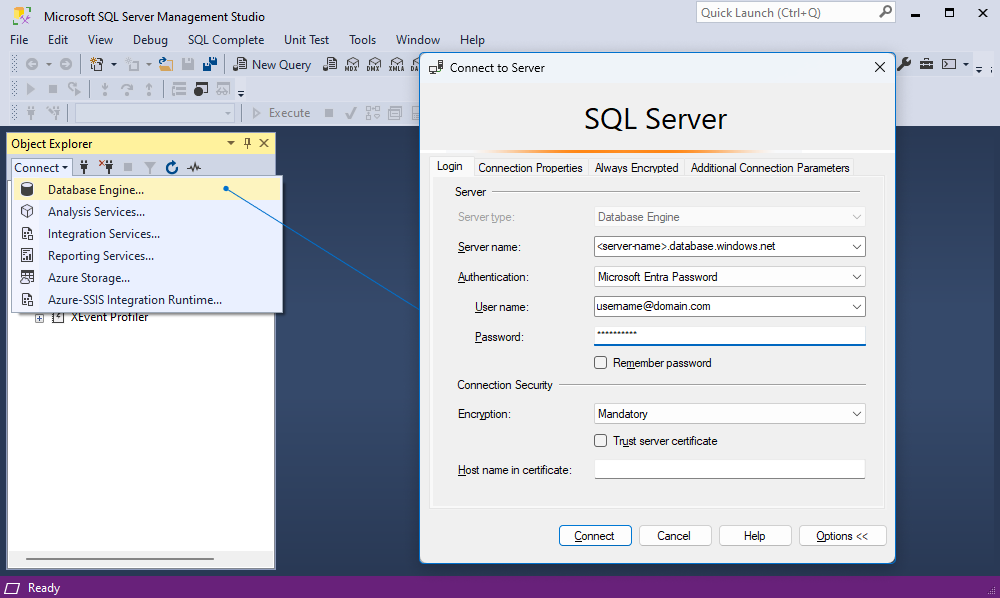
2. On the toolbar of Object Explorer, select Connect > Database Engine.
3. On the Login tab of the Connect to Server dialog, specify the connection details:
- Server name: Specify a URL of the Azure SQL Server instance in the following format:
<server-name>.database.windows.net. - Authentication: Select Microsoft Entra Password.
- User name: Specify a Microsoft Entra ID username with Azure SQL database permissions in the following format:
[email protected]. - Password: Specify the password associated with the specified Microsoft Entra ID username.
- Encryption: Select the encryption level for the connection. The default value is Mandatory.
- Trust server certificate: Select this option to skip the server certificate validation. By default, the option is deactivated (set to False), which ensures better security by using enforced trusted certificates.
- Host name in the certificate: Leave it blank to ensure the certificate matches the server name. Fill this field only when the server name differs from the Common Name or Subject Alternate Name, such as when using DNS aliases.
Note
You must specify a username from a Microsoft Entra ID account or a managed or federated domain linked to Microsoft Entra ID.
4. Select Connect to establish the connection.
When the connection is successful, the Connect to Server dialog is closed. The connection with databases appears in Object Explorer.
Connect to Azure SQL with Microsoft Entra Integrated
This method is used when your on-premises Windows domain is federated with Microsoft Entra ID, and you’re logged in to your machine with those credentials.
Note
The Microsoft Entra Integrated authentication works only if your local machine is connected to a domain federated with Microsoft Entra ID.
1. Open SSMS.
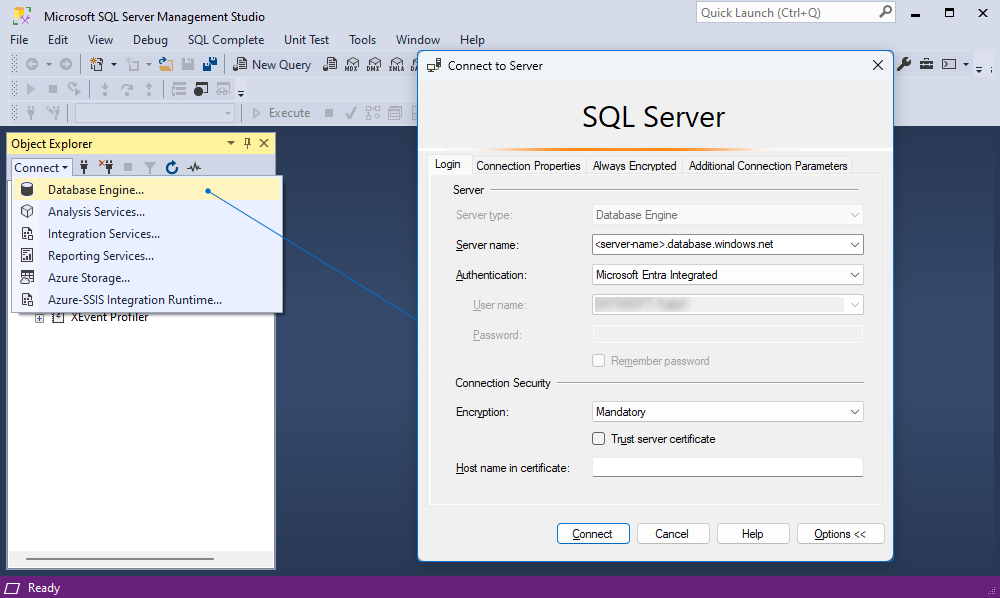
2. On the toolbar of Object Explorer, select Connect > Database Engine.
3. On the Login tab of the Connect to Server dialog, specify the connection details:
- Server name: Specify a URL of the Azure SQL Server instance in the following format:
<server-name>.database.windows.net. - Authentication: Select Microsoft Entra Integrated.
- User name: It is automatically pre-filled with your Windows credentials.
- Encryption: Select the encryption level for the connection. The default value is Mandatory.
- Trust server certificate: Select this option to skip the server certificate validation. By default, the option is deactivated (set to False), which ensures better security by using enforced trusted certificates.
- Host name in the certificate: Leave it blank to ensure the certificate matches the server name. Fill this field only when the server name differs from the Common Name or Subject Alternate Name, such as when using DNS aliases.
4. Select Connect to establish the connection.
When the connection is successful, the Connect to Server dialog is closed. The connection with databases appears in Object Explorer.
Connect to Azure SQL with Microsoft Entra MFA
This method allows you to use MFA for secure authentication.
1. Open SSMS.
2. On the toolbar of Object Explorer, select Connect > Database Engine.
3. On the Login tab of the Connect to Server dialog, specify the connection details:
- Server name: Specify a URL of the Azure SQL Server instance in the following format:
<server-name>.database.windows.net. - Authentication: Select Microsoft Entra MFA.
- User name: Specify a Microsoft Entra username with Azure SQL database permissions in the following format:
[email protected]. -
Encryption: Select the encryption level for the connection. The default value is Mandatory.
Note
Users who connect to Azure SQL Database and Azure SQL Managed Instance must update existing connections in the most recently used list to use the Strict (SQL Server 2022 and Azure SQL) encryption level.
- Trust server certificate: Select this option to skip the server certificate validation. By default, the option is deactivated (set to False), which ensures better security by using enforced trusted certificates.
- Host name in the certificate: Leave it blank to ensure the certificate matches the server name. Fill this field only when the server name differs from the Common Name or Subject Alternate Name, such as when using DNS aliases.
4. Select Connect to establish the connection.

5. The Sign in to your account dialog opens, where you need to enter the username from the Microsoft account you provided in Step 2.
Note
No password is required if a user belongs to the domain connected to Microsoft Entra ID.
6. You’ll be prompted to authenticate using one of the methods configured based on the MFA administrator setting.
SSMS will connect to the Azure SQL database when verification is complete successfully. The Connect to Server dialog is closed, and the connection with databases appears in Object Explorer.
Encryption levels
The following table shows the encryption levels available for Microsoft Entra authentication.
| Encryption | Description | Default state |
|---|---|---|
| Optional | Encryption is used if the server supports it, but the connection can proceed even if encryption is not enforced. | No |
| Mandatory | Encryption is required, and the connection will fail if encryption is not supported or can’t be negotiated. | Yes |
| Strict (SQL Server 2022 and Azure SQL-specific) | Encryption is strictly enforced, and the client verifies the server’s TLS/SSL certificate. The connection will fail if the server certificate is invalid or cannot be verified by a trusted Certificate Authority (CA). Note that the Trust server certificate checkbox is unavailable. |
No |
Worked example: Validate the connection to an Azure SQL database with Microsoft Entra MFA authentication
Let’s walk through how to connect to an Azure SQL database using Microsoft Entra MFA authentication and confirm the connection by executing a SELECT query with dbForge SQL Complete.
1. In the Connect to Server dialog, select the Microsoft Entra MFA authentication and specify all the connection details, including the Strict (SQL Server 2022 and Azure SQL-specific) encryption.
2. Select Connect to create the connection.

3. Next, sign in to the specified Microsoft account and confirm the verification.
In the case of successful verification, the new connection appears in Object Explorer.
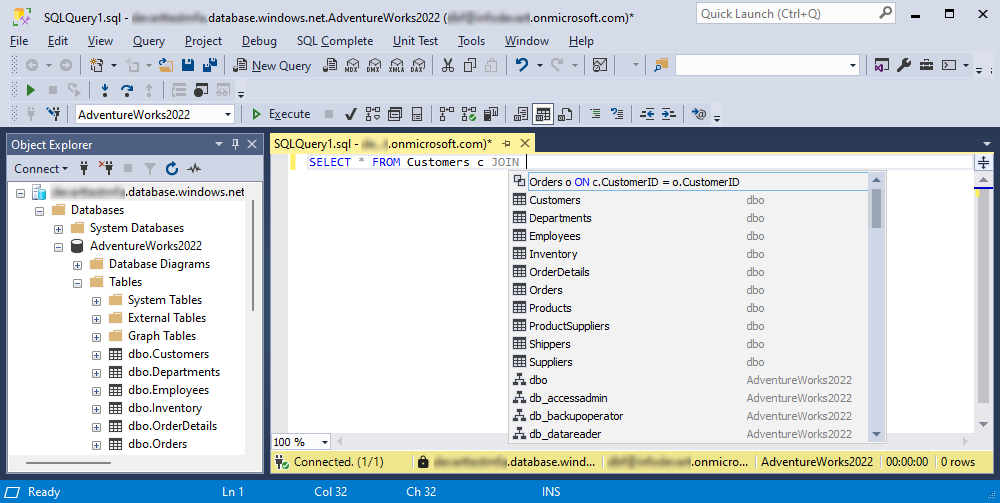
4. On the toolbar, select New Query and start typing the SELECT query. As you can see, SQL Complete prompts a list of available JOIN statements while typing.
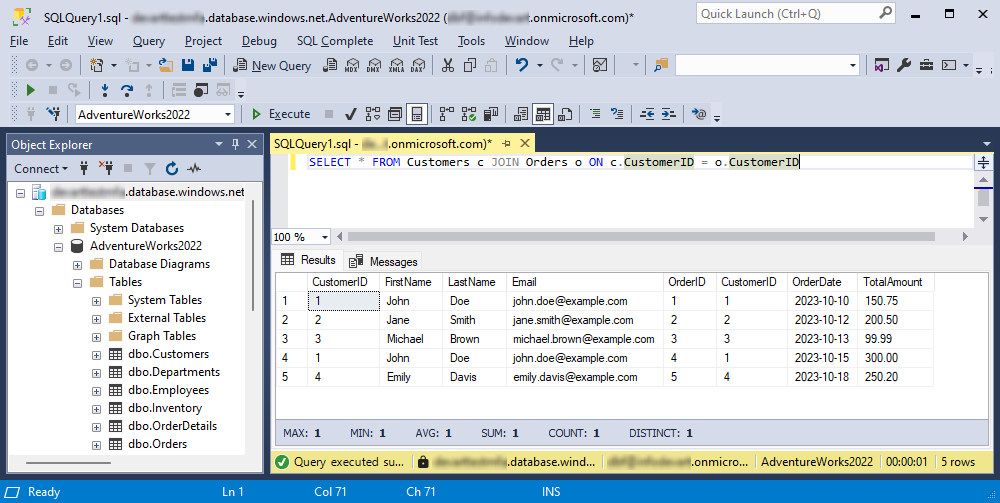
5. Insert the required statement and execute the query.
The result would be as follows: