Installing and Activating Software Remotely
Group Policy automated-program installation is specifically designed for deploying Windows Installer packages (MSI files).
Therefore, when deploying the ODBC Driver for Brevo using Group Policy, be sure to use the corresponding MSI file for the ODBC Driver for Brevo.
Prerequisites: Locating the MSI Installation File
Prior to making configuration settings in the Group Policy, you'll need to create a distribution folder:
-
Create a shared network folder on the publishing server.
-
Set the appropriate sharing permissions on this folder to allow read access to the driver installation package for all domain users.
-
Download the ODBC Driver for Brevo MSI file, and place it in the network folder.
The MSI file for the ODBC Driver for Salesforce is taken as an example to illustrate the Group Policy installation process. Use the same steps described in this section when installing the ODBC Driver for Brevo.
Further in this section, you'll find more detailed information on how to deploy and activate the ODBC Driver for Brevo on remote client computers using Group Policy.
Server-Side Actions
-
Open the Group Policy Management desktop application.
-
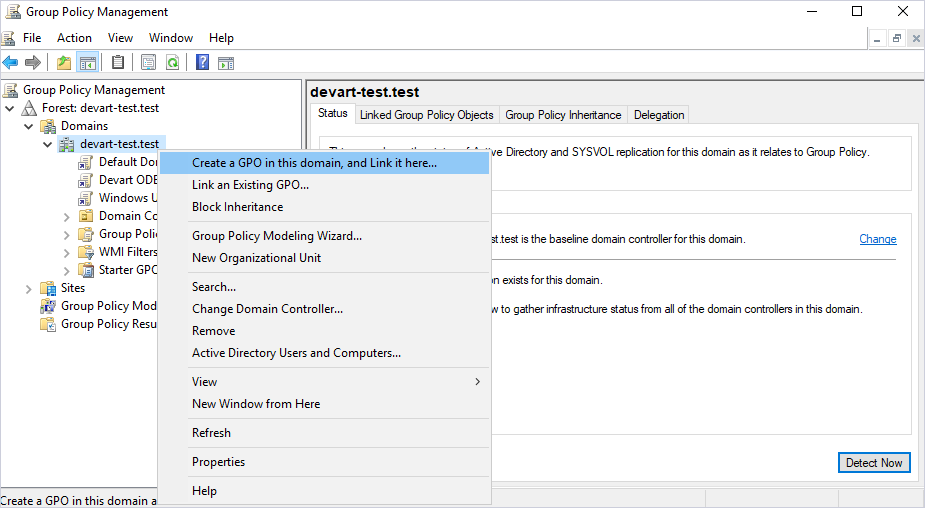
In the Group Policy Management window, navigate to the desired forest node, then expand the appropriate option under the Domains node. For this example, we'll select devart-test.test.
Right-click the Domains node, and from the context menu, select Create a GPO in this domain, and Link it here.
-
You can now create a New Group Policy Object. In the New GPO dialog enter a name for the new object and click OK. The new GPO will then appear within the Group Policy Management container.
For example, let's create a GPO named after the ODBC driver name.
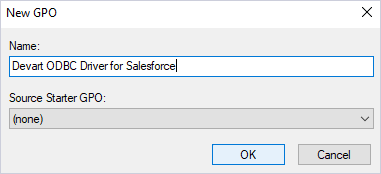
Keep in mind that each ODBC Driver for Brevo Windows installation package corresponds to one Group Policy Object (GPO), which is important for managing future software upgrades.
To install multiple drivers using Group Policy, you need to create a separate GPO for each driver you want to deploy.
-
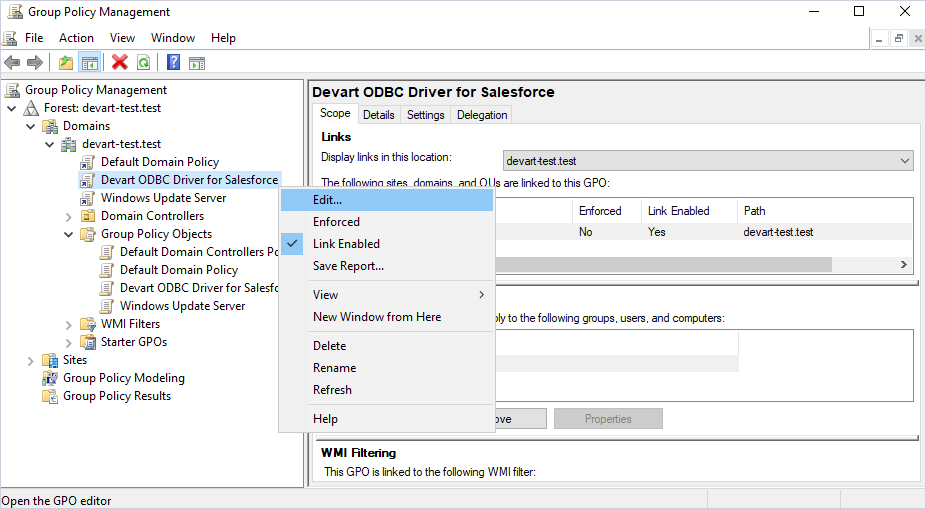
Right-click the new object and select Edit from the context menu.
-
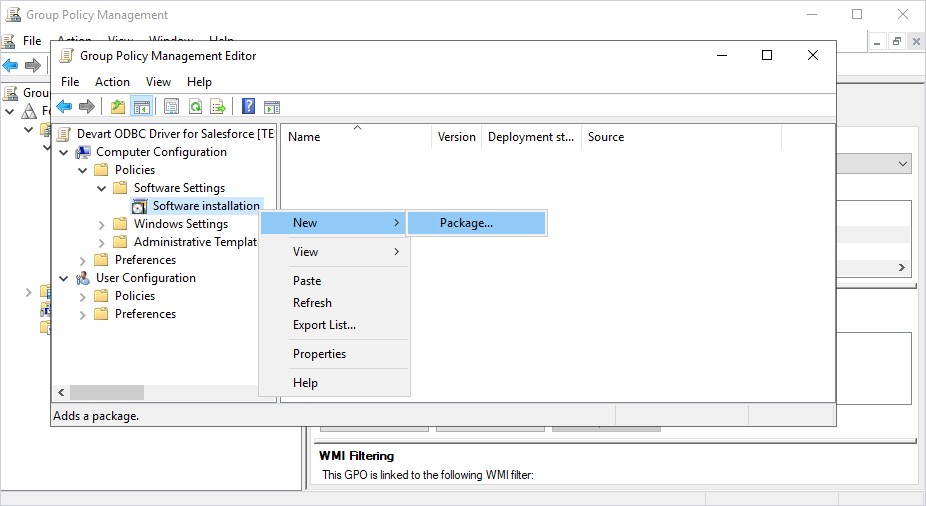
In the left pane of the Group Policy Management Editor, navigate to Computer Configuration --> Policies --> Software Settings --> Software installation.
Your current deployment package will appear in the right pane. Right-click Software installation, then select New --> Package.
-
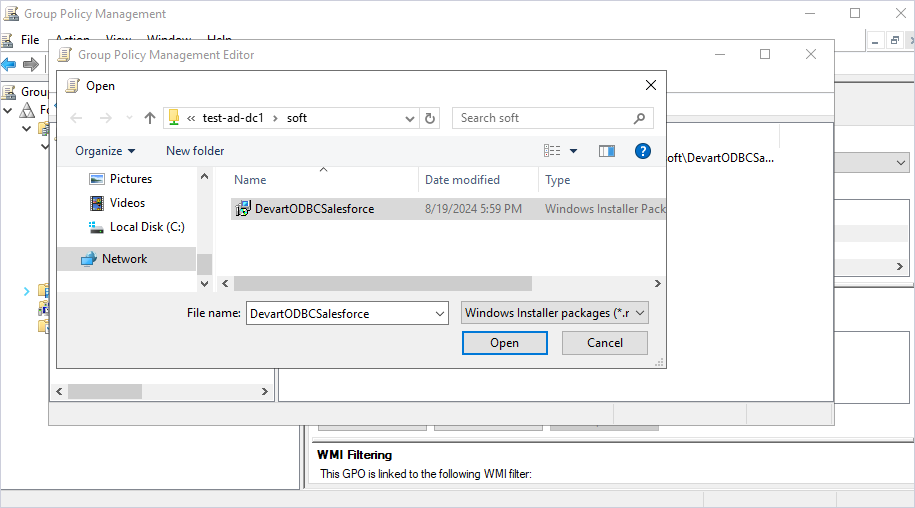
In the Group Policy Management Editor dialog that opens, select the desired MSI installation file and click Open.
-
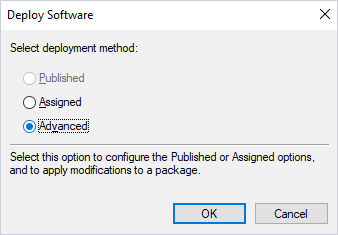
In the Deploy Software dialog, select Advanced to specify the software deployment method. The Advanced deployment method allows you to make necessary modifications to the MSI file, such as creating the MST file in Orca.
-
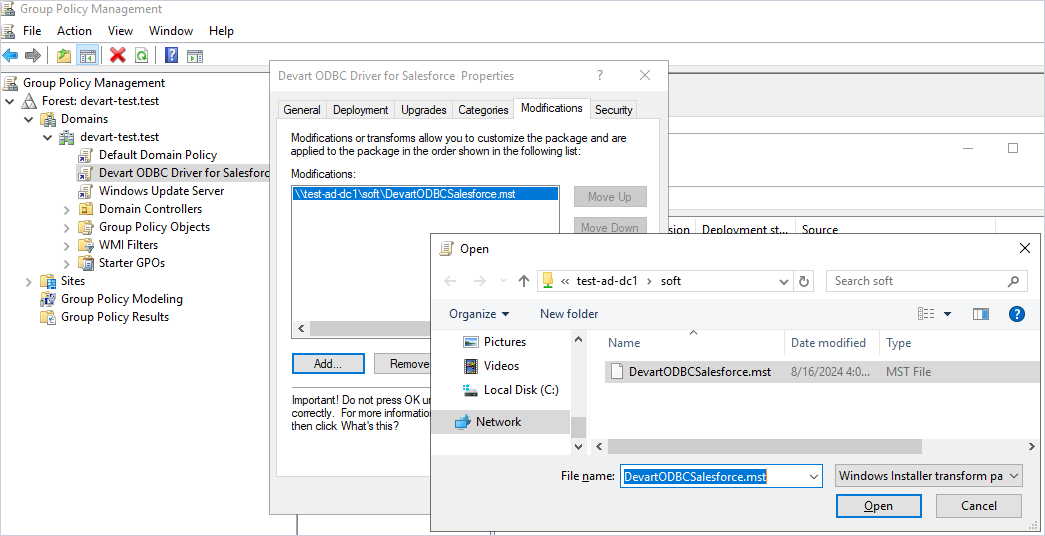
In the Properties dialog of the installation package that opens, go to the Modifications tab and select Add. Browse for the corresponding MST file, select it, and click Open to apply the settings.
-
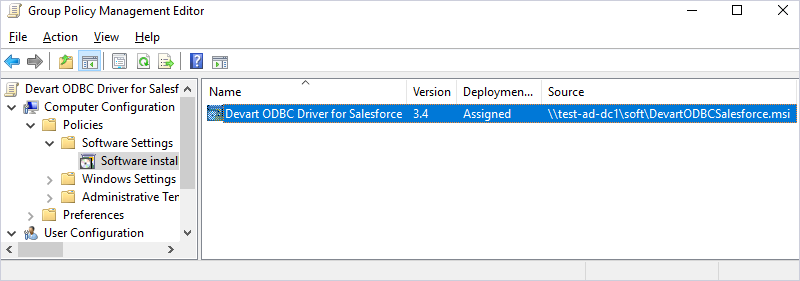
If configured correctly, the Group Policy Management Editor window should look as follows:
Client-Side Actions
For the ODBC Driver for Brevo to be successfully installed on remote client machines, all domain users must restart their computers after logging in for the first time.
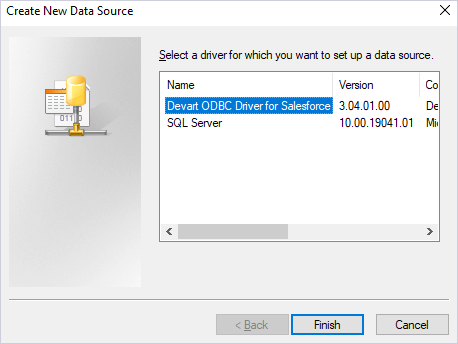
In case of successful deployment, the ODBC driver will be installed on the client's computer. To verify, open the ODBC Data Source Administrator on the client's machine and add the deployed ODBC driver.
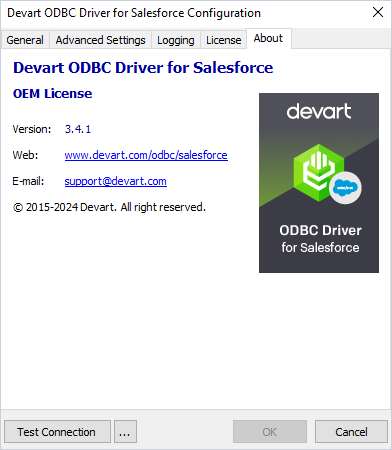
All information on the deployed driver is accessible upon clicking the About tab.
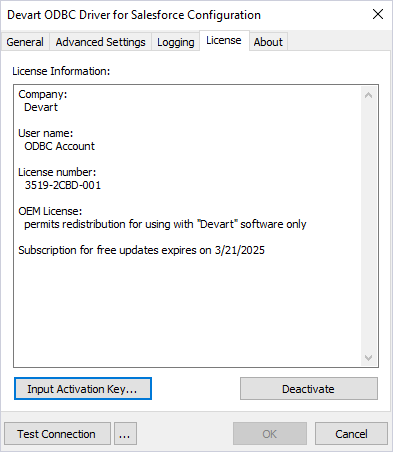
Similarly, the valid license key will be automatically activated after the successful installation of the ODBC Driver for Brevo.
See Also


