|
|
ODBC Driver for QuickBooks Desktop Connecting SQL Server Management Studio to QuickBooks Desktop via ODBC Driver |
|
|
|
ODBC Driver for QuickBooks Desktop Connecting SQL Server Management Studio to QuickBooks Desktop via ODBC Driver |
|
You can use Microsoft SQL Server Management Studio (SSMS) to connect your QuickBooks Desktop data to a SQL Server instance. A linked server is a feature in SQL Server that enables execution of distributed queries across different data sources, including non-SQL Server databases. It allows you to reference external tables—such as those from QuickBooks Desktop—within a single SQL query. With linked servers, you can run commands across different data platforms and integrate them seamlessly with your SQL Server environment. A linked server can be created either through the Object Explorer interface or by executing T-SQL stored procedures.
Key advantages of using linked servers with QuickBooks Desktop:
To ensure proper integration with Microsoft SQL Server Management Studio (SSMS), the working environment must meet the following conditions:
You can configure a user to run under a specific account in two different ways:
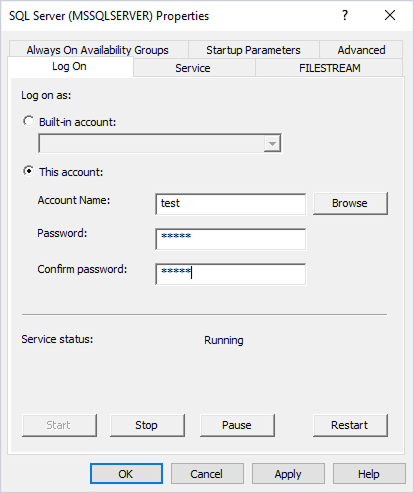
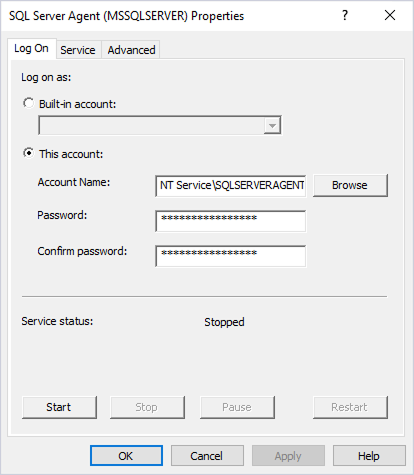
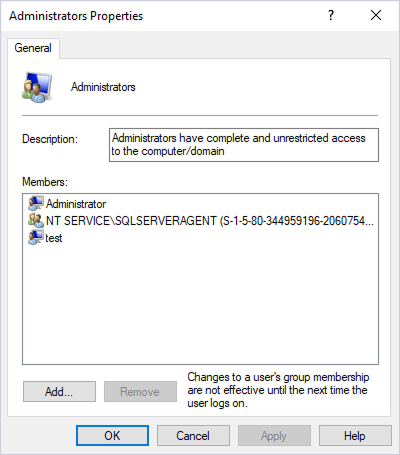
After configuring a user account, click OK to confirm your changes. Then restart the SQL Server service.
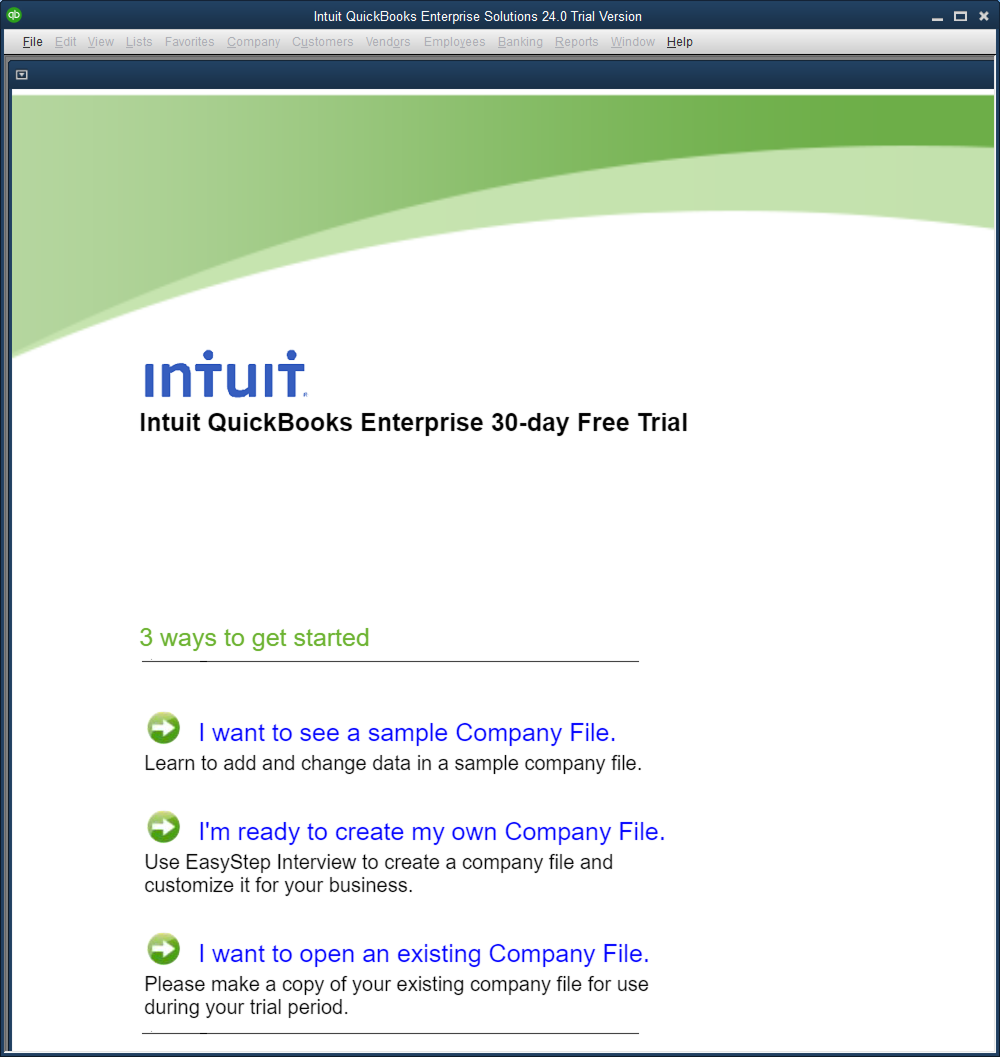
Launch QuickBooks Desktop with administrator privileges and click I want to open an existing Company File.
In QuickBooks Desktop, click I want to see a sample Company File to download a company file. After the download, navigate to the folder where the file was saved, open the sample database, and then close the application. Now, launch QuickBooks Desktop with administrator privileges and click I want to open an existing Company File to access the previously saved file.
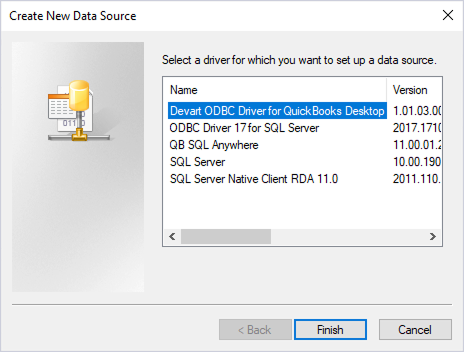
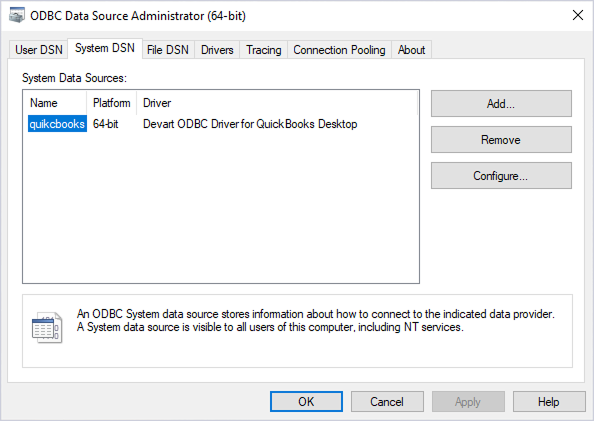
Open ODBC Data Sources. In the ODBC Data Source Administrator dialog, navigate to the System DSN tab and click Add. In the Create New Data Source dialog, select Devart ODBC Driver for QuickBooks Desktop as the driver for which you want to set up a data source and click Finish.
Next, specify a Data Source Name and set a path to the QuickBooks file you want to use. Click OK to continue.
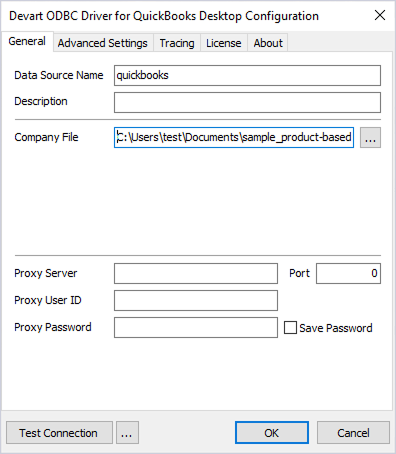
Don't click Test Connection at this stage.
As a result, the data source is added. Click OK to save the configuration and close the dialog.
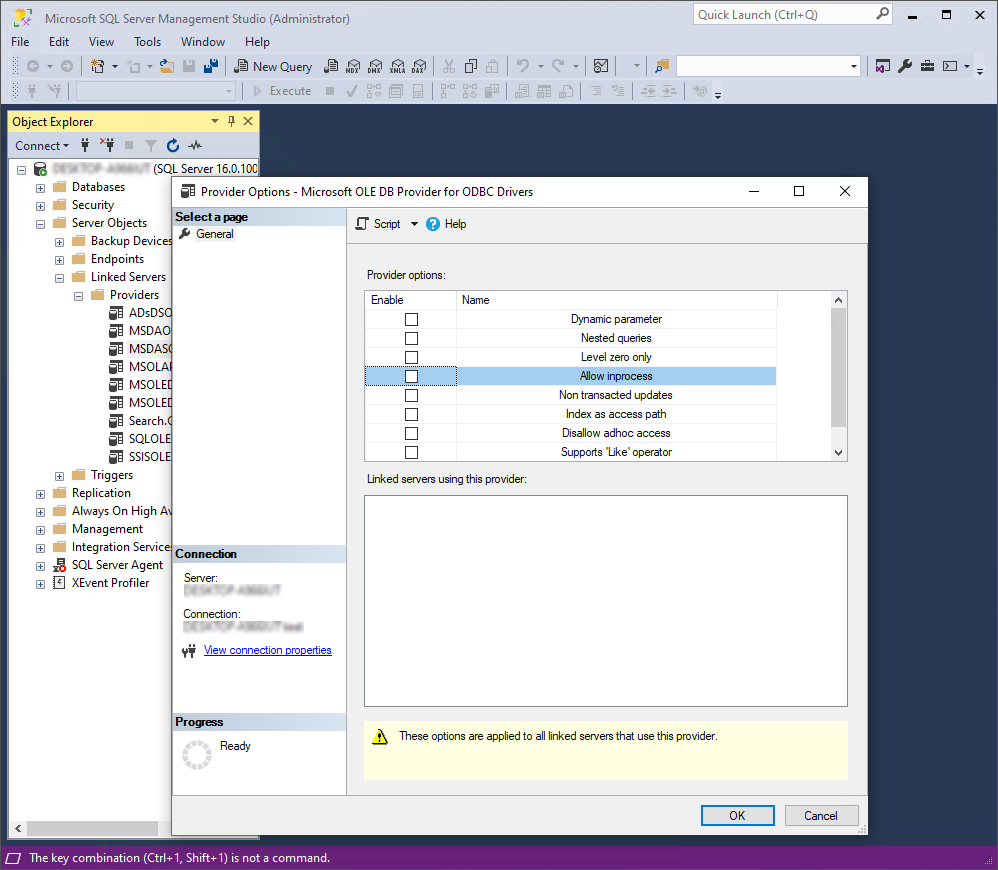
Run SSMS as an administrator and connect to the server using your local user account. In the Object Explorer, navigate to Server Objects > Linked Servers > Providers > MSDASQL. Then, right-click the MSDASQL provider and select Properties from the menu. In the Provider Options dialog, clear the Allow inprocess checkbox. Click OK to apply the changes.
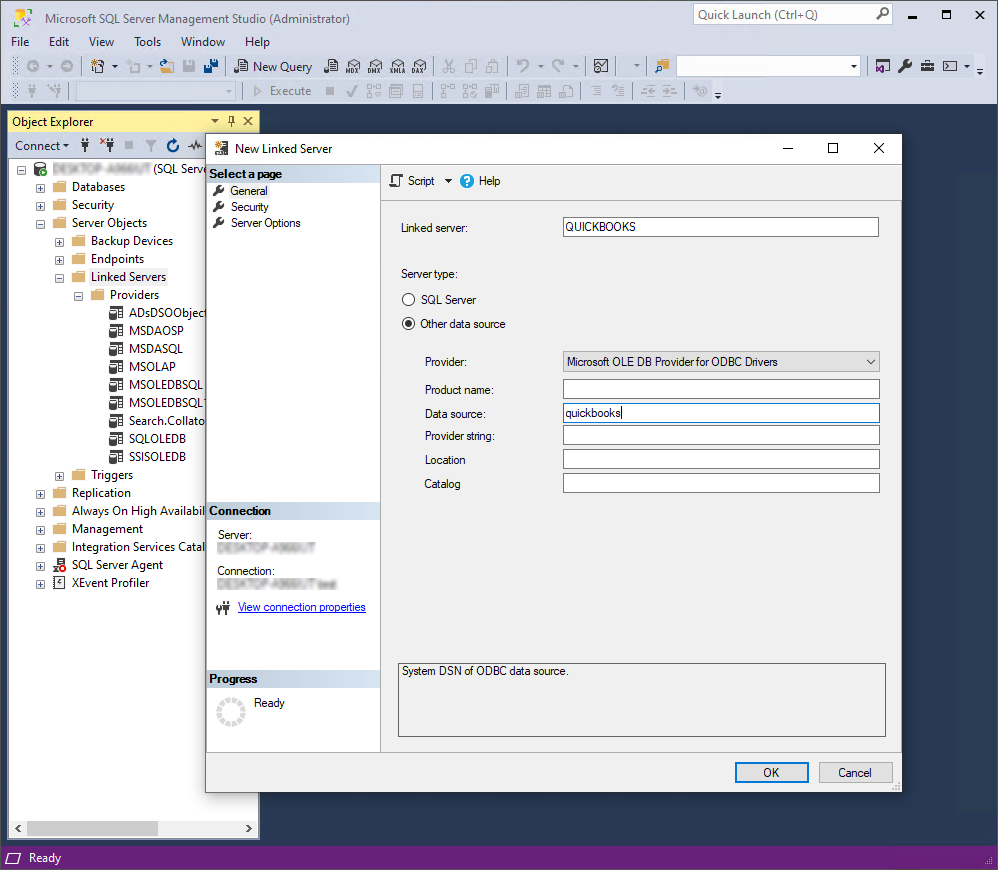
In the Object Explorer, navigate to Server Objects. Right-click Linked Servers and select New Linked Server from the menu. In the New Linked Server dialog, fill in the fields:
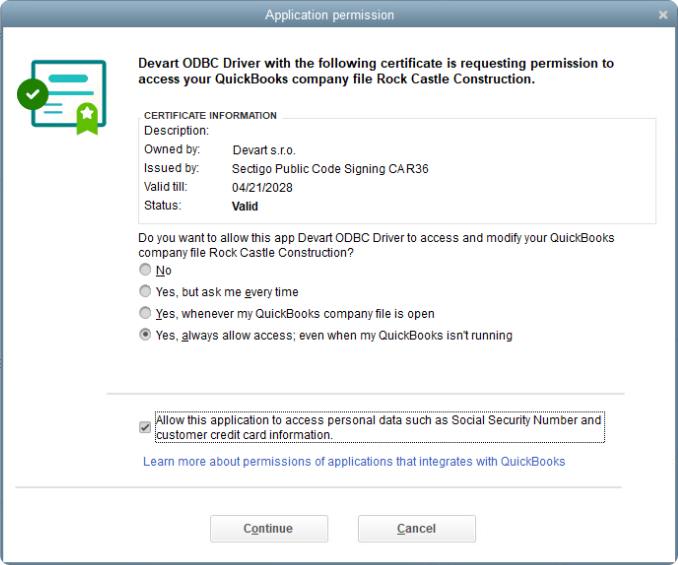
Click OK. In the Application permission dialog that appears in QuickBooks Desktop, define the permission levels for ODBC Driver for QuickBooks Desktop to access the QuickBooks company file. Then, click Continue.
In the Object Explorer, navigate to Server Objects > Linked Servers and select the newly created linked server. Expand the node, then navigate to Catalogs > default > Tables, and execute the following query:
SELECT * FROM [linked_server_name].[default]..[Account]
GO 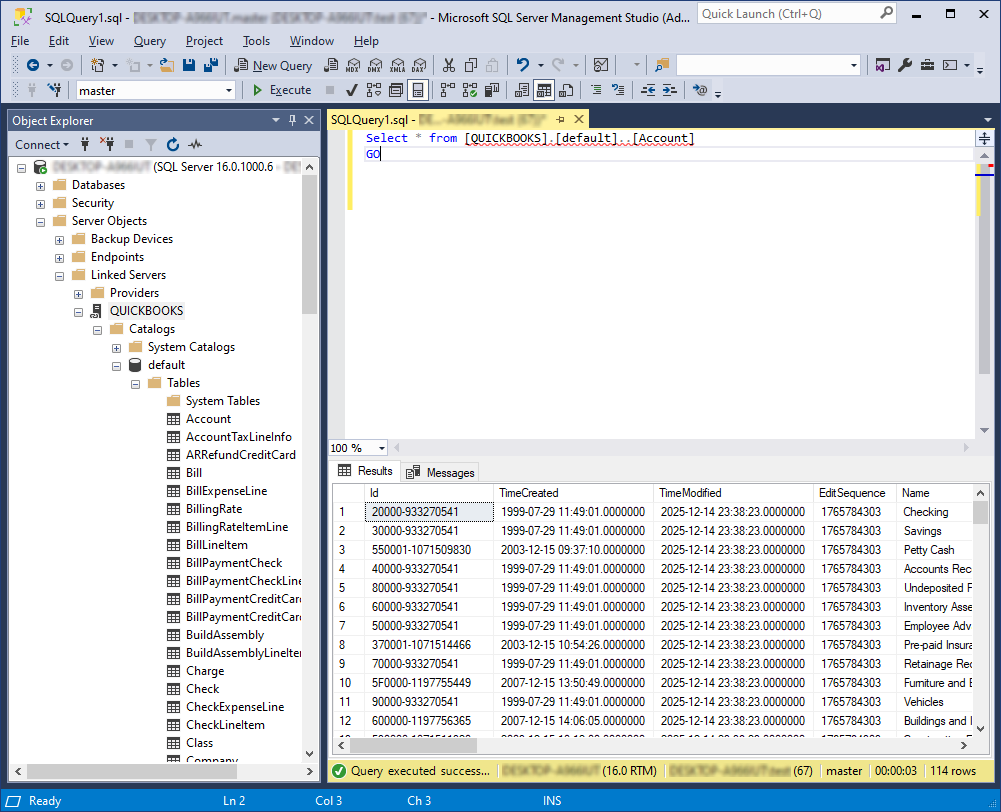
Successful execution confirms that the linked server has been added and is functioning correctly.