Connecting to Delighted from Microsoft Excel using ODBC Driver for Delighted
You can use Microsoft Excel to access data from a Delighted database using ODBC connector. With ODBC Driver, you can import the data directly into an Excel Spreadsheet and present it as a table. Make sure that you use matching Excel and ODBC Driver, e.g. if you have installed a 64-bit ODBC Driver, you will need to use the 64-bit version of Excel.
When working with Microsoft Excel, there are different ways of retrieving data from various data sources using our ODBC drivers.
Connecting Excel to Delighted with Get & Transform (Power Query)
You can use Get & Transform (Power Query) to connect to Delighted from Excel with ODBC. This method assumes that you've installed an ODBC driver for Delighted.
- Click the Data in Excel, then expand the Get Data drop-down list. Click From Other Sources > From ODBC.

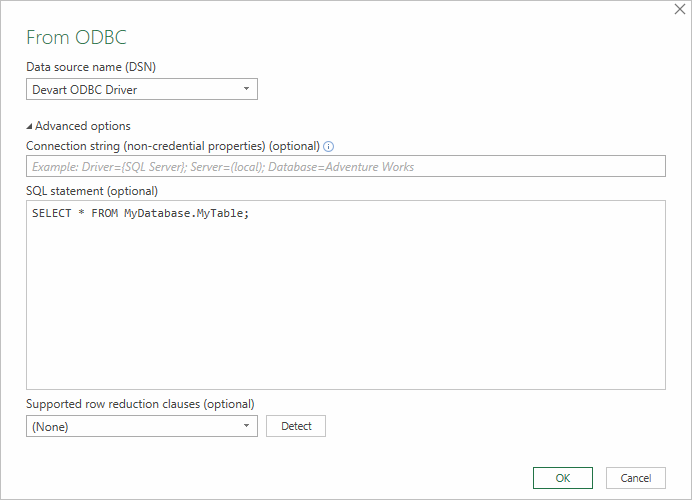
- In the From ODBC dialog, choose your data source name (DSN). If you haven't configured your ODBC driver yet, you can expand the Advanced Options dialog box and enter the connection string for your data source (without credentials, which are defined in the credentials dialog box in the next step). Additionally, you can enter an SQL statement that will be executed right after establishing a connection to the data source. Click OK.
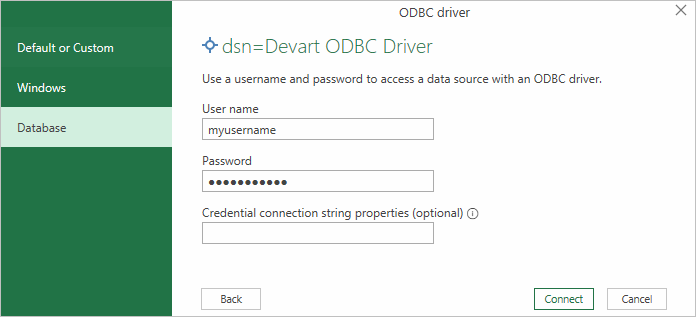
- If you're using a database username or password, select Database and enter your credentials in the dialox bog, then click Connect.
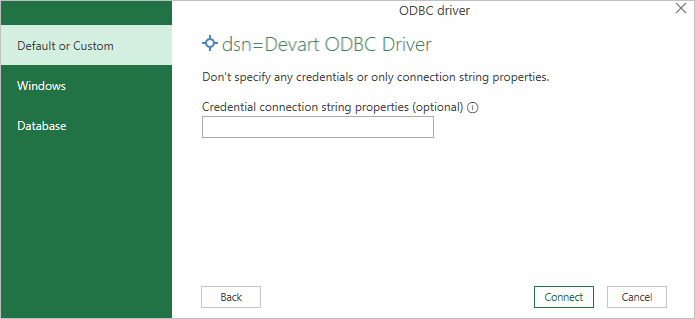
If your database is not password-protected or you've already specified your credentials in the ODBC data source settings, select Default or Custom and press Connect
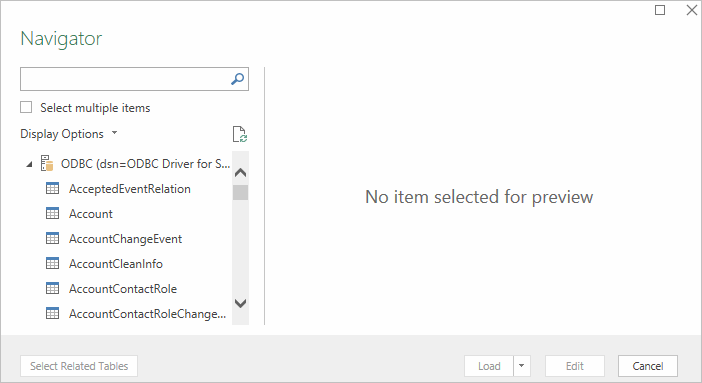
- In the window that appears, select the table you want to retrieve data from, and click Load.
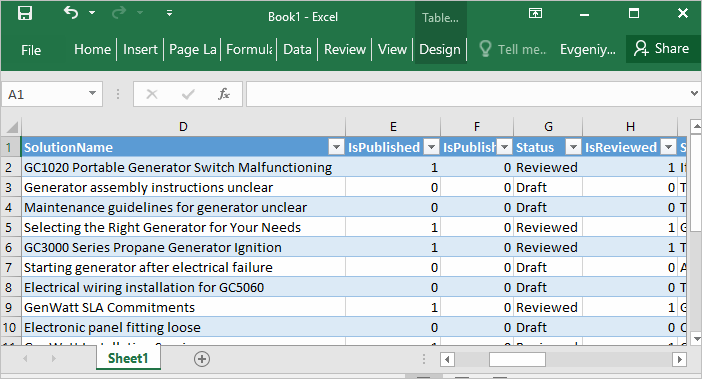
The data from the table will be a displayed in an Excel spreadsheet where you can further work with it.
Connecting Excel to Delighted with Data Connection Wizard (Legacy Wizard)
You can use this option to connect to OLE DB or ODBC external data source that has already been defined.
- In Excel, go to the Data tab. Click From Other Sources, and then click From Data Connection Wizard.
- In the opened dialog, select ODBC DSN and click Next to continue.
- Now select a data source you want to connect to, and click Next.
- To connect to the table containing the required data, select its name and click Next to enter and save information about your new file or click Finish.
- In the Import data dialog, you can select the way your data will be viewed in Excel and the place where to put it in the worksheet, and click OK.
- The required data is now displayed in the existing Excel worksheet.
Connecting Excel to Delighted with the Query Wizard
You can use this option to create a simple query for retrieving data from Delighted to Excel via ODBC driver.
- Open Excel, in the main menu, click the Data tab.
- Click the From Other Sources dropdown menu, and then click From Microsoft Query.
- In the appeared dialog, you can choose the data source you want to connect to.
- After a successful connection, you can select the data you want to be displayed in Excel and click Next.
- The next two steps allow filtering and sorting the data. Click Next to skip these procedures.
- If you plan to further use the query, you can save it by clicking the Save button on the right.
- Select Return Data To Microsoft Excel and click Finish.
- In the Import data dialog, you can select the way your data will be viewed in Excel and the place where to put it in the worksheet, and click OK.
- The required data is successfully imported to Excel.
Connecting Excel to Delighted with Microsoft Query
You can use this option to create a more complex query for retrieving Delighted data to Excel via ODBC driver.
- Start Excel, click the Data tab.
- In the appeared ribbon, click From Other Sources, and then click From Microsoft Query.
- In the next dialog, choose the data source you want to connect to (e.g., using data source name - Devart ODBC Delighted). Uncheck Use the Query Wizard to Create/Edit Queries and click OK.
- Now you can select the tables you want to add to your query. When you finish, just click the Add button.
- In the graphical editor, you can filter rows or columns of data, sort data, join multiple tables, create a parameter query, etc.
Connecting Excel to Delighted with PowerPivot
You can use PowerPivot - an Excel add-in to perform data analysis and create complex data models. To load the required data, do the following:
- In Excel, click the PowerPivot tab, then click Manage to go to the PowerPivot window.
- In the opened window, click From Other Sources.
- When the Table Import Wizard opens, select Others (OLEDB/ODBC) and click Next.
- In the Specify a Connection String window, click the Build button.
- In the Data Link Properties dialog, specify the data source you want to connect (e.g., using data source name - Devart ODBC Delighted), and then click Next.
- Now you should choose how to import the data (either select a table from the list or write a query to specify the data to be imported).
- When the Import operation succeeded, click the Close button. The retrieved data is inserted in the active worksheet.