Connect to Zoho CRM through a proxy server
To connect to Zoho CRM through a proxy server on Windows:
1. Open the ODBC Data Source Administrator.
2. Navigate to either User DSN or System DSN tab.
3. Create a new DSN or edit an existing DSN.
- To create a new DSN for Zoho CRM:
- Click Add.
- Select your Zoho CRM ODBC Driver from the list, then click Finish.
- To edit an existing Zoho CRM DSN:
- Select the DSN.
- Click Configure.
4. In the Devart ODBC Driver for Zoho CRM Configuration dialog, enter proxy settings:
- Proxy Server – The hostname or IP address of the proxy server.
- Port – The port number used by the proxy.
- Proxy User ID – The username for proxy authentication.
- Proxy Password – The password for proxy authentication.
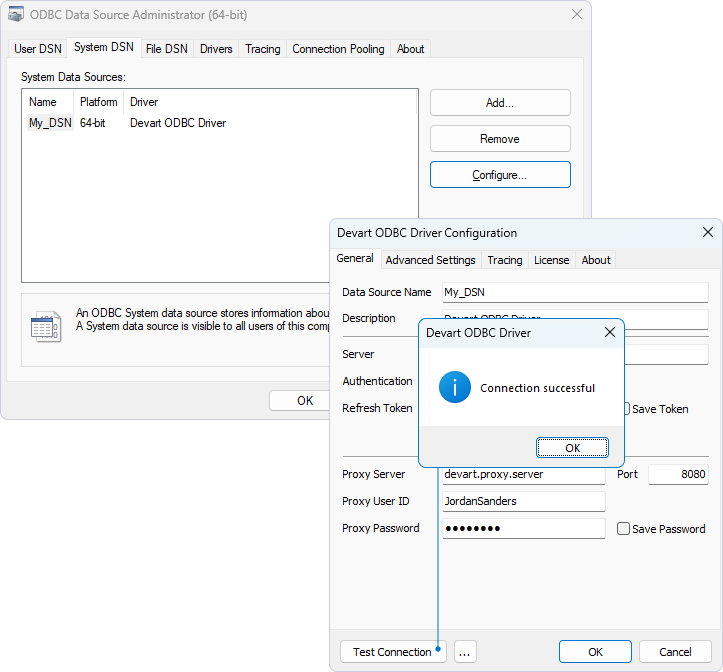
5. Optional: Select Save Password to remember the password.
6. Optional: Click Test Connection to verify the connection settings.
7. Click OK.
The following example shows a Zoho CRM ODBC connection string configured to use a proxy server.
DRIVER={Devart ODBC Driver for Zoho CRM};Domain=crm.zoho.com;Refresh Token=<your_refresh_token>;Proxy Server=<your_proxy_server>;Proxy Port=<your_proxy_port>;Proxy User=<your_proxy_username>;Proxy Password=<your_proxy_password>