Enable ODBC tracing on macOS
You can enable tracing of ODBC function calls using one of the following methods:
- In iODBC Administrator: Enables tracing for all ODBC applications.
- In the odbcinst.ini file: Enables tracing specifically for Devart ODBC Driver for Salesforce.
Enable tracing using iODBC Administrator
1. In Launchpad, type iODBC Administrator, then open the iODBC Administrator app.
2. Select the Tracing tab.
3. Optional: To change the default log path, specify the new path under Log file path.
4. Under When to trace, select All the time.
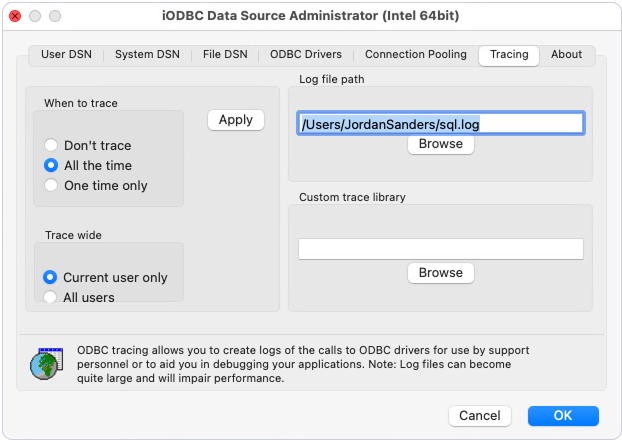
5. Click OK.
6. Once the issue is reproduced, disable tracing by selecting Do not trace under Log file path and clicking OK.
Enable tracing in the odbcinst.ini file
1. Open the odbcinst.ini file in one of the following locations:
- To enable tracing for all users, open
/Library/ODBC/odbcinst.ini. -
To enable tracing for your user only, open
/Users/username/Library/ODBC/odbcinst.ini.Replace username with the name of your macOS user account.
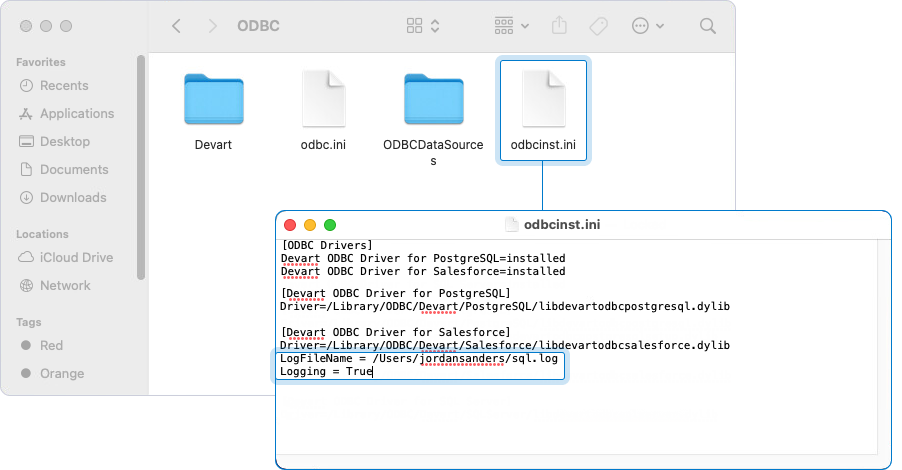
2. Under the [Devart ODBC Driver for Salesforce] section, add the following options:
LogFileName– The full path to the log file. For example:/Users/jordansanders/sql.log.Logging– The tracing status flag. Set toTrueto enable tracing.
 [Devart ODBC Driver for Salesforce]
LogFileName = <filepath>
Logging = True
3. Once the issue is reproduced, disable tracing by setting Logging to False in the odbcinst.ini file.