Activate the driver using Group Policy
To activate ODBC Driver for Salesforce when deploying it using Group Policy, follow these steps:
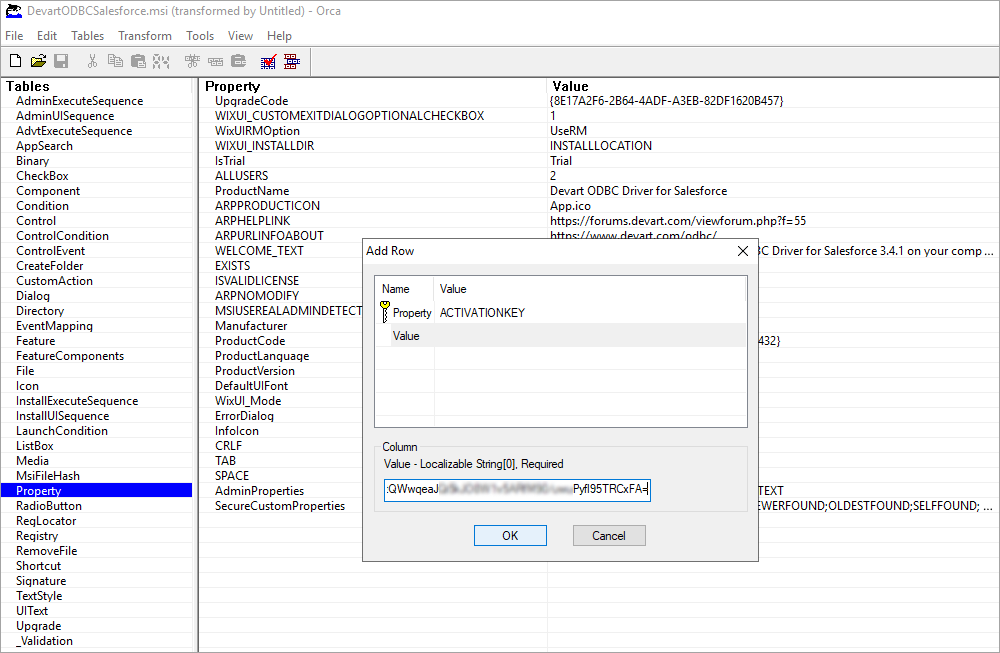
1.1. Use Orca to create a custom MST file for the driver.
1.2. In the MST file, add a property named ACTIVATIONKEY and assign it a valid license key for the driver.
2. Save the MSI file for the driver and the MST file in a shared network folder accessible to all domain users.
3. Configure the Group Policy:
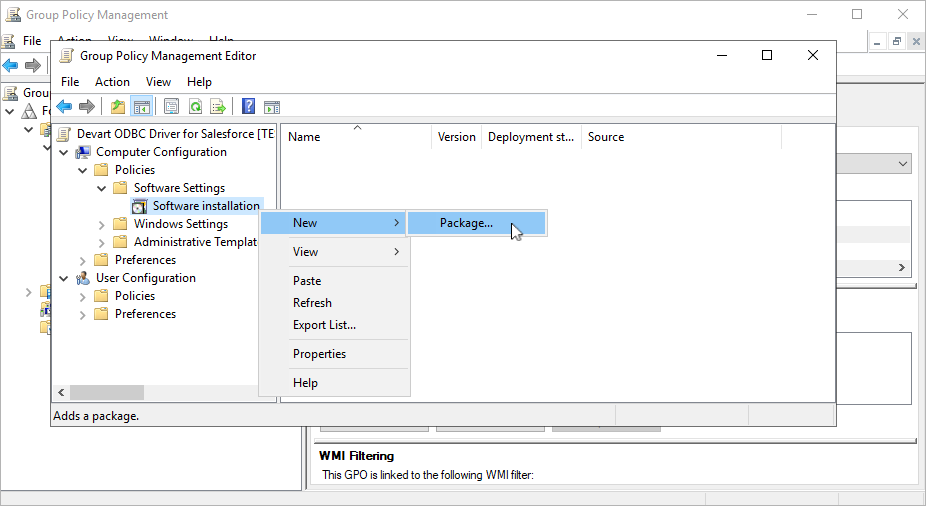
3.1. Open the Group Policy Management tool and create a new Group Policy Object (GPO) or edit an existing one.
3.2. Navigate to Computer Configuration > Policies > Software Settings > Software installation. Right-click Software installation, then select New > Package.
3.3. In the dialog that opens, navigate to the MSI installation file you want to deploy, then select Open.
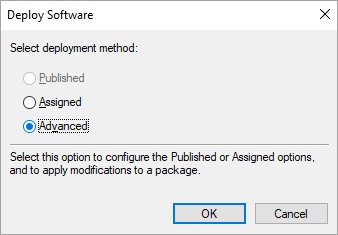
3.4. In the Deploy Software dialog, select Advanced to specify the software deployment method. This option lets you make modifications to the MSI file, such as applying an MST file created using Orca.
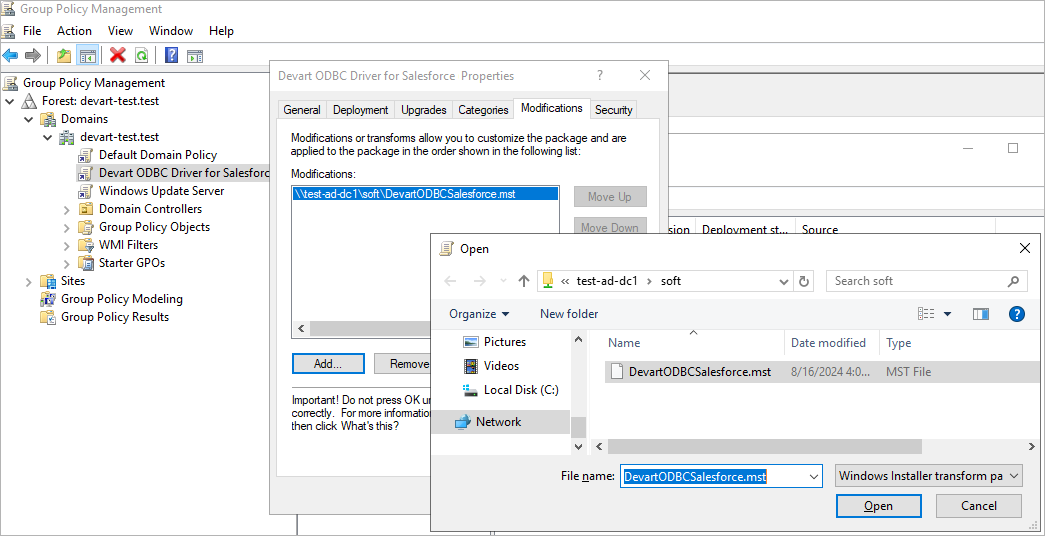
3.5. In the Devart ODBC Driver for Salesforce Properties dialog, navigate to the Modifications tab and select Add. Browse to the MST file, select it, then select Open.
4. For ODBC Driver for Salesforce to install successfully on remote client machines, all domain users must restart their computers after their first login.
5. After deployment, the ODBC driver will be installed and activated on the client computer. To start working with the driver, open the ODBC Data Source Administrator on the client machine and add the deployed ODBC driver.