Connect Alteryx Designer to Oracle
Alteryx Designer is a data analytics and ETL (Extract, Transform, Load) platform that lets you prepare, blend, and analyze data from many sources, including Oracle databases. When connected to Oracle, Alteryx Designer can extract data, transform it through visual workflows, and load it into other systems for analytics, reporting, or predictive modeling.
Note
You need to have a configured Data Source Name (DSN). For instructions, see Configure a Windows DSN for Oracle.
Prerequisites
- Download and install Alteryx Designer.
- Download and install Devart ODBC Driver for Oracle.
Configure a DSN in Alteryx Designer
To configure a DSN in Alteryx Designer for Oracle:
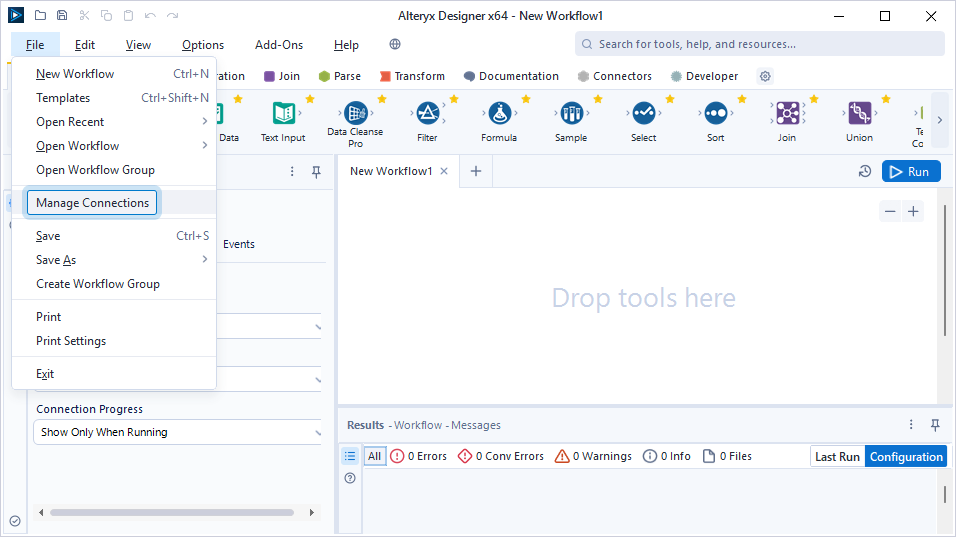
1. Open Alteryx Designer.
2. Select File > Manage Connections.
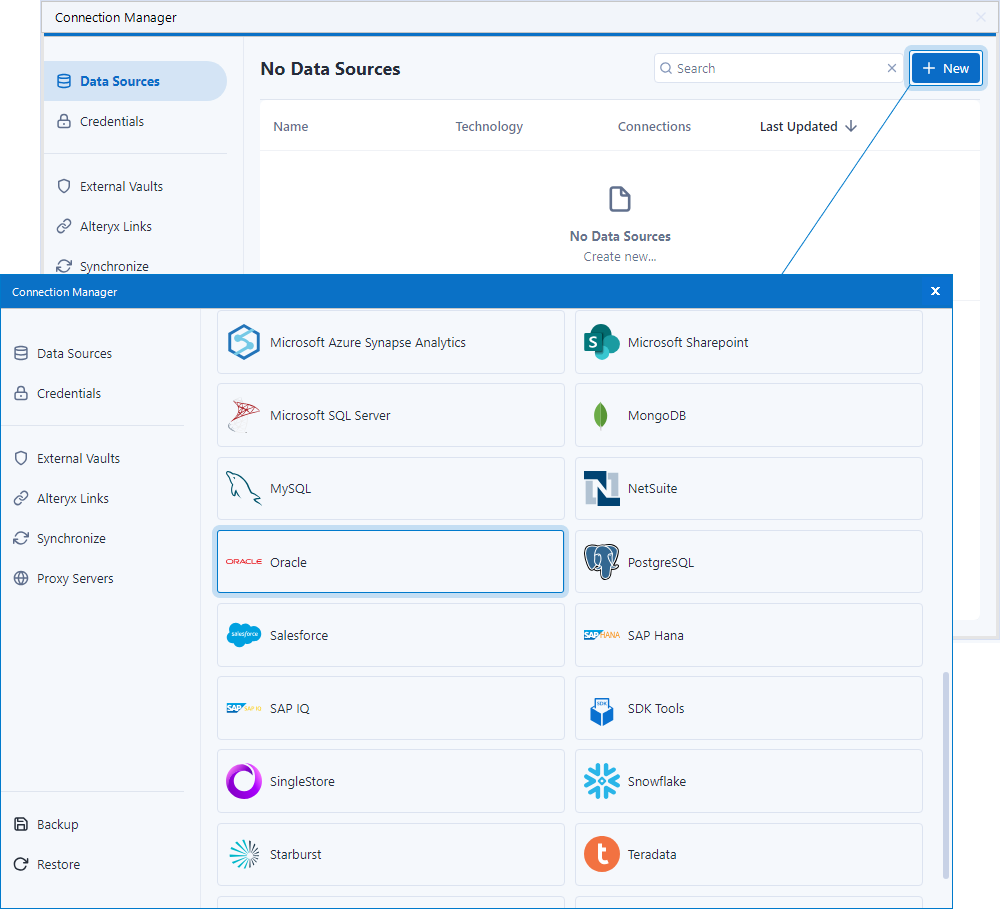
3. On the Connection Manager page, click New and select Oracle.
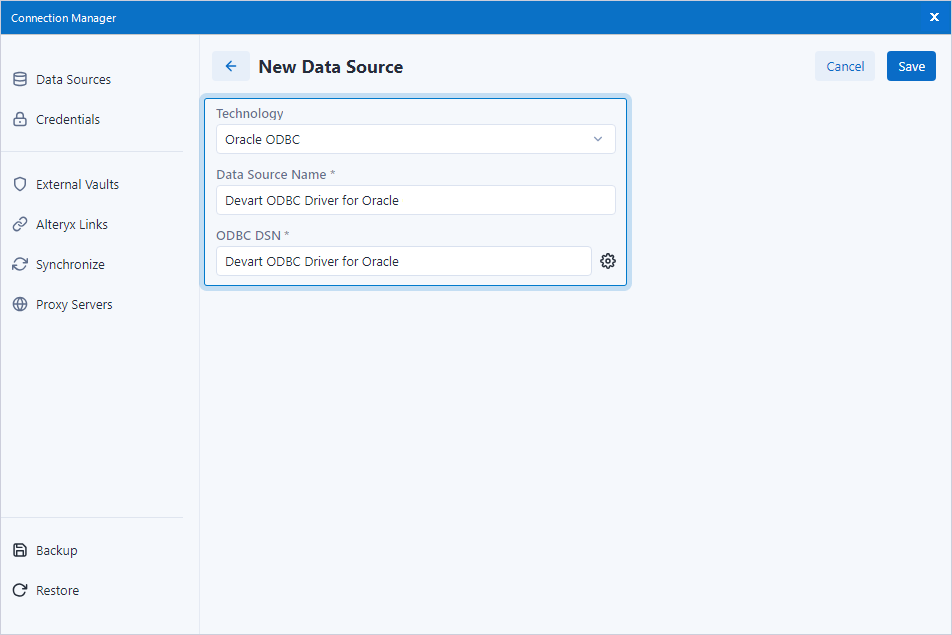
4. Under New Data Source, specify the data source details:
- Technology – Select Oracle ODBC.
- Data Source Name – Enter a unique name for the data source.
- ODBC DSN – Choose your configured Oracle DSN from the list.
5. Click Save.
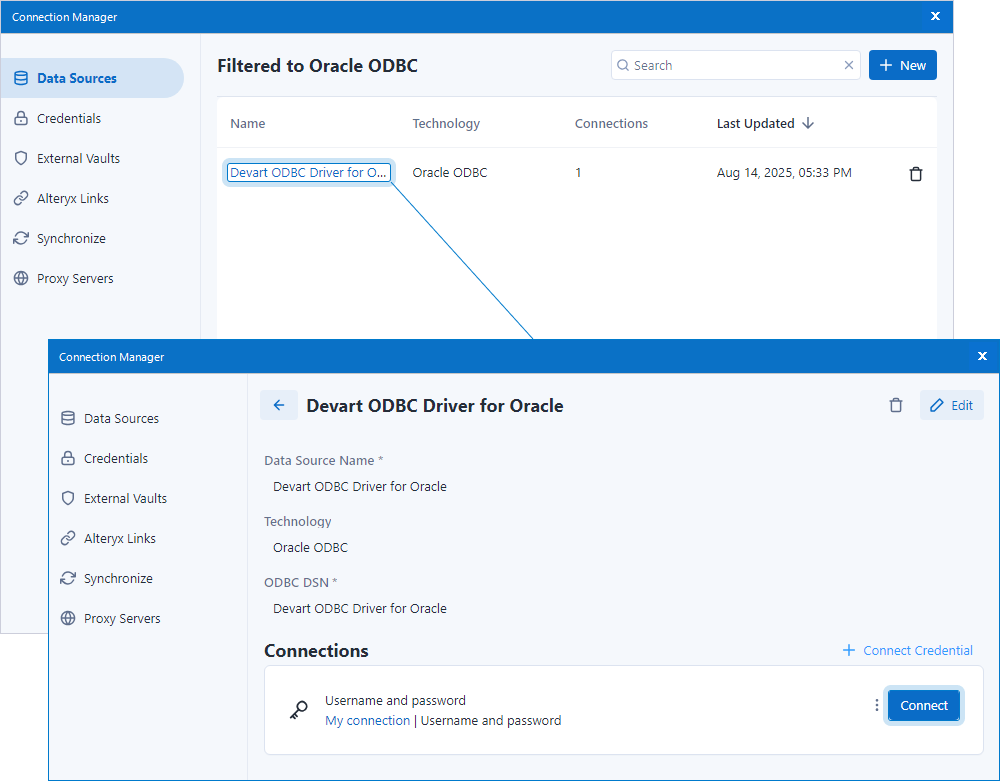
The new data source appears on the Connection Manager page (in this example, Devart ODBC Driver for Oracle).
6. In the Connections section, click Connect Credential on the right.

Connection details are displayed under Connections.
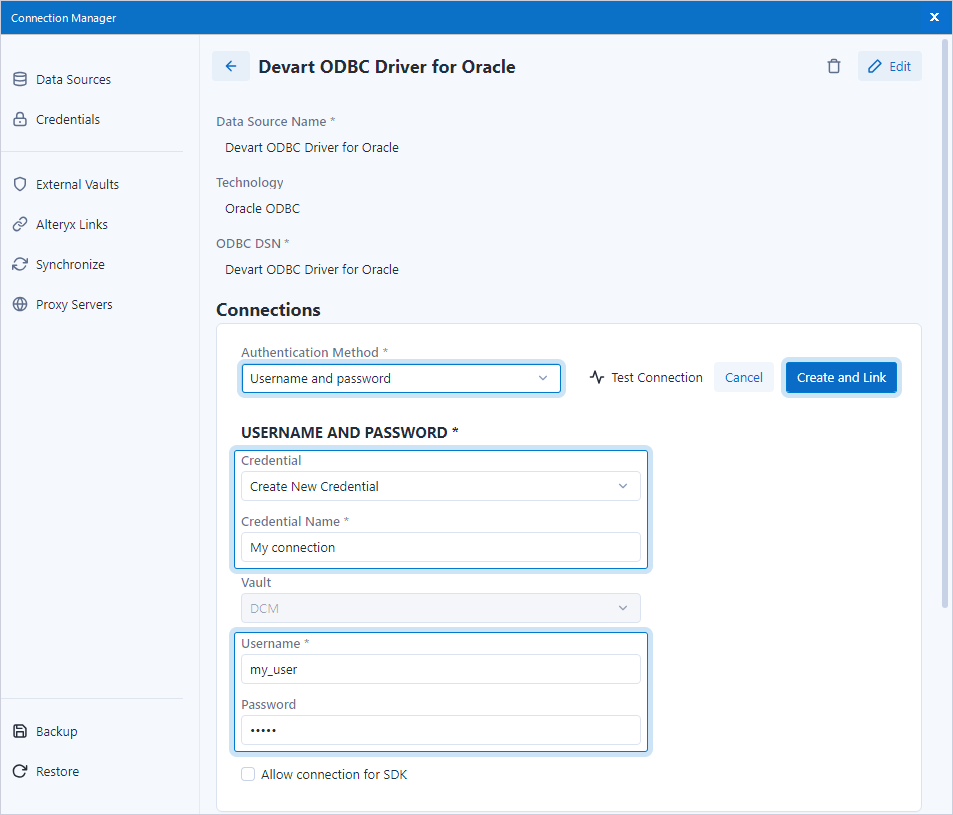
7. In the Connections section, specify the connection details:
- Authentication Method – Select Username and password.
- Credential – Select Create New Credential.
-
Credential Name – Enter a name for the new credential.
- Username – Enter your Oracle database username.
- Password – Enter your Oracle database password.
8. Click Create and Link.
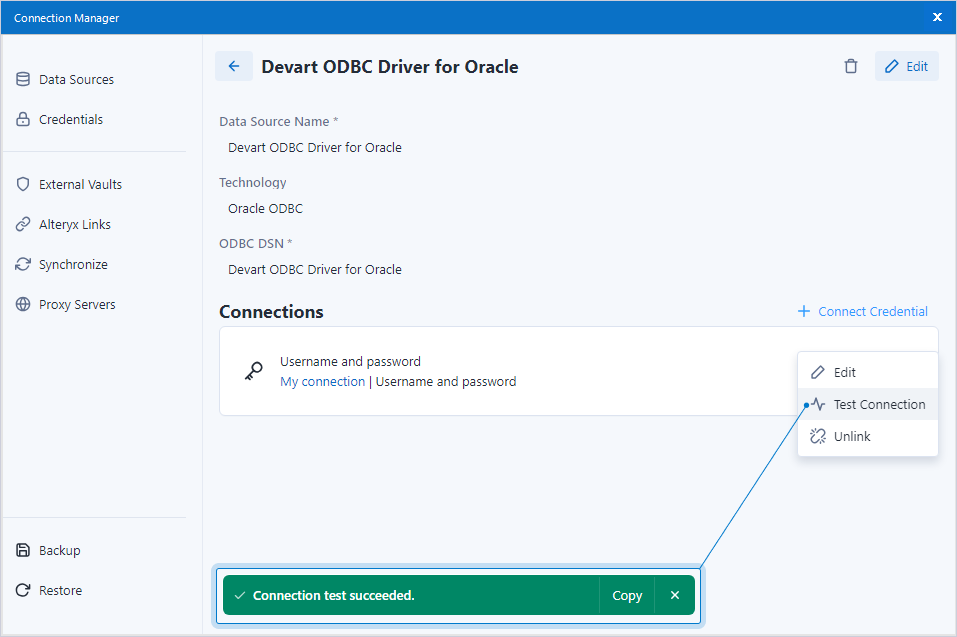
The new connection appears under Connections on the Connection Manager page.
9. Optional: Click Test Connection to verify the connection settings and ensure the DSN is correctly configured.
10. Close the Connection Manager page.
Connect to an Oracle Database in Alteryx Designer
To integrate Oracle data into an Alteryx Designer workflow:
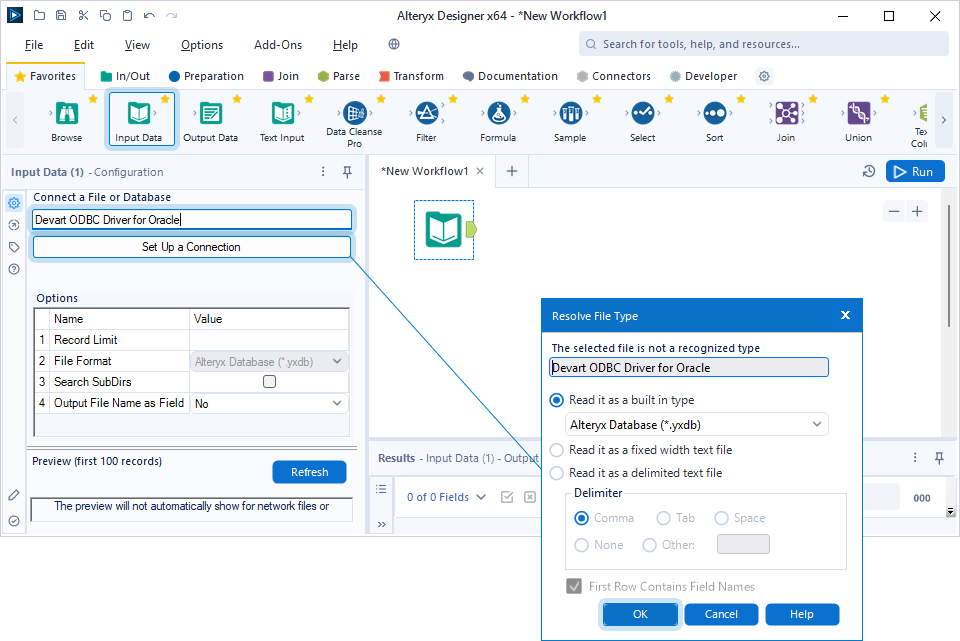
1. Open Alteryx Designer and drag an Input Data tool from the Favorites toolbar onto the canvas.
2. In the Input Data Configuration window, click anywhere in the Connect a File or Database field, and enter the name of the database you want to access.
3. Click Set Up a Connection.
4. In the Resolve File Type dialog, keep the default settings or change them as needed, then click OK.
5. On the Data connections page, select the Data sources tab, then under Frequently used data sources or All data sources, select ODBC for the Oracle data source.

6. In Connection Manager, go to the Data Sources tab, select your Oracle DSN, and click Connect.
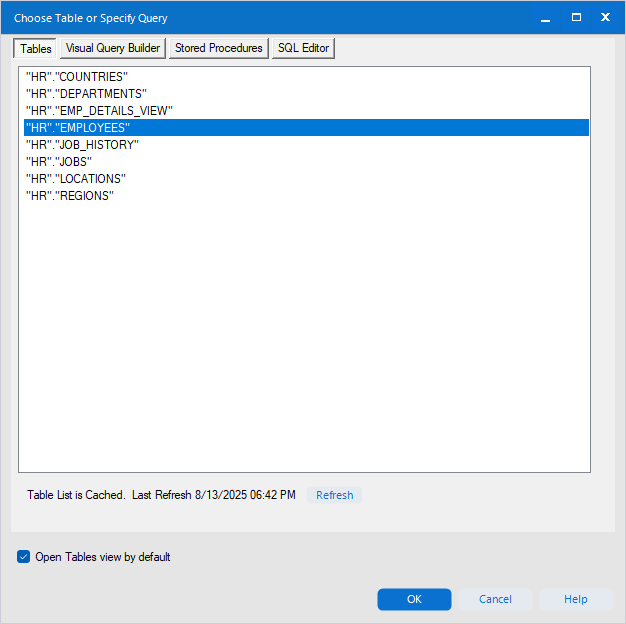
The Choose Table or Specify Query dialog opens.
7. Optional: Select the Tables tab to switch to the Tables view.
8. Choose a table to load data from and click OK.
9. Optional: Select the Open Tables view by default checkbox to display data in the Tables view automatically.
10. Click Run to load the data.
11. Optional: Click Refresh to preview the first 100 records in the Preview window.
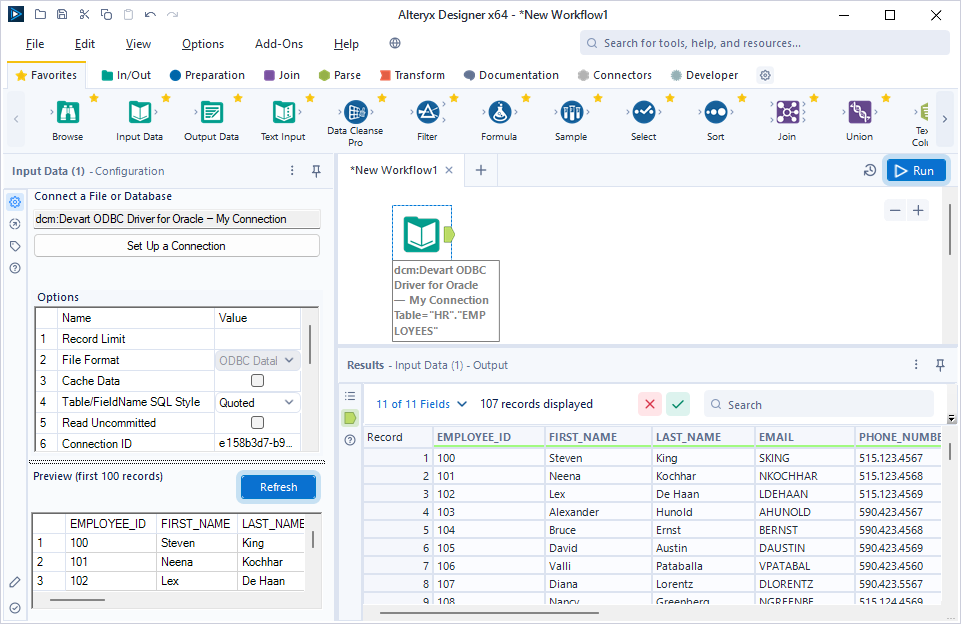
The Oracle data is loaded into your Alteryx workflow and displayed as a table.