Create a DSN in the iODBC Administrator
1. Navigate to Applications > iODBC, then open the iODBC Administrator64 app.
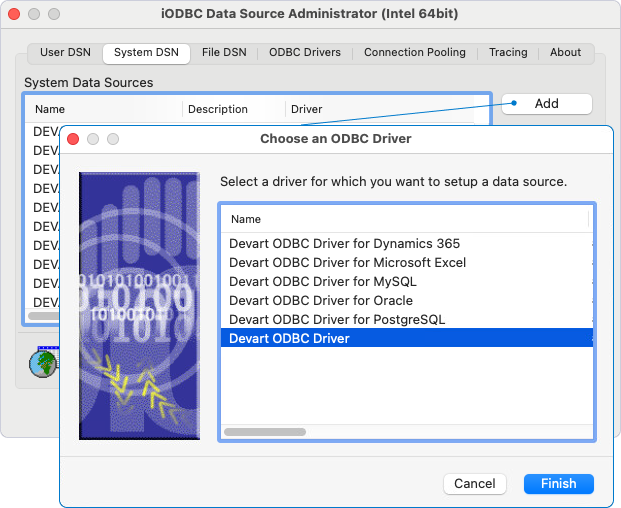
2. Select the System DSN tab (recommended) to create a DSN accessible to all system users.
3. Click Add to create a new DSN.
4. Select Devart ODBC Driver for Oracle, then click Finish.
5. In the dialog that appears, enter the DSN details:
- Data Source Name (DSN) – Specify a name for your DSN (for example, Oracle_DSN).
- Comment – Optional: Enter a short description of the DSN.
6. Specify connection string parameters and their values.
6.1. Select the plus (+) icon to create a Keyword/Value pair.
6.2. Double-click the Keyword field and specify the parameter name.
6.3. Double-click the Value field and specify the value for the parameter.
Required parameters:
- Direct – True.
- Host – The host name of the server hosting your Oracle database.
- Port – The port number for the connection.
- Service Name – The service name of your Oracle database.
- User ID – Your Oracle username.
- Password – Your Oracle password.
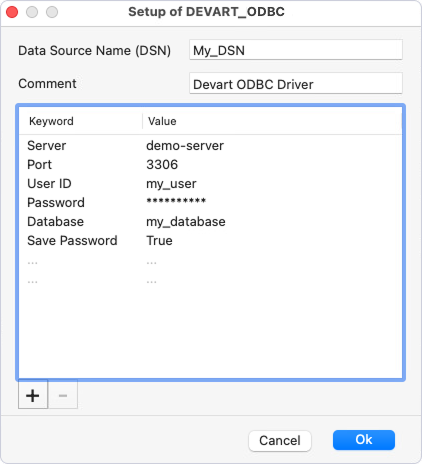
7. Click Ok to save the DSN.
8. Optional: Click Test to verify the configuration.
Note
If the password isn’t saved in the DSN, you’ll be prompted to enter it at runtime when connecting to a data source. If the password is saved in the DSN, leave the User ID and Password fields empty.