Create a DSN in the iODBC Administrator
1. Navigate to Applications > iODBC, then open the iODBC Administrator64 app.
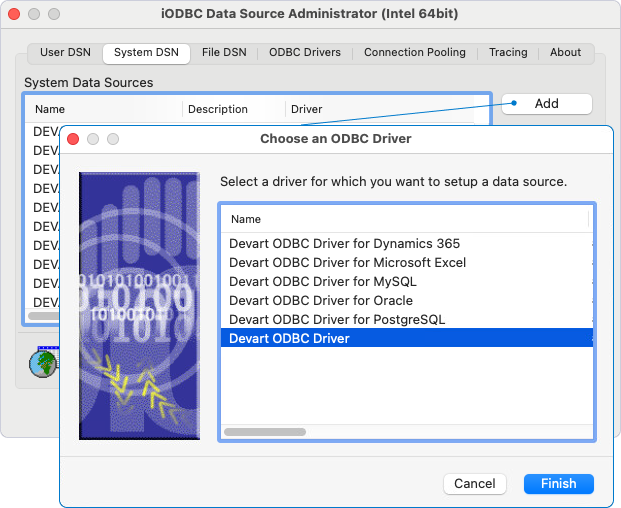
2. Select the System DSN tab (recommended) to create a DSN accessible to all system users.
3. Click Add to create a new DSN.
4. Select Devart ODBC Driver for Dynamics 365, then click Finish.
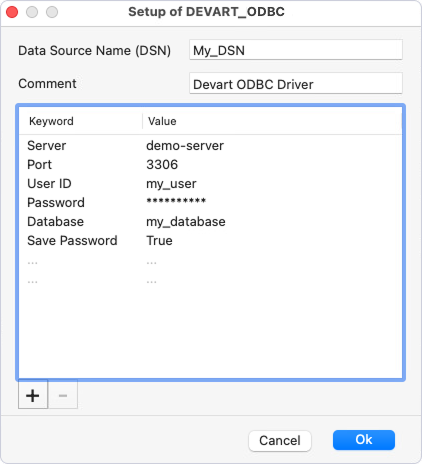
5. In the dialog that appears, enter the DSN details:
- Data Source Name (DSN) – Specify a name for your DSN (for example, Dynamics 365_DSN).
- Comment – Optional: Enter a short description of the DSN.
6. Specify connection string parameters and their values.
6.1. Select the plus (+) icon to create a Keyword/Value pair.
6.2. Double-click the Keyword field and specify the parameter name.
6.3. Double-click the Value field and specify the value for the parameter.
Required parameters:
- Data Source – The login URL for Dynamics 365 (for example,
https://dynamicsaccount.crm.dynamics.com). - User ID – Your Dynamics 365 username.
- Password – Your Dynamics 365 password.
7. Click Ok to save the DSN.
8. Optional: Click Test to verify the configuration.
Note
If you’re using Login and Password authentication when connecting to a data source and the password isn’t saved in the DSN, you’ll be prompted to enter it at runtime. If the password is saved in the DSN, or if you’re using OAuth 2.0 authentication, leave the User ID and Password fields empty.