Setting Up HTTP tunneling
To set up HTTP tunnel:
- Check that tunnel.php script is successfully uploaded to the web server. If no, see Uploading the Tunneling Script topic.
-
Click the New Connection button on the Database Explorer toolbar to open the Database Connection Properties dialog box.
Note
The Database Explorer is not available in the dbForge Data Compare for MySQL and dbForge Schema Compare for MySQL.
- Switch to the HTTP tab, check Use HTTP tunnel.
-
Enter the URL of the tunnel.php script uploaded to the web server. Note that if the web server is located on the port different from default 80, you should enter an URL like this: http://_web_server_name:port/script_location.
Select Keep connection alive to make the web server preserve the created connection open between requests.
-
If the tunneling script is located on the password-protected server, select Use Credentials and input login information (user, password) required to connect to the web server.
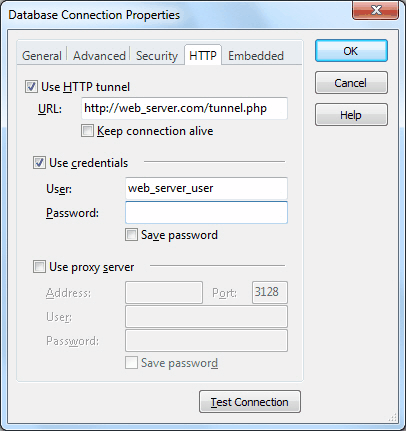
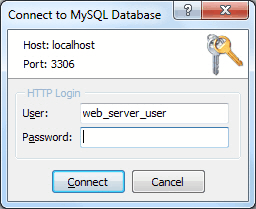
Tip: Select the Save password check box, otherwise while opening the connection, the Connect to MySQL Database dialog box will appear and dbForge Fusion for MySQL will ask you to enter the password again.
-
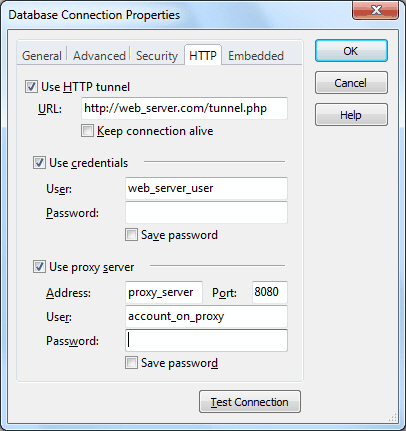
If you can not access the web server directly, but only through a proxy server, select Use Proxy and specify proxy settings.
-
On the General tab, set login information required to connect to the MySQL Server. Specify the following:
- Host - the host name of the remote MySQL Server located on the web server.
- Port - the TCP/IP port to connect to the remote MySQL Server. By default, it is 3306.
- User - the name of the user account on the remote MySQL Server.
- Password - the password of the user account on the remote MySQL Server.
- Specify the default database of the MySQL Server. To see all available databases in the Database Explorer window, select Show all databases, otherwise you will see only the selected one.
- (Optional) To test the created connection, click the Test Connection button.
- Click OK to establish the database connection.
Tip: To see in the Database Explorer a more appropriate name for the created connection, change the default connection name. By default, it is generated like this: <selected database>.<MySQL Server host>.