Creating model using Model-First approach
Creating a model using Model-First approach
This section explains how to create an Entity Framework model using the Model-First approach.
To create a model using the Model-First approach, perform the following sequence of actions:
1. In the Solution Explorer window, right-click the name of your project.
2. From the shortcut menu, select the Add command and select the New Item option.
Note
In the standalone application click the Create New Model button on the Entity Developer toolbar.
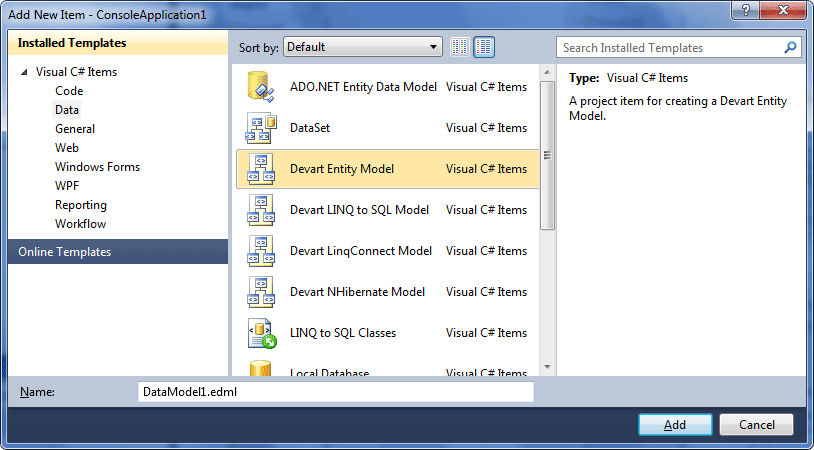
3. In the Installed Templates column of the Add New Item window, select Data.
4. In the central column of the Add New Item window, select Devart Entity Model.
Note
In the standalone application in the displayed New Model dialog select Devart Entity Model and click Create.
5. Click Add.
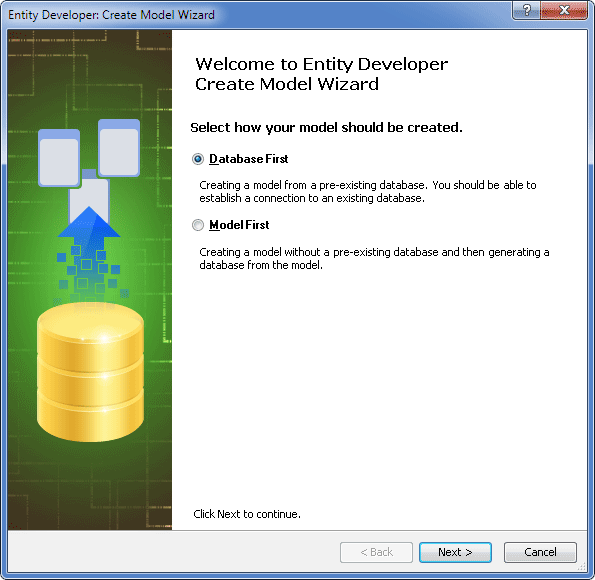
6. On the Create Model Wizard welcome page, select Model First and click Next.
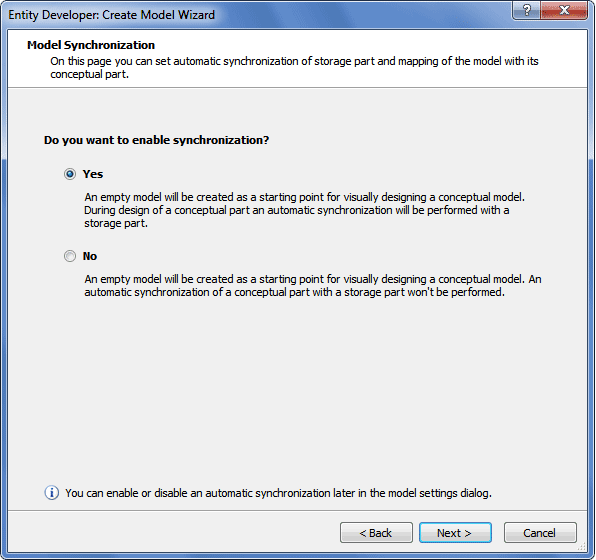
7. On the Model Synchronization page, select Yes and click Next.
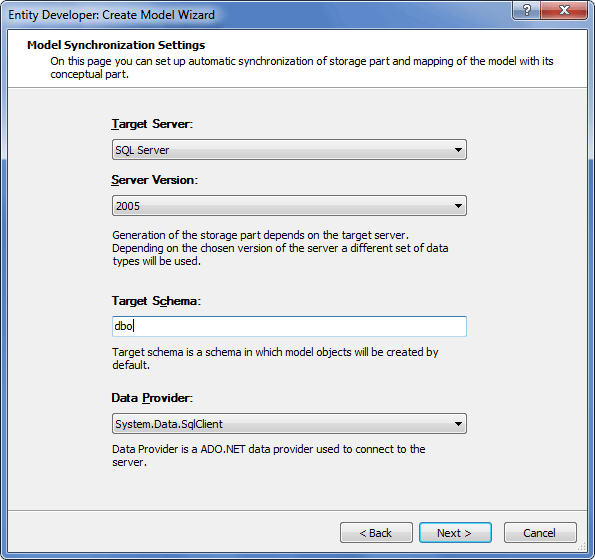
8. On the Model Synchronization Settings page, specify the appropriate settings for model synchronization and click Next.
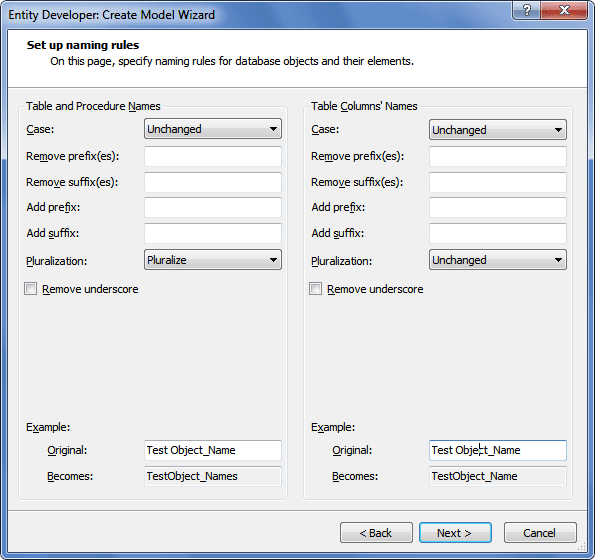
9. On the Set up naming rules page, specify the appropriate naming rules (if required) and click Next.
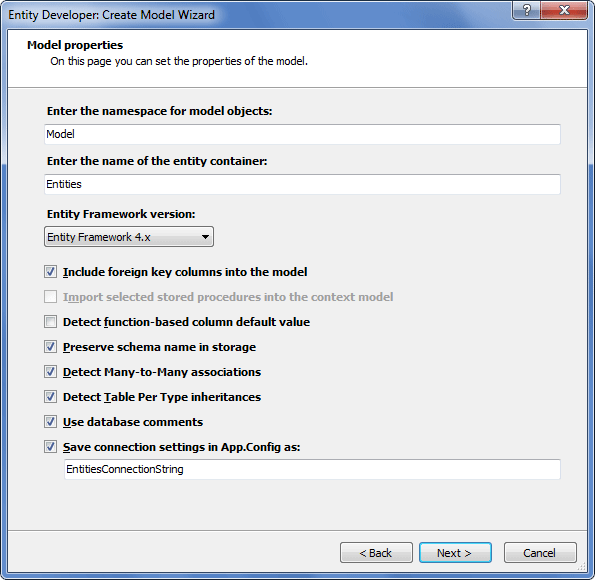
10. On the Model properties page, specify the properties of the model:
Use the Enter the namespace for model objects field to define the namespace where model objects will be placed in when generating code.
Use the Enter the name of the entity container field to specify the name of the entity container to contain all instances of entities for the Entity Data Model; you can easily change it later.
In the Entity Framework version dropdown list specify the version of Entity Framework that will be used for your project. One of the following versions can be selected (depending on Entity Framework installed on your computer): 3.5, 4.x, 5 and 6.
Keep the Include foreign key columns into the model checkbox selected to include foreign key columns in the model (not available for Entity Framework v1).
The Import selected stored procedures into the context model checkbox is disabled for the Model-First approach. If selected, this option creates corresponding methods in the conceptual model for procedures and functions selected at the stage of choosing model diagram contents. For functions and stored procedures that return one or more result sets, this will create complex types that correspond to the structure of the result.
Keep the Detect function-based column default value checkbox selected if you want columns having a function-based default value to be interpreted as Identity.
Keep the Preserve schema name in storage checkbox selected to indicate that schema name should be preserved in the storage part.
Keep the Detect Many-to-Many associations checkbox selected to indicate that many-to-many associations should be detected.
Keep the Detect Table Per Type inheritances checkbox selected to indicate that table per type inheritances should be detected.
Keep the Use database comments checkbox selected to indicate that comments for database objects, if supported by DBMS, should be used for model objects Documentation initialization and taken into account when executing model or database update operations.
Use the Save connection settings in App.Config (Web.Config) as option to specify that the connection string should be saved in App.Config (or Web.Config) with a certain name. If the checkbox is deselected, the connection string is specified explicitly in the model class constructor.
11. Click Next.
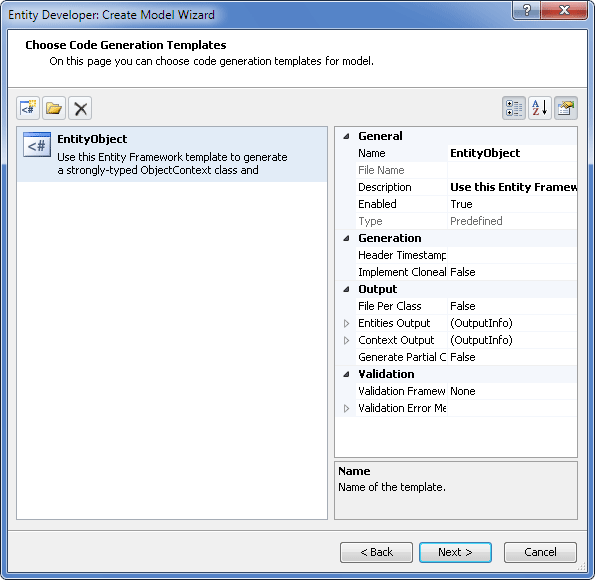
12. The Choose Code Generation page allows you to select code generation templates you want to add to the new model. By default this page contains the most frequently used template. The properties area of this page allows you to configure the properties of the selected template. Three buttons at the top of this page allow you to add more templates from gallery, add existing templates from disk and remove templates from the list.
Often users add the DbContext template and remove the EntityObject template on this page.
13. Click the Add template button.
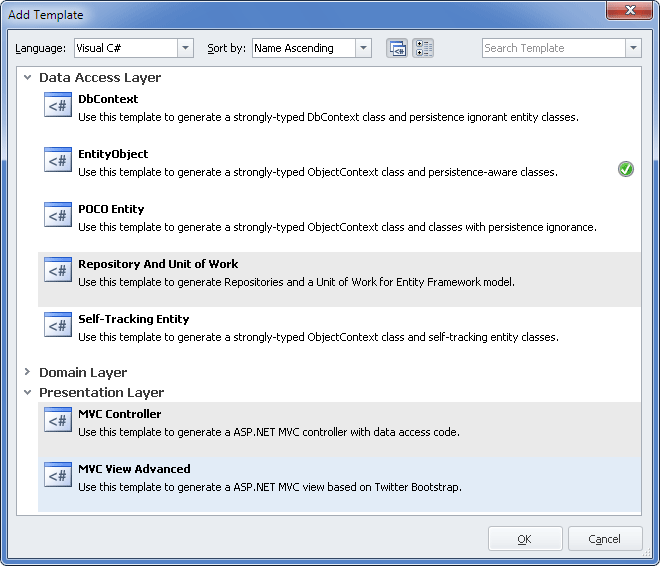
14. The Add Template dialog box lists all predefined and shared templates. Choose the required one and click OK. The selected template will be added to the list on the Choose Code Generation page together with all related templates (without which the template would work incorrectly).
15. After all the required templates are added to the list on the Choose Code Generation page of the wizard, click Next.
16. The final page of the wizard is displayed. This page may differ depending on the options selected in previous steps. The download ‘Entity Framework’ NuGet package checkbox is displayed, if Entity Framework 4.x or 5 is selected and the list of code generation templates contains the DbContext template, or if Entity Framework 6 is selected (irrespective of the selected templates).
Note
Absence of the Entity Framework NuGet package on your machine will prevent certain functionality from working properly.
17. Click Finish.
The model is successfully created.
Creating a class
This procedure explains how to create a class. For the purpose of this example, we shall create the Blog class.
1. In the active diagram area press INSERT.
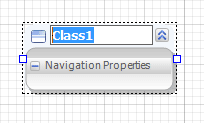
2. Enter Blog in the class name field and press ENTER.
3. Right-click the created class and select New Property from the Add submenu of the shortcut menu.
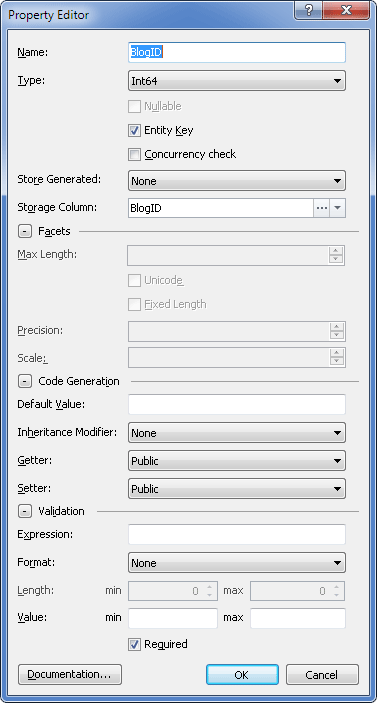
4. In the Name field of the Property Editor dialog box, enter the name of the property (BlogID).
5. From the Type dropdown list, select Int64.
6. Ensure that the Entity Key checkbox is selected.
7. From the Store Generated dropdown list, select Identity. This step must be performed for all other entity keys in the model.
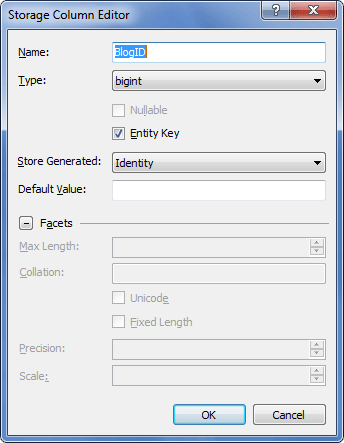
8. (Optional) To change the default parameters of the database column, to which this property is to be mapped, click the three-dotted button in the Storage Column field and, in the Storage Column Editor dialog box (see below), enter the desired values and click OK.
9. In the Property Editor dialog box click OK.
10. To create the second property (BlogTitle), right-click the created class and select New Property from the Add submenu of the shortcut menu.
11. In the Name box of the Property Editor dialog box, enter the name of the property (BlogTitle).
12. From the Type dropdown list, select String.
13. Leave other settings as they are and click OK.
All other classes in the model are created similarly. For more information on how to create classes, see Working with classes.
The resulting model is shown further in this topic.
Creating an association
This procedure describes how to create an association. For the purpose of this procedure, we suppose that at least the Blog class (with the BlogID and BlogTitle properties) and the Post class (with the PostID and Status properties) have been created. The association that is created in this procedure is of the One-to-Many type.
To create an association, perform the following sequence of actions:
1. On the model diagram, right-click the Blog class and, from the Add submenu of the shortcut menu, select New Association.
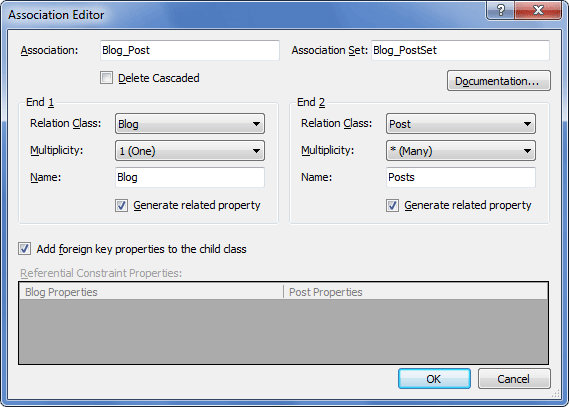
2. From the Relation Class dropdown list in the End 1 area select Blog, from the Multiplicity dropdown list select 1 (One), and leave other settings set to their default values.
3. From the Relation Class dropdown list in the End 2 area select Post, from the Multiplicity dropdown menu select * (Many), and leave other settings set to their default values.
4. Click OK.
Note, that as during creation of this association the Add foreign key properties to the child class checkbox was selected, the BlogID property was automatically created in the Post class.
For information on how create other types of associations, see Working with associations.
Creating an inheritance
This procedure describes how to create an inheritance. For the purpose of this procedure we suppose that the Author class with the AuthorID, Address, Name and AuthorDiscriminator properties, and the RegularAuthor class with the RegularAuthorID and DateofFirstBlogPost properties (note that for both of these properties the Nullable property value is set to True) have already been created. The inheritance that is created in this procedure is of the Table-per-Hierarchy type.
To create an inheritance, perform the following sequence of actions:
1. On the model diagram, select the Author class and the RegularAuthor class while holding the CTRL button, right-click one of the selected classes and from the Add submenu of the shortcut menu, select New Inheritance.
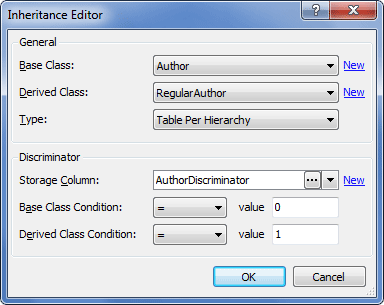
2. From the Base Class dropdown list, select Author.
3. From the Derived Class dropdown list, select RegularAuthor.
4. From the Type dropdown list, select Table Per Hierarchy.
5. In the Discriminator area, from the Storage Column dropdown list select AuthorDiscriminator.
6. Set the Base Class Condition equal to 0.
7. Set the Derived Class Condition equal to 1.
8. Click OK. Then the following warning message will be displayed: Discriminator column ‘AuthorDiscriminator’ is mapped to the conceptual model property ‘AuthorDiscriminator’. Do you want to delete the property now?
9. Click Yes.
The AuthorDiscriminator property will be deleted from the base class.
This ends the procedure of inheritance creation.
Note
In case of TPH inheritance creation, certain requirements should be met: either all properties of the derived class should be nullable or the corresponding storage columns must have the default value assigned.
For the purpose of this example, we create one more TPH inheritance with the Author base class and the GuestAuthor derived class. All settings in the Inheritance Editor are similar, with the exception that we set the Derived Class Condition equal to 2.
For more information on how to create inheritances of other types, see Working with inheritances.
Summary description of the model
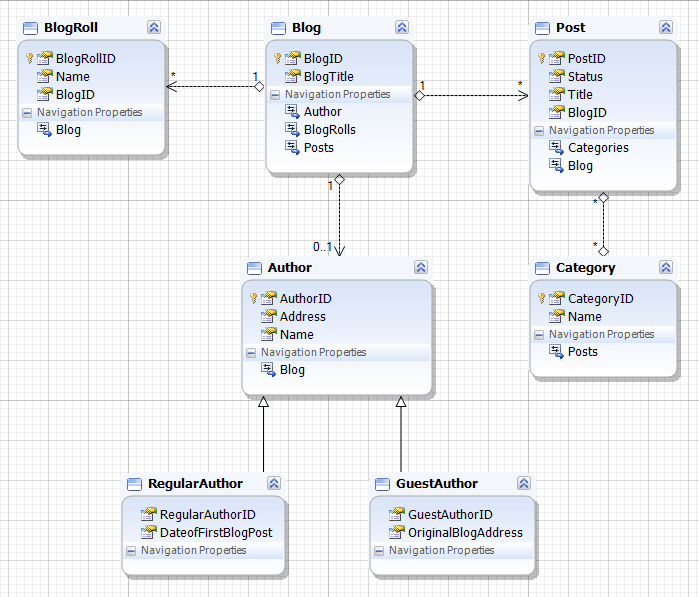
The resulting model should contain the following items:
-
Classes:
-
Blog;
-
BlogRoll;
-
Author;
-
RegularAuthor;
-
GuestAuthor;
-
Post;
-
Category.
-
-
Associations:
-
Blog - Post, Blog - BlogRoll (one-to-many);
-
Blog - Author (one-to-one);
-
Category - Post (many-to-many).
-
-
Inheritances:
-
Author - RegularAuthor;
-
Author - GuestAuthor.
-
Below is the example of the resulting model:
Mapping and code generation setup
This section explains how to set up mapping and code generation in Entity Framework models.
Mapping setup
To set up how mapping is stored, perform the following sequence:
1. Navigate to the Model Explorer window, select the model and click to display the Properties window for the selected model.
2. In the Properties windows, locate the Metadata Artifact Processing row and select the appropriate value from the dropdown list on the right. For the purpose of this tutorial, we assume that the CopyToOutputDirectory is selected.
Note
This setting is overridden, when the DbContext template is used. In that case, the way XML mapping is stored is defined through the value of the Fluent Mapping property of the template.
Code generation setup
This section explains how to set up code generation in Entity Framework models.
For the purpose of code generation, you may need to create and define folders, into which generated code will be saved, as well as other parameters available in the Properties window of the selected template.
The definition of output folders for code generation is optional, if such folders are of no importance for you, go directly to Step 8 of the procedure.
To define folders for code generation, perform the following sequence of actions:
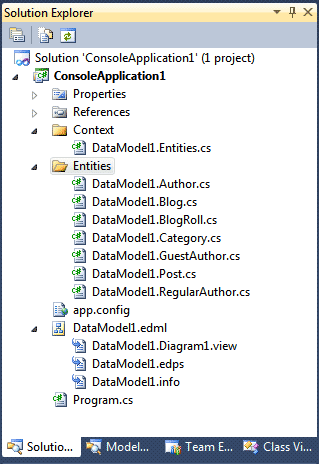
1. In your project in the Solution Explorer window, create a folder for entities (for example, Entities) and a folder for context (for example, Context).
2. Navigate to the Model Explorer window, select the template and click to display the Properties window for the selected template.
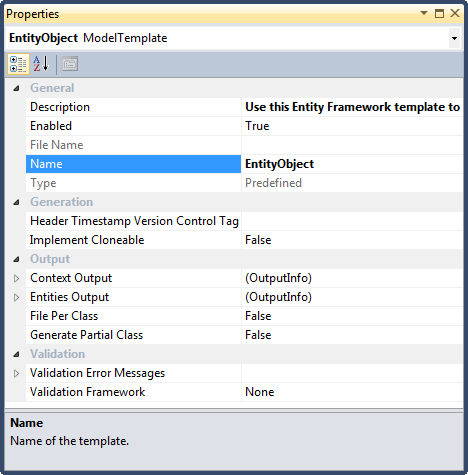
3. In the Output section of the model properties, click the Context Output line and then click the displayed three-dotted button.
4. In the Select Project Folder dialog box, select the appropriate folder for the context class file (for example, the Context folder that was created in Step 1 of this procedure) and click OK.
5. Click in the Entities Output line and click the three-dotted line to open the Select Project Folder window.
6. In the Select Project Folder window, select the appropriate folder for entity files (for example, the Entities folder that was created in Step 1 of this procedure) and click OK.
7. Select an appropriate value for the File Per Class property: if different folders are specified for the context and entities, the File Per Class parameter must be set to True.
8. Set the Generate Partial Class property to True define that for each class of the model a partial class should be generated, in which it will be possible to add code that won’t be overwritten by the designer. The property can be used, if File Per Class is set to True.
9. To enable the entity property validation mechanism in the Validation section locate the Validation Framework row and select the appropriate framework; use the Validation Error Messages row to apply error messages stored in the application resources. For details on validation refer to Entity Property Validation.
10. Ensure that you have a physical connection to the database server.
11. To generate code, save the model in Microsoft Visual Studio. In the Entity Developer stand-alone application, click the  button on the toolbar or press F7.
The context and entities are successfully generated and stored in the specified folders:
Updating the database from the model
This section explains how to update the database from the model that has been created using the Model-First approach. We assume that there is a valid connection to the database server.
To update the database from the model, perform the following sequence of actions:
1. Select Tools –> Entity Developer –> Update Database from Model.
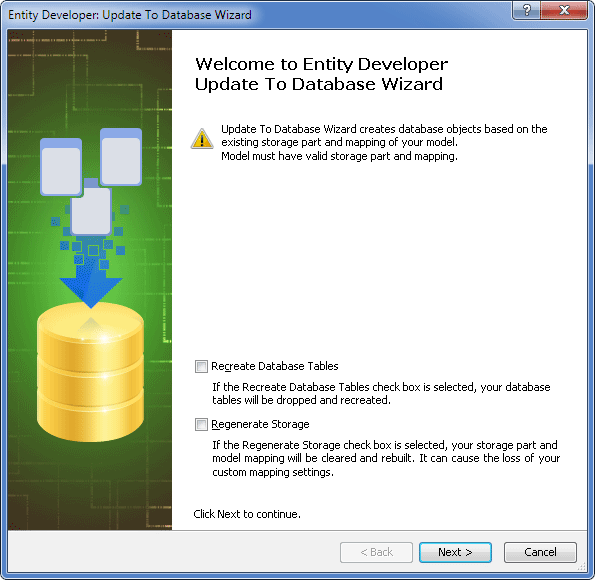
Note
If the Recreate Database Tables checkbox is selected, the existing database tables will be dropped and created anew.
If the Regenerate Storage checkbox is selected, the whole Model Storage part and Mapping, including the description of storage columns and ends of relations, will be completely re-generated.
Since Entity Framework model has explicit difference between Conceptual and Storage parts and Mapping between them, and Storage part and Mapping are required, this feature can be very useful, because it eliminates the need to create Storage part and Mapping manually in Model-First Approach.
2. (Optional) Select the Regenerate Storage checkbox, if appropriate.
3. Click Next.
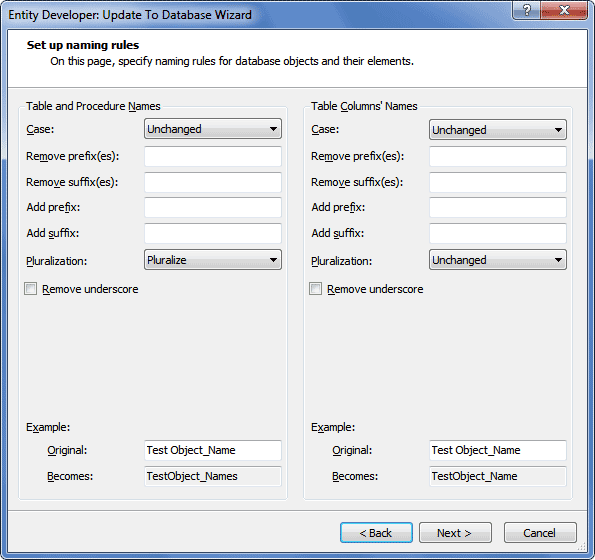
4. On the Set up naming rules page, leave all the settings as they are and click Next.
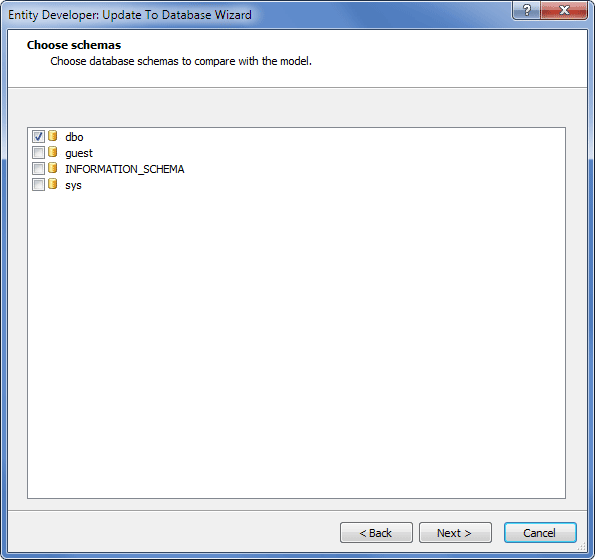
5. On the Choose schemas page, select one or more schemas to be compared and click Next.
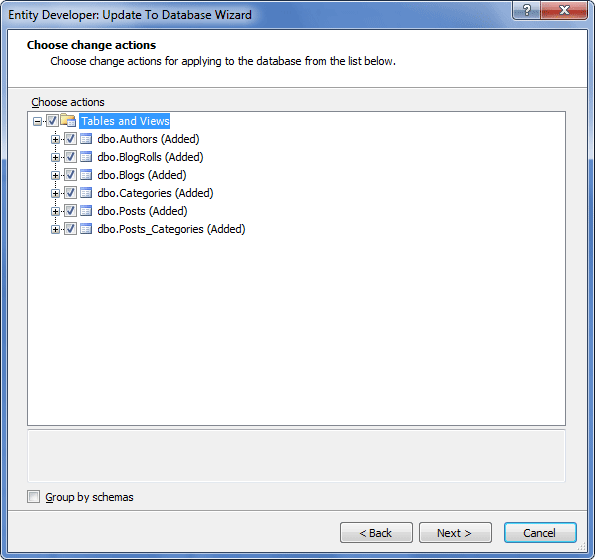
6. On the Choose change actions page, select the appropriate action(s). You can use the shortcut menu of the root nodes to select or clear all added, dropped, or changed objects. Click Next.
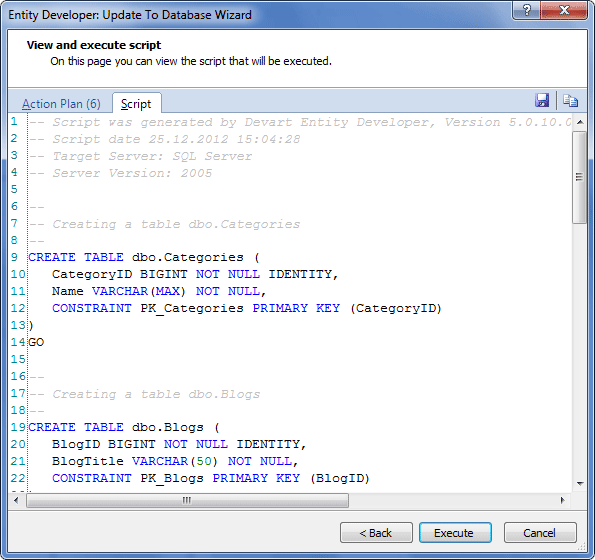
7. On the View and execute script page, click Execute to execute the displayed scripts.
8. On the final window of the wizard click Finish.
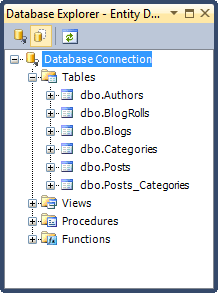
9. To check that the process provided valid results, go View –> Entity Developer and select Database Explorer.
Note
In case you just want to generate a database object creation script, you can use Generate Database Script Wizard, for details see the Generate Database Script Wizard section.
Testing the model
Certain test data must be entered in order to test the correctness of entities and mapping. A sample procedure for entering test data is given below.
Entering test data
To enter test data, perform the following sequence of actions:
1. In the Database Explorer window (see above), right-click dbo.Blogs and, from the shortcut menu, select Retrieve data.
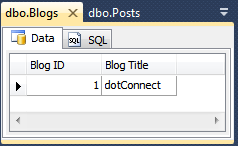
2. In the Blog Title column of the Data tab, enter “dotConnect”, as shown below.
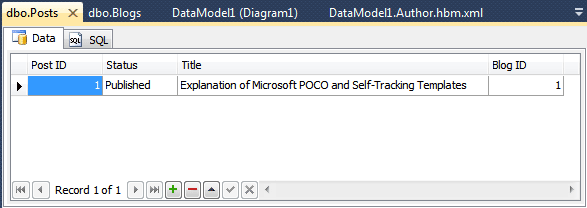
3. In the Database Explorer window, right-click dbo.Posts and, from the shortcut menu, select Retrieve data.
4. Enter the test data, as shown below.
Creating and using a new query
After the test data have been entered, the next stage is to create a new query and use it to test the validity of the model. Data returned on the query must be identical to those entered in the previous procedure.
To create and use a query, perform the following sequence of actions:
1. Go to Tools –> Entity Developer and select New Query.
2. From the Query type dropdown list of the Entity Developer Query toolbar, select LINQ.
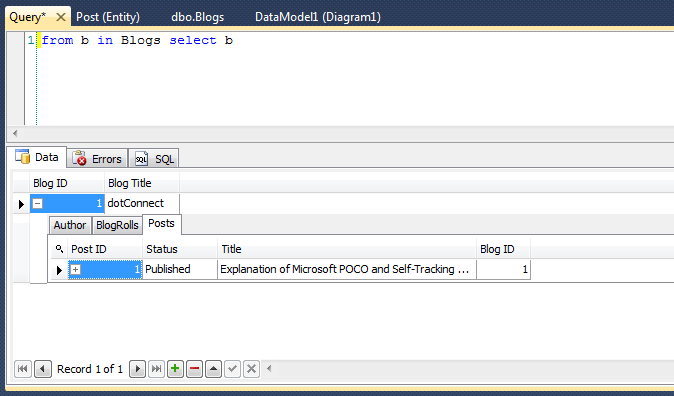
3. From the Model Explorer window, drag, for example, the Blog class and drop it onto the displayed Query.eqry tab. The query (“from b in Blogs select b”) is formed.
4. On the Entity Developer Query toolbar, click the Run Query button.
5. View the results of the query (shown below).