To create a model from your existing database, perform the following sequence of actions:
| 1. | In the Solution Explorer window, right-click the name of your project. |
| 2. | From the shortcut menu, select the Add command and select the New Item option. |
|
|
In the standalone application click the Create New Model button on the Entity Developer toolbar.
|
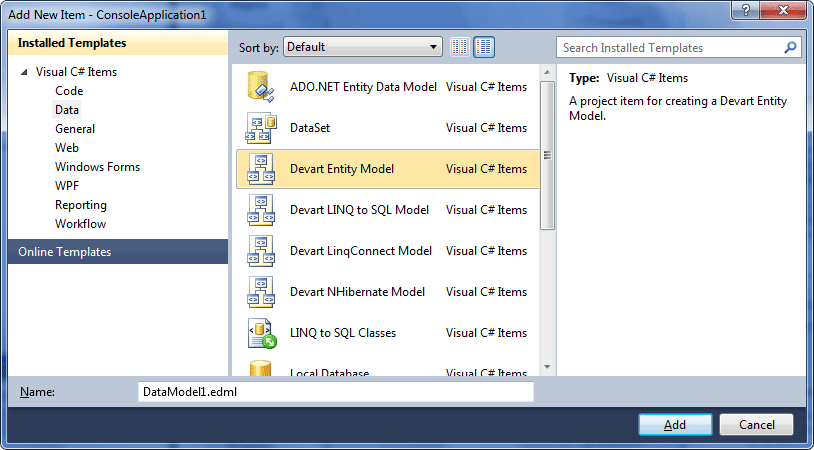
| 3. | In the Installed Templates column of the Add New Item window, select Data. |
| 4. | In the central column of the Add New Item window, select Devart Entity Model. |
|
|
In the standalone application in the displayed New Model dialog select Devart Entity Model and click Create.
|
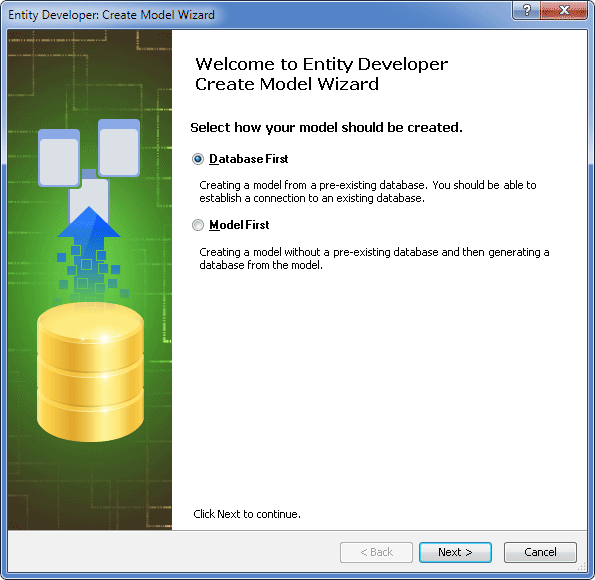
| 6. | Select the Database First option and click Next. |
|
|
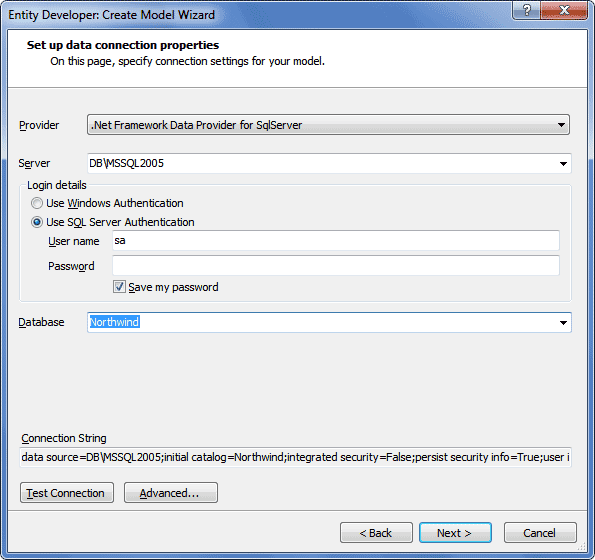
This page may differ from the one pictured above, depending on which provider is selected.
|
| 7. | On the Set up connection properties page, specify connection parameters as appropriate for the type of the server to be used. |
| 8. | (Optional) To check that the connection is valid, click Test connection. If the connection cannot be established, correct the entered data and repeat this step. |
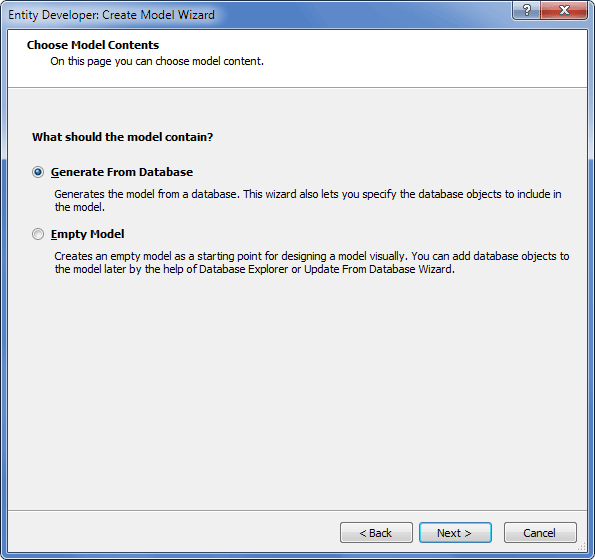
| 10. | On this page, select the Generate From Database option and click Next. |
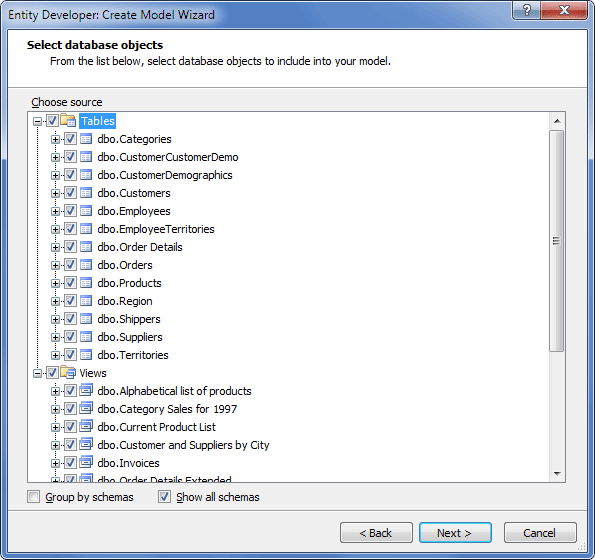
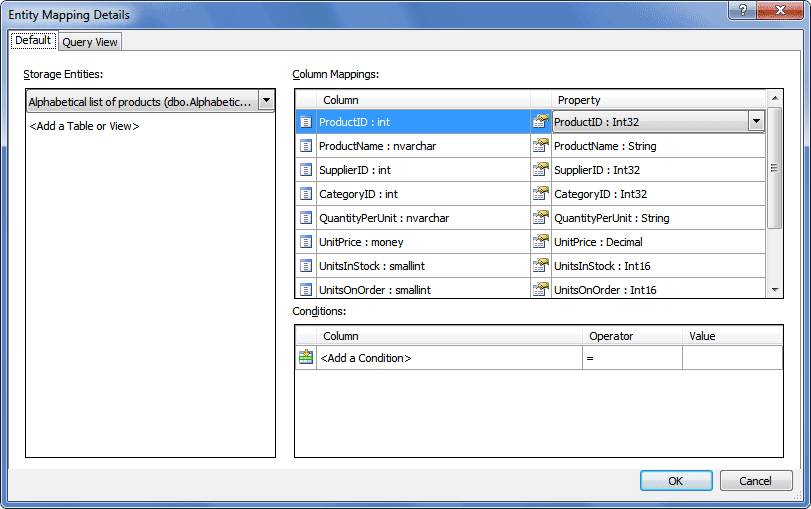
| 11. | On the Select database objects page, select the table and/or views as well as stored procedures and functions that are to be included in the model and click Next. |
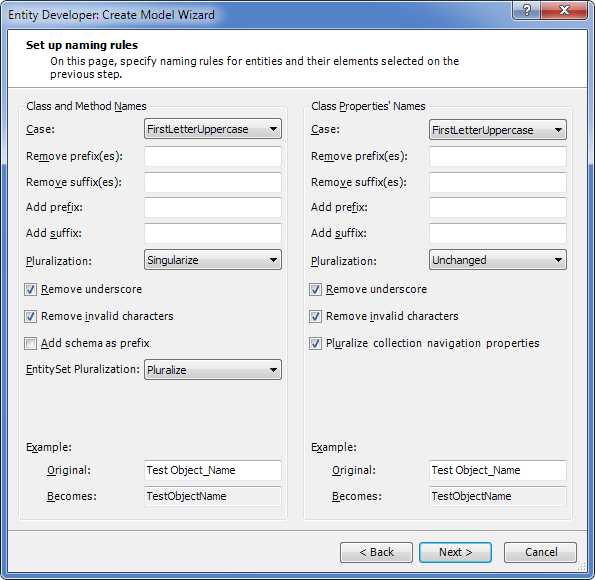
| 12. | On the Set up naming rules page, define the naming rules for your model and click Next. |
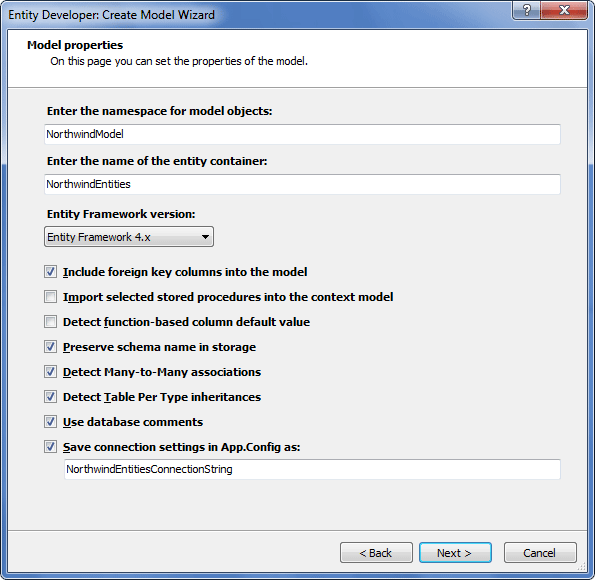
| 13. | On the Model properties page, specify the properties of the model: |
Use the Enter the namespace for model objects field to define the namespace where model objects will be placed in when generating code.
Use the Enter the name of the entity container field to specify the name of the entity container to contain all instances of entities for the Entity Data Model; you can easily change it later.
In the Entity Framework version drop-down list specify the version of Entity Framework that will be used for your project. One of the following versions can be selected (depending on Entity Framework installed on your computer): 3.5, 4.x, 5 and 6.
Keep the Include foreign key columns into the model check box selected to include foreign key columns in the model (not available for Entity Framework v1).
Keep the Import selected stored procedures into the context model check box to create corresponding methods in the conceptual model for procedures and functions selected at the stage of choosing model diagram contents. For functions and stored procedures that return one or more result sets, this will create complex types that correspond to the structure of the result.
Keep the Detect function-based column default value check box selected if you want columns having a function-based default value to be interpreted as Identity.
Keep the Preserve schema name in storage check box selected to indicate that schema name should be preserved in the storage part.
Keep the Detect Many-to-Many associations check box selected to indicate that many-to-many associations should be detected. If this check box is not selected, a class with two one-to-many associations will be generated for an intermediate table instead of a many-to-many association.
Keep the Detect Table Per Type inheritances check box selected to indicate that table per type inheritances should be detected.
Keep the Use database comments check box selected to indicate that comments for database objects, if supported by DBMS, should be used for model objects Documentation initialization and taken into account when executing model or database update operations.
Use the Save connection settings in App.Config (Web.Config) as option to specify that the connection string should be saved in App.Config (or Web.Config) with a certain name. If the check box is deselected, the connection string is specified explicitly in the model class constructor.
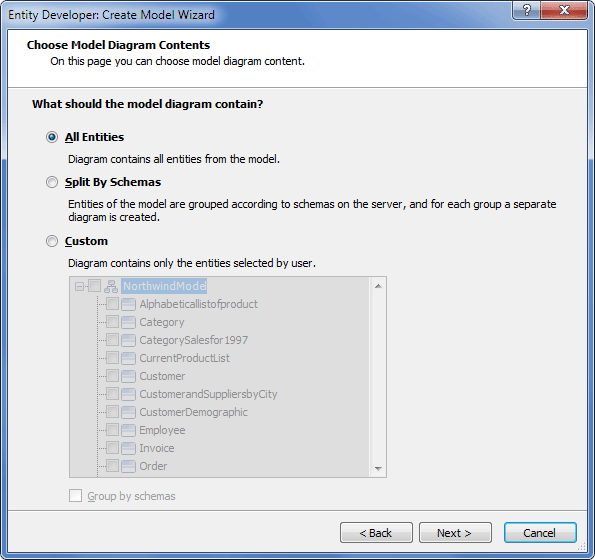
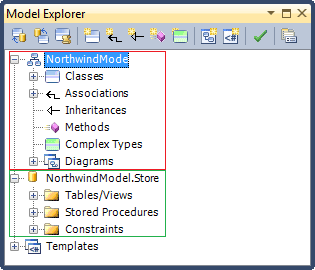
| 15. | On the Choose Model Diagram Contents page, select, which entities should be displayed on the diagram. There are three options: All Entities (all entities are displayed on the diagram), Split by Schemas (entities of a schema are displayed on a separate diagram), or Custom (manually select the required entities). |
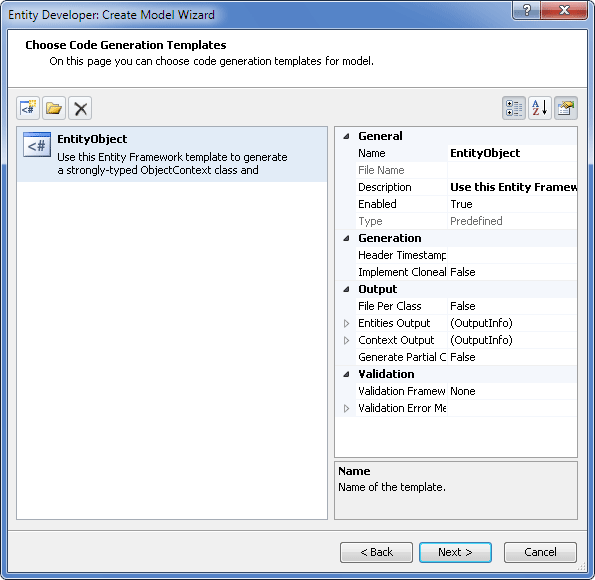
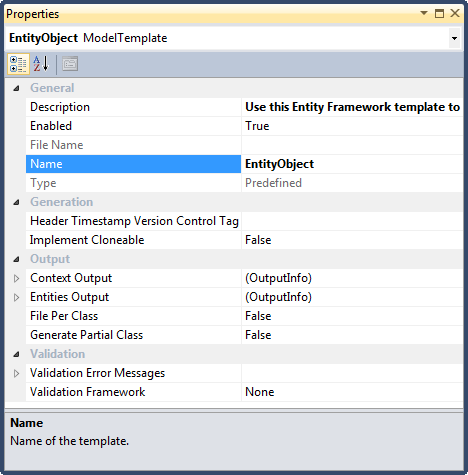
| 17. | The Choose Code Generation page allows you to select code generation templates you want to add to the new model. By default this page contains the most frequently used template; the properties area of this page allows you to configure the properties of the selected template. Three buttons at the top of this page allow you to add more templates from gallery, add existing templates from disk and remove templates from the list.
Often users add the DbContext template and remove the EntityObject template on this page. |
| 18. | Click the Add template button. |
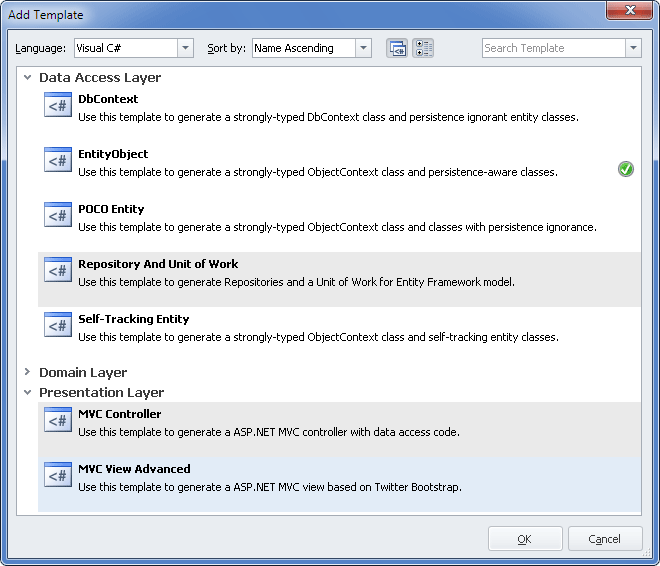
| 19. | The Add Template dialog box lists all predefined and shared templates. Choose the required one and click OK. The selected template will be added to the list on the Choose Code Generation page together with all related templates (without which the template would work incorrectly). |
| 20. | After all the required templates are added to the list on the Choose Code Generation page of the wizard, click Next. |
| 21. | The final page of the wizard is displayed. This page may differ depending on the options selected in previous steps. The download 'Entity Framework' NuGet package check box is displayed, if Entity Framework 4.x or 5 is selected and the list of code generation templates contains the DbContext template, or if Entity Framework 6 is selected (irrespective of the selected templates). |
|
|
Absence of the Entity Framework NuGet package on your machine will prevent certain functionality from working properly.
|
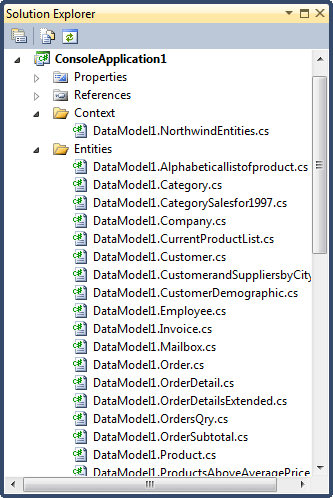
The model is successfully created:

|
 Prerequisites