The following walkthrough describes how to map an entity to two or more tables in Entity Developer. An entity can be mapped to two or more tables if they share the same primary key.
In order to complete this walkthrough, you will need access to the database server you are using. You will also need a data provider to the corresponding server installed on your system. In Microsoft Visual Studio, you should create a new project that will be used for the purpose of this walkthrough.
|
The walkthrough uses a SQL Server database, however you may perform it with any database - just create the corresponding database with a similar structure.
To create a database, execute the following script against an instance of SQL Server or SQL Server Express (to execute this script you may use any appropriate tool, for example MS SMS or Devart dbForge Studio for SQL Server):
CREATE TABLE test.Customers (
CustomerID int NOT NULL,
CompanyName nvarchar(40) NOT NULL,
ContactName nvarchar(30),
CONSTRAINT PK_Customers PRIMARY KEY (CustomerID)
);
CREATE TABLE test.CustomerAdress (
CustomerID int NOT NULL,
ContactTitle nvarchar(30),
Address nvarchar(60),
City nvarchar(15),
Region nvarchar(15),
PostalCode nvarchar(10),
Country nvarchar(15),
Phone nvarchar(24)
CONSTRAINT PK_CustomerAdress PRIMARY KEY (CustomerID)
CONSTRAINT FK_Customer_CustomerAdress FOREIGN KEY (CustomerID) REFERENCES test.Customers(CustomerID) ON DELETE CASCADE
);
|
To create a model from your database, perform the following sequence of actions:
| 1. | In the Solution Explorer window, right-click the name of your project. |
| 2. | From the shortcut menu, select the Add command and select the New Item option. |
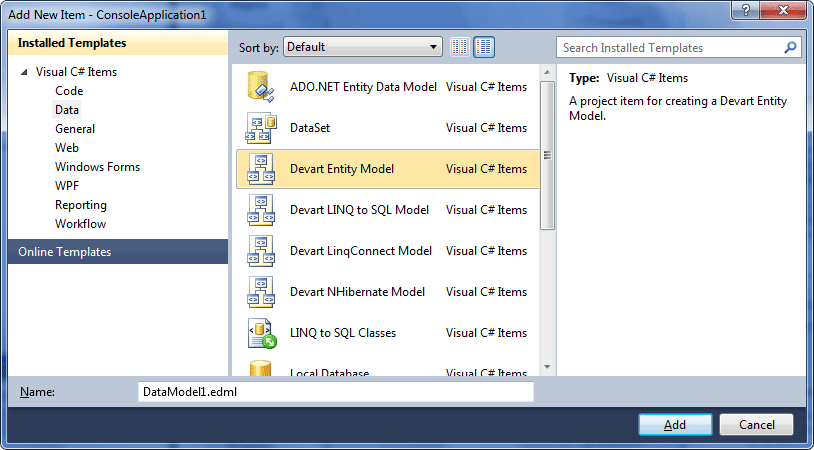
| 3. | In the Installed Templates column of the Add New Item window, select Data. |
| 4. | In the central column of the Add New Item window, select Devart Entity Model. |
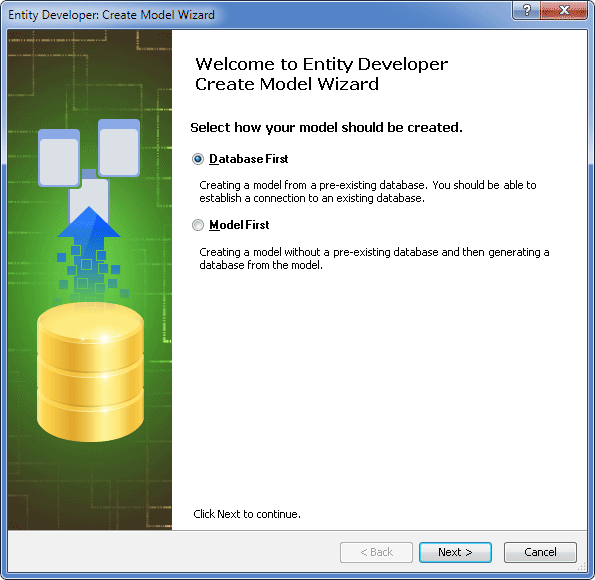
| 6. | Select the Database First option and click Next. |
|
|
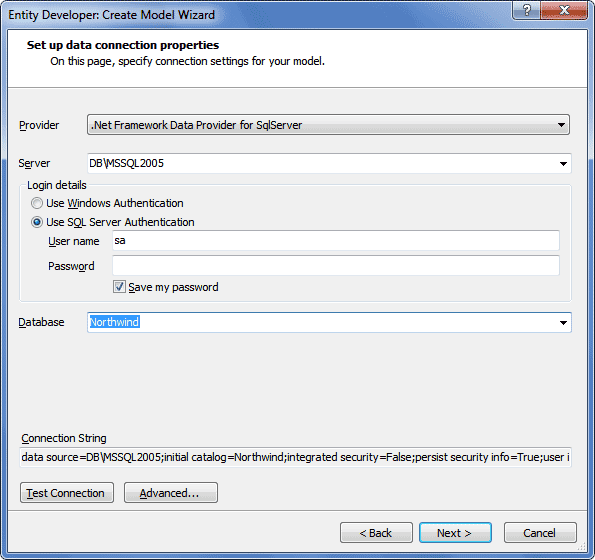
This page may differ from the one pictured above, depending on which provider is selected.
|
| 7. | On the Set up connection properties page, specify connection parameters as appropriate for the type of the server to be used. |
| 8. | (Optional) To check that the connection is valid, click Test connection. If the connection cannot be established, correct the entered data and repeat this step. |
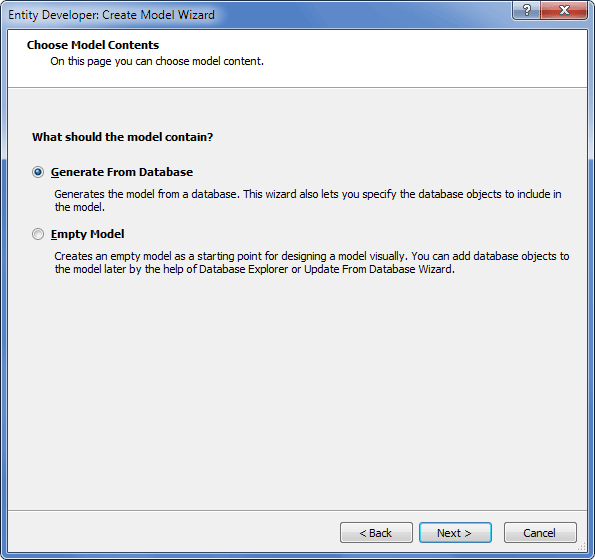
| 10. | On this page, select the Generate From Database option and click Next. |
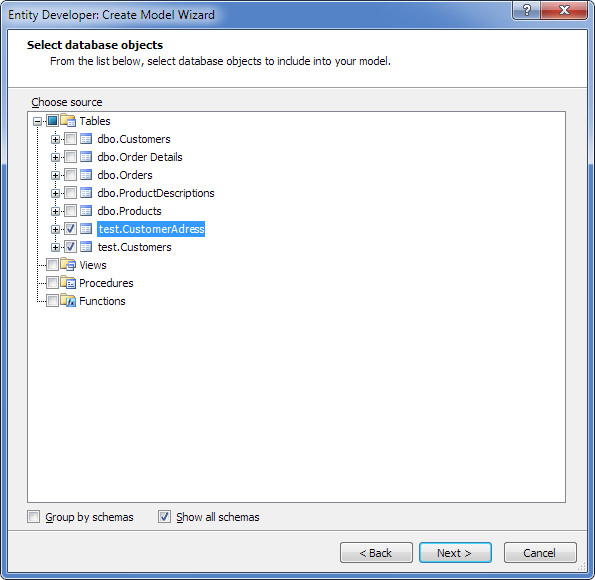
| 11. | On the Select database objects page, select the newly created tables that are to be included in the model and click Next. |
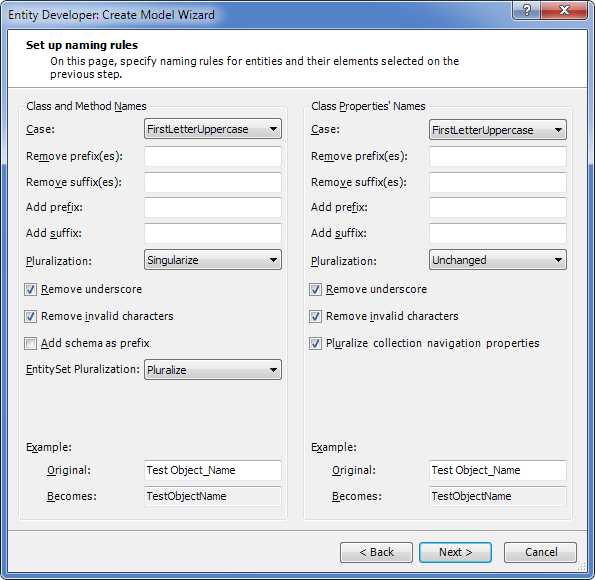
| 12. | On the Set up naming rules page, define the naming rules for your model and click Next. |
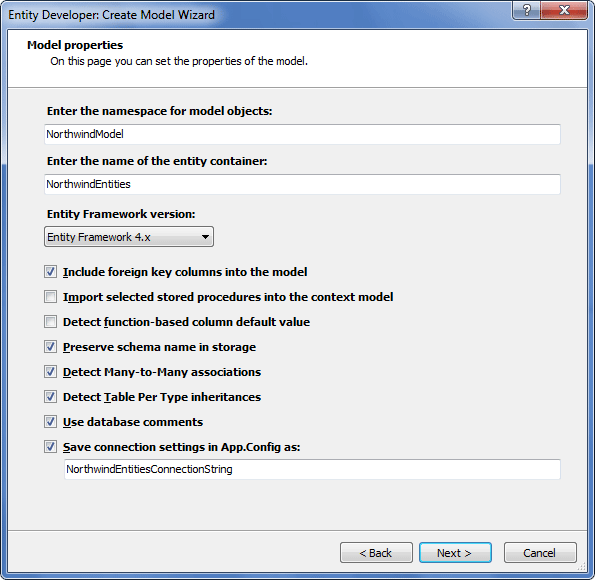
| 13. | On the Model properties page, specify the properties of the model (you may leave the default settings) and click Next. |
| 14. | On the Choose Model Diagram Contents page, select, which entities should be displayed on the diagram. Since there are only two entities in our walkthrough, select All Entities and click Next. |
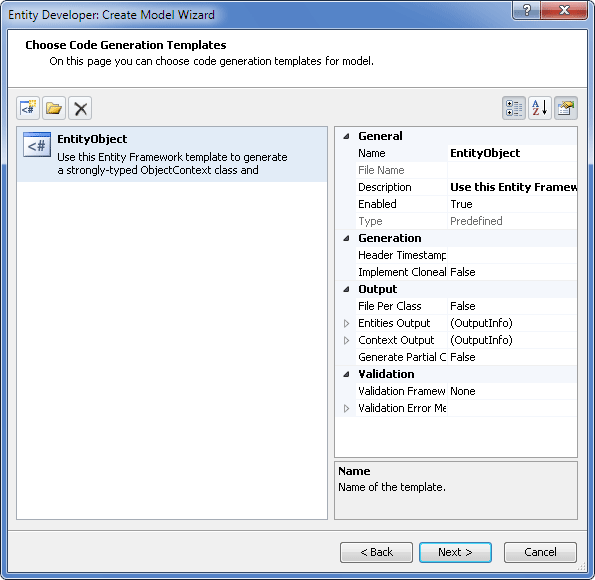
| 15. | The Choose Code Generation page allows you to select code generation templates you want to add to the new model. By default this page contains the most frequently used template; the properties area of this page allows you to configure the properties of the selected template. Three buttons at the top of this page allow you to add more templates from gallery, add existing templates from disk and remove templates from the list. |
The model is successfully created:
|
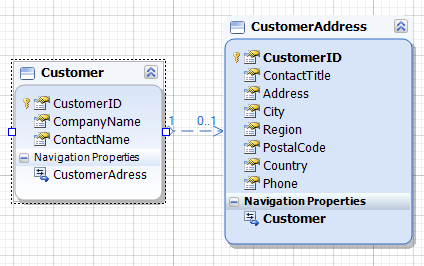
Now we will update the Customer entity to combine data from the Customers and CustomerAddress tables.
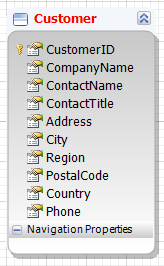
| 1. | Select all the properties in the CustomerAddress entity except the CustomerID property and press Ctrl+X. |
| 2. | Click the Customer entity and press Ctrl+V. |
| 3. | Click the CustomerAddress entity and press Delete. |
| 4. | In the first opened dialog box, asking whether to delete object from the model, click Yes. |
| 5. | In the second opened dialog box, asking whether to delete the corresponding storage model objects, click No. |
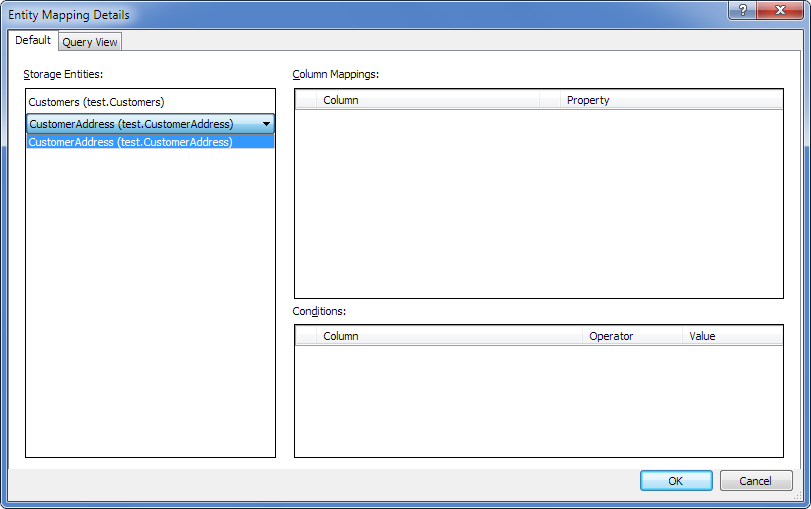
| 6. | Right-click the Customer entity and then click Mapping Details. |
| 7. | In the Entity Mapping Details dialog box click <Add a Table or View> and select CustomerAddress (test.CustomerAddress). |
| 8. | The properties are mapped to the corresponding columns automatically. Click OK. |
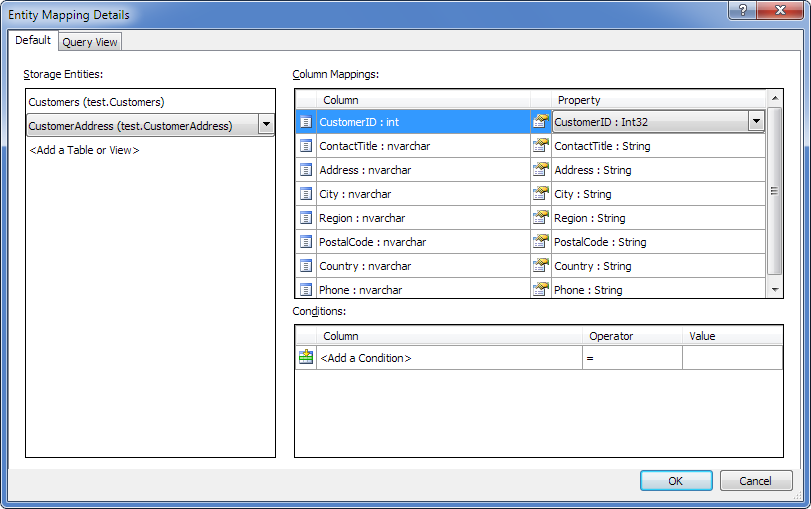
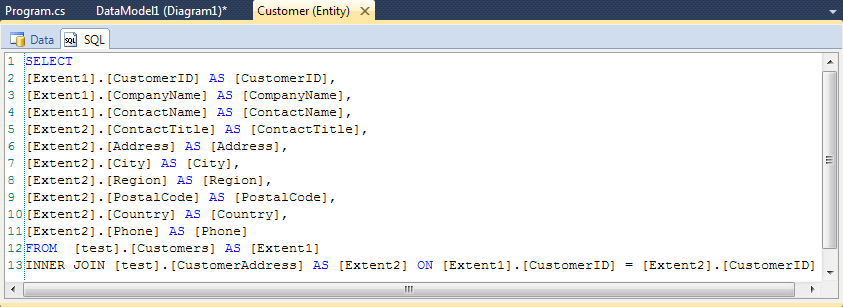
Now our Customer entity is mapped to two tables: Customers and CustomerAddress.
|
Now you can test mapping of the Customer entity. Right-click the entity and then click Retrieve Data. On the SQL tab of the opened Customer (Entity) document you can inspect the SQL generated by Entity Framework to query the entity.
|
Send feedback on this topic
© 2008 - 2026 Devart. All rights reserved.
 Prerequisites