This topic describes how to work with type mapping rules in Entity Developer and provides an explanation of the specifics of mapping types in Entity Developer.
|
Changes introduced through the use of the procedures described below are applicable to the way the entire Entity Developer application works rather than a particular model, so you must be extra careful when changing or removing type mapping rules. |
In Entity Developer, you can:
| • | create type mapping rules; |
| • | edit/restore default type mapping rules; |
| • | enable/disable type mapping rules; |
| • | and remove type mapping rules. |
The procedures for executing each of these actions are given below.
To access the list of type mapping rules do the following:
| 1. | From the application's main menu, select Tools and then select Options. |
|
If you are using Entity Developer as an add-in to Microsoft Visual Studio, to access this functionality, select Tools --> Options and then, in the navigation pane of the Options dialog box, select Entity Developer --> Servers' Options. |
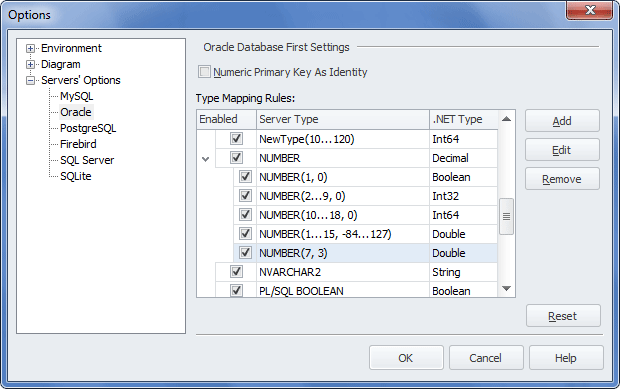
The Options dialog box is displayed:
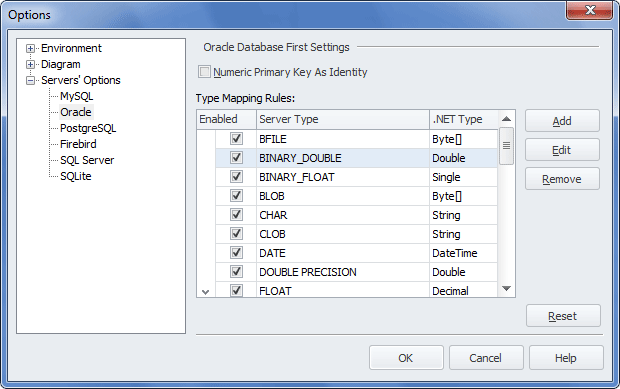
|
The list of supported database servers under Servers' Options depends on the database servers that the installed edition of our product supports and may differ from the one in the picture above. |
| 2. | (Optional) Under Servers' Options, select the required server. |
To enable/disable type mapping rules:
use the corresponding check box column in the Type Mapping Rules list of the Options dialog or the corresponding check box in the Type Mapping Rule Editor dialog box.
 Editing a Type Mapping Rule
Entity Developer contains a set of predefined type mapping rules that the user can edit. To edit a type mapping rule, perform the following sequence of actions:
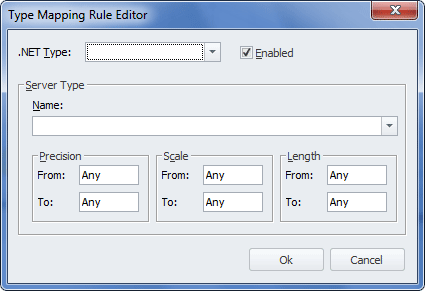
The Type Mapping Rule Editor dialog box is displayed:
The selected type mapping rule is successfully changed.
|

Adding a Main Type Mapping Rule
In Entity Developer, you can add your own custom rules for mapping server types to .NET types. For that purpose, perform the following sequence of actions:
The Type Mapping Rule Editor dialog box is displayed:
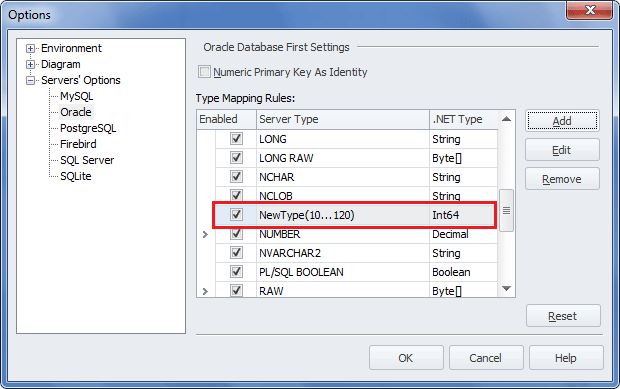
The new type mapping rule is successfully added to the list of rules:
|
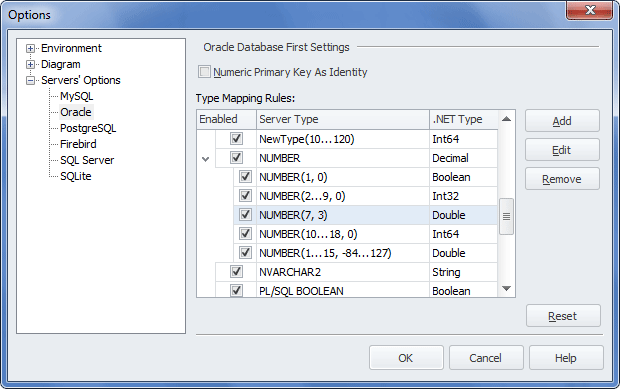
Adding a Type Mapping Sub-Rule
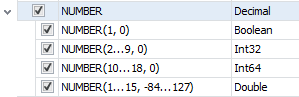
Main rules for type mapping can have an unlimited number of sub-rules. The procedure for adding a sub-rule to the main rule is highly similar to the procedure of adding a main rule; however, you must select the server rule, which you want to add a sub-rule to. Another thing to remember while adding sub-rules is that the order, in which sub-rules are displayed under the main rule, is of extreme importance, since the application checks the sub-rules from top to bottom within the main rule. For the sake of example, suppose that you have the following main rule and a number of sub-rules in it: Now suppose that you need to add another sub-rule with the following parameters: precision = 7 and scale = 3. After the procedure for adding a sub-rule has been completed, the new sub-rule is displayed in the end of the sub-rule list: Since the application performs checks from top to bottom, in the situation, when it receives the NUMBER type precision equal to 7, the checks will be stopped at the first sub-rule, that is, at NUMBER (10...18, 0), while the sub-rule you have created will never be used at all. To remedy this situation, you need to drag and drop your newly created rule two positions up, so that the order, in which sub-rules are placed within the main rule, will be as follows: |
Removing a Type Mapping Rule
In Entity Developer, you can remove available type mapping rules. To remove a type mapping rule, perform the following sequence of actions:
The selected type mapping rule is successfully removed.
|
