ASP.NET Identity is a new system of user authentication and authorization, that continues the evolution of ASP.NET membership system, and is used in the Visual Studio 2015 project templates for ASP.NET MVC, Web Forms, Web API and SPA. You can read more on ASP.NET Identity in Microsoft documentation.
dotConnect for SQLite enables you to employ an implementation of ASP.NET Identity for SQLite database using either ADO.NET or Entity Framework functionality in your web applications. This allows you to use such ASP.NET Identity benefits as unit-testable user authentication system, social login support, OWIN integration, etc. This tutorial demonstrates creating an ADO.NET implementation of ASP.NET Identity.
To complete this tutorial you need Visual Studio 2015 or higher. For Visual Studio 2015 or higher, see Using ADO.NET Implementation of ASP.NET Identity 1 for SQLite.
In order to create an ASP.NET MVC 5 application using dotConnect for SQLite for storing identity information, perform the following steps:
-
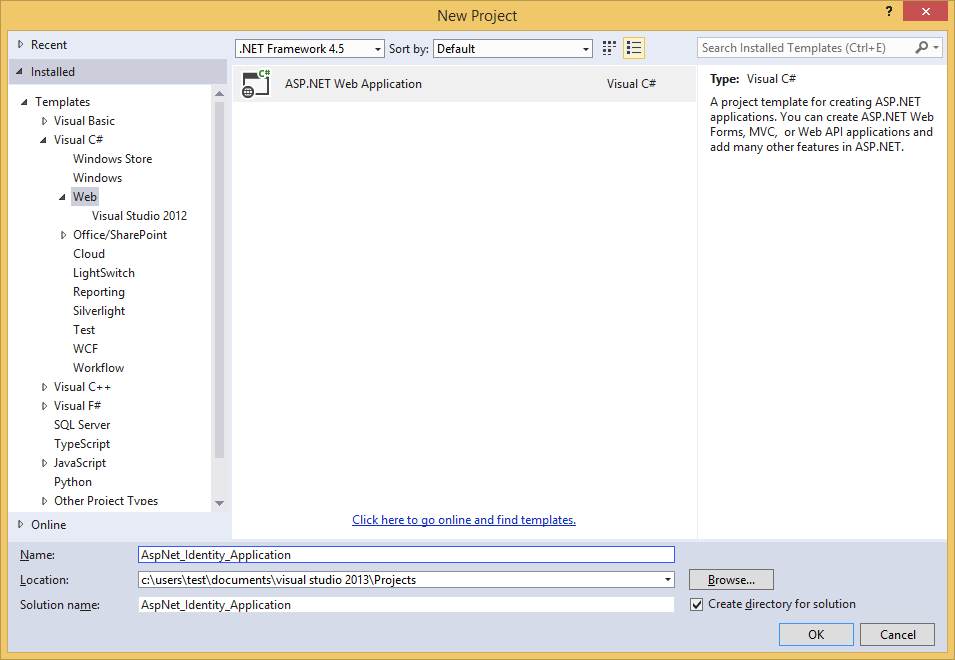
In the Add New Project dialog box expand Visual C# on the left, then Web, and then select ASP.NET Web Application. Name your project, for example, "AspNet_Identity_Application" and then click OK.
-
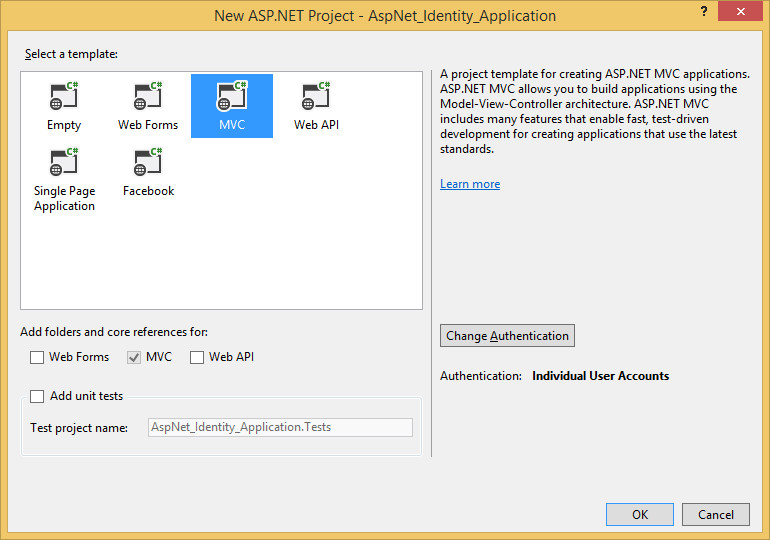
In the New ASP.NET Project dialog box, select the MVC template with the default options (that includes Individual User Accounts as authentication method) and click OK.
-
In Solution Explorer, right-click your project and select Manage NuGet Packages from the shortcut menu. In the search text box dialog, type "Identity.EntityFramework". Select this package in the list of results and click Uninstall. You will be prompted to uninstall the dependency package EntityFramework. For Visual Studio 2015, click Yes. For Visual Studio 2015 or higher, click No.
-
Add references to the necessary dotConnect for SQLite assemblies:
- Devart.Data.dll
- Devart.Data.SQLite.dll
- Devart.Data.SQLite.Web.Identity.dll
For ASP.NET Identity 2 you need to add the reference to the Devart.Data.SQLite.Web.Identity.dll, having the revision number 2, and installed to the Program Files\Devart\dotConnect\SQLite\Web\ASP.NET Identity 2 folder
When creating an ASP.NET application, using ASP.NET Identity, you can use the existing ASP.NET Identity functionality as is or customize this functionality. For example, you may add storing some custom information about the user. In our tutorial we will demonstrate both options.
 Using Existing ASP.NET Identity Functionality
First, you need to create a schema that will store information about users. To do it, execute the Install_identity_tables.sql script, which goes with dotConnect for SQLite. By default, this script is in the Program Files\Devart\dotConnect\SQLite\Web\ASP.NET Identity 2 folder. You can also copy this script from the Identity Database Script chapter of this topic. After this perform the following steps:
- In the Models project folder open the IdentityModels.cs (or IdentityModels.vb for Visual Basic) file. that is in the Models folder, from the project.
Replace the file contents with
Note that if you have specified the name for the application other than "AspNet_Identity_Application", you must use the corresponding namespace name in the code above instead of "AspNet_Identity_Application".
-
In the Controllers project folder open the AccountController.cs (or AccountController.vb for Visual Basic) file.
If you use Visual Studio 2015, replace
with:
If you use Visual Studio 2015, there is no such line, just add the above code to the beginning of the file.
-
In the App_Start project folder open the IdentityConfig.cs (or IdentityConfig.vb for Visual Basic) file.
Replace
with:
-
Replace the following line in the Create method:
with:
-
In the App_Start project folder open the Startup.Auth.cs (or Startup.Auth.vb for Visual Basic) file.
If you use Visual Studio 2015, replace
with:
If you use Visual Studio 2015, there is no such line, just add the above code to the beginning of the file.
-
Delete the following line:
For Visual Studio 2015 or higher only - in the Controllers project folder open the ManageController.cs (or ManageController.vb for Visual Basic) file. Add the following code to the beginning of the file:
In the web.config file of your project, replace the default connection string with your SQLite one.
<add name="DefaultConnection" connectionString="DataSource=mydatabase.db;" providerName="Devart.Data.SQLite" />
 Extending ASP.NET Identity Functionality
 Checking Application
Now we can run our application and check if everything works correctly.
- Run the application by pressing CTRL+F5.
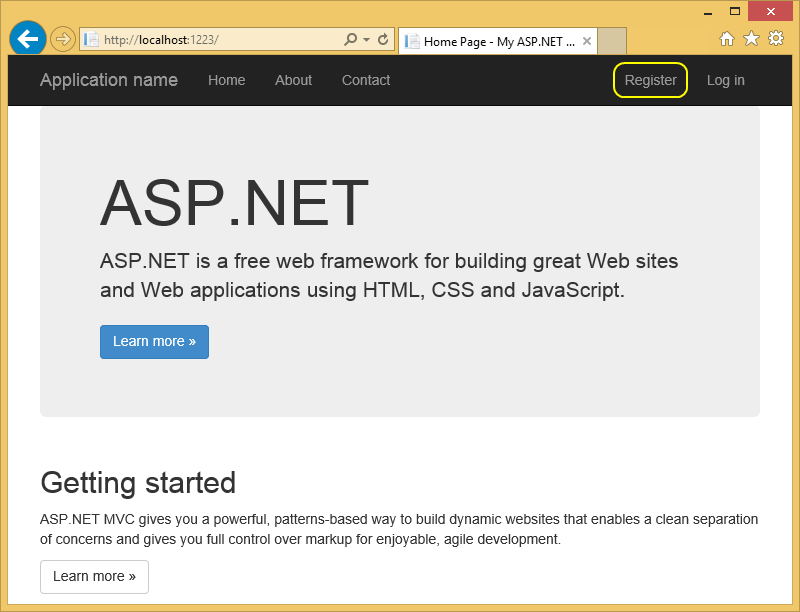
- Switch to the Register tab on the top of the page.
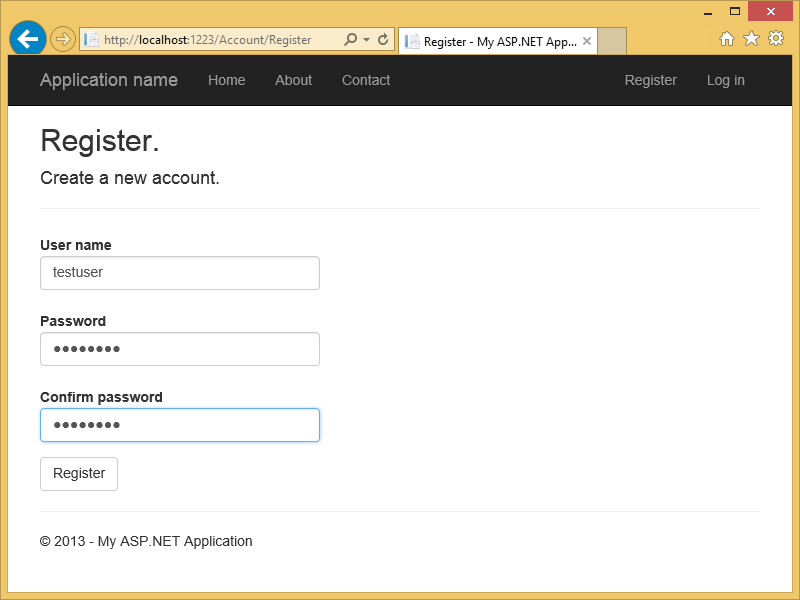
For an example with extended ASP.NET Identity functionality the page looks like the following:
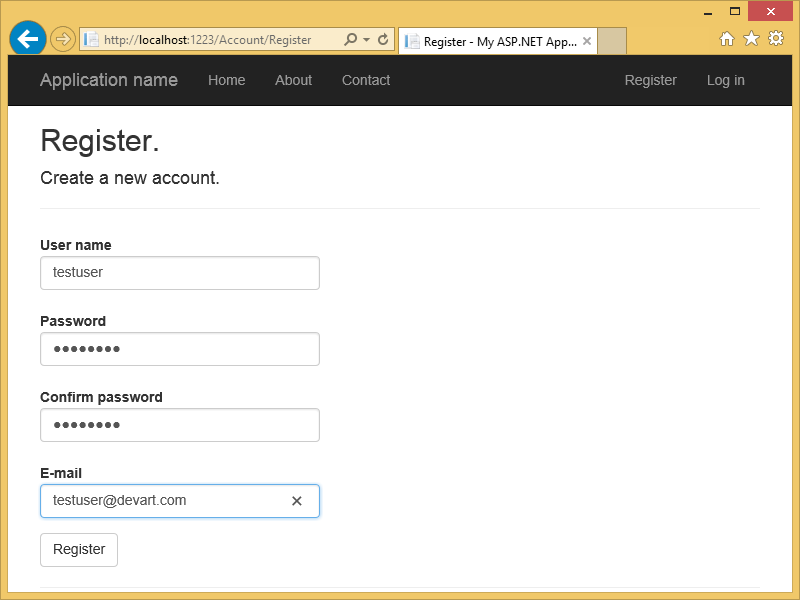
- Enter a new user name and password (and email - if you have created an example with extended ASP.NET Identity functionality) to the corresponding boxes and click the Register button.
- The new user is now registered and logged in.
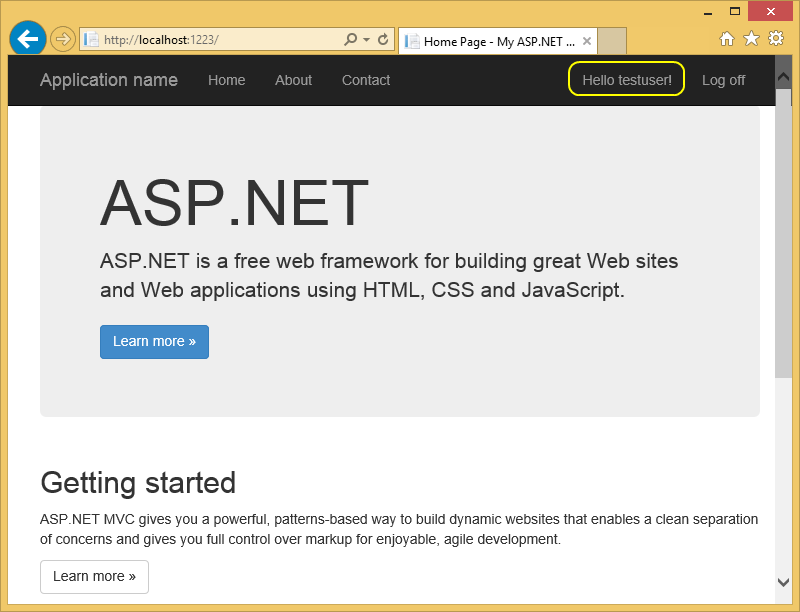
- After this you may use an appropriate database tool to connect to the database where the user data is stored and verify that the data is stored correctly.
 Identity Database Script
See Also
Using Entity Framework Implementation of ASP.NET Identity 1 for SQLite | Using ADO.NET Implementation of ASP.NET Identity 1 for SQLite | Using Entity Framework Implementation of ASP.NET Identity 2 for SQLite | Using Entity Framework Core Implementation of ASP.NET Core Identity for SQLite