Using Entity Framework Core Implementation of ASP.NET Core Identity for MySQL
On this page
ASP.NET Core Identity is a modern system for user authentication and authorization in ASP.NET Core. You can find more information about ASP.NET Core Identity in the official Microsoft documentation.
dotConnect for MySQL provides support for implementing ASP.NET Core Identity with MySQL databases by utilizing Entity Framework Core in your web applications. With this integration, you can take advantage of ASP.NET Core Identity features such as a unit-testable authentication system, social login support, and OWIN integration. This tutorial demonstrates how to create an Entity Framework implementation of ASP.NET Core Identity.
Prerequisites
Before you begin, install the following prerequisites:
To create an ASP.NET Core application that uses dotConnect for MySQL to store identity information, follow the instructions corresponding to your version of Visual Studio.
 Visual Studio 2022, 2026
1. Open Visual Studio.
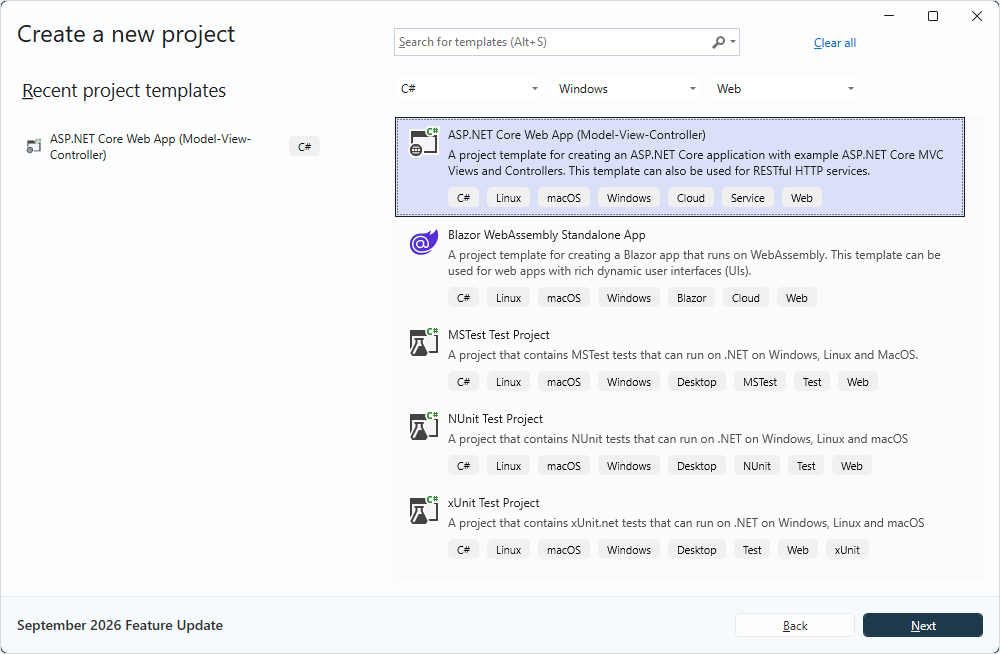
2. Click Create a new project.
3. In the Create a new project dialog, select the project template:
3.1. Filter out the list of project templates by configuring the following parameters:
3.2. Select the ASP.NET Core Web App (Model-View-Controller) project template.
 Tip: Tip: |
|
To find the template, enter its name in the search box, then select the matching result.
|
4. Click Next.
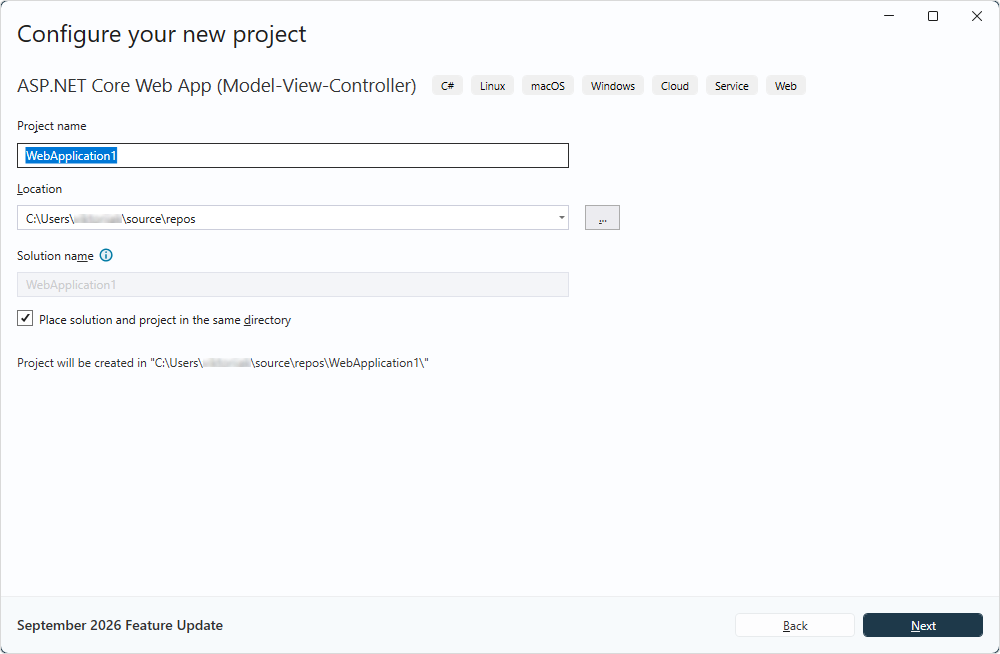
5. In the Configure your new project dialog, configure the project settings:
Project name – Enter the project name. The default project name is WebApplication followed by a sequential number, such as WebApplication1, WebApplication2, WebApplication3, etc.
Location – Click the ellipsis (...) and specify the path to save the project. The default path is:
|
|---|
C:\Users\%USERPROFILE%\source\repos
|
Solution name – Enter a folder name where you want to store one or more projects. The default solution name is the same as the project name.
If you don't want to create a solution folder, select Place solution and project in the same directory.
6. Click Next.
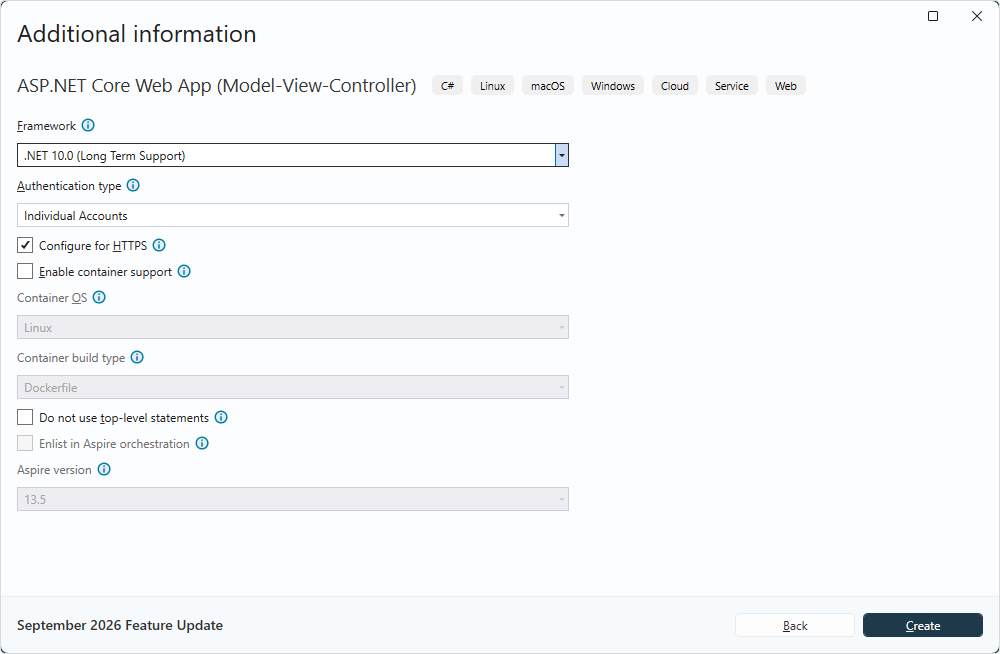
7. In the Additional information dialog, configure additional project settings:
Framework – Select .NET 10.0.
Authentication type – Select Individual Accounts.
Optional: Configure additional options such as container support, top-level statements, and orchestration settings according to your project requirements.
8. Click Create.
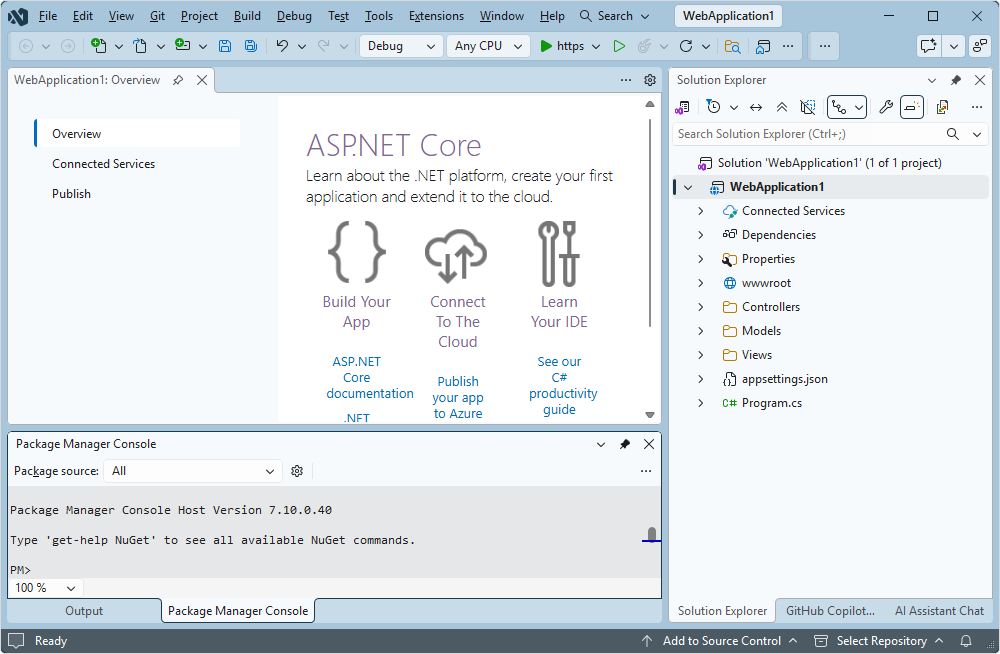
The project opens in Visual Studio.
9. In Package Manager Console, execute the following command:
|
|---|
install-package Devart.Data.MySql.EFCore
|
10. In the appsettings.json project file, replace the default connection parameters with your MySQL connection settings.
|
|---|
"ConnectionStrings": {
    "DefaultConnection": "User Id=root;Host=localhost;Database=Test;"
  },
|
| Tip: |
|
To add your license key to the connection string, use the LicenseKey parameter.
|
11. In the Program.cs project file, locate the following line:
|
|---|
options.UseSqlServer(connectionString));
|
and replace it with:
|
|---|
options.UseMySql(connectionString));
|
12. In Solution Explorer, navigate to the Data > Migrations folder, then clear its contents.
13. In Package Manager Console, execute the following commands one by one:
|
|---|
add-migration CreateIdentitySchema -OutputDir Data\Migrations
|
Visual Studio 2019
-
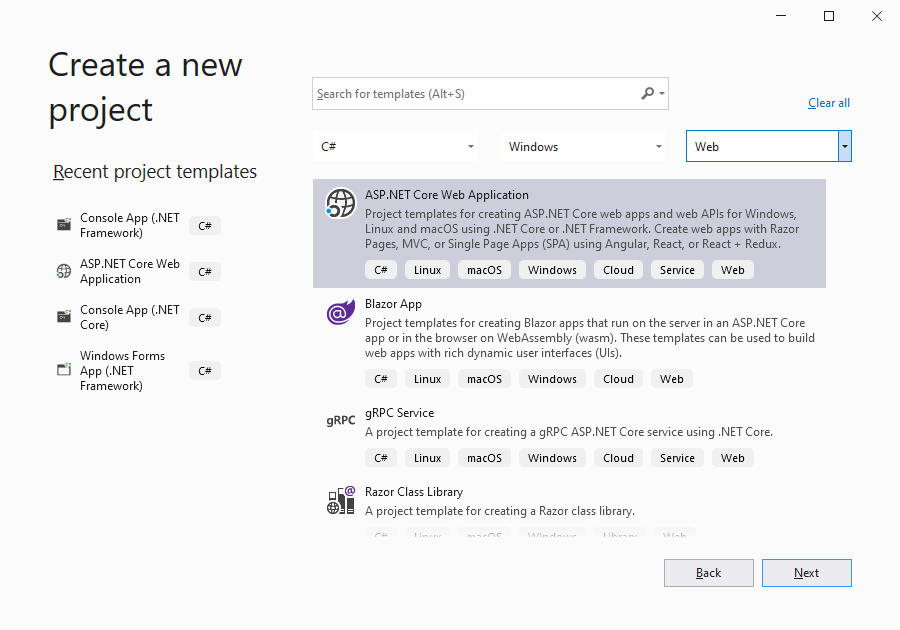
Select C# from the left-hand side of the list, then move to the middle section to choose Windows, and finally select Web on the right. Next, select ASP.NET Core Web Application, proceed by clicking Next, and then select Create.
-
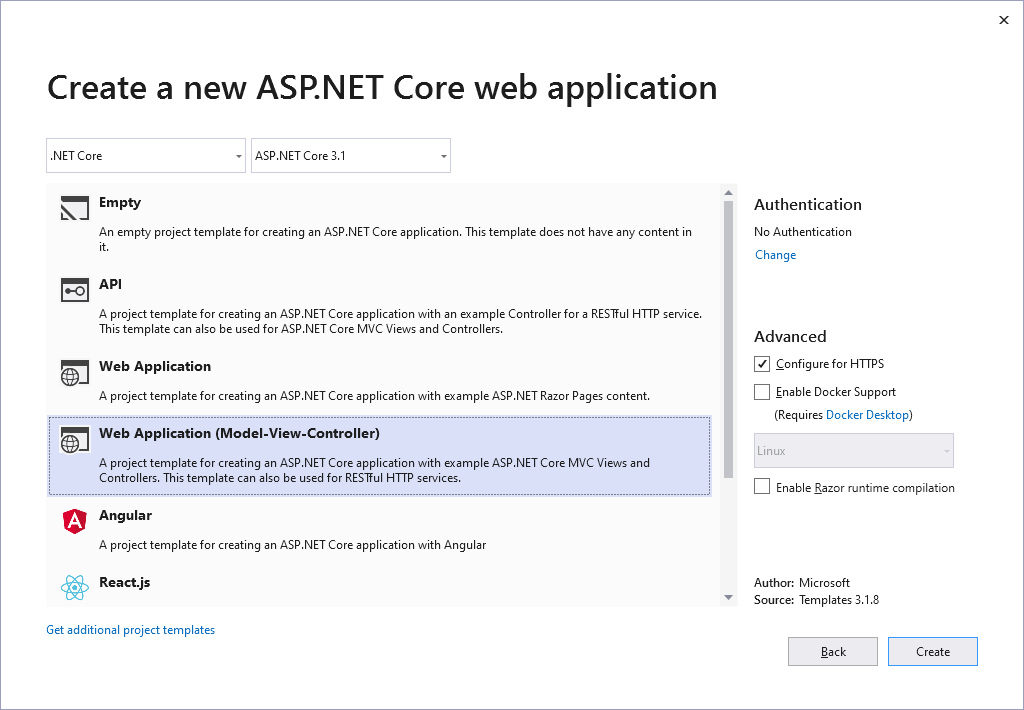
In the next dialog, select the Web Application (Model-View-Controller) template.
Visual Studio 2019
To proceed, click Change under Authentication.
Then select Individual User Accounts as the authentication method and click OK.
-
Execute the following command in the Package Manager Console:
|
|---|
install-package Devart.Data.MySql.EFCore |
In the appsettings.json file of your project, replace the default connection string with your MySQL one. For example:
|
|---|
"ConnectionStrings": {
  "DefaultConnection": "User Id=root;Host=localhost;Database=Test;"
},
|
If you purchased dotConnect for MySQL, add your license key to the connection string as the License Key connection string parameter.
In the Startup.cs file of the application, replace
|
|---|
options.UseSqlServer(Configuration.GetConnectionString("DefaultConnection")));
|
with
|
|---|
options.UseMySql(Configuration.GetConnectionString("DefaultConnection")));
|
In the Solution Explorer, open the Data\Migrations folder and delete all its content.
-
Execute the following command in the Package Manager Console:
|
|---|
add-migration CreateIdentitySchema -OutputDir Data\Migrations |
-
Execute the following command in the Package Manager Console:
Visual Studio 2017
-
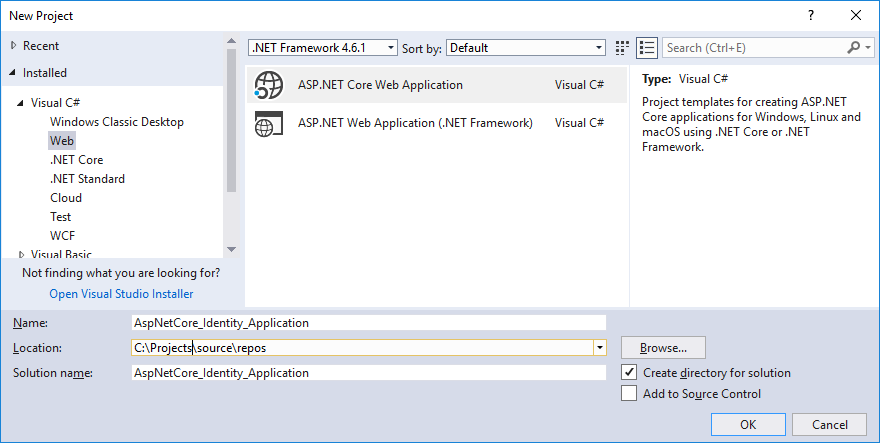
In the New Project dialog, expand Visual C# on the left, click Web, and select ASP.NET Core Web Application (.NET Core). Name your project, for example, "AspNetCore_Identity_Application", and click OK.
-
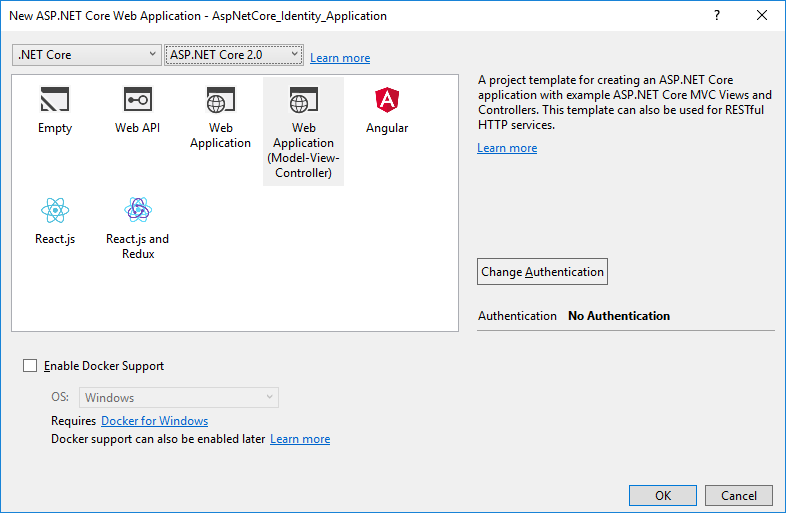
In the next dialog, select the Web Application (Model-View-Controller) template.
Visual Studio 2017
To proceed, click Change Authentication.
Then select Individual User Accounts as the authentication method and click OK.
-
Execute the following command in the Package Manager Console:
|
|---|
install-package Devart.Data.MySql.EFCore |
In the appsettings.json file of your project, replace the default connection string with your MySQL one. For example:
|
|---|
"ConnectionStrings": {
  "DefaultConnection": "User Id=root;Host=localhost;Database=Test;"
},
|
If you purchased dotConnect for MySQL, add your license key to the connection string as the License Key connection string parameter.
In the Startup.cs file of the application, replace
|
|---|
options.UseSqlServer(Configuration.GetConnectionString("DefaultConnection")));
|
with
|
|---|
options.UseMySql(Configuration.GetConnectionString("DefaultConnection")));
|
In the Solution Explorer, open the Data\Migrations folder and delete all its content.
-
Execute the following command in the Package Manager Console:
|
|---|
add-migration CreateIdentitySchema -OutputDir Data\Migrations |
-
Execute the following command in the Package Manager Console:
Checking Application
Now, we can run our application and check if everything works correctly.
Run the application by pressing CTRL+F5.
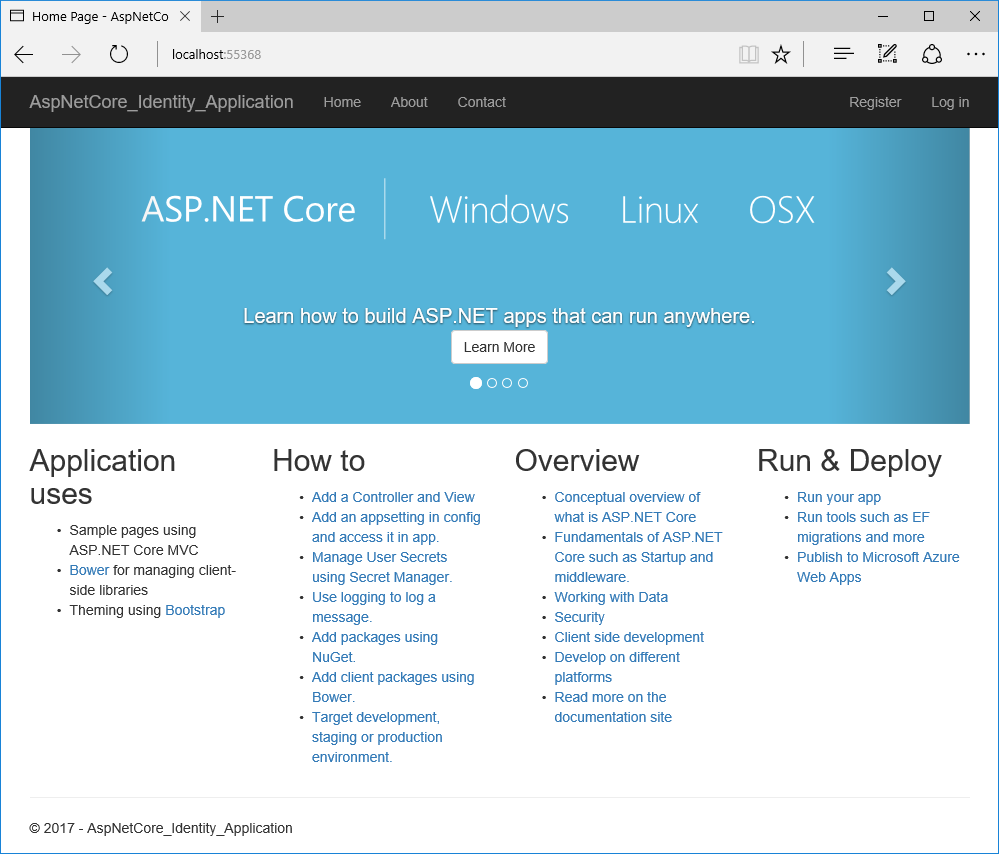
Switch to the Register tab at the top of the page.
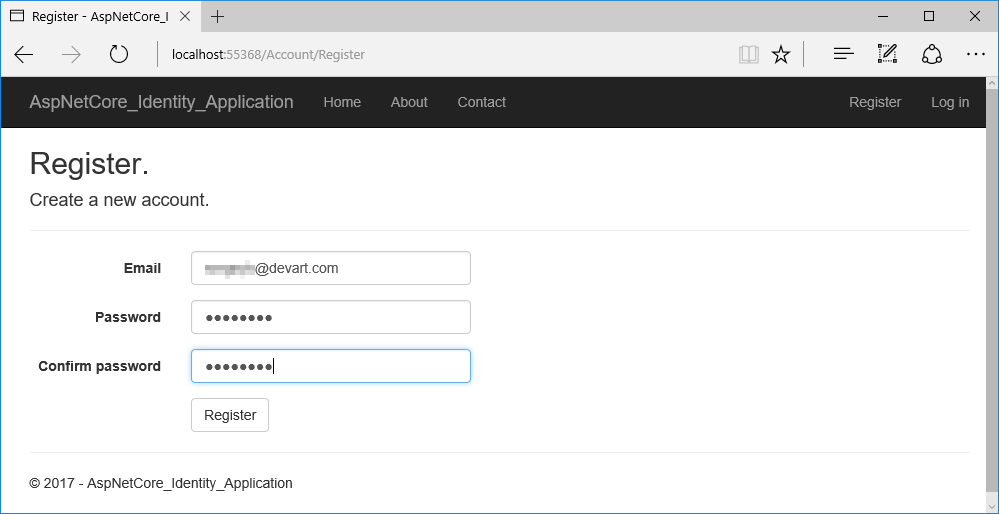
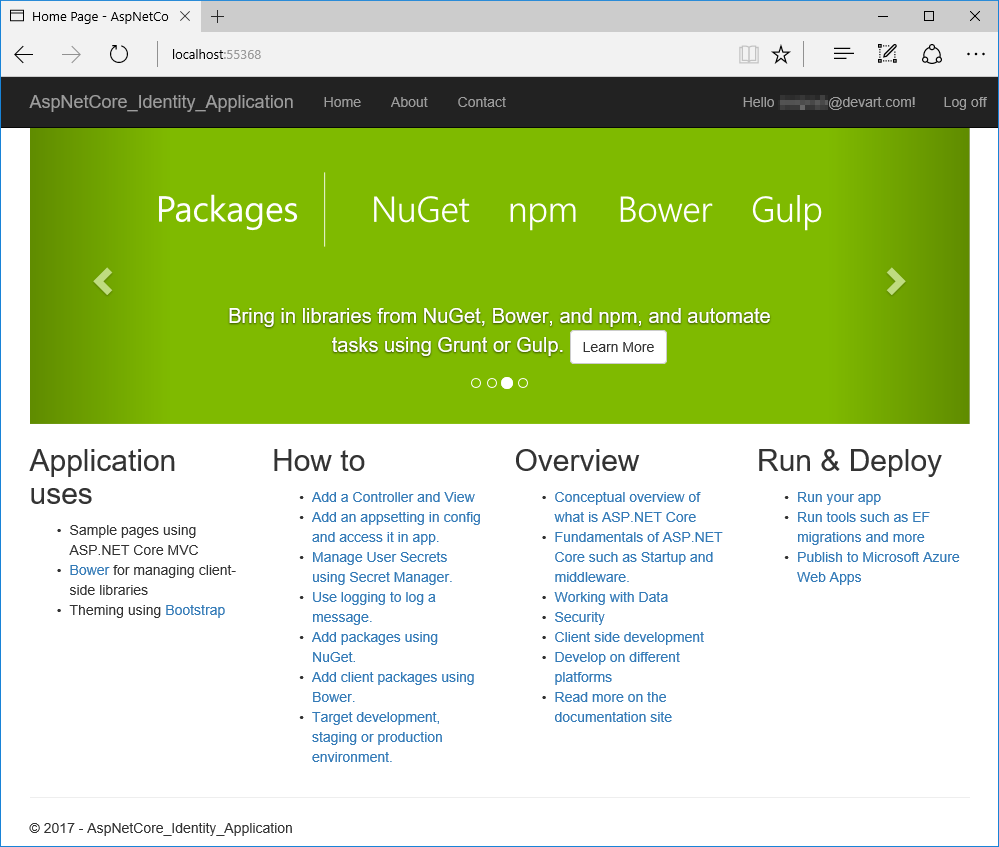
Enter your email and password in the designated fields, then click Register.
The new user is registered and logged in, and the ASP.NET Identity tables are created in the MySQL database.
See Also
Using Entity Framework Implementation of ASP.NET Identity 1 for MySQL
| Using Entity Framework Implementation of ASP.NET Identity 2 for MySQL
| Using ADO.NET Implementation of ASP.NET Identity 1 for MySQL
| Using ADO.NET Implementation of ASP.NET Identity 2 for MySQL