Customize existing generators
With dbForge Data Generator for SQL Server, you can configure existing generators to suit your specific needs.
Change the configurations for each column
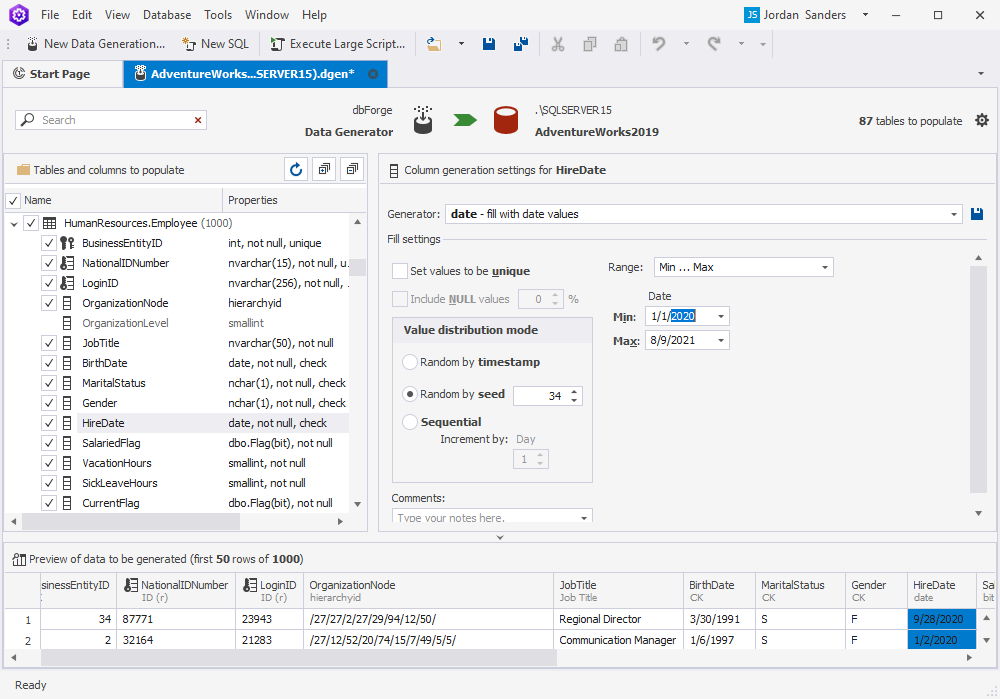
When you select a column to populate with data, dbForge Data Generator automatically assigns a generator. You can change a generator as well as customize its settings. For example, for the StartDate column you can change the minimum or maximum value. Just enter the values you need in the appropriate fields.
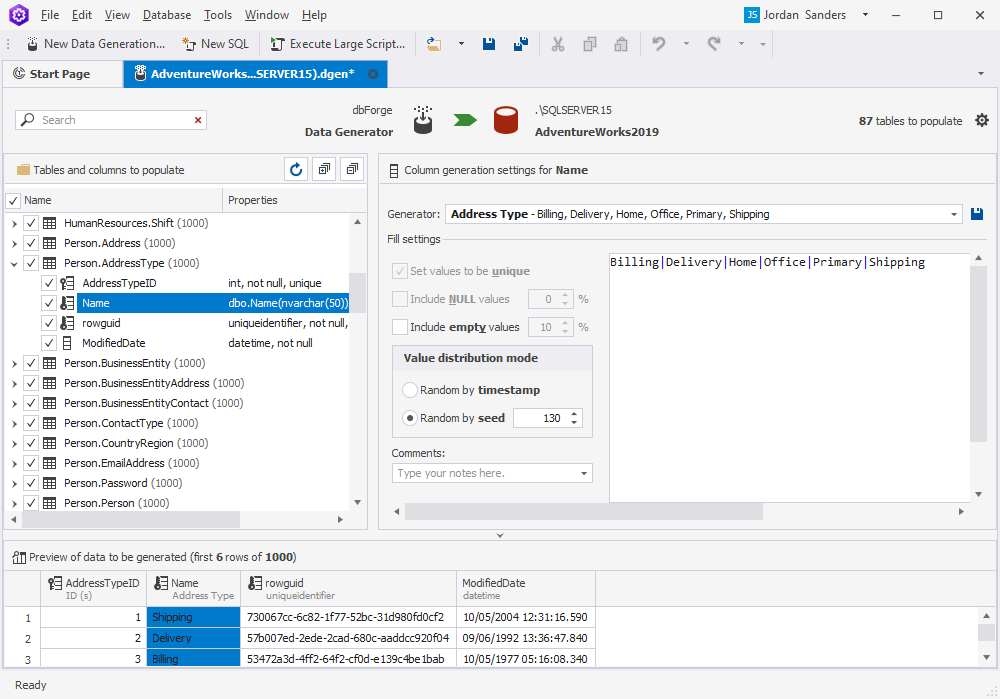
Similarly you can change the settings for the Address Type generator. For example, to add the Business address, edit the field listing all address types in the Fill settings group of options.
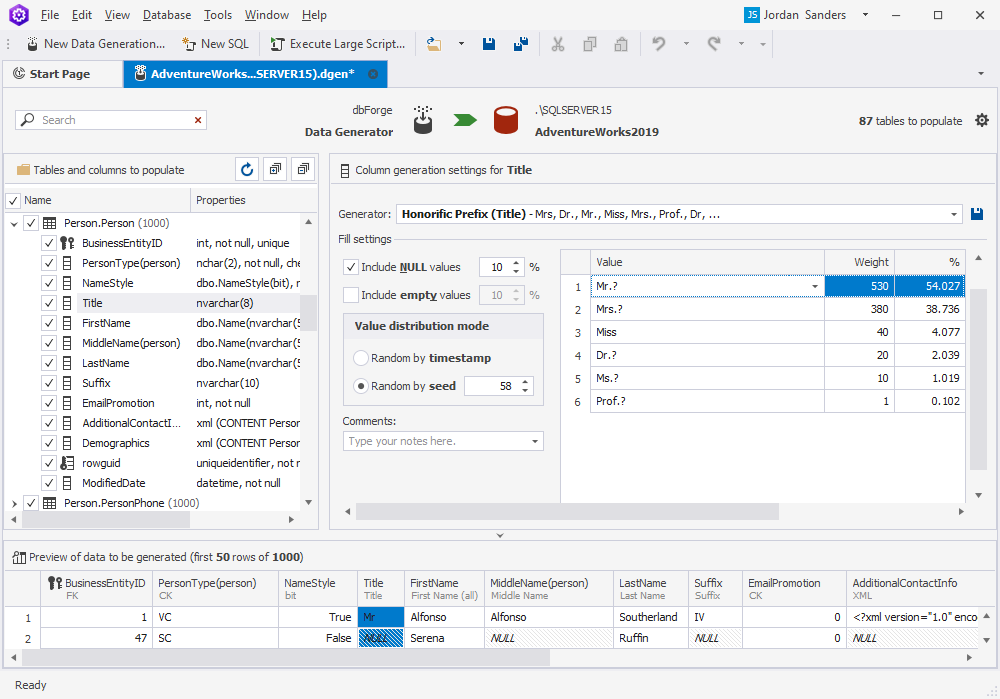
In the same way, to add the Sir title to the list of the Honorific prefixes generator, click the Green plus button and enter Sir in the last field in the list.
Data Generator for SQL Server allows customizing generators settings in a convenient way.
Create a list of values for those generators that use dictionaries
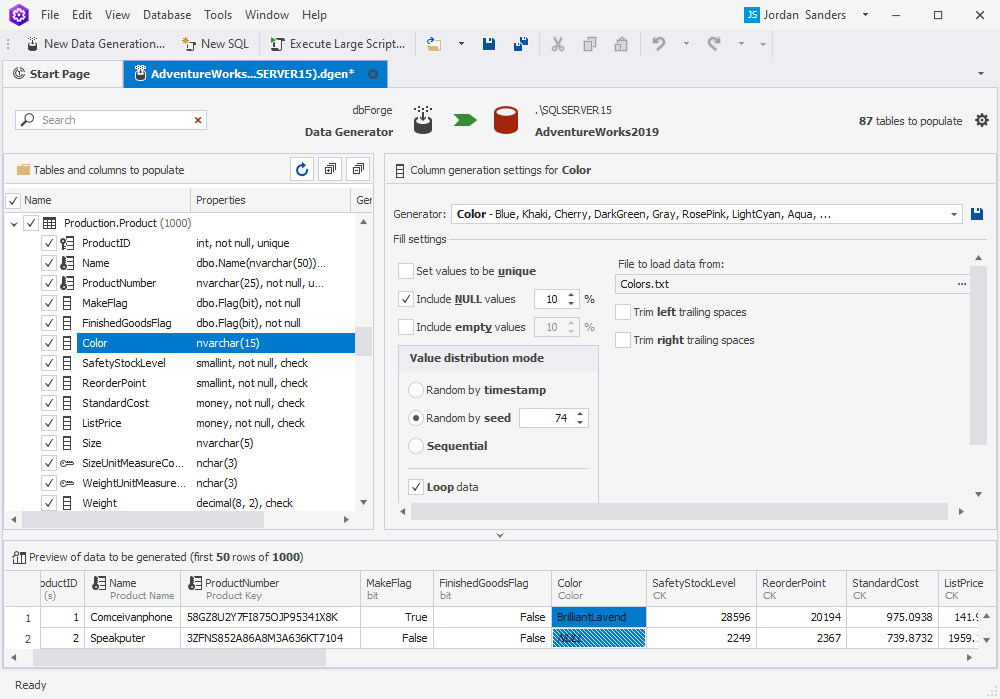
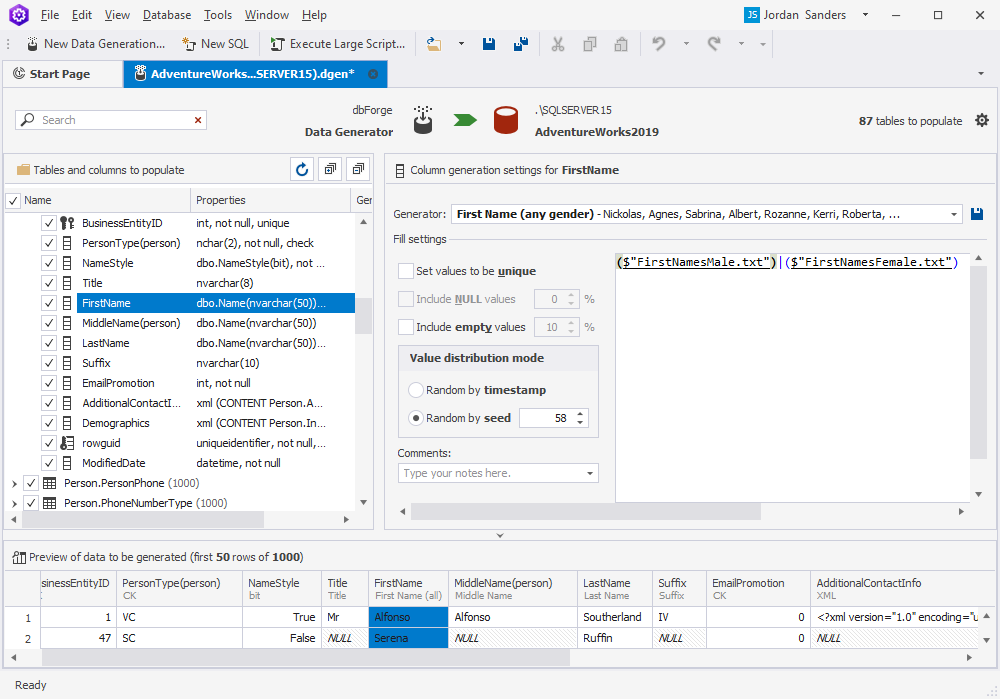
Certain generators use dictionaries or predefined lists of values to load data from. Thus, the Color generator uses the list Colors.txt
Generator files location
You can create your own dictionary. To do this, create a text file having each value on a new line. Then click the … button and select your file. The generator will use your list after this.
Note
The default location to store custom data generation settings is
C:\Users\Public\Public Documents\Devart\dbForge Data Generator for SQL Server\Data Generators, and while it is not possible to change it, you can specify a custom location of .dgen files by modifying the registry at:Computer\HKEY_CURRENT_USER\Software\Devart\dbForge Data Generator for SQL Server\Folders.
Edit custom lists
For some generators it is possible to edit lists of values right from the Data Generator UI.
To edit a dictionary:
1. Double click the file you want to edit to open it in the new window.
2. Make the necessary alterations to a list of values.
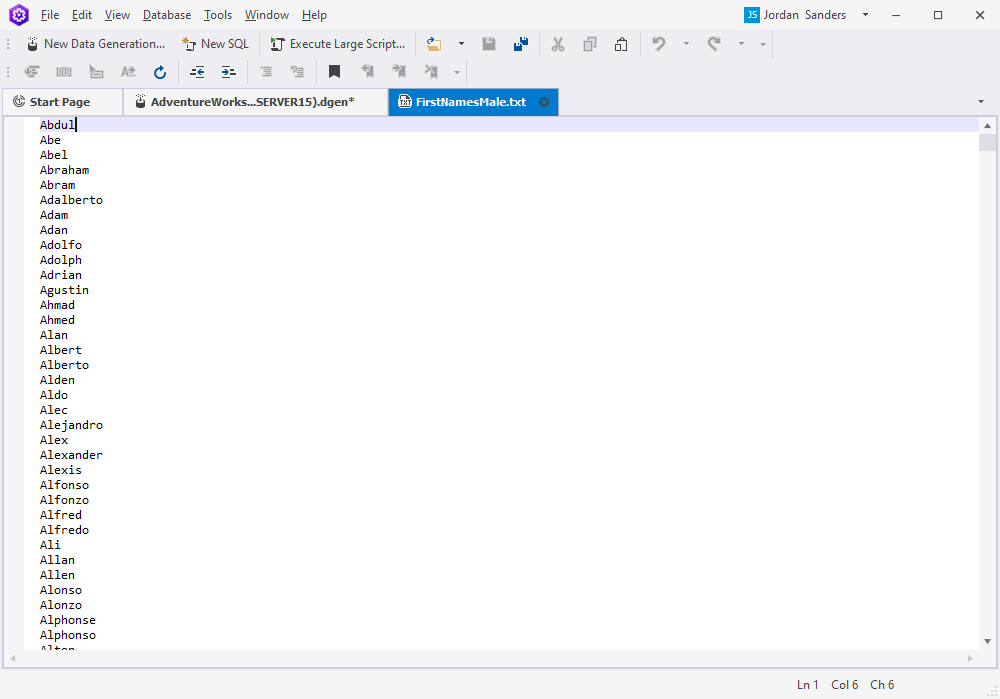
3. Close the window with the list and click Yes to save the changes.
Alternatively, you can find the necessary file on your machine and make changes to it.
Save custom generators
After you’ve set a generator for you needs, you can save a custom generator for further reuse:
To save a generator:
1. Select a generator and make all the necessary changes to it.
2. Click a 3.5-inch disk icon.
3. Provide a name and description for your new generator.
4. Click Save.
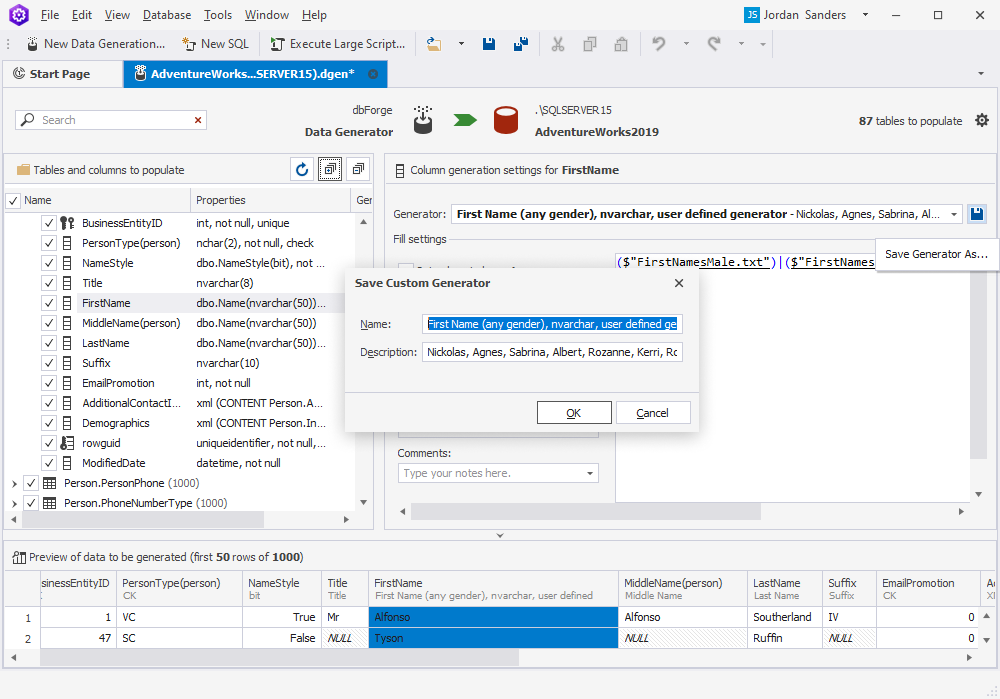
The saved generator will appear in the Generator list, in the User Defined category. Now you can use this generator for compatible columns.