Bidirectional data synchronization
The guide describes how to perform bidirectional data synchronization between two databases using Data Compare. This may be useful for users who need to keep both databases up to date, even when each database receives new or modified data independently.
Scenario: You want to keep both databases up to date, even though they receive data independently and simultaneously.
Data Compare lets you perform two-way data synchronization by:
- Adding new records from Database1 to Database2.
- Adding new records from Database2 to Database1.
- Updating records that differ between the databases.
You can automate the process of adding new records. However, updating existing records should be done manually.
Manual two-way synchronization
The synchronization process includes the following steps:
- Step 1: Add new records and update the existing ones in the target database
- Step 2: Synchronize data in both directions
Step 1: Add new records and update the existing ones in the target database
1. On the toolbar, select New Data Comparison to open the New Data Comparison wizard.
2. Select the source and target server connection and databases.
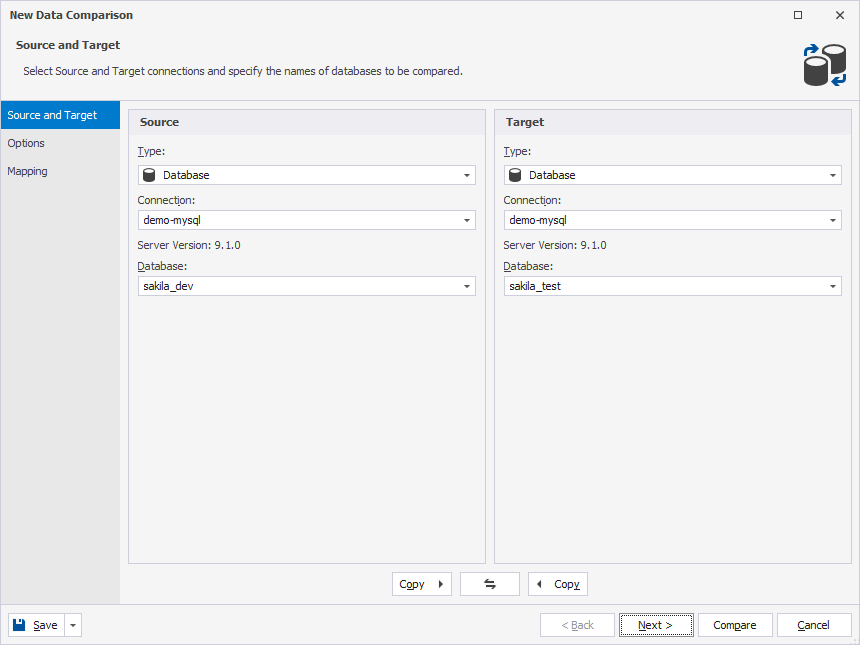
3. Select Compare to run the data comparison.
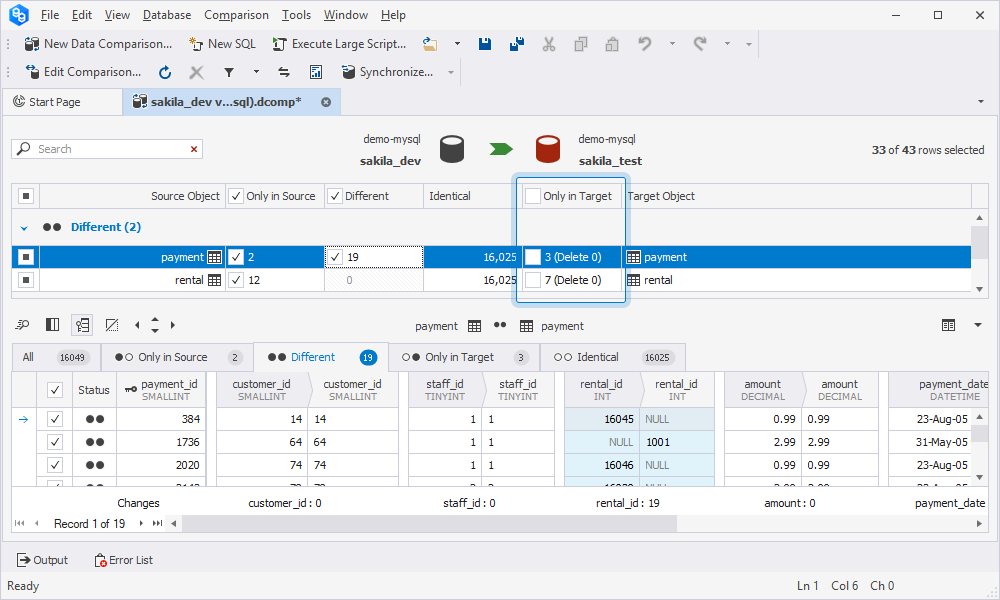
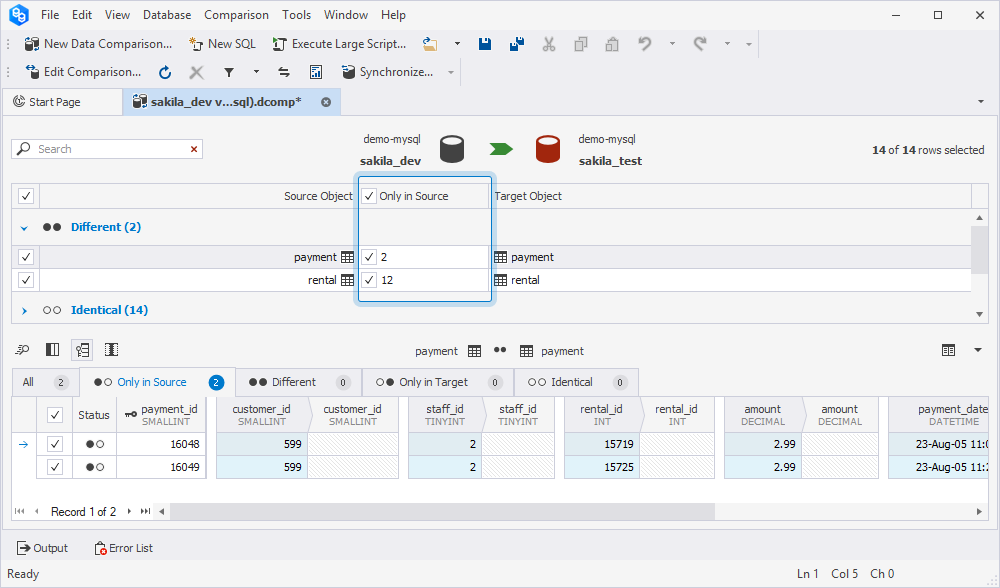
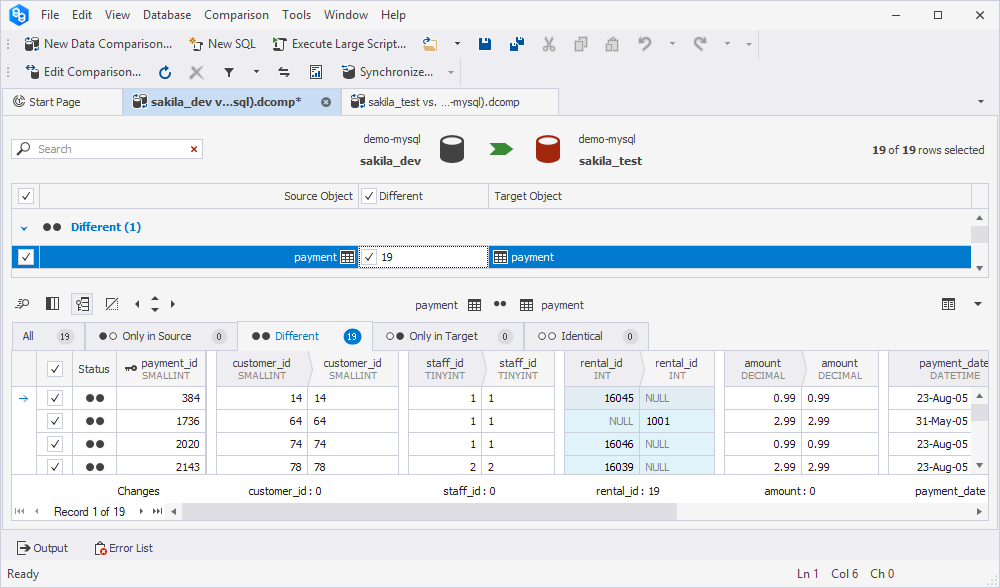
4. In the data comparison document (.dcomp) that opens, clear the Only in Target checkbox.
This prevents the deletion of those records that exist only in the target database.
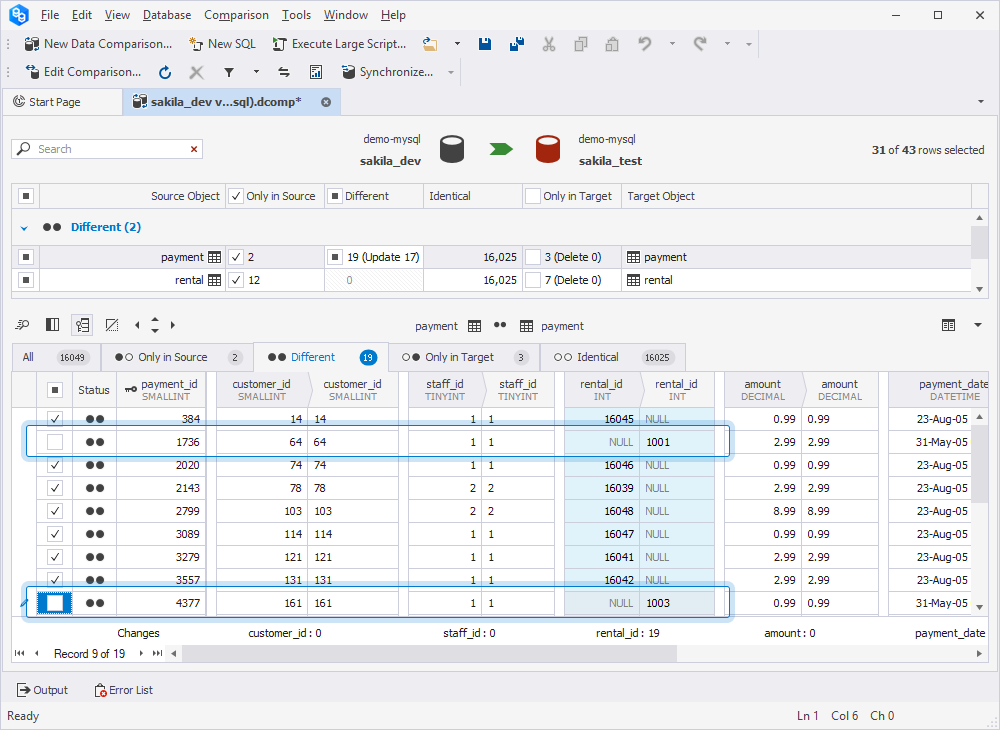
5. In the bottom grid, switch to the Different tab, analyze the data, and clear the checkboxes next to the records to include them from data synchronization.
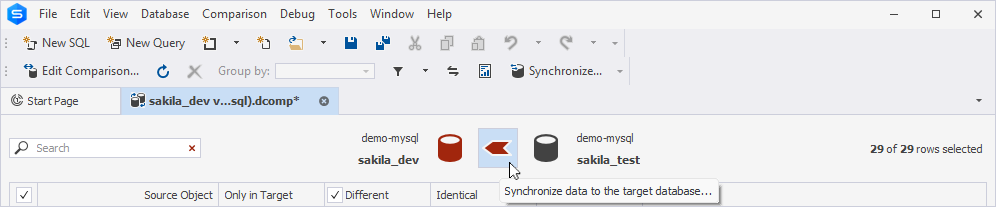
6. At the top of the document, select ![]() Synchronize data to the target database to open the Data Synchronization Wizard.
Synchronize data to the target database to open the Data Synchronization Wizard.
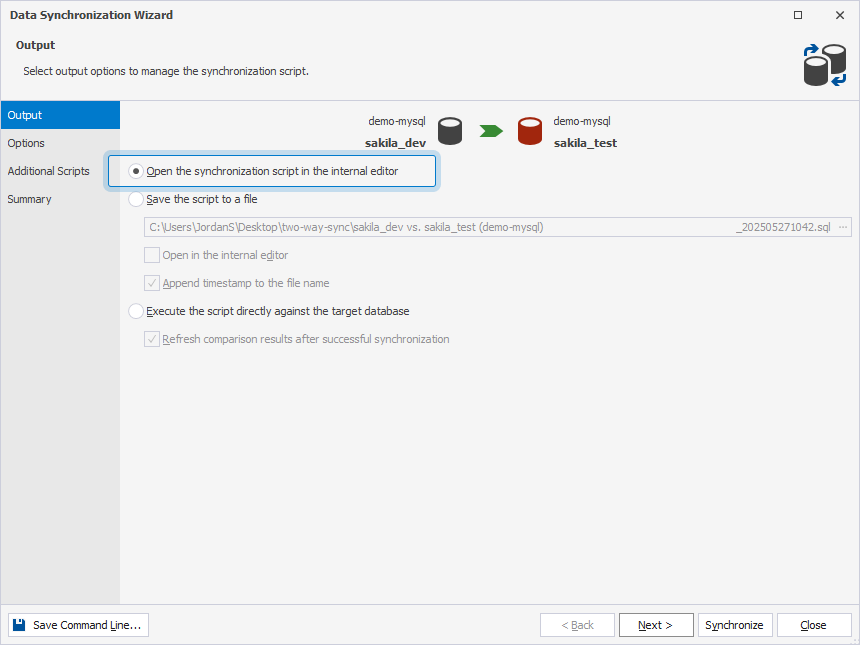
7. Select Open the synchronization script in the internal editor and then select Synchronize.
8. On the toolbar, select Execute or press F5 to execute the synchronization script.
Step 2: Synchronize data in both directions
To proceed, synchronize data using one of the following methods.
Method 1: Synchronization with data re-comparison
1. On the toolbar, select ![]() Refresh or press F5 to refresh the data comparison document.
Refresh or press F5 to refresh the data comparison document.
The .dcomp document now contains the up-to-date records in the Only in Target and Different columns, which you can migrate to the source database.
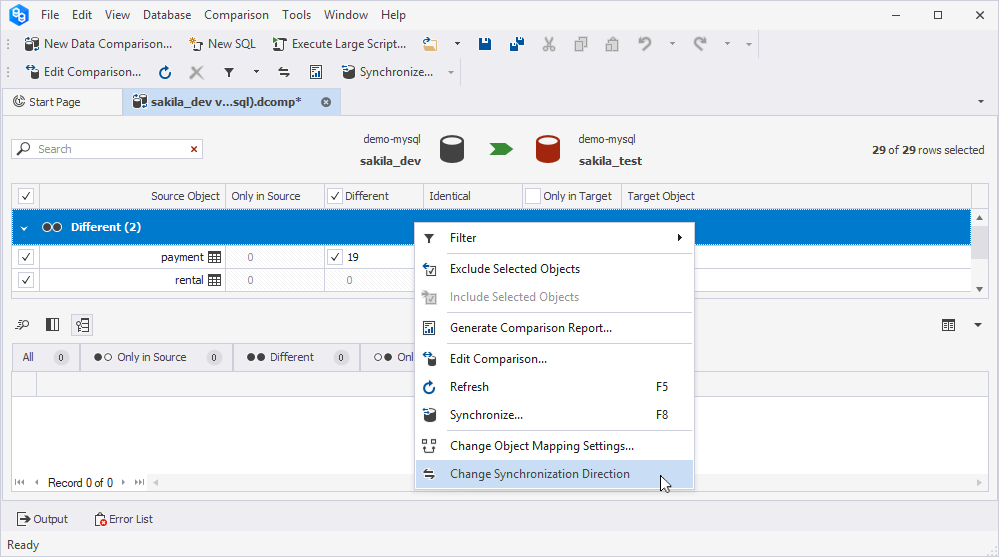
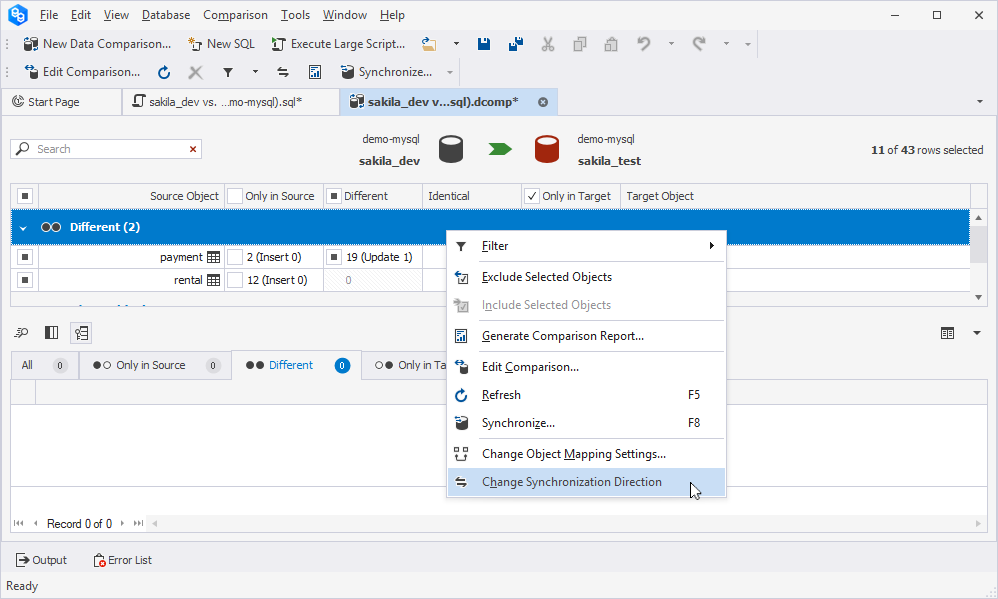
2. Right-click the data comparison grid and select Change Synchronization Direction.
3. Open the Data Synchronization Wizard and generate a synchronization script:
3.1. At the top of the document, select ![]() Synchronize data to the target database (now reversed).
Synchronize data to the target database (now reversed).
3.2. Select Open the synchronization script in the internal editor and then select Synchronize.
4. On the toolbar, select Execute or press F5 to execute the synchronization script.
Method 2: Synchronization without data re-comparison
1. Return to the data comparison document.
Note
When using this method, you don’t need to refresh the data comparison document.
2. In the data comparison grid, clear the checkbox next to Only in Source and select the checkbox next to Only in Target.
Selecting Only in Source prevents the deletion of those records that exist only in the source database.
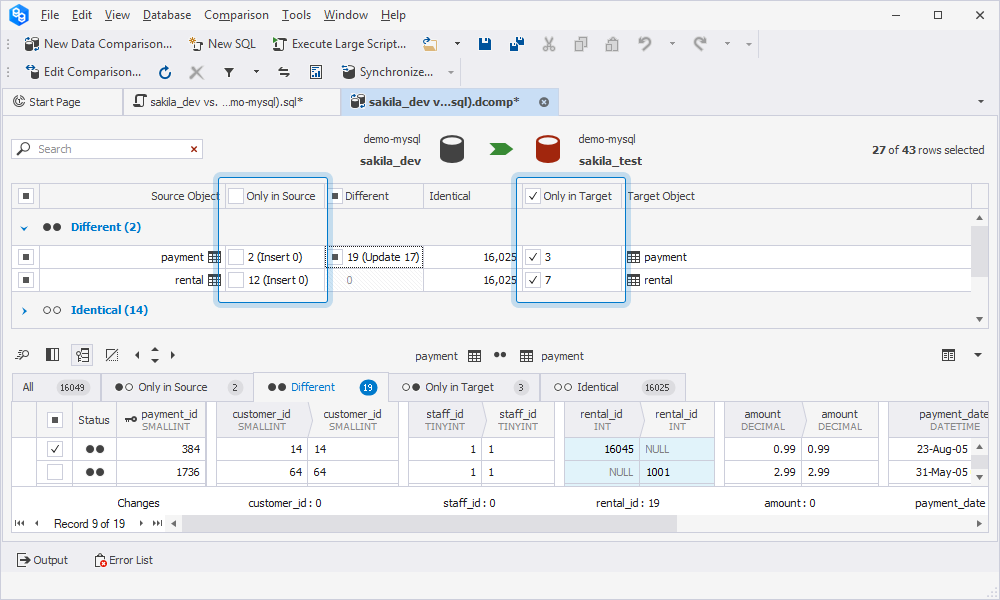
3. In the bottom grid, go to the Different tab and adjust the checkboxes as needed:
3.1. Clear the checkboxes for the records to exclude them from synchronization.
3.2. Select the checkboxes for the records to include.
4. Right-click the grid and select Change Synchronization Direction.
5. At the top of the document, select ![]() Synchronize data to the target database (now reversed) to open the Data Synchronization Wizard.
Synchronize data to the target database (now reversed) to open the Data Synchronization Wizard.
6. Select Open the synchronization script in the internal editor and then select Synchronize.
7. On the toolbar, select Execute or press F5 to execute the synchronization script.
Benefits and drawbacks of synchronization methods
The table provides the benefits and drawbacks of the mentioned synchronization methods.
| Name | Benefit | Drawback |
|---|---|---|
| With re-comparison | Ensures the latest changes are included. | Takes additional time to rerun the comparison. |
| Without re-comparison | Saves time by skipping re-comparison | Requires manual verification of data. |
Automated (partially) two-way synchronization
The automated data synchronization includes the following steps:
Step 1: Automate adding new records
To automate the addition of new records to databases in both directions:
1. On the toolbar, select New Data Comparison to open the New Data Comparison wizard.
2. Select the source and target server connections and databases.
3. On the Options page, under Display options, clear all checkboxes except Only in source records to exclude the records that exist only in the source database.
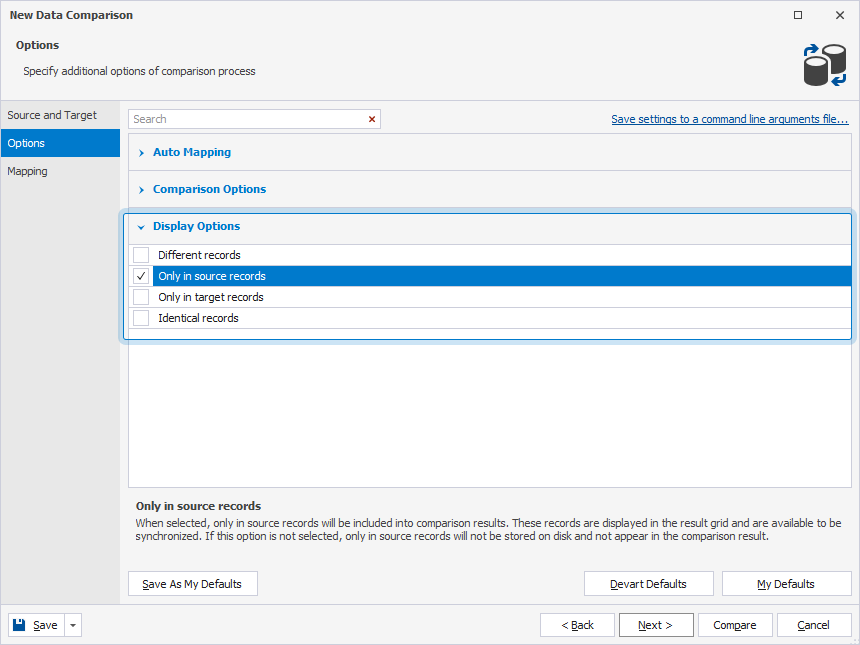
4. Select Compare to generate a .dcomp document with the records that exist only in the source database.
5. Save the .dcomp file:
5.1. On the menu bar, select File > Save As.
5.2. In the Save As dialog, specify the path to the file.
6. Generate the first .bat file with the command-line settings (from the source to the target).
The execution of this file automatically adds new records from the source to the target database.
6.1. On the toolbar, select Edit Comparison.
6.2. In the left-bottom corner of the Change Data Comparison Properties dialog, select Save > Save Command Line.
6.3. In the Command line execution file settings dialog that opens, select Save to save the .bat file with command-line settings.
7. In the Change Data Comparison Properties dialog, select ![]() Swap Source and Target settings.
Swap Source and Target settings.

8. Select Compare to open a .dcomp document.
9. Save the .dcomp file with the swapped settings as you did in steps 5.
Note
Save the file with a new name to avoid overwriting the existing .dcomp file.
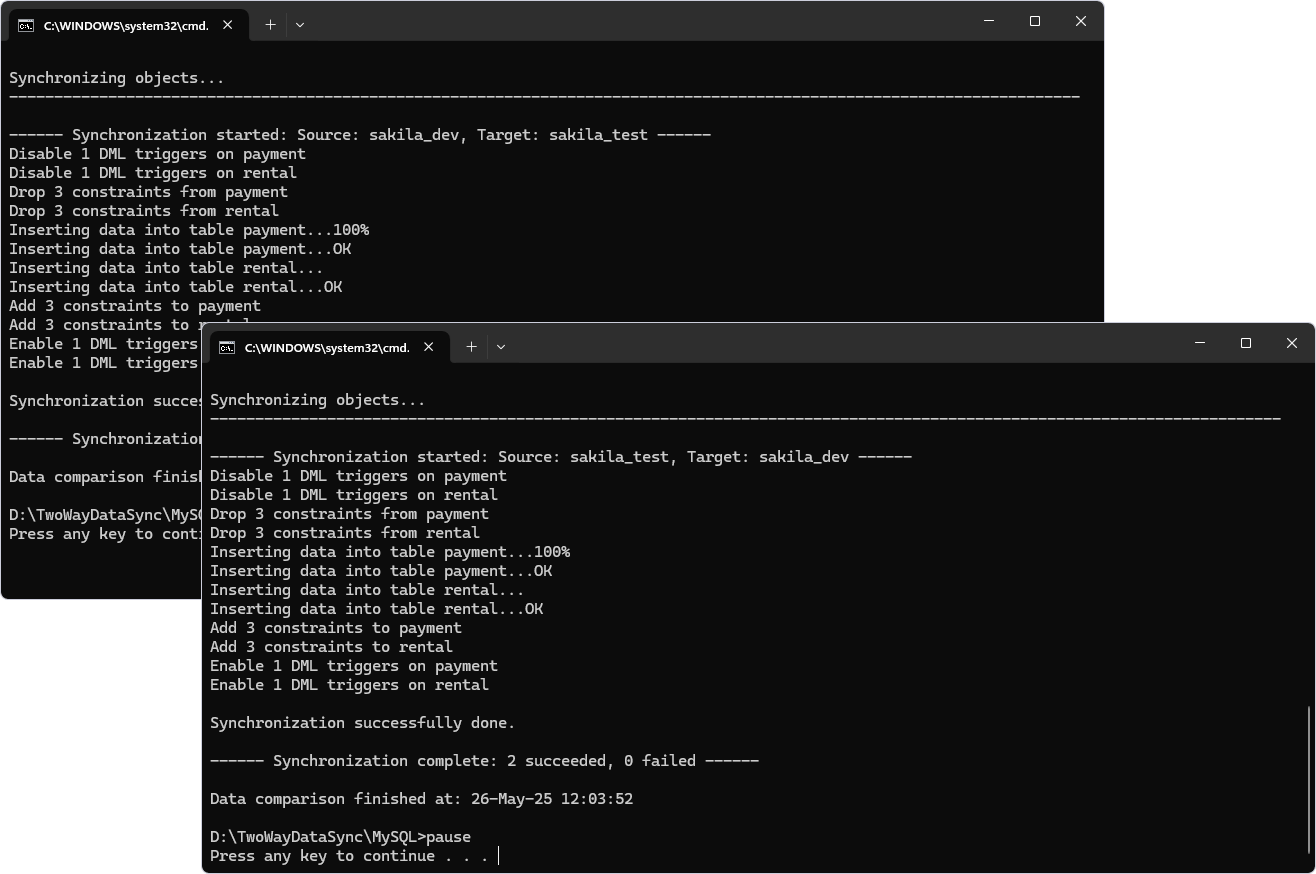
10. Create the second .bat file for synchronization in the opposite direction.
11. Run both .bat files to automate adding records in both directions.
Step 2: Manually synchronize different records
Automating the synchronization of differing records is not supported due to the need for manual data validation.
To synchronize the records:
1. On the toolbar, select New Data Comparison to open the New Data Comparison wizard.
2. Select the source and target server connection and databases.
3. On the Options page, under Display options, clear all checkboxes except Different records.
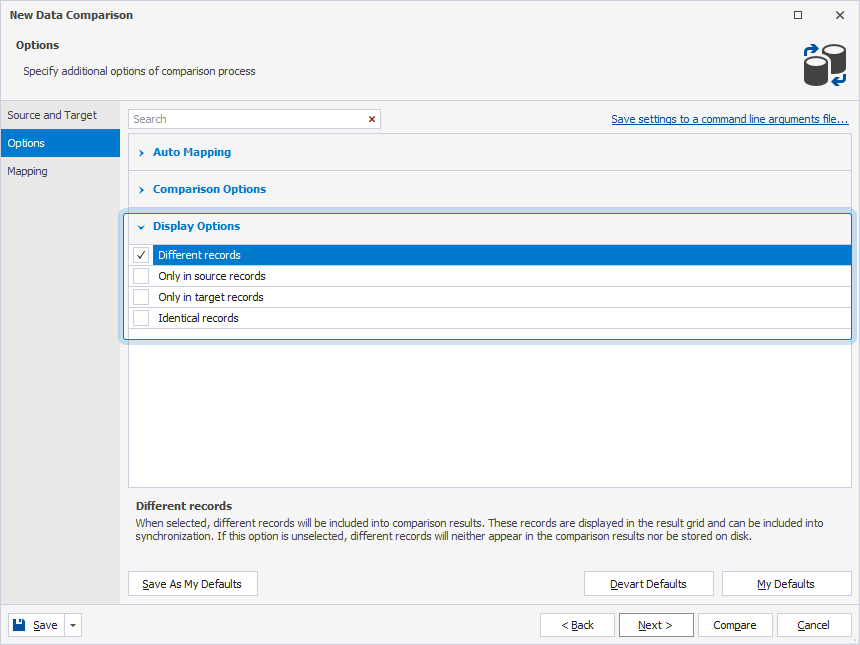
4. Select Compare to run the data comparison.
5. In the upper grid, select a table to view differences in the bottom grid.
6. In the bottom grid, select the checkboxes for records to transfer.
7. At the top of the document, select ![]() Synchronize data to the target database to open the Data Synchronization Wizard.
Synchronize data to the target database to open the Data Synchronization Wizard.
8. Select Open the synchronization script in the internal editor and then select Synchronize.
9. On the toolbar, select Execute or press F5 to execute the synchronization script.
10. Return to the data comparison document and refresh it.
11. Select the records you want to transfer from target to source.
12. Right-click the data comparison grid and select Change Synchronization Direction.
13. At the top of the document, select ![]() Synchronize data to the target database to open the Data Synchronization Wizard.
Synchronize data to the target database to open the Data Synchronization Wizard.
14. Select Open the synchronization script in the internal editor and then select Synchronize.
15. On the toolbar, select Execute or press F5 to execute the synchronization script.