View comparison result
After you have compared the data sources, Schema Compare displays the comparison results in the upper part of the Results window. There you can select objects for synchronization.

If you need to compare the data sources again using the same project settings, and update the comparison results, click  Refresh or press F5.
In case you need to change the settings, click  Edit Comparison.
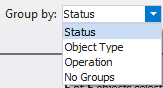
By default, the results are grouped for display by status. For convenience when working with the results of the comparison, you can use other options for grouping the results:
The Owner column displays the owner (or schema) of the object.
If you want to check the tables that were automatically mapped, you can click the Edit Comparison button and switch to the Table Mapping tab.
Select objects for synchronization
The number of objects that will be deployed is shown above the table with the results.
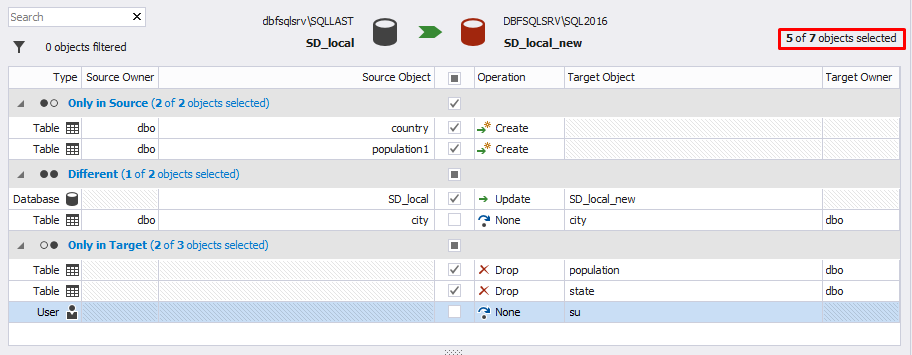
By default, all objects are selected.
If you don’t want to deploy an object, click to deselect a check-off box next to it.
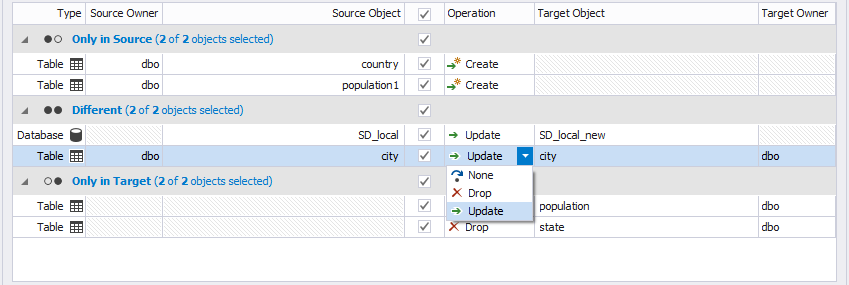
If you want to change the operation with the object, click the cell of this product in the Operation column and select the required operation from the drop-down list.
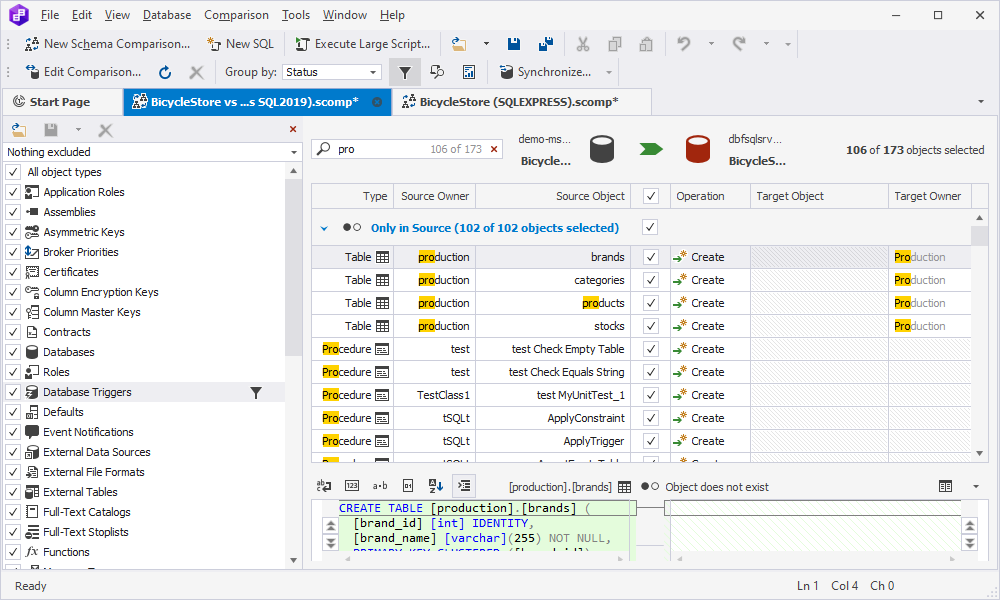
Search for objects
In the comparison results document, you can search for objects by typing the search text in the Search box. The list is filtered to display only those objects that contain the search text.
The default search mode is case-insensitive. It means that searching for an object that has pro in its name will highlight all objects containing the text whether it is capitalized (Pro) or lowercase (pro). As you type, objects that match the search text will be highlighted in the grid. The number of matching options will be displayed in the search box.
To clear the search results, click ![]() Clear Filter in the Search box.
Clear Filter in the Search box.
Save the comparison and synchronization options
Schema Compare for SQL Server allows saving comparison and synchronization options for further use, for example for automating and/or scheduling database comparison and synchronization tasks. The settings are saved as a .scomp file.
The asterix near the .scomp file name means that the project has not yet been saved.

To save the comparison settings, in the comparison results document, click the Save icon or press Ctrl+S.
Note
If you save the .scomp file before configuring the synchronization settings, it will contain the custom comparison settings but the default synchronization settings.
To save the custom synchronization settings, you need to call the Schema Synchronization wizard by clicking Synchronize on the toolbar, or clicking the green arrow button, or pressing F8. Then make all the necessary settings and close the wizard. Now if you save the project, it will contain both custom comparison and synchronization settings.
Want to Find out More?

Overview

All features

Request a demo
