Connect dbForge Event Profiler to SQL Server
To get started, you must create a server connection.
The guide describes how to:
- Create a connection
- Manage database connections
- Edit a database connection
- Delete a database connection
To create a connection
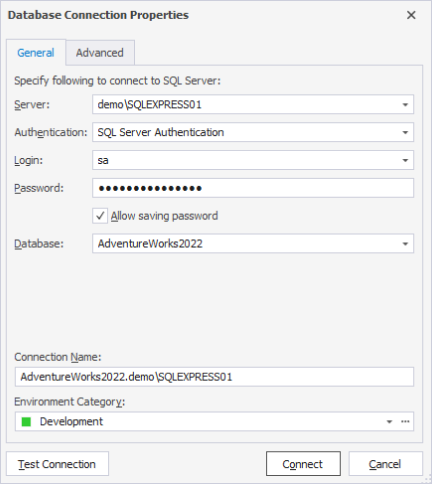
1. On the Database menu, click New Connection. The Database Connection Properties dialog opens with two tabs - General and Advanced.
2. On the General tab, specify the connection details:
- Server: Enter the server or choose it from the dropdown list.
- Recent displays a list of the recently used server connections.
- Local displays server instances that offer services by running the application on the same machine as the client application.
- Network displays server instances connected to one another within a network using network devices such as routers, switches, and gateways.
- Authentication: Choose the authentication mode from the dropdown list.
- Windows Authentication
- SQL Server Authentication
- Active Directory - Universal with MFA authentication
- Azure Active Directory - Password
- Azure Active Directory - Integrated
For more information about how to connect to a database with the Azure Active Directory authentication, see Using Azure Interactive Authentication.
Note
To connect to a SQL Server using a custom port, specify the server name followed by a comma and the custom port number. For example, localhost,62005.
- Login and Password: Enter the user credentials, respectively. By default, the Allow saving password checkbox is selected. If you don’t want to save the password, clear the checkbox.
- Database: Choose the database to connect to from the dropdown list.
- Optional: Connection Name: The connection name is generated automatically from the hostname. If you want to create a distinctive name for the connection, type the new name.
- Optional: Environment Category: Select the document category (Development, Production, Sandbox, and Test) for the server connection from the dropdown list. This will allow you immediately to know which server you are connected to. To customize colors for the servers, see Associate tabs with connections.
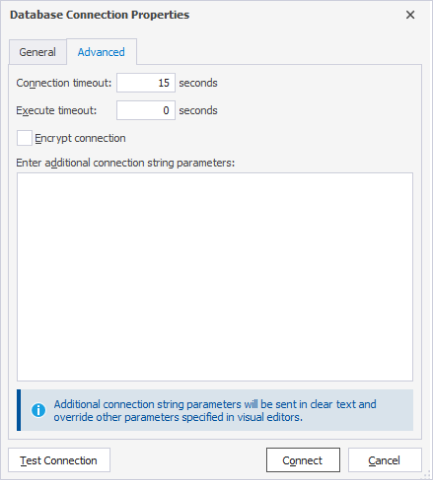
3. Optional: On the Advanced tab, configure additional connection properties:
- Connection timeout: Set the time (in seconds) during which the server should wait to establish a connection. The default value is 15 seconds.
- Execute timeout: Set the time (in seconds) during which the task should be completed. The default value is 0 seconds.
- Encrypt connection: Select the checkbox to use the encrypted connection.
- Enter additional connection string parameters: Set additional properties to the connection string. They will override other parameters specified in visual editors.
4. Optional: Click Test Connection to verify the connection.
5. Click Connect to create the connection.
Note
If you set up a connection in one of the following tools, it will be automatically added to other dbForge SQL Tools:
Manage database connections
dbForge Event Profiler for SQL Server offers you a visual, quick, and simple way to manage database connections through the Connection Manager.
To open the Connection Manager, navigate to the Database menu and select Connection Manager.
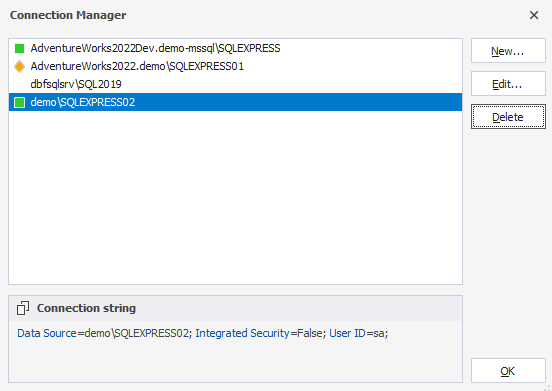
You can view, create, edit, or delete a server connection. At the bottom of the manager, you can view the connection string for the selected connection. Click OK to choose the connection for the current session.
Edit a database connection
To edit a database connection, select the connection you want to modify and click Edit. In the Database Connection Properties dialog that opens, make the changes to database connection parameters and click Connect. To save the changes, click OK.
Delete a database connection
To delete a database connection, select the connection you want to delete and click Delete. To save the changes, click OK.