Using Data Pump in the DevOps process
dbForge Data Pump for SQL Server can become an integral part of the DevOps process via the PowerShell cmdlets that automate data import and export.
To start using Data Pump in the DevOps process, make sure that:
- dbForge DevOps Automation for SQL Server and dbForge Data Pump for SQL Server are installed on your computer. For more information about the installation of dbForge Data Pump, see Installing.
- The installed PowerShell version is 3.0 or later.
Note
By default, PowerShell is installed on Windows 8, 8.1, 10, and 11. For other versions, download PowerShell from the official Microsoft website.
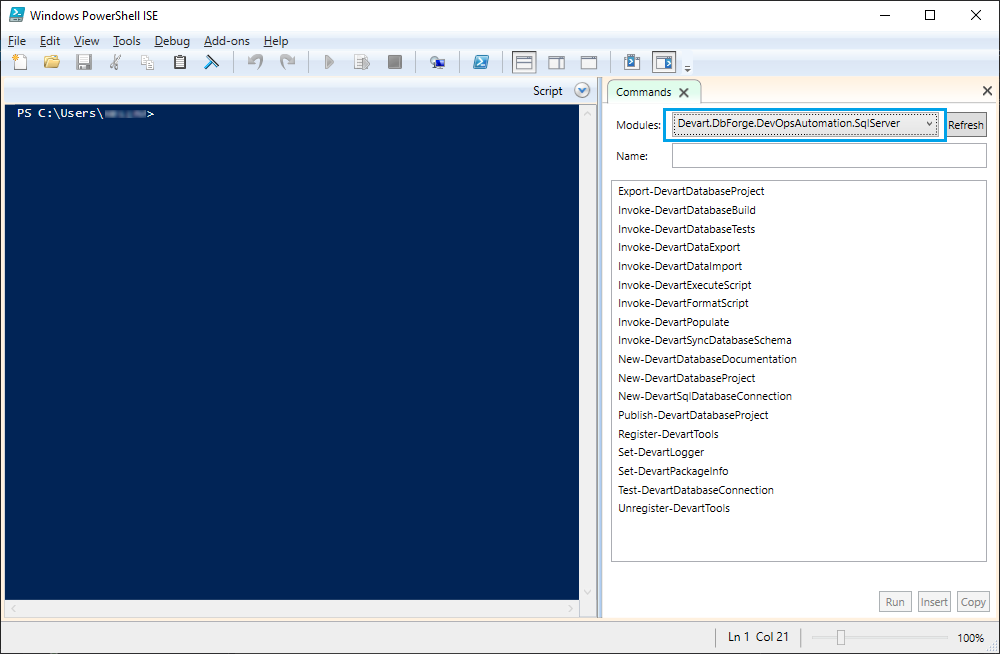
To check the current version of PowerShell, open WindowsPowerShell ISE and execute the
$PSVersionTable.PSVersioncommand. In the Major column, you can see the version currently installed on your computer.
The guide covers the following topics:
- Installing dbForge DevOps Automation PowerShell for SQL Server
- Exporting data using the Invoke-DevartDataExport cmdlet
- Importing data using the Invoke-DevartDataImport cmdlet
Installing dbForge DevOps Automation PowerShell for SQL Server
dbForge DevOps Automation for SQL Server is supplied as part of dbForge SQL Tools (Professional version) and automatically includes dbForge DevOps Automation PowerShell for SQL Server.
To install dbForge DevOps Automation PowerShell for SQL Server
1. Go to the download page and click Get for free.
2. On the Devart Identity Server page, sign in to your account, and click Download. If you don’t have a Devart account, then you need to sign up.
3. After the download is complete, go to the folder with the downloads and run the sqltoolspro.exe file to install dbForge DevOps Automation PowerShell for SQL Server.
4. In the dbForge SQL Tools Professional installer, click Install.
Note
Prior to installing the tool, make sure that SSMS instances are closed.
5. On the Select Products page, make sure that the dbForge DevOps Automation PowerShell for SQL Server check box is selected. Then, click Next.
Note
If you have not installed dbForge Data Pump for SQL Server yet, then select the dbForge Data Pump for SQL Server check box as well.
6. After the installation is complete, click Finish. The Devart.DbForge.DevOpsAutomation.SqlServer module with a set of cmdlets appears in Windows PowerShell ISE.
You can check the full list of requirements to run dbForge DevOps Automation on the Requirements and Compatibility page.
Exporting data using the Invoke-DevartDataExport cmdlet
The Invoke-DevartDataExport cmdlet exports data from one or several tables to the following file formats: HTML, Text, XLS, XLSX, MS Access, RTF, PDF, JSON, XML, CSV, ODBC, DBF, SQL, and Google Sheets.
To export data using the PowerShell cmdlet
1. Run Windows PowerShell ISE on your computer.
2. In Windows PowerShell ISE, execute the PowerShell script to export data.
Syntax
Invoke-DevartDataExport -TemplateFile <string> [-Connection <object>] [-OutputFile <string>] [-OutputTable <string>] [-Range <string>] [-SingleFile <SwitchParameter>] [-Table <string>] [<CommonParameters>]
Parameters used in the script
| Parameter | Description |
|---|---|
| -TemplateFile <string> | Specifies a *.det data import template file containing data export settings. |
| -Connection <object> | Uses DevartDatabaseConnectionInfo or a connection string. |
| -OutputFile <string> | Specifies the destination file or directory for multiple export. This option is unavailable for the ODBC format. |
| -OutputTable <string> | Specifies the destination table name. This option is available for the SQL, ODBC and Access formats. |
| -Range <string> | Specifies the range of exported rows. |
| -SingleFile <SwitchParameter> | Indicates that all data has to be exported into a single file, even if there are several source tables. |
| -Table <string> | Specifies the source table name. Multiple tables can be specified. |
Example
Invoke-DevartDataExport -Connection $connection -TemplateFile "C:\Temp\template.det"
Importing data using the Invoke-DevartDataImport cmdlet
The Invoke-DevartDataImport cmdlet imports data to the required SQL database from a variety of formats: Text, MS Excel, MS Access, XML, JSON, CSV, ODBC, DBF, and Google Sheets.
To import data using the PowerShell cmdlet
1. Run Windows PowerShell ISE on your computer.
2. In Windows PowerShell ISE, execute the PowerShell script to import data.
Syntax
Invoke-DevartDataImport [-Connection <object>] [-Create <SwitchParameter>] [-InputFile <string>] [-InputTable <string>] [-Table <string>] -TemplateFile <string> [<CommonParameters>]
Parameters used in the script
| Parameter | Description |
|---|---|
| -TemplateFile <string> | Specifies the template file. |
| -Connection <object> | Uses DevartDatabaseConnectionInfo or a connection string. |
| -Create <SwitchParameter> | If specified, a new table to import the data to will be created. |
| -InputFile <string> | Specifies the file with the data that you want to import. This option is unavailable for the ODBC format. |
| -InputTable <string> | Specifies the table or view to import data from (for the Access and ODBC formats). |
| -Table <string> | Specifies the target table (the one where you want to insert the imported data). |
Example
Invoke-DevartDataImport -Connection $connection -TemplateFile "C:\Temp\template.dit"
Video tutorial
Watch the video tutorial to learn how to use dbForge Data Pump in DevOps process: